
Popular categories
Looking for a yarn?


Comments / Questions (41)
![]() Nancy Bernard wrote:
Nancy Bernard wrote:
I'm trying to knit the Daisy Delight with the Merino Extra Fine in size 5/6 and I'm confused. It appears to be asking for 66 stitches in 2 ridges before increasing to 84 stitches. Even my shortest circular needle will not allow that and I can't see it fitting over my granddaughter's head. Am I missing something? Thank you.
06.02.2026 - 05:13
![]() Stephanie wrote:
Stephanie wrote:
Fals jemand wie ich auch denkt beim Maschenanschlag geht kein Kinderkopf durch nehmt die größte Größe und zählt dann die Zunahme ab von der jeweiligen Größe klappt wirklich gut bisher brauchte 134 .Meine 6 Jährige ist sehr lang gebaut da hab ich dann die 6 Maschen eingeplant abzuziehen von der Zunahme.
01.02.2026 - 23:54
![]() Stephanie wrote:
Stephanie wrote:
Wie macht man das im Muster mit den Gelb? Läuft das 60g Knäul hinten die ganze Zeit mit oder nehme ich jeweils im Mustersatz diesen Gelben Faden mit und schneide, den dann ab oder vernähe quer den Faden ein den Anfang und Ende? Ich verstehe das noch nicht ganz ,weil ich niemals solch3 Muster gestrickt habe! Meine halt da braucht man nie 50g Wolle von bei 2 Reihen sehr seltsam
01.02.2026 - 23:49DROPS Design answered:
Liebe Stephanie, Sie führen den gelben Faden in der Runde hinter der Arbeit mit. Sie können diese Faden beim Mitführen mit dem Strickfaden 1 x auf der Strecke bis zur nächsten Masche verkreuzen, damit der gelbe Faden nicht durchhängt. Sie können sich dazu auch gut unsere Hilfsvideos anschauen, Sie finden welche im Kopf der Anleitung unter "Videos". 50 g steht dort als Verbrauch, weil Sie ja nicht weniger als 1 Knäuel zu 50 g kaufen können - es wird immer auf die Menge aufgerundet, die man kaufen kann. Viel Spaß beim Stricken!
02.02.2026 - 11:38
![]() Julia wrote:
Julia wrote:
Hallo, kann es sein, dass die Strickschrift einen Fehler enthält? In Reihe 36/37 müssten meiner Meinung nach die weißen Maschen anders sein, damit wieder eine Blume entsteht.
11.12.2023 - 22:22DROPS Design answered:
Liebe Julia, die Zunahmen werden in der Mitte vom Diagram gestrickt, so wird das Diagram so aussehen, aber wenn Sie das Diagram folgen genauso wie beschrieben, werden die Blumen richtig aussehen. Viel Spaß beim stricken!
12.12.2023 - 08:59
![]() Laubscher wrote:
Laubscher wrote:
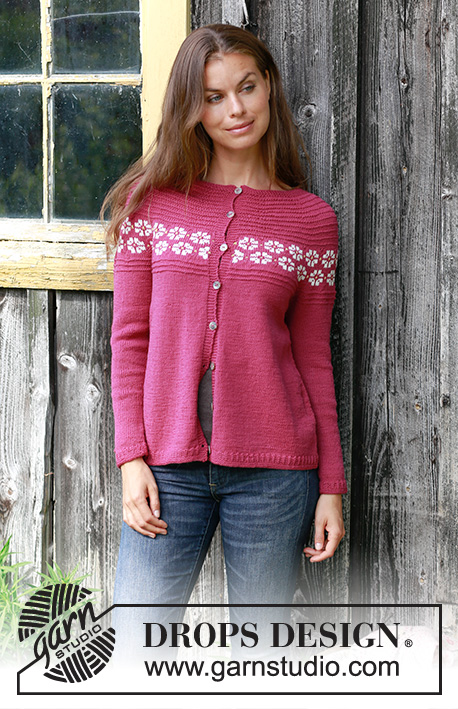
Pouvez-vous me dire dans quelle qualité de laine le modèle en photo a été réalisé ? Est-ce en Drops Merino extra fine ou Cotton Light ou Drops Lima? Je me pose la question car le modèle en photo me semble d'un rose plus magenta que le bruyère 34 Drops merino que je viens de recevoir Merci de votre réponse. Cordialement Véronique Laubscher
31.10.2023 - 12:18DROPS Design answered:
Bonjour Mme Laubscher, le modèle photographié a été tricoté en DROPS Merino Extra Fine, notez que les couleurs peuvent varier d'un ordinateur à l'autre, mais également en fonction de la luminosité de la photo du modèle, et du bain des couleurs. Bon tricot!
31.10.2023 - 16:19
![]() Chevrier wrote:
Chevrier wrote:
Bonjour. Je pense qu il y a une erreur de mesure pour la taille 5/6 ans car c est indiqué 16 cm des emmanchures jusqu au côtes et j ai fait 23 cm et c est juste en hauteur.
30.10.2023 - 16:11
![]() Christa wrote:
Christa wrote:
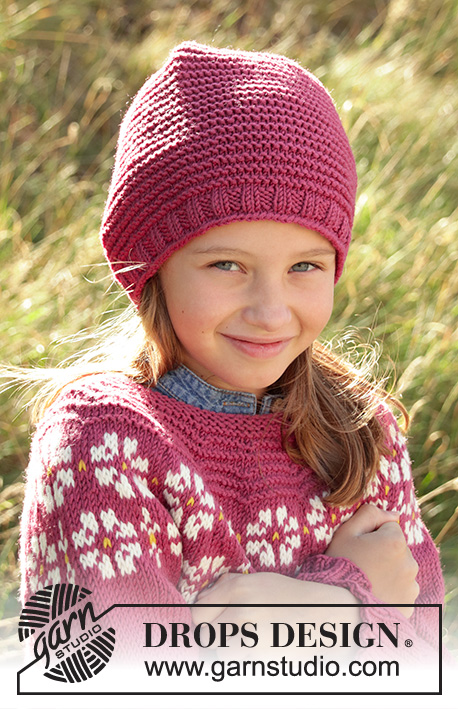
Ich habe dieses Modell für meine Urenkelin nachgearbeitet. Ist wunderschön geworden, mit passender Mütze. Sieht super aus! Danke fürderhin perfekte Anleitung!
24.10.2023 - 11:40
![]() Leanne Hart wrote:
Leanne Hart wrote:
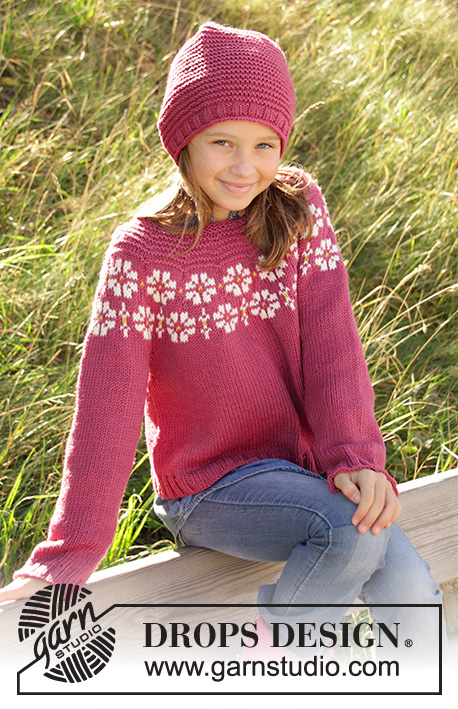
Do you have the pattern of the hat shown in the main picture?
09.08.2023 - 00:37DROPS Design answered:
Hi Leanne, You can find all our children's hats if you search for 'Children's hats' in the search box. Happy crafting!
09.08.2023 - 07:15
![]() Laila wrote:
Laila wrote:
Hei jeg forstår ikke denne biten følgende biten:strikk opp 1 ny maske i hver av de 6 maskene som ble lagt opp på bolen (= 50-54-57-59-68 masker) skal de 6 maskene strikkes opp fra bilen eller legger de opp?
09.06.2023 - 16:12DROPS Design answered:
Hei Laila. Når du delte bærestykket og satte erm maskene på 1 tråd og fortsatte med bolen, la du opp 6 nye masker under hvert erme. Så når du skal strikke ermene og har satt erm-maskene på en liten rundpinne, skal du nå strikke opp 1 maske i hver av de 6 maskene du la opp på bolen. På den måten unngår du å sy hullet under ermet etterpå dersom du legger opp 6 nye masker under ermet. Se Nederst på siden og Leksjonen: Hvordan strikke en genser ovenfra og ned. Pkt. 18. Eller se videoen: Hvordan strikke opp masker under erme. mvh DROPS Design
12.06.2023 - 08:58
![]() Françoise TEYCHENEY wrote:
Françoise TEYCHENEY wrote:
Bonjour, je suis en train de réaliser ce modèle en 11/12 ans et je ne comprend pas pourquoi après les augmentations qui se situent au milieu du diagramme , on recommence par 2 mailles endroit en naturel au dessus de la flèche, puisque les augmentations sont situées plus loin ? Merci pour votre réponse
25.02.2023 - 10:50DROPS Design answered:
Bonjour Mme Teycheney, les 2 m en naturel du rang suivant sont les mêmes 2 mailles qu'au rang précédent, et, au lieu d'avoir 4 m rose, on a maintenant 5 m rose - Les pétales vont ainsi être alignés comme avant, on a simplement augmenté le nombre de mailles en rose entre les fleurs (de part et d'autre de la maille naturel au milieu du diagramme. Suivez simplement le diagramme comme il est, vous verrez comment le motif va se former de lui-même. Bon tricot!
27.02.2023 - 09:53
|
|||||||||||||||||||
Daisy Delight#daisydelightsweater |
|||||||||||||||||||
 |
 |
||||||||||||||||||
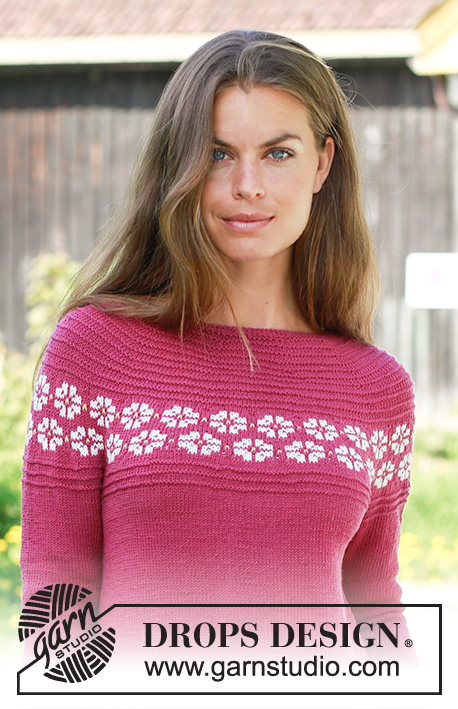
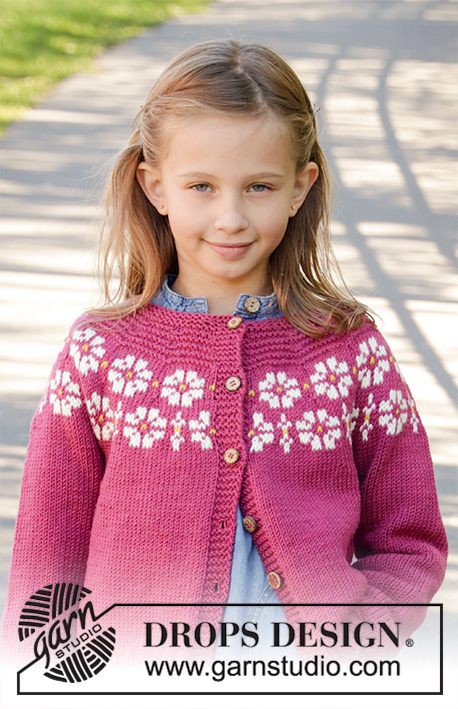
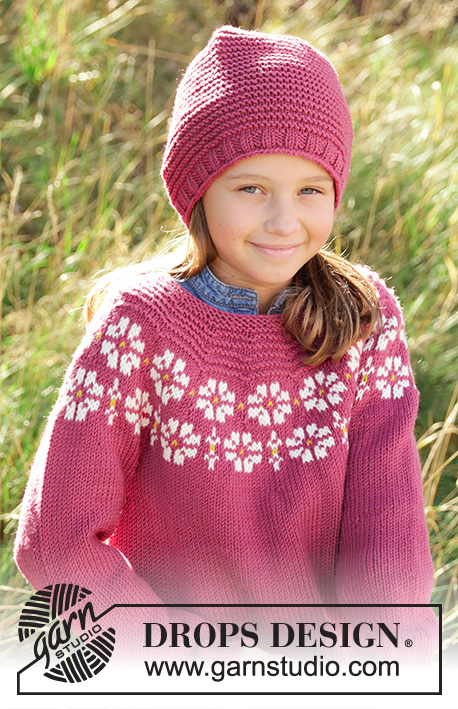
Knitted jumper for children in DROPS Merino Extra Fine, DROPS Lima and DROPS Cotton Light. The piece is worked top down with flowers, coloured pattern, garter stitch and stocking stitch. Sizes 3-12 years.
DROPS Children 34-7 |
|||||||||||||||||||
|
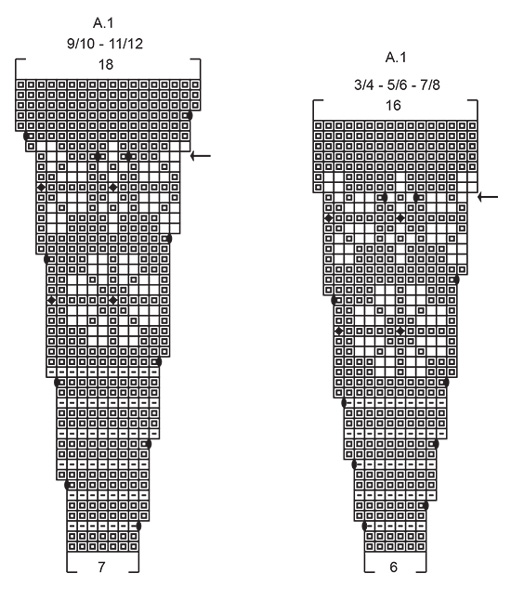
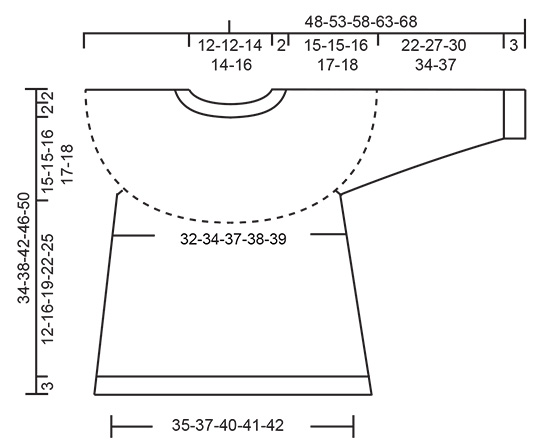
------------------------------------------------------- EXPLANATIONS FOR THE PATTERN: ------------------------------------------------------- RIDGE/GARTER STITCH (worked in the round): 1 ridge = 2 rounds. Knit 1 round and purl 1 round PATTERN: See diagram A.1. Choose diagram for your size. The diagram shows all the rows in the pattern seen from the right side. INCREASE TIP-1 (evenly spaced): To work out how to increase evenly, count the total number of stitches on the needle (e.g. 72 stitches) and divide by the number of increases to be made (e.g. 17) = 4.2. In this example increase by making 1 yarn over after approx. each 4th stitch. On the next round work the yarn overs twisted to avoid holes. INCREASE TIP-2 (for sides of body): Work until there is 1 stitch left before the marker thread, 1 yarn over, knit 2 (marker thread sits in the middle of these 2 stitches), 1 yarn over = 2 stitches increased. On the next round work the yarn overs twisted to avoid holes. Then work the new stitches in stocking stitch. DECREASE TIP (for sleeves): Decrease 1 stitch on each side of the marker thread as follows: Work until there are 3 stitches left before the marker thread, knit 2 together, knit 2 (marker thread sits in the middle of these 2 stitches), slip 1 stitch as if to knit, knit 1 and pass the slipped stitch over the knitted stitch = 2 stitches decreased. ------------------------------------------------------- START THE PIECE HERE: ------------------------------------------------------- JUMPER - SHORT OVERVIEW OF THE PIECE: The piece is worked in the round with circular needle, top down. It is divided for body and sleeves; the body is continued in the round with circular needle and the sleeves in the round with short circular needle, double pointed needles. YOKE: Cast on 62-66-70-76-82 stitches with circular needle size 4 mm and heather/cerise/dark red. Work 2 RIDGES – see description above. Knit 1 round where you increase 16-18-20-22-23 stitches evenly on round - READ INCREASE TIP-1! = 78-84-90-98-105 stitches. Purl 1 round. Insert a marker in this round and measure onwards from here. On the next round work according to diagram A.1, (choose diagram for the right size) a total of 13-14-15-14-15 times on the round. REMEMBER THE KNITTING TENSION! When diagram A.1 has been completed in height there are 208-224-240-252-270 stitches on the needle. On the next round increase 4-4-6-2-6 stitches evenly = 212-228-246-254-276 stitches. Continue with stocking stitch until the piece measures 15-15-16-17-18 cm from the marker. The next round is worked as follows: Place the first 44-48-51-53-62 stitches on a thread (= sleeve), cast on 6 new stiches, knit 62-66-72-74-76 (= front piece), place the next 44-48-51-53-62 stitches on a thread (= the other sleeve), cast on 6 new stitches and knit 62-66-72-74-76 stitches. BODY: There are 136-144-156-160-164 stitches on the round. THE PIECE IS NOW MEASURED FROM HERE! Insert 1 marker thread in the middle of the 6 new stitches cast on under each sleeve. Work stocking stitch in the round. When the piece measures 3 cm increase 1 stitch on each side of both marker threads (= 4 stitches increased) READ INCREASE TIP–2! Repeat the increase every 3-4-5-6-7 cm a total of 3 times = 148-156-168-172-176 stitches on the needle. Continue working as before until the piece measures 12-16-19-22-25 cm. Work 1 round where you increase 12-12-12-12-12 stitches evenly = 160-168-180-184-188 stitches. Work rib in the round with knit 2 / purl 2 for 3 cm. Loosely cast off with knit over knit and purl over purl. Cut and fasten the strand. SLEEVE: Place the stitches from one thread on short circular needle/double pointed needles size 4 mm (= 44-48-51-53-62 stitches) and knit up 1 stitch in each of the 6 stitches cast on under the sleeve (= 50-54-57-59-68 stitches). Insert 1 marker thread in the middle of these 6 stitches. Work stocking stitch in the round for 2 cm. Now decrease 1 stitch on each side of the marker thread - READ DECREASE TIP. Continue with stocking stitch and repeat the decrease every 4-3½-4-4-3½ cm until you have decreased a total of 5-7-7-8-10 times = 40-40-43-43-48 stitches on the round. Work stocking stitch until the sleeve measures 22-27-30-34-37 cm. Work 1 round and increase 4-4-5-5-4 stitches evenly on this round = 44-44-48-48-52 stitches. Work rib in the round with knit 2 / purl 2 for 3 cm. Loosely cast off with knit over knit and purl over purl. Cut and fasten strand. Work the other sleeve in the same way. |
|||||||||||||||||||
Diagram explanations |
|||||||||||||||||||
|
|||||||||||||||||||
 |
|||||||||||||||||||
 |
|||||||||||||||||||
Have you finished this pattern?Tag your pictures with #dropspattern #daisydelightsweater or submit them to the #dropsfan gallery. Do you need help with this pattern?You'll find 28 tutorial videos, a Comments/Questions area and more by visiting the pattern on garnstudio.com. © 1982-2026 DROPS Design A/S. We reserve all rights. This document, including all its sub-sections, has copyrights. Read more about what you can do with our patterns at the bottom of each pattern on our site. |
|||||||||||||||||||


With over 40 years in knitting and crochet design, DROPS Design offers one of the most extensive collections of free patterns on the internet - translated to 17 languages. As of today we count 325 catalogues and 12298 patterns translated into English (UK/cm).
We work hard to bring you the best knitting and crochet have to offer, inspiration and advice as well as great quality yarns at incredible prices! Would you like to use our patterns for other than personal use? You can read what you are allowed to do in the Copyright text at the bottom of all our patterns. Happy crafting!
Post a comment to pattern DROPS Children 34-7
We would love to hear what you have to say about this pattern!
If you want to leave a question, please make sure you select the correct category in the form below, to speed up the answering process. Required fields are marked *.