
Popular categories
Looking for a yarn?


Comments / Questions (42)
![]() Emily wrote:
Emily wrote:
I working a size M. I don't understand how to work the body. I knitted 113 st and the pattern doesn't blend with the next stitches. Do I pick up where I left off when adding the back or do I continue the current pattern?
11.05.2026 - 21:05
![]() Alina wrote:
Alina wrote:
Ich stricke L, nicht XL. Ich habe mich in der ersten Frage vertippt.
24.04.2026 - 00:48DROPS Design answered:
Liebe Alina, mit L haben Sie 131 Maschen, die stricken Sie so: 1 Randmasche, die 8 Maschen A.1 ingesamt 16 Mal widerholen (über die nächsten 128 Maschen) dann die 1. Masche A.1 und 1 Randmasche, bein den Rückreihen stricken Sie: 1 Randmasche, die letzte Masche A.1 (links nach rechts gelesen), dann A.1 wiederholen und 1 Randmasche. Viel Spaß beim Stricken!
24.04.2026 - 09:16
![]() Alina wrote:
Alina wrote:
Ich stricke die Größe XL und bin gerade bei dem Rücken Teil. Ich bin gerade bei A1 bei der 18. Reihe wenn man das Diagramm von unten liest. Ich verstehe nicht wie ich am Ende das Muster enden soll. Muss ich da auch die erste Masche von der Reihe wieder wiederholen? Das Muster geht am Ende nicht auf. Und die nächste hin Reihe passt auch nicht mehr. Wie stricke ich das Muster in der hin Reihe wieder weiter
23.04.2026 - 23:14DROPS Design answered:
Liebe Alina, in XL haben Sie 139 Maschen für das Rückenteil, die stricken Sie mit A.1 so: 1 Randmasche, die 8 Maschen A.1 17 Mal wiederholen (= über die nächsten 136 Maschen), dann die 1. Masche A.1 stricken (so wird das Muster symmetrisch) und 1 Randmasche = 1+136+1+1=139 Maschen. Kann das Ihnen helfen? Bei den Rückreihen stricken Sie: 1 Randmasche, die letzte Masche A.1 (lesen Sie links nach rechts), dann A.1 von links nach rechts wiederholen und 1 Randmasche. Viel Spaß beim Stricken!
24.04.2026 - 09:08
![]() Heike wrote:
Heike wrote:
Wie nähe ich die abgekettelten Maschen an den Ärmel, ohne dass Wülste entstehen?
28.02.2026 - 21:56
![]() Heike wrote:
Heike wrote:
Wie nähe ich die abgekettelten Maschen am Ende an den Ärmel an, ohne dass Wülste entstehen?
28.02.2026 - 21:52DROPS Design answered:
Liebe Heike, diese Maschen können Sie wie beim diesem Video zusammennähen. Viel Spaß beim Fertigstellen!
02.03.2026 - 09:33
![]() Sabine wrote:
Sabine wrote:
Ich stricke die Größe XL! Ich finde auch die Anleitung nicht ganz so Verständlich gemacht!
29.01.2026 - 15:42
![]() Sabine wrote:
Sabine wrote:
Ich verstehe das Muster von A2 nicht.Es heißt 1 Randmasche plus die letzten 5 Maschen, dann 4X24 Maschen8welche?) und endlich die ersten 21 Maschen und 1 Randmasche. das ergibt aber bei mir nur 124 Maschen.
28.01.2026 - 11:06DROPS Design answered:
Liebe Sabine, um Ihnen besser helfen zu können, nennen Sie bitte die Größe, die Sie stricken. Danke!
29.01.2026 - 12:06
![]() Emily wrote:
Emily wrote:
I am working the front left shoulder in size medium and I do not understand the directions for increasing on row 14. If I am to increase on the purl side at the end of the row, then does that mean the pattern is shifted when I switch to knitting on the right side.
15.01.2026 - 19:58DROPS Design answered:
Dear Emily, when you work next row from right side calculate how to work the new stitches in A.3 so that the previous A.3 will continue and the new stitches will be incorporated into the pattern. Happy knitting!
19.01.2026 - 07:02
![]() Yana wrote:
Yana wrote:
Please help me. I don’t get it…. 8 stitches for a pattern. For the size S I have 115 stitches and it doesn’t dived into 8. Even without 2 edge stitches I’d still doesn’t dived into 8. How can I place A1 pattern symmetrically? Also there are rows where I should alternate yarns but I have dark yarn at the beginning of the row and white yarn at the end of the row. Should I take new piece of yarn?
28.12.2025 - 22:43
![]() Anna wrote:
Anna wrote:
Ich verstehe nicht, wie ich ein ordentliches Muster schaffen soll. Bin bei A2. 131:24 geht nicht auf und so verschiebt sich alles, wenn ich eine Reihe beende, dann bin ich ganz woanders, nicht am Pfeil, aber da soll ich doch jede Reihe starten oder nicht? Das wird ein großes Durcheinander.
21.11.2025 - 20:22DROPS Design answered:
Liebe Anna, so stricken Sie A.2: 1 Randmasche, die 5 letzten Maschen A.2, dann 4 Mal die 24 Maschen und endlich die 21 ersten Masche A.2, 1 Randmasche = 1+5+96+21+1=131. Bei den Rückreihen lesen Sie das Diagram links nach rechts, am Anfang der Rückreihe beginnen Sie mit der 21. Masche (die letzte Masche bei der Hinreihe), dann lesen Sie das Diagram rechts nach links und endlich die 5 ersten Maschen ab rechts. Viel Spaß beim Stricken!
24.11.2025 - 07:59
|
|||||||
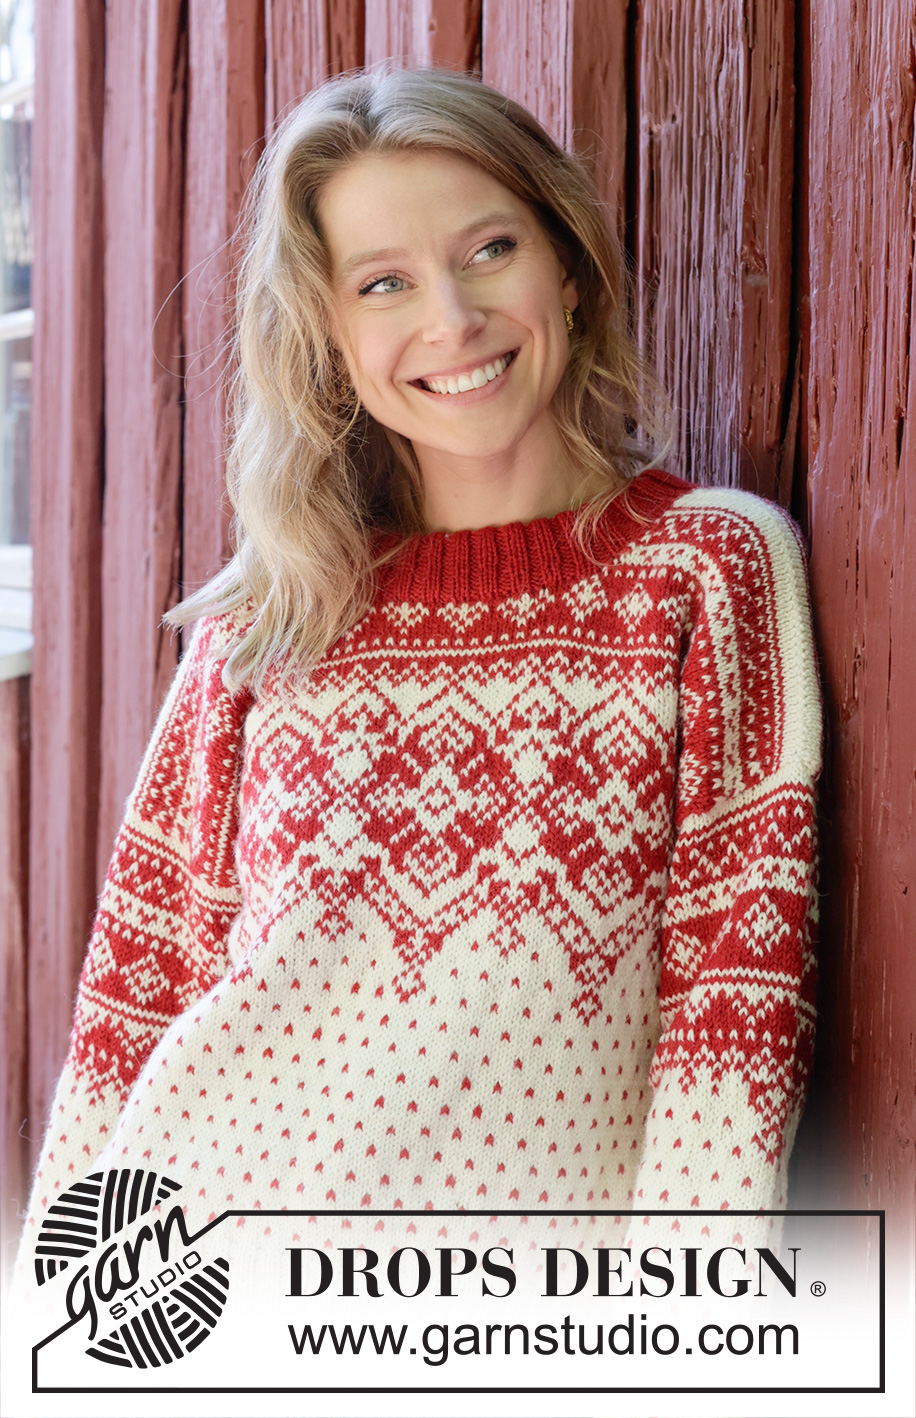
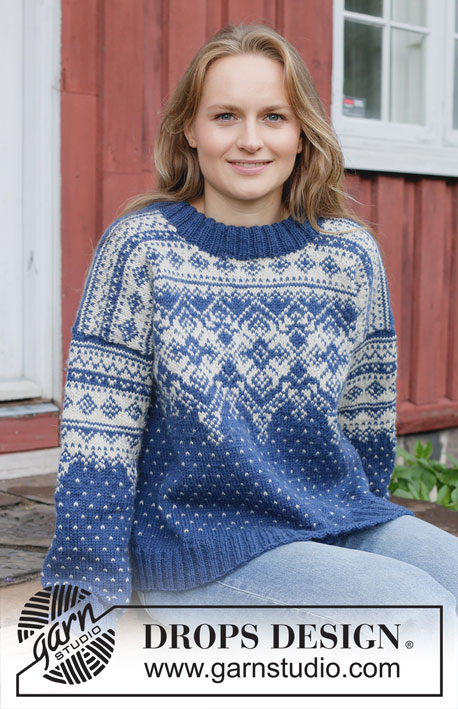
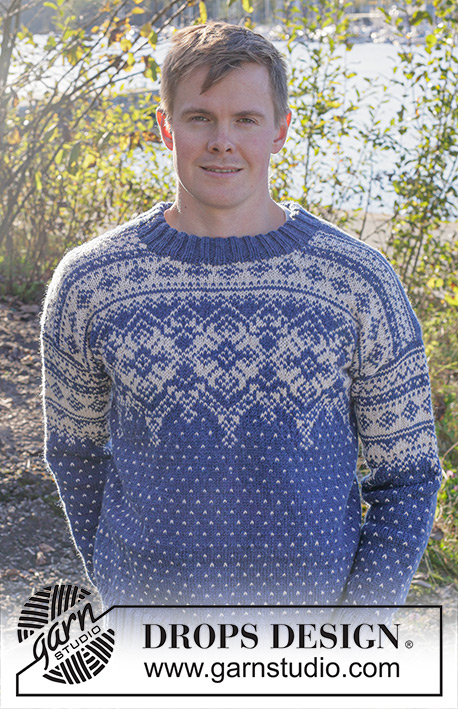
Nordic Flower#nordicflowersweater |
|||||||
 |
 |
||||||
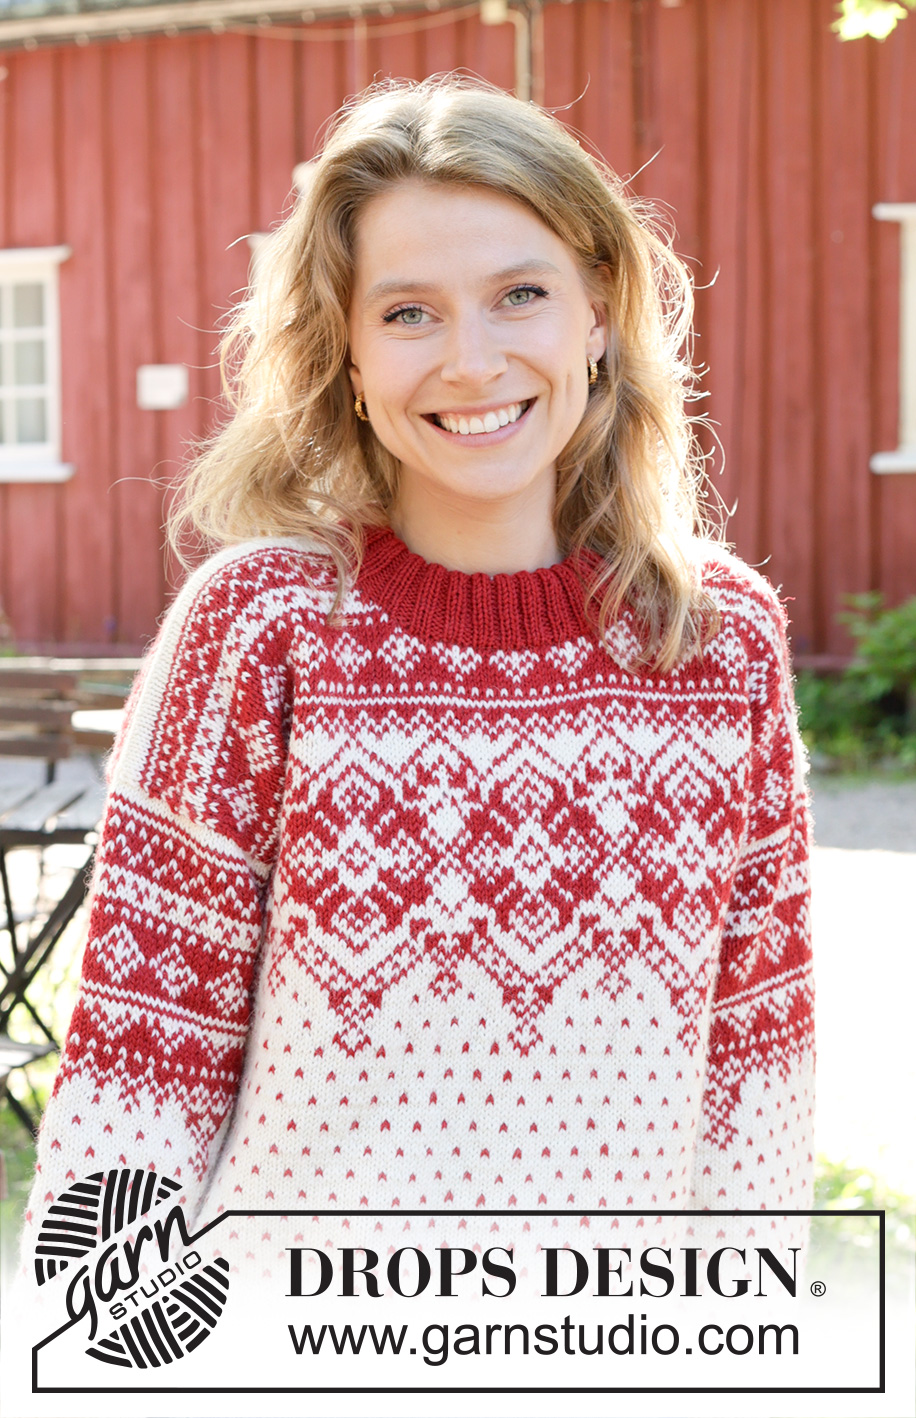
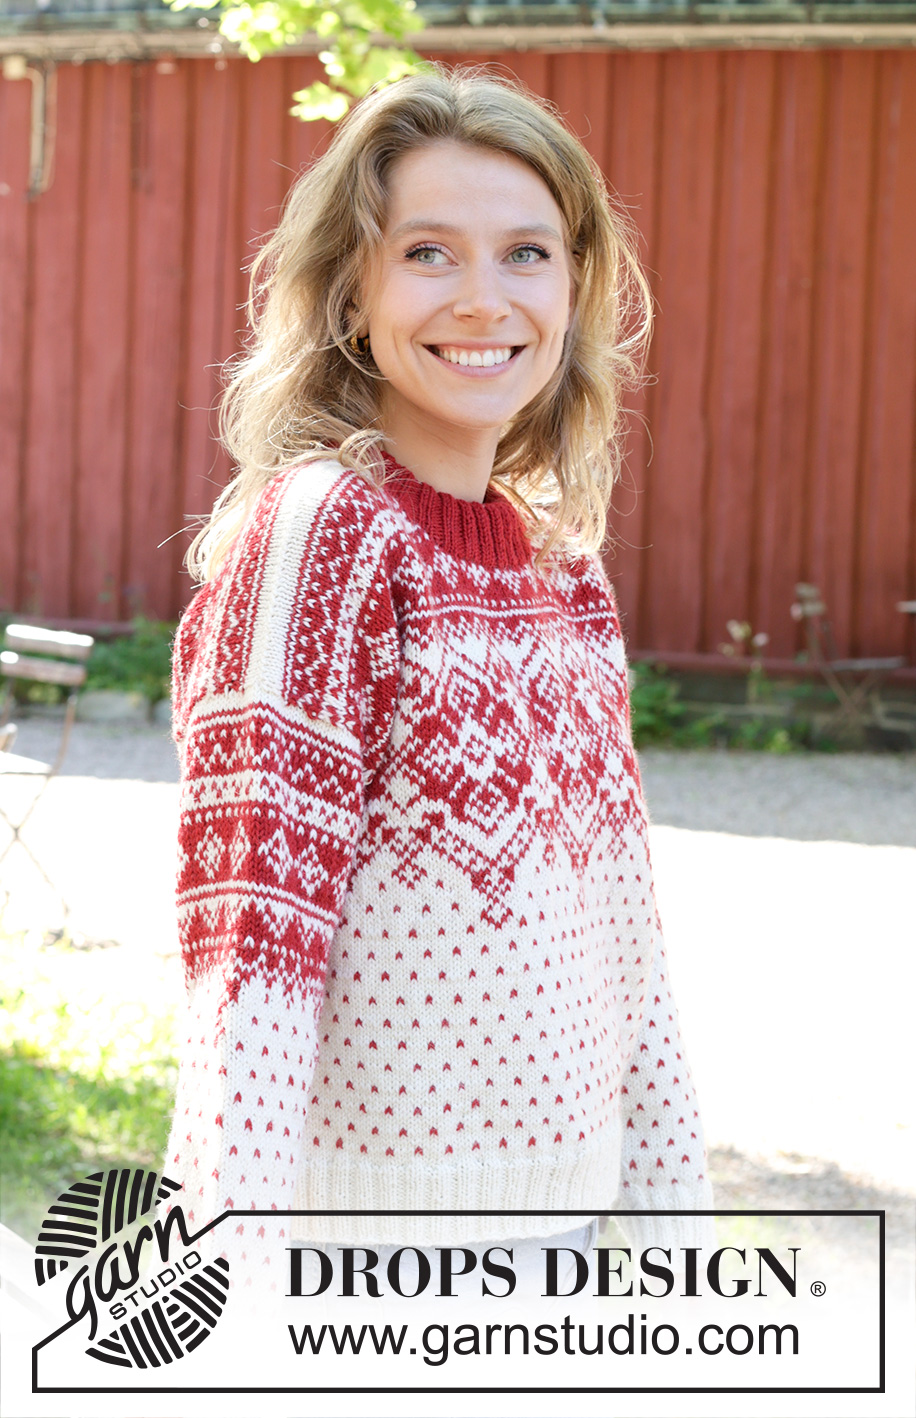
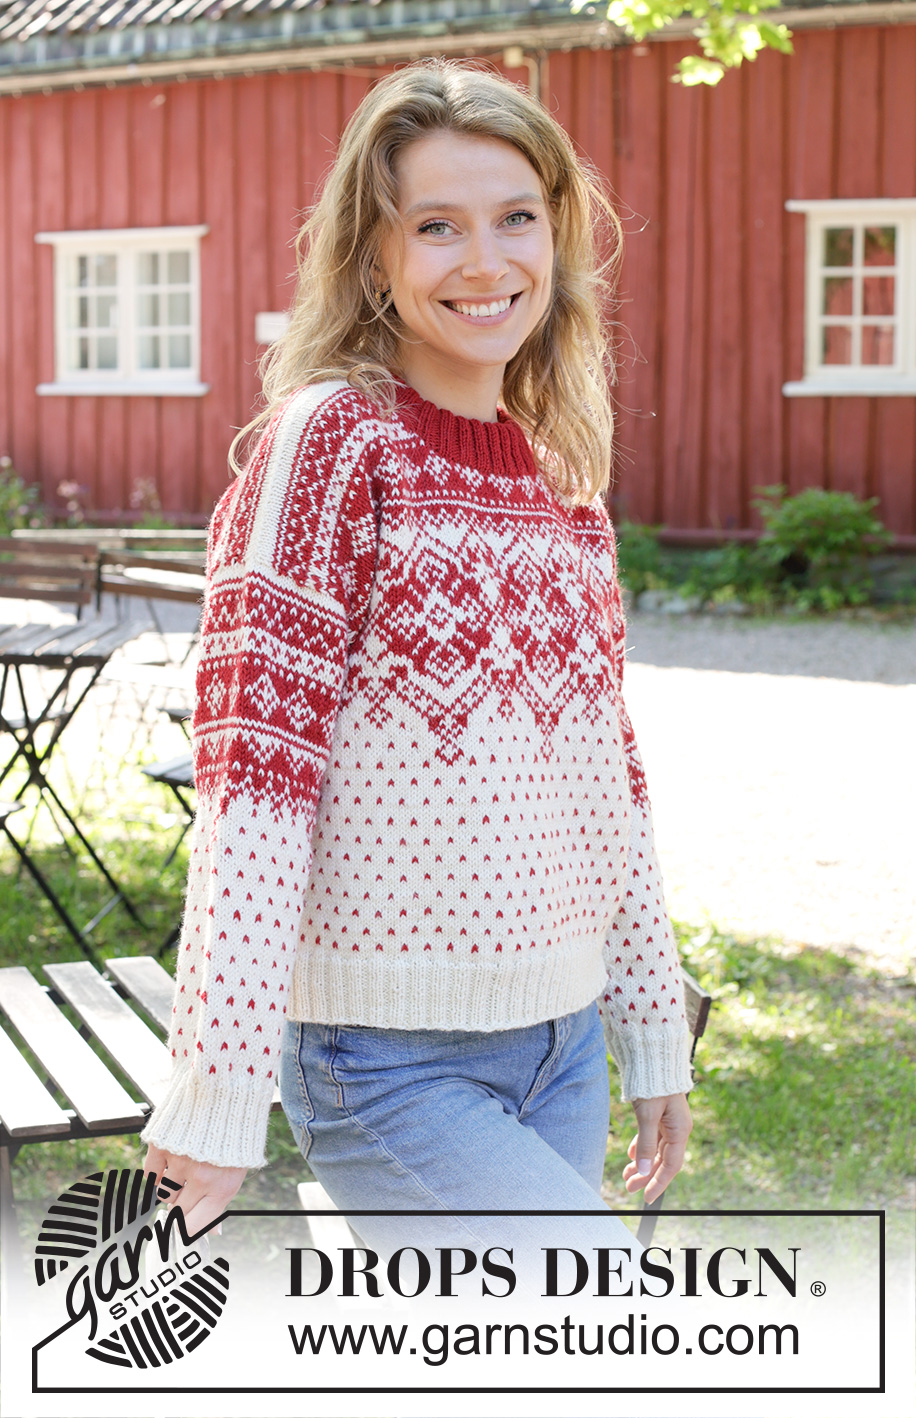
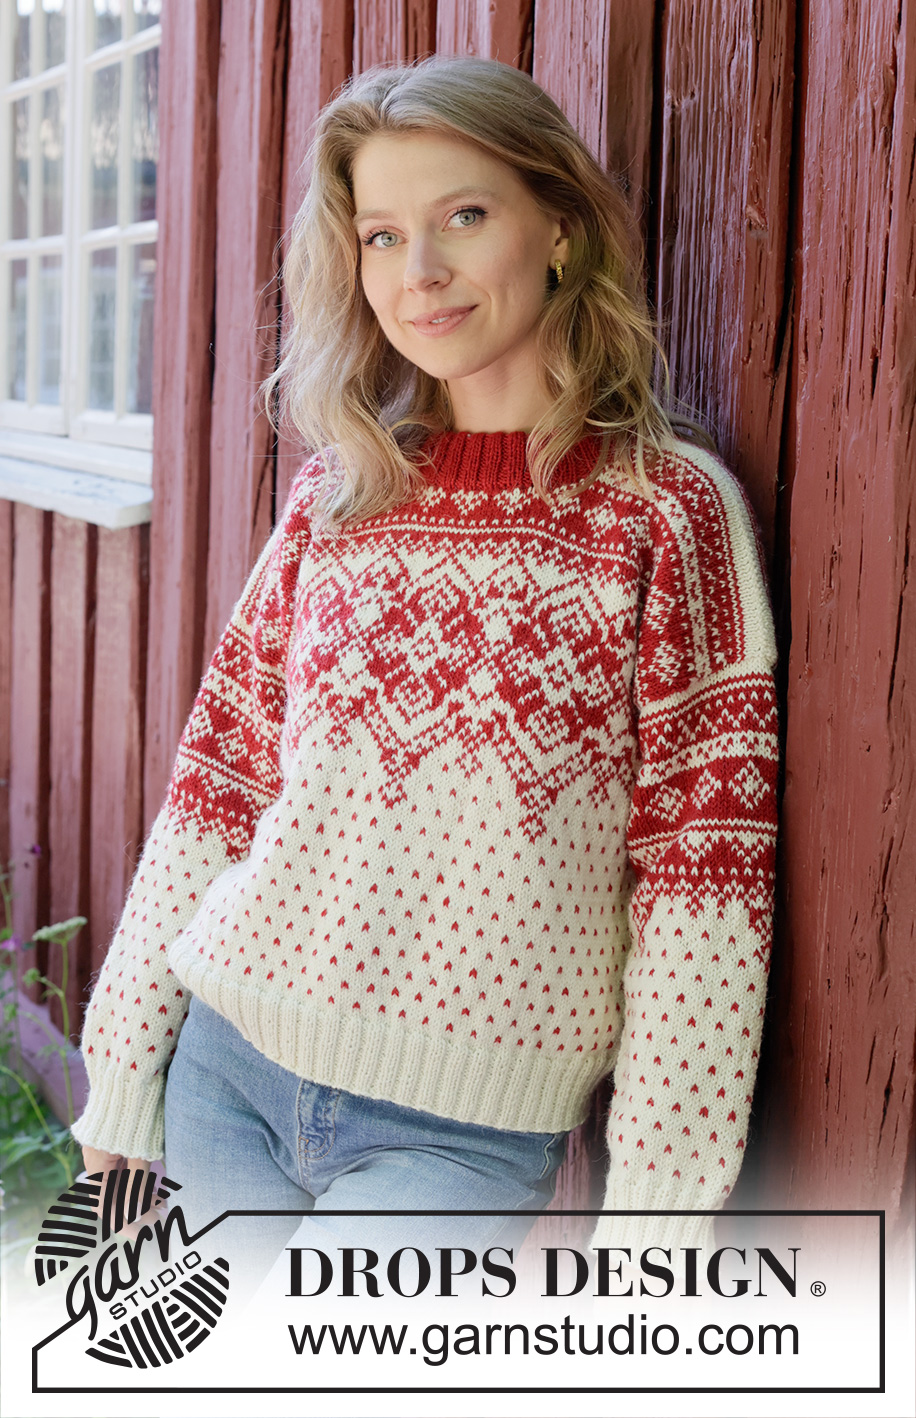
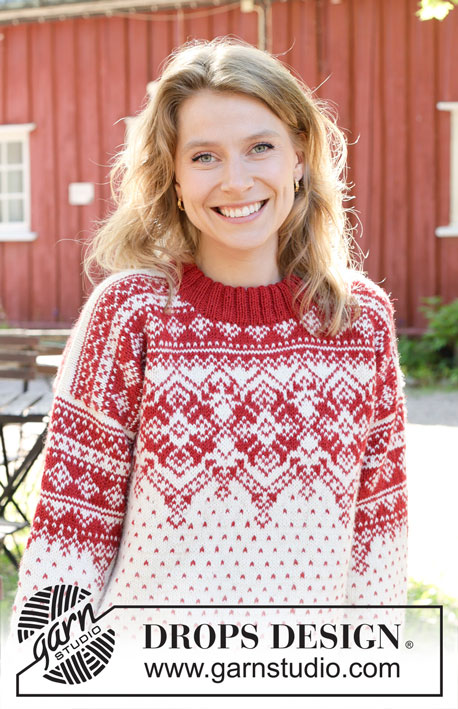
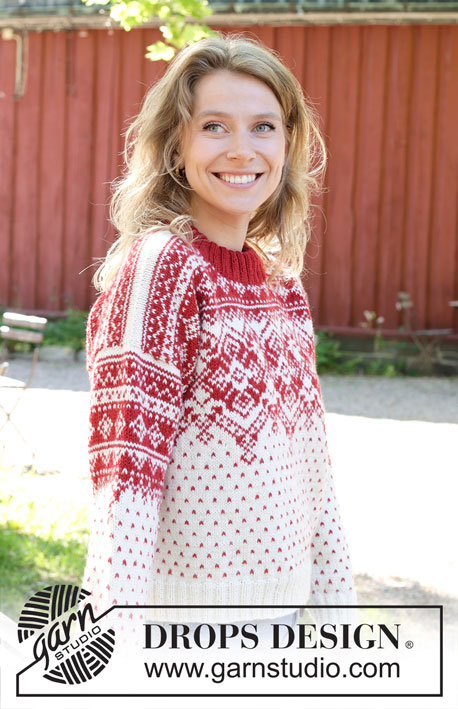
Knitted jumper in DROPS Lima or DROPS Karisma. Piece is knitted top down with Nordic pattern and double neck edge. Size: S - XXXL
DROPS 255-17 |
|||||||
|
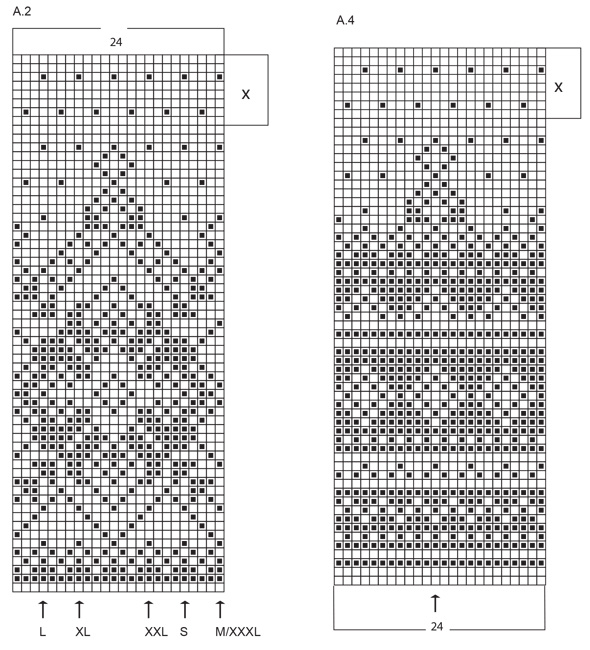
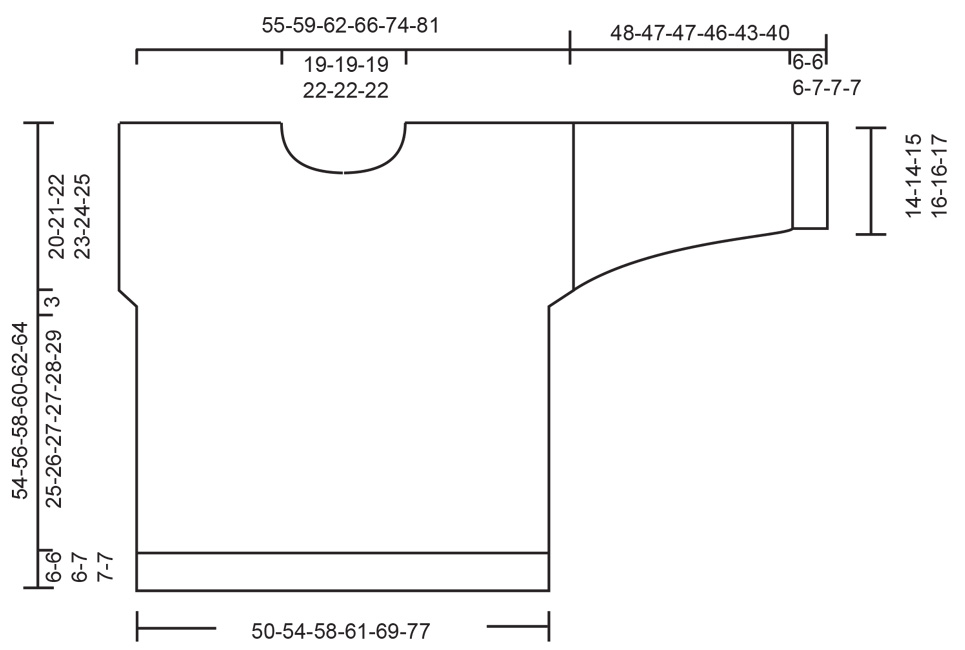
---------------------------------------------------------- EXPLANATION FOR THE PATTERN: ---------------------------------------------------------- GARTER STITCH (when working back and forth): Knit on all rows, i.e. knit from right side and knit from wrong side. 1 ridge vertically = knit 2 rows. PATTERN: See diagrams A.1 to A.4. Diagrams show all rows in pattern seen from the right side. Work pattern in stocking stitch. INCREASE TIP: Increase 1 stitch by making 1 yarn over, on next row/round work yarn over twisted to avoid holes. Then work the new stitches in stocking stitch. DECREASE TIP: Decrease 1 stitch on each side of marker thread as follows: Work until 3 stitches remain before marker thread and knit 2 together, knit 2 (marker thread is in the middle of these 2 stitches), slip 1 stitch knitwise, knit 1, pass slipped stitch over stitch worked (= 2 stitches decreased). KNITTING TIP: To avoid the knitting tension to tighten when working pattern, it is important not to tighten the strands on back side of piece. Use a larger needle size when working pattern try needed. When there are large gaps in the pattern, twine the yarn on the back of piece. ---------------------------------------------------------- START THE PIECE HERE: ---------------------------------------------------------- JUMPER - SHORT OVERVIEW OF THE PIECE: In this pattern needles of different length have been used, begin with fitting length for number of stitches and switch as needed. Work piece back and forth on needle. Finish front and back piece separately. Work top down, down to armholes, slip parts together and work in the round over all stitches. Pick up stitches for sleeves around the armholes. Then work sleeves downwards in the round on needle. Finish by picking up stitches around the neck and working a double neck edge. BACK PIECE: RIGHT SHOULDER: Work back and forth on circular needle. Cast on 38-42-46-46-54-62 stitches on circular needle size 4 mm with DROPS Lima in colour off white or DROPS Karisma in colour off white. Purl 1 row from wrong side, then work 4 rows PATTERN - read explanation above - as shown in A.1, with 1 edge stitch in GARTER STITCH in each side – read explanation above. The edge stitches are always worked in garter stitch. Put piece aside, and work the left shoulder. LEFT SHOULDER: Cast on 38-42-46-46-54-62 stitches on circular needle size 4 mm with DROPS Lima in colour off white or DROPS Karisma in colour off white. Purl 1 row from wrong side, then work 4 rows pattern as shown in A.1, with 1 edge stitch in garter stitch in each side. On next row slip shoulders together for back piece as explained below. BACK PIECE: Work next row as follows from right side: Work 5th row in A.1 over stitches from left shoulder, cast on 39-39-39-47-47-47 new stitches on row with colour red/wine red, work 5th row in A.1 over stitches on right shoulder = 115-123-131-139-155-171 stitches. Read KNITTING TIP! Work 1 edge stitch as before, work A.1 until 2 stitches remain, work first stitch in A.1 (so that pattern begins and ends the same), 1 edge stitch as before. When A.1 has been worked, continue as follows: 1 edge stitch, work A.2 until 1 stitch remain, work 1 edge stitch as before - see start arrow for your size! Pattern will not fit one whole repetition in the sides but there is one whole repetition of A.2 in the middle of row. When piece measures 20-21-22-23-24-25 cm from cast-on edge, insert 1 marker in each side of piece. Note which row in pattern this is. Continue A.2 and cast off at the beginning of every row in each side: 2 stitches 1 time, and 1 stitch 3 times = 105-113-121-129-145-161 stitches. Finish with 1 row from wrong side. Cut the yarn and put piece aside, and work front piece as explained below. FRONT PIECE: LEFT SHOULDER: Cast on 38-42-46-46-54-62 stitches on circular needle size 4 mm with DROPS Lima in colour off white or DROPS Karisma in colour off white. Purl 1 row from wrong side, then work as follows from right side: 1 edge stitch in garter stitch, Work the last 4 last stitches in A.3 1-0-1-1-1-1 time in total, work A.3 over the next 32-40-40-40-48-56 stitches and finish with 1 edge stitch. On 14th-14th-16th-16th-18th-18th row in diagram begin increase for neck, cast on new stitches at the end of every row from wrong side as follows: 1 stitch 1 time, 2 stitches 2 times and 3 stitches 1 time = 46-50-54-54-62-70 stitches, work the increased stitches in the pattern. When increases are done, cut the yarn. Last row worked is from wrong side. Put piece aside, and work the right shoulder. RIGHT SHOULDER: Cast on 38-42-46-46-54-62 stitches on circular needle size 4 mm with DROPS Lima in colour off white or DROPS Karisma in colour off white. Purl 1 row from wrong side, then work as follows from right side: 1 edge stitch in garter stitch, work A.1 over the next 32-40-40-40-48-56 stitches, work the first 4 stitches in A.1 1-0-1-1-1-1 time, finish with 1 edge stitch in garter stitch. On 13th-13th-15th-15th-17th-17th row in diagram begin increase for neck, cast on new stitches at the end of every row from right side as follows: 1 stitch 1 time, 2 stitches 2 times and 3 stitches 1 time = 46-50-54-54-62-70 stitches, work the increased stitches in the pattern. Work last row from wrong side. On next row slip shoulders together for front piece as explained below. FRONT PIECE: Work next row from right side as follows: Work next row in A.1 over stitches from right shoulder, cast on 23-23-23-31-31-31 new stitches on row with colour red/wine red, continue A.1 over stitches from left shoulder = 115-123-131-139-155-171 stitches. Read KNITTING TIP! Work 1 edge stitch, A.1 until 2 stitches remain, work first stitch in A.1 (so that pattern begins and ends the same), 1 edge stitch in garter stitch. When A.1 has been worked, continue as follows: 1 edge stitch as before, A.2 until 1 stitch remains, work 1 edge stitch as before - see start arrow for your size! Pattern will not fit one whole repetition in the sides but there is one whole repetition of A.2 in the middle of row so that the pattern is symmetrical. When piece measures 20-21-22-23-24-25 cm from cast-on edge, insert 1 marker in each side of piece - make sure that this is the row as on back piece. Continue A.2 and cast off at the beginning of every row in each side: 2 stitches 1 time, and 1 stitch 3 times = 105-113-121-129-145-161 stitches. Finish with 1 row from wrong side, do not cut the yarn. BODY: On next row from right side work parts together as follows: Work 105-113-121-129-145-161 stitches from front piece (continue A.2 as before as far as the pattern), work the next 105-113-121-129-145-161 stitches from back piece (continue A.2 as before as far as the pattern). There are now 210-226-242-258-290-322 stitches on needle. Continue in the round with A.2. NOTE! The pattern will not fit in each side under sleeve but work as far as possible towards each side, make sure that there is at least 1 stitch with colour off white in each side when working dots. When the pattern is done, repeat the top 8 rounds in pattern (marked with x). Work as before until piece measures 25-26-27-27-28-29 cm from where the parts were put together, adjust so that a few rounds without dots have been worked before rib. Now finish the piece with colour off white. On next round begin rib while AT THE SAME TIME increasing 42-46-50-50-62-66 stitches evenly on needle = 252-272-292-308-352-388 stitches. Switch to circular needle size 3 mm and work rib (= knit 2/purl 2 - remember increase). Cast off when rib measures 6-6-6-7-7-7 cm. Jumper measures 54-56-58-60-62-64 cm. ASSEMBLY: Sew the shoulder seams. SLEEVES: Work sleeves in the round from armhole and downwards on circular needle size 4 mm. Pick up from right side 84-88-92-96-100-106 stitches along armhole – use colour off white, begin at the marker at the bottom of armhole and pick up stitches until marker in the other side. Stitches cast off in each side of body are sewn together when finish. Insert 1 marker thread at beginning of row. Insert in addition 1 marker in one of the 2 middle stitches on round (= approx. mid on top of sleeve). Marker thread mid under sleeve is used when decreasing under sleeve and marker mid on top of sleeve should be used to count where to begin pattern under sleeve. Work 1 round in stocking stitch with colour off white. Then work pattern, i.e. work A.4 around the sleeve - stitch with arrow in A.4 should fit stitch with marker mid on top of sleeve - count out towards marker thread where pattern should begin mid under sleeve (the pattern will not fit mid under sleeve). When sleeve measures 3 cm from marker on the shoulder, decrease mid under sleeve – read DECREASE TIP and decrease as follows: Decrease 2 stitches every 3-2½-2½-2-2-1½ cm 13-14-14-15-16-18 times in total = 58-60-64-66-68-70 stitches. When A.4 has been worked one time vertically, repeat the last 8 rounds (marked with x in diagram) Work until sleeve measures 42-41-41-39-36-33 cm from marker, finish with a few rows without dots. Now finish with colour off white. Switch to double pointed needles size 3 mm and work rib (= knit 2/purl 2) while AT THE SAME TIME increasing 10-12-12-10-12-14 stitches evenly on 1st round = 68-72-76-76-80-84 stitches. When rib measures 6-6-6-7-7-7 cm cast off. DOUBLE NECK EDGE: Use circular needle size 3 mm and colour red/wine red. Begin at one shoulder seam and pick up approx. 120 to 136 stitches around the neck), number of stitches must be divisible by 4. Work rib (= knit 2/purl 2) for 9 cm. Switch to circular needle size 4 mm and cast off. ASSEMBLY: Fold the rib down on inside of garment. Fasten rib to get a double neck edge. To avoid a tight neck edge that sticks out it is important to keep the seam elastic. Sew the opening under each sleeve. |
|||||||
Diagram explanations |
|||||||
|
|||||||
 |
|||||||
 |
|||||||
 |
|||||||
Have you finished this pattern?Tag your pictures with #dropspattern #nordicflowersweater or submit them to the #dropsfan gallery. Do you need help with this pattern?You'll find 31 tutorial videos, a Comments/Questions area and more by visiting the pattern on garnstudio.com. © 1982-2026 DROPS Design A/S. We reserve all rights. This document, including all its sub-sections, has copyrights. Read more about what you can do with our patterns at the bottom of each pattern on our site. |
|||||||


With over 40 years in knitting and crochet design, DROPS Design offers one of the most extensive collections of free patterns on the internet - translated to 17 languages. As of today we count 325 catalogues and 12298 patterns translated into English (UK/cm).
We work hard to bring you the best knitting and crochet have to offer, inspiration and advice as well as great quality yarns at incredible prices! Would you like to use our patterns for other than personal use? You can read what you are allowed to do in the Copyright text at the bottom of all our patterns. Happy crafting!
Post a comment to pattern DROPS 255-17
We would love to hear what you have to say about this pattern!
If you want to leave a question, please make sure you select the correct category in the form below, to speed up the answering process. Required fields are marked *.