
Popular categories
Looking for a yarn?


Comments / Questions (23)
![]() Karin wrote:
Karin wrote:
Hvorfor svarer i ikke på mit spørgsmål ??? Er vrangpindene indtegnet i mønsteret ? eller hvordan ?
11.11.2025 - 11:30DROPS Design answered:
Hei Kari.n. Vrangpinnene er tegnet inn i diagrammet. Da leser man diagrammet fra venstre mot høyre, husk også å lese diagramteksten for diagram ikonene. mvh DROPS Design
17.11.2025 - 19:44
![]() Karin wrote:
Karin wrote:
Hej hvordan strikkes mønsteret på vrangsiden ? Er det ret over ret og vrang over vrang, eller strikkes alle vrang ?
02.11.2025 - 16:14DROPS Design answered:
Hei Karin. Bakstykket strikkes i glattstrikk, (les siste linje under GENSER - KORT OVERSIKT OVER ARBEIDET), bortsett fra vrangborden nederst. mvh DROPS Design
17.11.2025 - 11:03
![]() Coralie wrote:
Coralie wrote:
Bonjour, Quand je réuni le dos et devant. Il y a écrit continuer en jersey, pourtant il faut bien continuer en a3, point de blé, a4 pour le devant?
01.12.2024 - 21:05DROPS Design answered:
Bonjour Coralie, tout à fait, vous devez continuer en jersey et point fantaisie, exactement comme avant, ceci va être modifié, merci pour votre retour. Bon tricot!
03.12.2024 - 09:15
![]() Coralie wrote:
Coralie wrote:
Bonjour, Je ne comprend pas comment je peux tricoté 35 mailles jetsey raccourcie de la manche, alors qu'au rang 1 j'en tricotte 11 et après 7 fois 4 ou alors il faut en faire 6 et non 7 comme indiqué .
01.12.2024 - 21:03DROPS Design answered:
Bonjour Coralie, vous aurez tricoté 70 mailles au dernier des rangs raccourcis (35 m de chaque côté du marqueur du milieu de la manche), soit: au 1er rang vous tricotez 11 mailles, au 2ème: 22 mailles (11 mailles avant + 11 mailles après le marqueur), à partir du 3ème rang, vous tricotez 4 mailles en plus à la fin de chaque rang, soit 22+4 = 26 m au 3ème rang, 34 m au 4ème rang, et ainsi de suite jusqu'à ce que vous ayez tricoté 70 mailles au total, soit 35 de chaque côté du marqueur (7 rangs sur l'endroit et 7 rangs sur l'envers = 14 rangs au total). Bon tricot!
02.12.2024 - 10:40
![]() Tineke wrote:
Tineke wrote:
Waar precies moet je meten bij het voorpand op 24 cm om aan de meerderingen bij het armsgat te beginnen. Is dat bij de marker bij de Europese schouder of op een andere plek. Bij voorbaat dank voor de hulp. Groeten, tineke
18.11.2024 - 13:15DROPS Design answered:
Dag Tineke,
Er staat op een gegeven moment: 'Alle lengte afmetingen op het voorpand worden vanaf hier genomen'. Dat is dus vanaf de schoudernaad waar je steken opneemt om het voorpand naar beneden te breien.
28.11.2024 - 20:31
![]() Marianne Schlichting wrote:
Marianne Schlichting wrote:
I har svaret mig, at jeg skal tage ud med 1 omslag. Det jeg spørger om er, hvor på pinden skal der tages ud, det besvarer I ikke.
01.08.2024 - 08:25DROPS Design answered:
Hej Marianne, det er de 2 masker som er tegnet ind i diagrammet :)
01.08.2024 - 09:05
![]() Marianne Schlichting wrote:
Marianne Schlichting wrote:
På forstykke 6. linie står, der tages 2 masker ud i A.1 før første snoning. Hvor skal der tages ud?
18.07.2024 - 14:46DROPS Design answered:
Hej Marianne, du tager ud med 1 omslag og strikker omslaget drejet på næste pind :)
31.07.2024 - 11:56
![]() Hanneke wrote:
Hanneke wrote:
Goedendag, maat M, bij het voorpand, nadat 28 st zijn opgenomen en averecht gebreid, dus bij 1e patroonnaald, moeten 3 st in tricotst gebreid en dan A1. Moet dit niet averecht tricot zijn? Nu wordt het recht gebreid vóór de kabel en averecht aan de andere kant. Kabel komt niet mooi tot z'n recht. M vr groet.
09.05.2024 - 10:46DROPS Design answered:
Dag Hanneke,
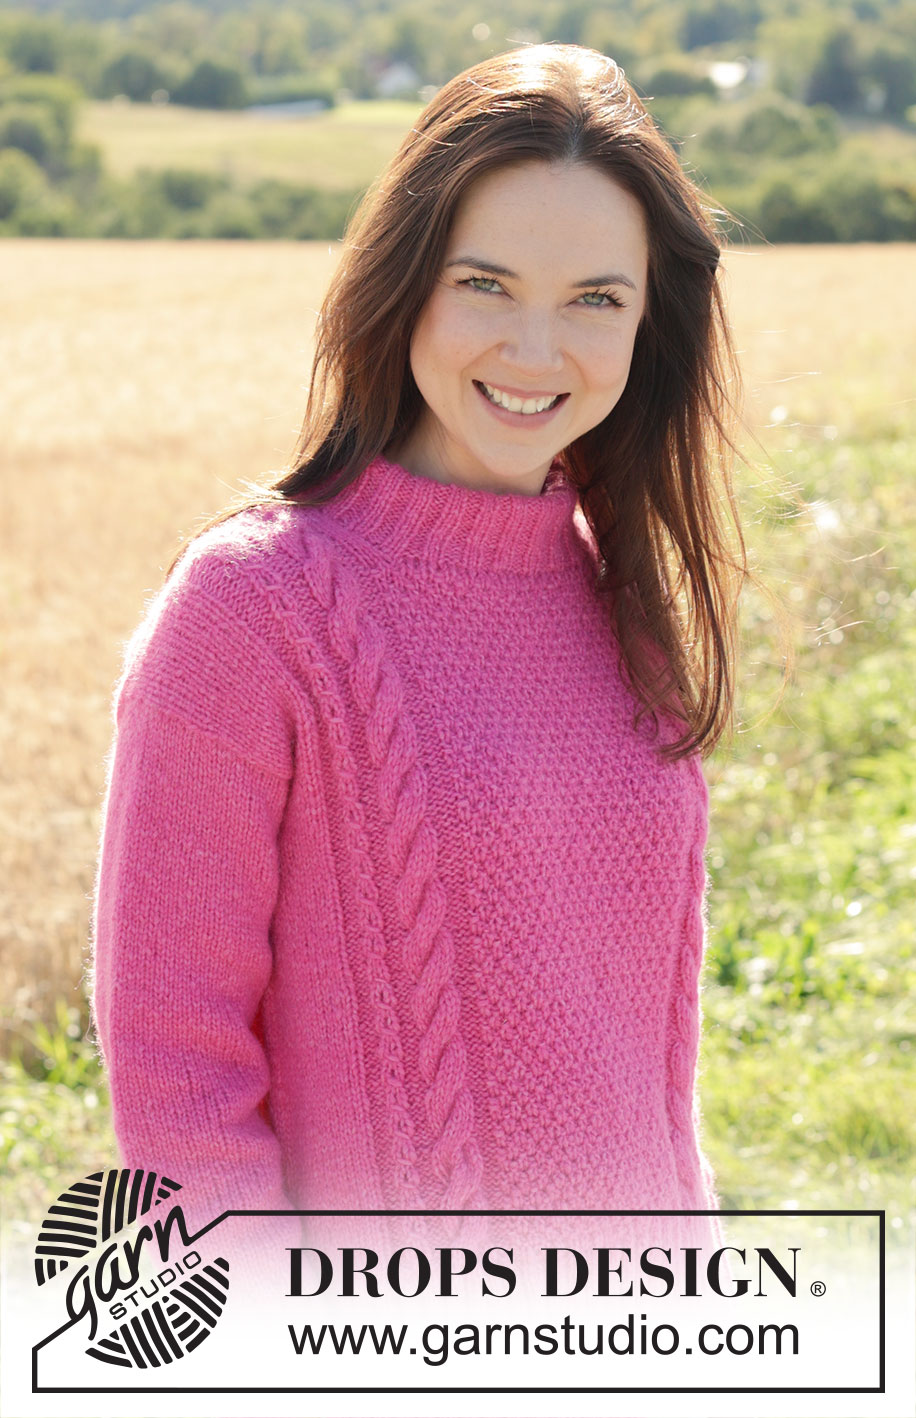
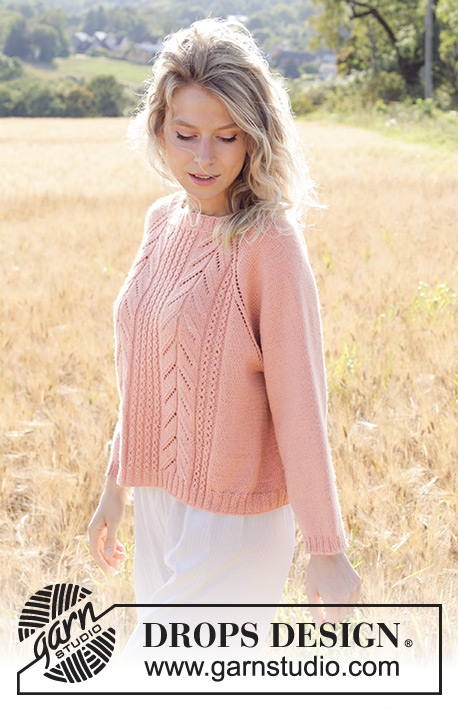
Nee, dit moeten tricotsteken zijn. De averechte steken naast de kabel komen er later bij. Deze 3 tricotsteken zitten bij de hals en als je goed kijkt kun je ze op de derde foto zien.
10.05.2024 - 09:25
![]() Esther Vradis wrote:
Esther Vradis wrote:
Ce magnifique modèle m'a séduit mais j'avais peur de me lancer mais grâce à vos explications et vidéos cela devient additif. Bon tricot à tous/toutes.
15.04.2024 - 23:36
![]() Vradis-Willa Esther wrote:
Vradis-Willa Esther wrote:
Pour la "petite tresse" du motif (sur 3 mailles) il est indiqué : Glisser 1 maille et tricoter 2 mailles endroit, passer la maille glisser par dessus les mailles tricotée. Il nous reste .... 1 seule maille.. Deux rangs après on fait 1 (seule)jetée Du coups on "diminue" 1 maille tout les 4 rangs ??? J'ai du défaire et je passe la maille glissée sur une seule maille tricotée (et non sur les 2 mailles comme indiqué).
15.04.2024 - 19:39DROPS Design answered:
Bonjour Mme Vradis-Willa, pour cette petite torsade, on ne diminue qu'une seule maille: on glisse 1 maille comme pour la tricoter à l'endroit, on tricote les 2 mailles suivantes à l'endroit (mais pas ensemble), puis on passe la maille glissée par-dessus les 2 mailles tricotées = il reste 2 mailles, au rang suivant sur l'endroit, on fait 1 jeté = on a de nouveau 3 mailles. Bon tricot!
16.04.2024 - 13:28
|
|||||||||||||||||||||||||||||||
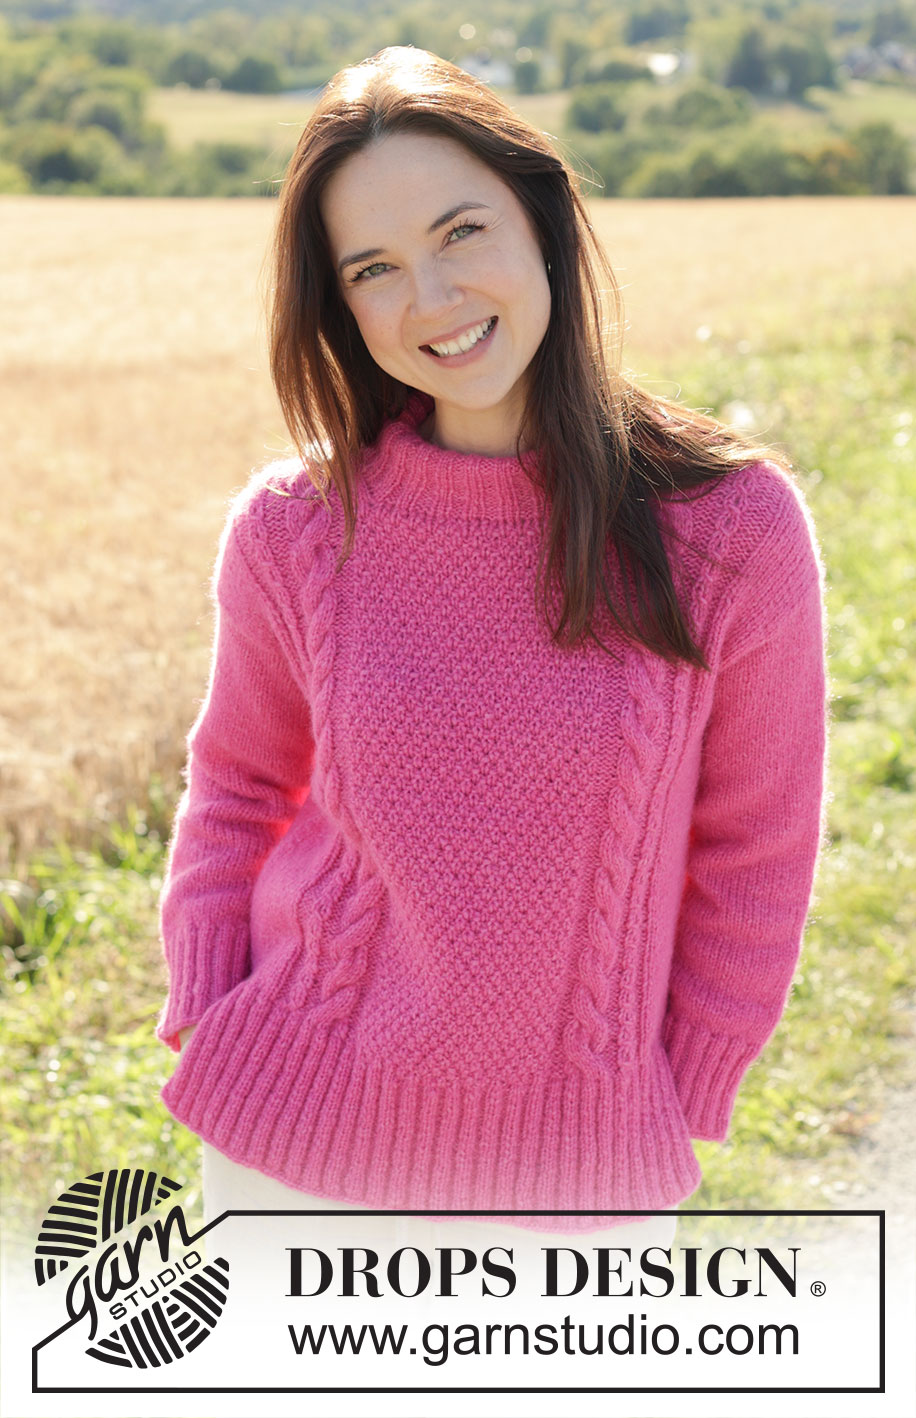
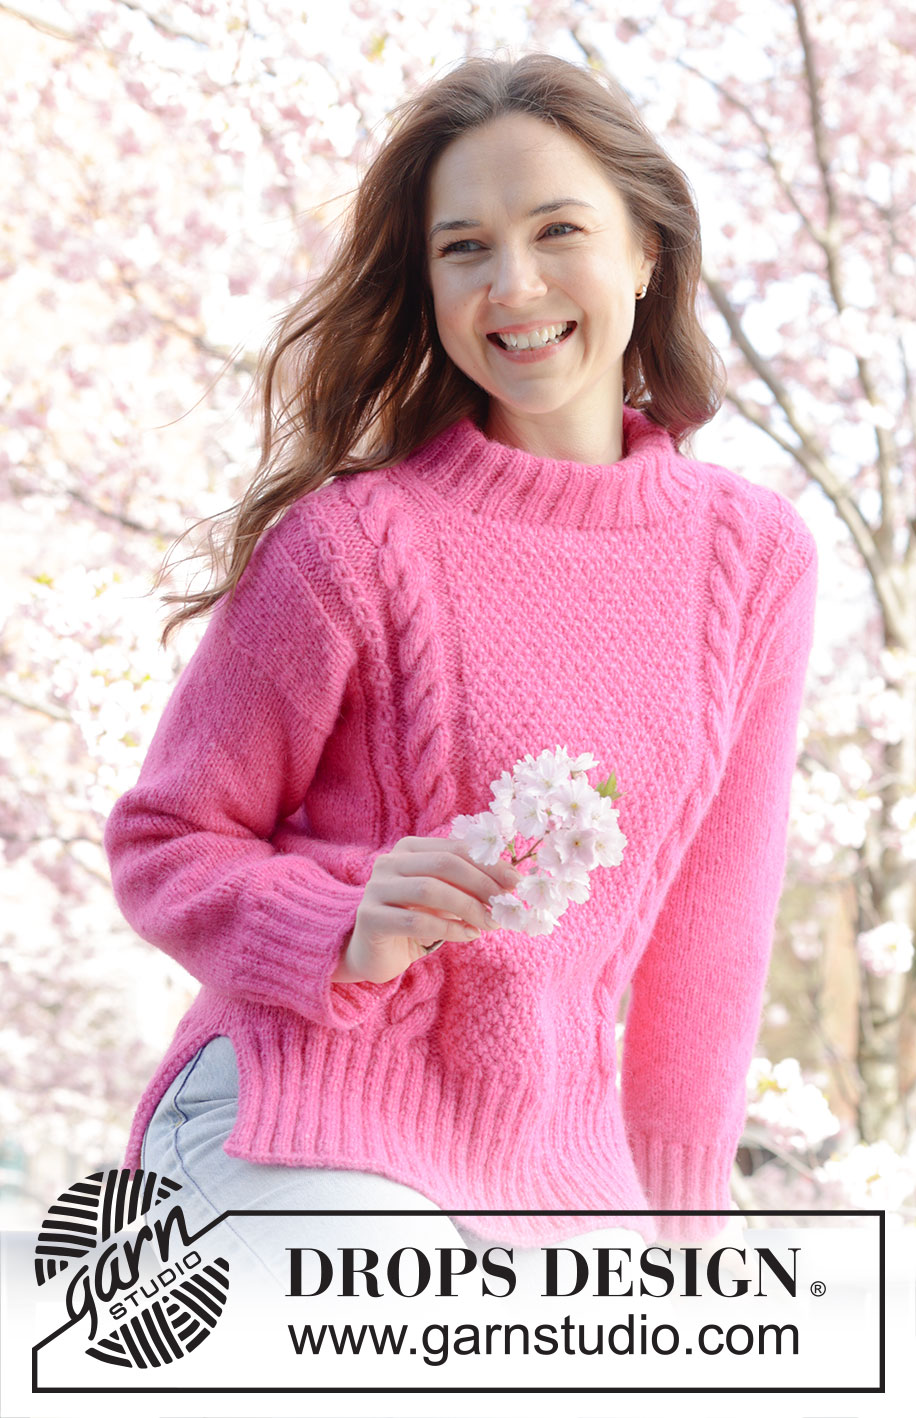
Berry Me Sweater#berrymesweater |
|||||||||||||||||||||||||||||||
 |
 |
||||||||||||||||||||||||||||||
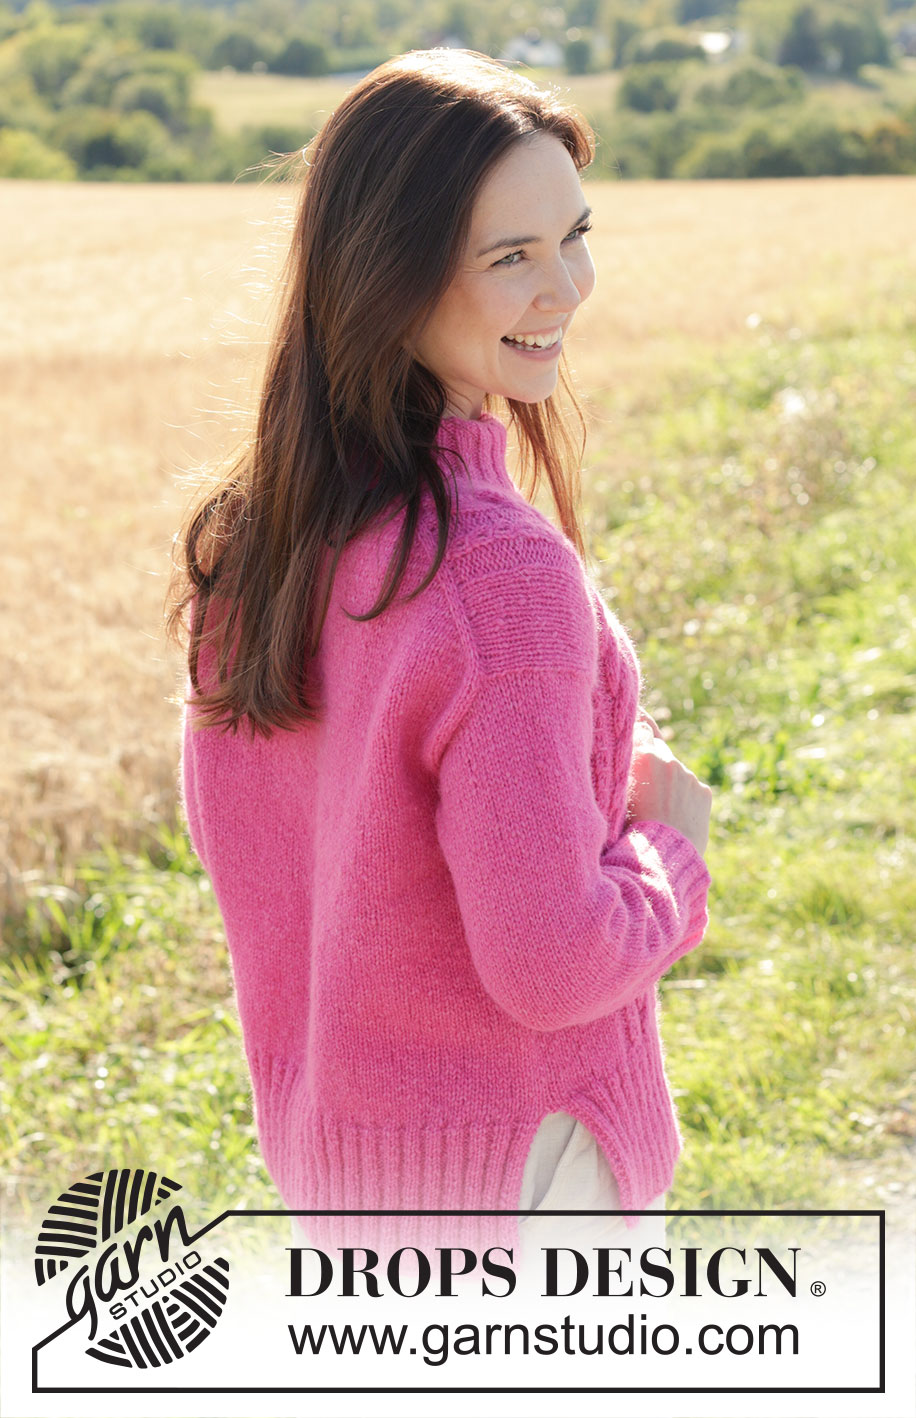
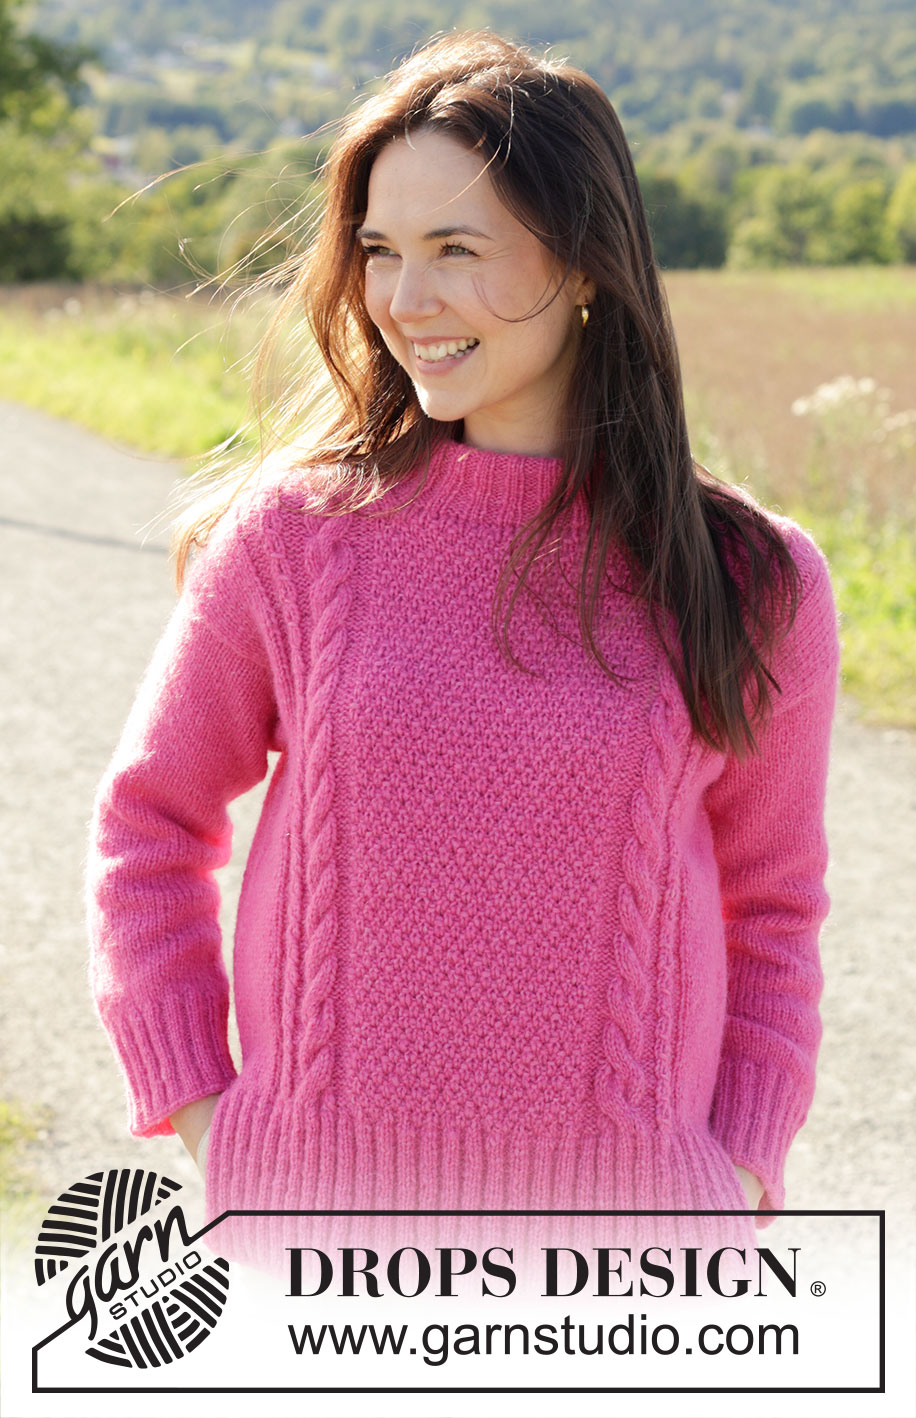
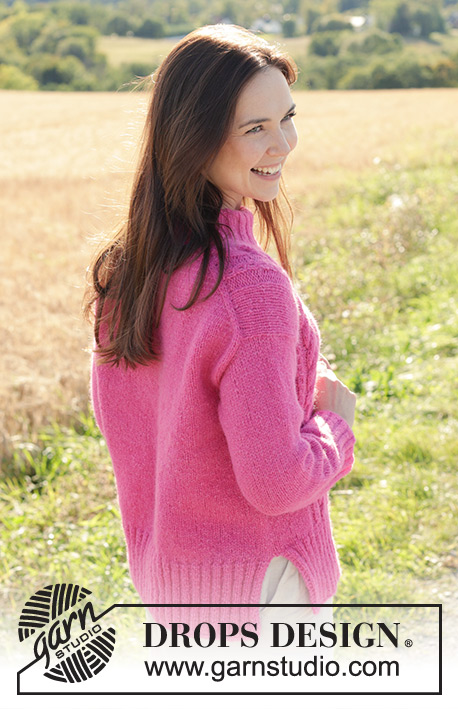
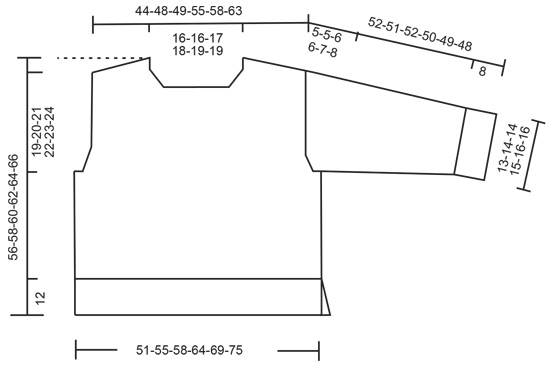
Knitted jumper in DROPS Air or DROPS Paris. Piece is knitted top down with European shoulder / diagonal shoulder, vents in the sides . Size: S - XXXL
DROPS 250-33 |
|||||||||||||||||||||||||||||||
|
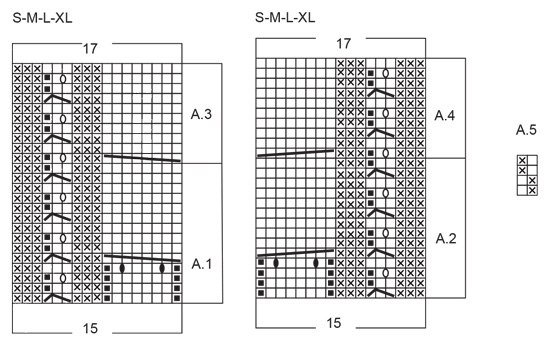
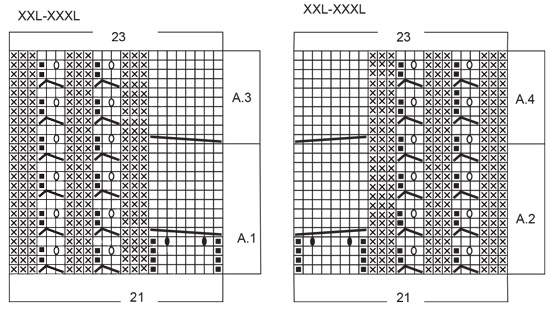
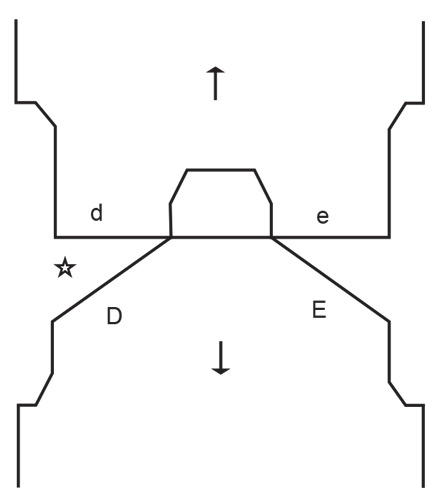
---------------------------------------------------------- EXPLANATION FOR THE PATTERN: ---------------------------------------------------------- GARTER STITCH (back and forth): Knit all rows. 1 ridge vertically = knit 2 rows. INCREASE TIP-1: INCREASE 1 STITCH TOWARDS THE LEFT - from RIGHT SIDE: Use left needle to pick up yarn between 2 stitches from row below, pick up yarn from the front and knit in the stitch loop that is on the back of the needle. INCREASE 1 STITCH TOWARDS THE RIGHT - from RIGHT SIDE: Use left needle to pick up yarn between 2 stitches from row below, pick up yarn from the back and knit in the stitch loop that is on the front side of the needle. INCREASE TIP-2: INCREASE 1 STITCH TOWARDS THE RIGHT - from WRONG SIDE: Use left needle to pick up yarn between 2 stitches from row below, pick up yarn from the back and purl in the stitch loop that is on the front side of the needle. INCREASE 1 STITCH TOWARDS THE LEFT - from WRONG SIDE: Use left needle to pick up yarn between 2 stitches from row below, pick up yarn from the front and purl in the stitch loop that is on the back side of the needle. INCREASE TIP-3: INCREASE PURL 1 TOWARDS THE LEFT – from THE RIGHT SIDE: Use left needle to pick up yarn between 2 stitches from row below, pick up yarn from the front and purl in the stitch loop that is on the back side of needle. INCREASE PURL 1 TOWARDS THE RIGHT – from THE RIGHT SIDE: Use left needle to pick up yarn between 2 stitches from row below, pick up yarn from the back and purl yarn in the stitch loop that is on the front side of needle. DECREASE TIP (applies to mid under sleeves): Decrease 1 stitch on each side of marker thread as follows: Work until 3 stitches remain before marker thread, knit 2 together, knit 2 (marker thread is between these 2 stitches), slip 1 stitch knitwise, knit 1, pass slipped stitch over stitch worked. PATTERN: See diagrams A.1 to A.5. Diagrams show all rows in pattern seen from the right side. Choose diagram for your size in A.1/A.3 and A.2/A.4 ---------------------------------------------------------- START THE PIECE HERE: ---------------------------------------------------------- JUMPER - SHORT OVERVIEW OF THE PIECE: In this pattern long and short needles have been used - begin with fitting length and switch as needed. Work piece back and forth on needle. Begin by casting on stitches in the back of neck. Then work back piece downwards while at the same time increasing in each side of piece until number of stitches for shoulder width is reached. Back piece has a slight diagonal shoulder. Then work down to armholes. Now put back piece a side and work the front piece. Front piece is first worked in 2 parts. Begin by picking up stitches along one shoulder, work pattern while increasing towards the neck. Repeat on the other shoulder. Put right and left front piece together when increases for neck are done. Then work front piece down to armholes. Now slip front piece and back piece on to same circular needle and work body downwards in the round on circular needle before dividing the piece again for vents. Pick up stitches for sleeves around the armholes. First work back and forth with short rows to form a sleeve cap. Then work sleeves downwards in the round on needle. Finish by picking up stitches around the neck and work a neck edge. Fold the neck edge double against the wrong side and fasten. Work front piece in pattern, work back piece in stocking stitch. BACK PIECE: Cast on 31-31-33-35-37-37 stitches on circular needle size 4.5 mm with DROPS Air or DROPS Paris. Purl 1 row from wrong side. Read INCREASE TIP-1 and work next row from right side as follows: Knit 3, increase towards the left, knit until 3 stitches remain, increase towards the right, knit 3. Read INCREASE TIP-2 and work next row from wrong side as follows: Purl 3, increase towards the right, purl until 3 stitches remain, increase towards the left, purl 3. Continue like this and increase the same way from both right side and wrong side 24-28-28-32-34-38 times in total. After last increase there are 79-87-89-99-105-113 stitches on needle. Insert 1 marker in the side. Now measure piece from here! Work in stocking stitch back and forth until piece measures 10-10-11-12-11-12 cm, measured along the edge of armhole. Work next row as follows from right side: Knit 3, increase towards the left, work until 3 stitches remain, increase towards the right, knit 3 – remember INCREASE TIP-1. Increase like this on every row from right side 3-3-4-4-5-5 times in total = 85-93-97-107-115-123 stitches. Work until piece measures 13-13-14-15-15-16 cm, measured from marker along armhole. Cut the yarn, slip stitches on a thread or stitch holder, and work front piece as explained below. FRONT PIECE: Begin with left shoulder (when garment is worn). Pick up 24-28-28-32-34-38 stitches inside outermost stitch along left shoulder on back piece (i.e. pick up 1 stitch in every row from edge at the top of back piece, see D on chart). All length measurements on front piece are done from here. Purl 1 row from wrong side, then work as follows - from right side: 3 stitches in stocking stitch, A.1, stocking stitch over the last 6-10-10-14-10-14 stitches. When A.1 has been worked 1 time vertically, continue with A.3 over stitches in A.1 (increase 2 stitches in A.1 before first cable) = 26-30-30-34-36-40 stitches. When piece measures 9 cm, increase stitches towards the neck as explained below. Work next row as follows from right side: Knit 3, increase 1 purl towards the left, work pattern as before over the remaining stitches - read INCREASE TIP-3. Increase like this on every row from right side 3 times in total – purl the increased stitches from the right side = 29-33-33-37-39-43 stitches. Work 1 row with pattern from wrong side, cut the yarn and put piece aside. Then work right shoulder as explained below. Pick up 24-28-28-32-34-38 stitches inside outermost stitch along right shoulder on back piece (i.e. pick up 1 stitch in every row from edge at the top of back piece, see E on chart). All length measurements on front piece are done from here. Purl 1 row from wrong side, then work as follows - from right side: Knit 6-10-10-14-10-14, A.2, knit 3. When A.2 has been worked 1 time vertically, continue with A.4 over stitches in A.2 (increase 2 stitches in A.2 before first cable) = 26-30-30-34-36-40 stitches. When piece measures 9 cm, increase stitches towards the neck as explained below. Work next row as follows from right side: work pattern as before until 3 stitches remain, increase 1 purl towards the right, knit 3 - remember INCREASE TIP-3. Increase like this on every row from right side 3 times in total – purl the increased stitches from the right side = 29-33-33-37-39-43 stitches. After last increase work 1 row from wrong side. NOTE! Make sure to work the same number of rows on right and left shoulder! Work next row as follows from right side: Work pattern as before over the 29-33-33-37-39-43 stitches from right front piece, cast on 25-25-27-29-31-31 stitches for neck at the end of this row, then work pattern as before over the 29-33-33-37-39-43 stitches from left front piece = 83-91-93-103-109-117 stitches (there are 4 stitches more on front piece than on back piece due to cables). Work next row as follows from wrong side: Purl 6-10-10-14-10-14, A.3, knit 3, purl 31-31-33-35-37-37, knit 3, A.4, purl 6-10-10-14-10-14. Work next row as follows from right side: Knit 6-10-10-14-10-14, A.4, purl 3, A.5 over the next 31-31-33-35-37-37 stitches, purl 3, A.3, knit 6-10-10-14-10-14. Continue this pattern back and forth until piece measures 22-24-25-26-27-28 cm. Work next row as follows from right side: Knit 3, increase towards the left, work until 3 stitches remain, increase towards the right, knit 3 – remember INCREASE TIP-1 Increase like this on every row from right side 3-3-4-4-5-5 times in total = 89-97-101-111-119-127 stitches. Continue until piece measures 25-27-28-29-31-32 cm. Now put front piece and back piece together for body as explained below. BODY: Work pattern as before over the 89-97-101-111-119-123 stitches on needle, cast on 6-6-8-8-10-12 new stitches at the end of this row (in the side), work stocking stitch over the 85-93-97-107-115-127 stitches from back piece, cast on 6-6-8-8-10-12 new stitches at the end of row = 186-202-214-234-254-274 stitches. Insert 1 marker thread in each side on body, in the middle of the 10-10-12-16-18-20 stitches under each sleeve. Move marker threads upwards when working. Use the marker threads when dividing piece for vents in each side. Continue in stocking stitch and pattern until piece measures 44-46-48-50-52-54 cm, measured from the top point on shoulder on front piece. Now divide front piece and back piece to make vents in the sides. Slip the 91-99-105-115-125-135 stitches from back piece on a thread or needle and work only over stitches on front piece. FRONT PIECE: = 95-103-109-119-129-139 stitches. Knit 1 row from right side while increasing 39-43-45-51-53-59 stitches evenly = 134-146-154-170-182-198 stitches. Switch to circular needle size 3.5 mm. Work next row as follows - from wrong side: Work 2 stitches in GARTER STITCH – read explanation above, * purl 2, knit 2 *, work from *-* and finish with purl 2 and 2 stitches in garter stitch. Continue rib like this for 12 cm. Cast off. Jumper measures 56-58-60-62-64-66 cm in total, measured at the top of shoulder on front piece. BACK PIECE: = 91-99-105-115-125-135 stitches. Knit 1 row from right side while increasing 43-47-49-55-57-63 evenly = 134-146-154-170-182-198 stitches. Switch to circular needle size 3.5 mm. Work the same way as on front piece. SLEEVES: Place piece flat and insert 1 marker at the top of armhole (NOTE! It is not where stitches were picked up for front piece but approx. 6-8 cm down on front piece = mid on top of shoulder). Use circular needle size 4.5 mm, begin in the middle of the new stitches cast on under sleeve, and pick up 74-78-86-88-92-98 stitches along armhole - adjust to pick up same number of stitches on each side of marker along armhole. Now work stocking stitch back and forth with short rows over sleeve cap, this is done to get a better shape on sleeve. Begin mid under sleeve. 1st row (right side): work 9-10-10-11-11-12 stitches past marker, turn 2nd row (wrong side): work 9-10-10-11-11-12 stitches past marker, turn. 3rd row (right side): 4-4-4-4-4-3 stitches past where the previous turn was, turn 4th row (wrong side): work 4-4-4-4-4-3 stitches past where the previous turn was, turn Repeat 3rd and 4th row until 29-30-34-35-39-36 stitches have been worked past marker mid on top of sleeve (6-6-7-7-8-9 turns have been done in each side). Work from right side until beginning of round (mid under sleeve). Insert 1 marker thread here, this is used when decreasing stitches under sleeve. Move marker thread upwards when working. Continue working in the round in stocking stitch. When sleeve measures 7-7-8-8-9-10 cm from where stitches were picked up (all length measurements are done mid on top of sleeve), decrease 2 stitches mid under sleeve - read DECREASE TIP. Decrease every other round 3-3-4-4-5-6 times, then decrease every 3-2½-2½-2-2-1½ cm 10-11-13-13-13-14 times, a total of 13-14-17-17-18-20 times = 48-50-52-54-56-58 stitches. Continue to work until sleeve measures 44-43-44-42-41-40 cm. 8 cm remain until finished measurements. Try the jumper and work to desired length before rib. Knit 1 round while increasing 12-10-12-10-12-10 stitches evenly = 60-60-64-64-68-68 stitches. Switch to double pointed needles size 3.5 mm. Work rib (knit 2/purl 2) for 8 cm. Cast off. Sleeve measures approx. 52-51-52-50-49-48 cm. NECK EDGE: Begin at one shoulder line and pick up from right side inside 1 edge stitch approx. 100 to 112 stitches on a circular needle size 3.5 mm. Number of stitches must be divisible by 4. Work rib (knit 2/purl 2) in the round for 10 cm. Cast off. Fold rib at the top of neck down on inside of garment. Fasten rib to get a double neck edge. To avoid a tight neck edge that sticks out it is important to keep the seam elastic. |
|||||||||||||||||||||||||||||||
Diagram explanations |
|||||||||||||||||||||||||||||||
|
|||||||||||||||||||||||||||||||
 |
|||||||||||||||||||||||||||||||
 |
|||||||||||||||||||||||||||||||
 |
|||||||||||||||||||||||||||||||
 |
|||||||||||||||||||||||||||||||
Have you finished this pattern?Tag your pictures with #dropspattern #berrymesweater or submit them to the #dropsfan gallery. Do you need help with this pattern?You'll find 38 tutorial videos, a Comments/Questions area and more by visiting the pattern on garnstudio.com. © 1982-2026 DROPS Design A/S. We reserve all rights. This document, including all its sub-sections, has copyrights. Read more about what you can do with our patterns at the bottom of each pattern on our site. |
|||||||||||||||||||||||||||||||


With over 40 years in knitting and crochet design, DROPS Design offers one of the most extensive collections of free patterns on the internet - translated to 17 languages. As of today we count 324 catalogues and 12290 patterns translated into English (UK/cm).
We work hard to bring you the best knitting and crochet have to offer, inspiration and advice as well as great quality yarns at incredible prices! Would you like to use our patterns for other than personal use? You can read what you are allowed to do in the Copyright text at the bottom of all our patterns. Happy crafting!
Post a comment to pattern DROPS 250-33
We would love to hear what you have to say about this pattern!
If you want to leave a question, please make sure you select the correct category in the form below, to speed up the answering process. Required fields are marked *.