
Popular categories
Looking for a yarn?


Comments / Questions (34)
![]() Ashley wrote:
Ashley wrote:
Can this pattern be sized up to an 4XL?
23.10.2024 - 20:23DROPS Design answered:
Dear Ashley, probably but all our patterns are unfortunately only up to 3XL. You might get any individual assistance adjusting to the desired size from your yarn store or a knitting forum. Thanks for your comprehension. Happy knitting!
24.10.2024 - 09:18
![]() Georgia wrote:
Georgia wrote:
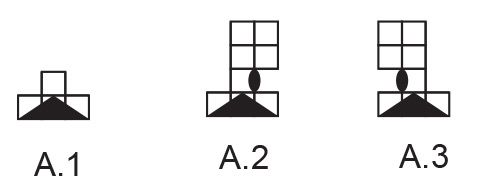
Hi :) For the V-neck decreases (using the A1 diagram), the pattern says, "Decrease 2 stitches on each side every 4th row 4 times in all sizes." If we start decreasing on the right side (so, that's the 1st row), the 4th row will be on the wrong side, and it is specifically stated that we should do all the decreases on the right side. Is there a mistake in the pattern or am I missing something? Thanks very much in advance :)
09.10.2024 - 21:59DROPS Design answered:
Dear Georgia, decrease on every 4th row as follows: *work 1 row from RS with decreases, work 3 rows (1 row from WS, 1 row from RS, 1 row from WS) without decreasing*, and repeat from *to*, there will be 3 rows between each decrease, this means you decrease on every 4th row. Happy knitting!
10.10.2024 - 09:17
![]() Lesley wrote:
Lesley wrote:
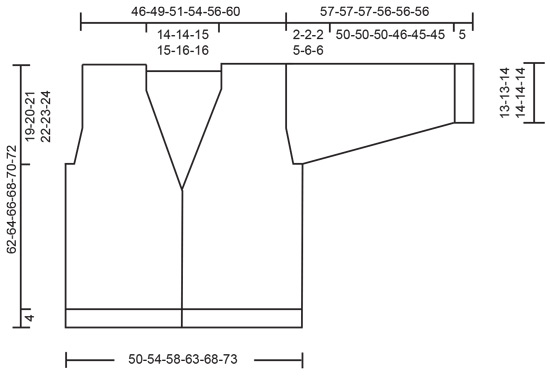
I am knitting size medium. It looks like the smaller sizes have the longest sleeve length. That doesn't seem right. It is for someone with 50cm arm. Wouldn't a 57 cm sleeve be too long? I would have thought 5cm cuff, 45cm sleeve and 2cm cap would be right. Should I instead start casting off at 50cm? (as indicated for the largest size)
06.10.2024 - 04:36DROPS Design answered:
Dear Lesley, you can see the size of the sleeve in the measurements schematic below. Out of the 57cm for the sleeve, 5cm are for the cuff, 50 for the sleeve and 2 for the sleeve cap. The sleeve seems shorter in the larger sizes because the yoke and the sleeve cap are larger in these sizes, so you can reach the necessary sleeve length with a shorter sleeve. If you need a shorter sleeve you can increase more often as you work the sleeve, to reach the necessary number of stitches earlier, at less cm. Happy knitting!
06.10.2024 - 14:13
![]() Marlies Crooijmans wrote:
Marlies Crooijmans wrote:
Ik wil een herenvest breien en nu zie ik een mooie in groen getint. Maar wil dit niet met rondbreinaalden doen met normale 2 naalden. Is dit mogelijk??
19.09.2024 - 15:32DROPS Design answered:
Dag Marlies,
Om een patroon aan te passen om op rechte naalden te breien hebben we een instructie gemaakt. Deze vind je hier.
19.09.2024 - 21:59
![]() Annmari wrote:
Annmari wrote:
Hej igen! Modell 246-7. Minska för V-hals. Vilka videor visar A.2 och A.3. Eller förklara med ord. Tack på förhand.
11.09.2024 - 20:08DROPS Design answered:
Hei Annmari. Generelle hjelpevideoer finner du finner under Videor, til høyre eller under bildet. Det er ikke laget noen hjelpevideo spesielt til diagram A.2 og A.3 til denne jakken, men du finner video på hvordan strikke 3 vrang sammen (Minska 3 am ihop til 1 am). Over diagrammene finner du tekst på hvordan de ulike diagram ikonene til diagram A.2 og A.3 skal strikkes. mvh DROPS Design
16.09.2024 - 09:40
![]() Annmari Jonsson wrote:
Annmari Jonsson wrote:
Modell 246-7 Hur stickas A.1? Har kommit till minskning v-hals. Hittar ett antal minskningar men ingen video med rubrik A.1 vilken av alla videor beskriver A.1? Förstår att jag ska sticka 1 rät kantmaska och en rät m. Men HUR stickas A.1 över nästa 3 m?? Tacksam för snabbt svar Annmari
09.09.2024 - 10:01DROPS Design answered:
Hei Annmari. Ta en titt på videoen: Minska 3 am ihop til 1 am (du finner videoen under Videor, til høyre eller under bildet). Denne videoen viser 2 forslag. Selv om videoen viser et arbeid fra vrangen, skal det i denne oppskriften strikkes 3 masker vrang sammen fra retten. Strikk maskene sammen som om de skulle ha vært strikket 1 vrang fra retten. mvh DROPS Design
09.09.2024 - 13:10
![]() Ursula wrote:
Ursula wrote:
Guten Tag, Sie schreiben: Bei einer Länge von 38cm beginnen die Abnahmen für den V-Ausschnitt. GLEICHZEITIG mit den V-Ausschnitt abnahmen wird für die Armausschnitte abgekettet. Jedoch heißt es später beim Armausschnitt: GLEICHZEITIG bei einer Länge von 43 cm beginnen. Mit dem V-Ausschnitt nach 38 cm beginnen, mit dem Armausschnitt nach 43 cm. Was bedeutet nun gleichzeitig?
09.06.2024 - 18:08DROPS Design answered:
Liebe Ursula, je nach der Grösse werden diese Abnahmen nach einer verschiedenen Höhe gestrickt, in Ihre Grösse beginnen Sie mit dem Halsauschnitt nach 38 cm, dann mit dem Armausschnitt nach 43 cm, so werden die V-Ausschnitt noch nicht fertig wenn Sie für den Armausschnitt beginnen, so werden beide Abnahmen gleichzeitig gestrickt. Viel Spaß beim Stricken!
10.06.2024 - 13:05
![]() Marga Strik wrote:
Marga Strik wrote:
Hoeveel garn heb ik nodig om het model City Rangers maat L te breien
17.05.2024 - 15:48DROPS Design answered:
Dag Marga,
Bovenaan bij de materialenlijst staat per maat aangegeven hoeveel gram je nodig hebt. (Het eerste getal geldt voor maat S, het tweede getal voor maat M, enzovoort). 1 bol weegt meestal 50 gram, maar let erop dat dit per garensoort verschillend kan zijn. Dus als er bijvoorbeeld 400 gram staat dan zou je 8 bollen nodig hebben als 1 bol 50 gram weegt.
20.05.2024 - 15:03
![]() Elke Behrend wrote:
Elke Behrend wrote:
Guten Tag, ich habe eine Frage zum Stricken der Blende des V-Ausschnitt es. Wie bekomme ich eine schöne Rundung hin am Knick von den geraden Stücken (Knopflöcher und Knöpfe) der Vorderteile zum Beginn des V-Ausschnittes? Bei mir gibt es immer eine *Delle". Vielen Dank für Ihre Hilfe!!! Und herzliche Grüße vom Bodensee Elke
11.02.2024 - 22:16DROPS Design answered:
Liebe Elke, meinen Sie, dass sich die Blende am Übergang zum V-Ausschnitt etwas wellt? Dann sind an dieser Stelle möglicherweise zu viele Maschen vorhanden, vielleicht versuchen Sie, an diesem "Knick" etwas weniger Maschen aufzufassen. Sollte sich das Problem dadurch verschlimmern, müssen Sie mehr Maschen auffassen - vielleicht liegt die "Delle" auch daran, dass es zu wenige Maschen sind - das lässt sich leider per "Ferndiagnose" schlecht sagen... Gutes Gelingen weiterhin!
12.02.2024 - 19:20
![]() Mina Bello wrote:
Mina Bello wrote:
é corrett CORPO: ... Continuare queste coste in piano per 4 cm. Lavorare 1 ferro diritto dal diritto del lavoro e diminuire 30 ?
09.01.2024 - 11:52DROPS Design answered:
Buonasera Mirna, si, il numero di maglie da diminuire è corretto. Buon lavoro!
09.01.2024 - 16:20
|
|||||||||||||
City Ranger#cityrangercardigan |
|||||||||||||
 |
 |
||||||||||||
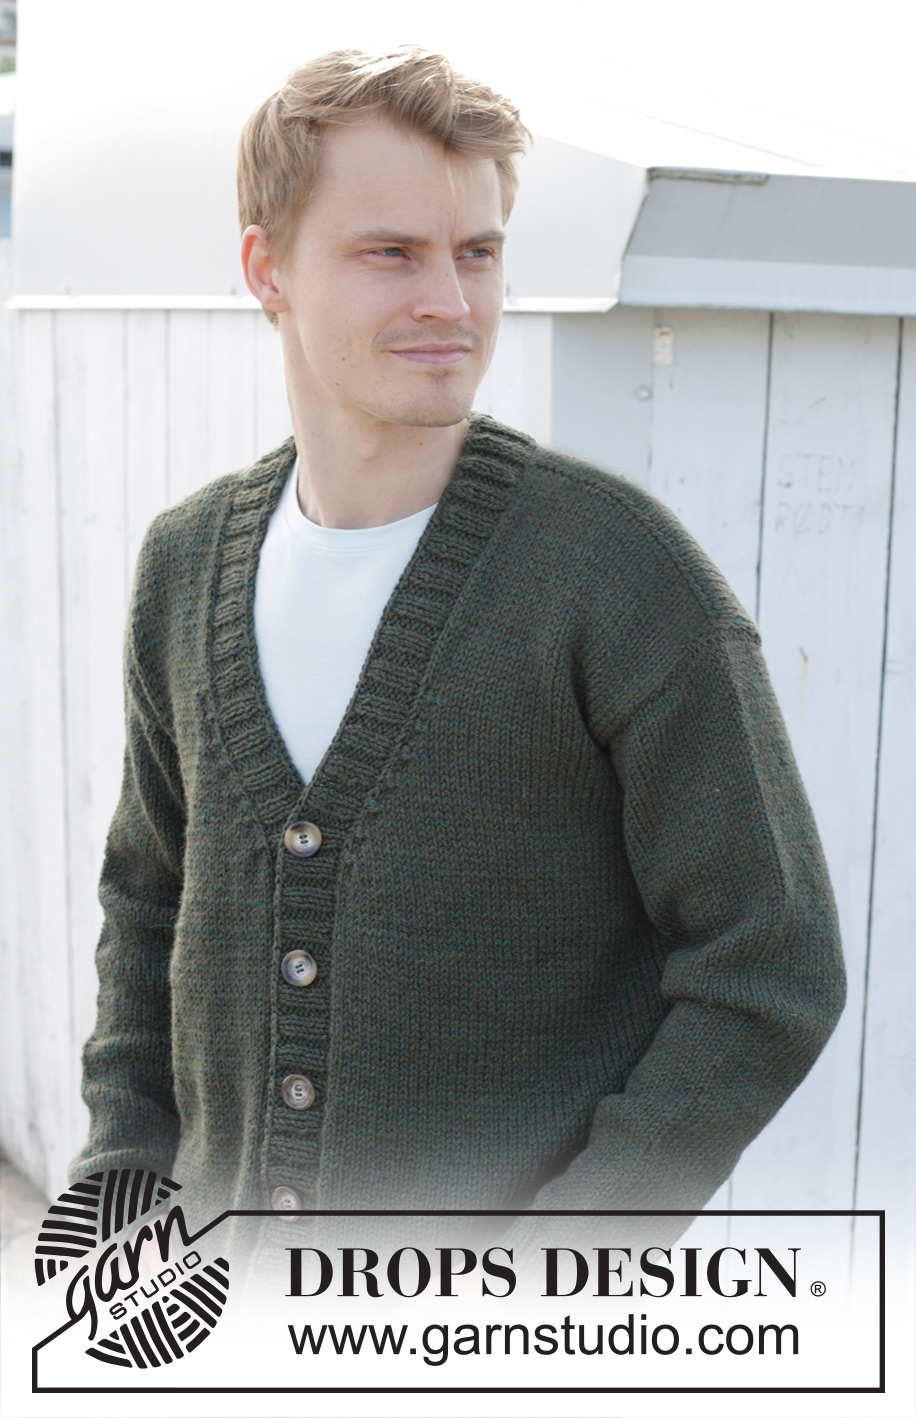
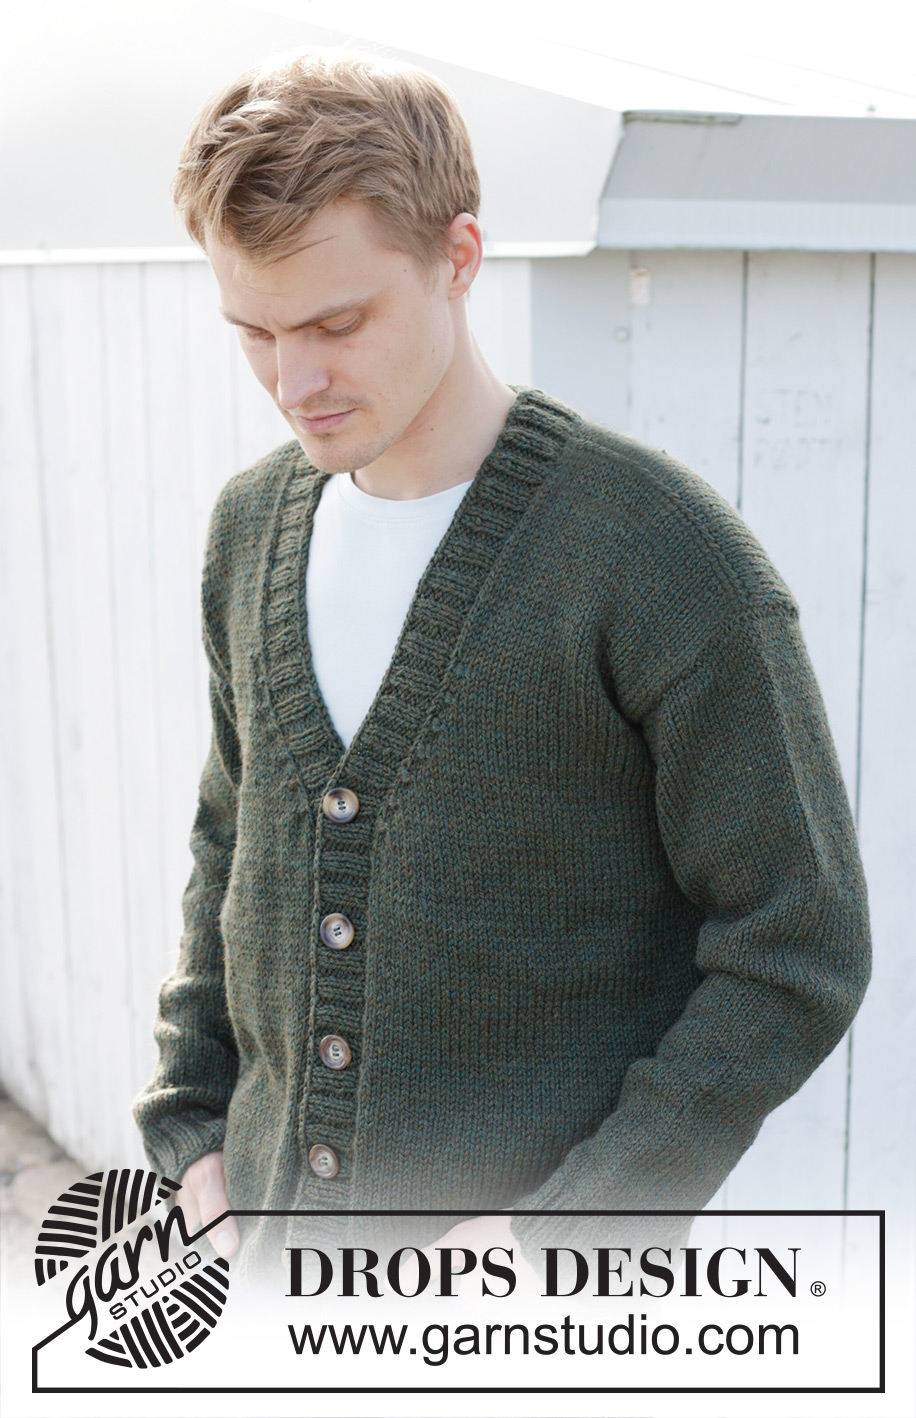
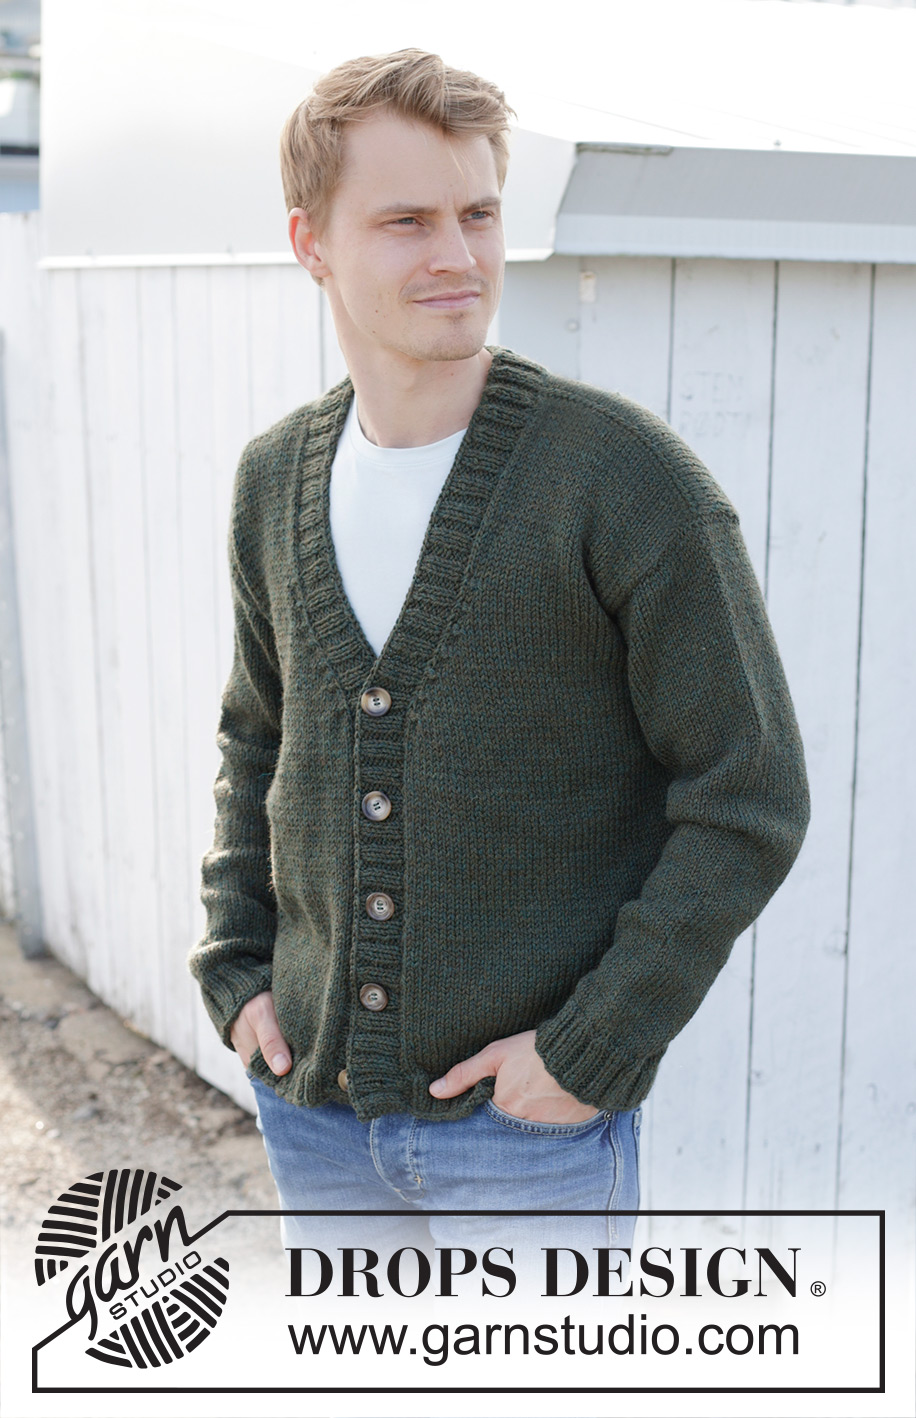
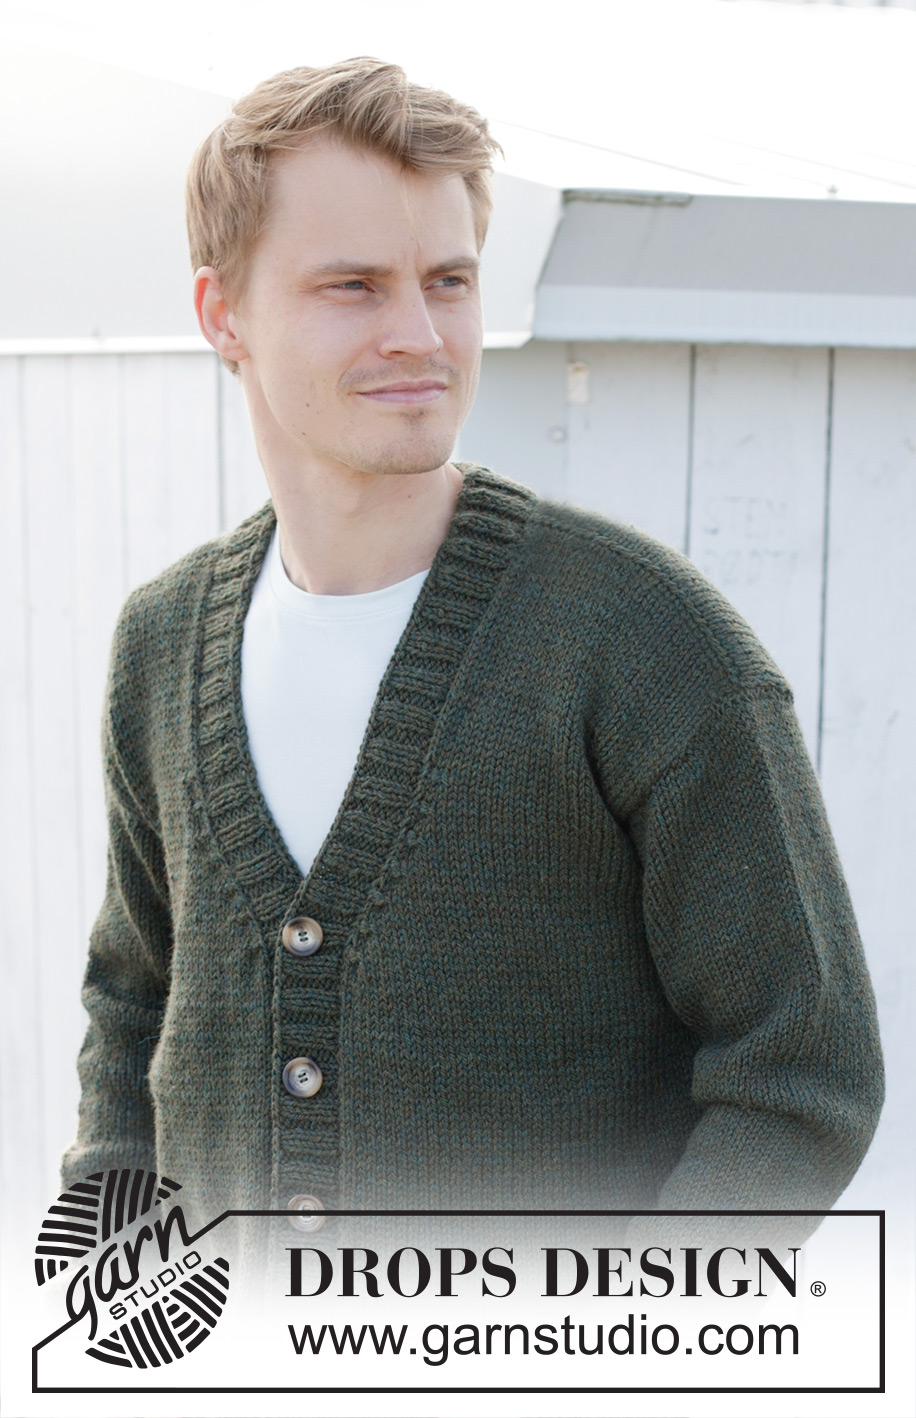
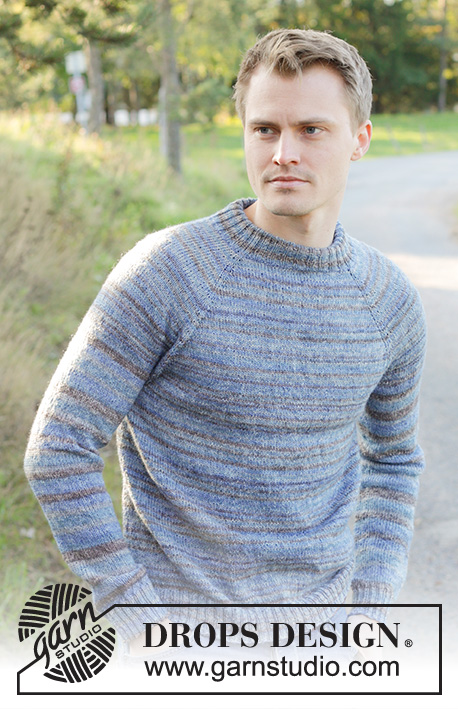
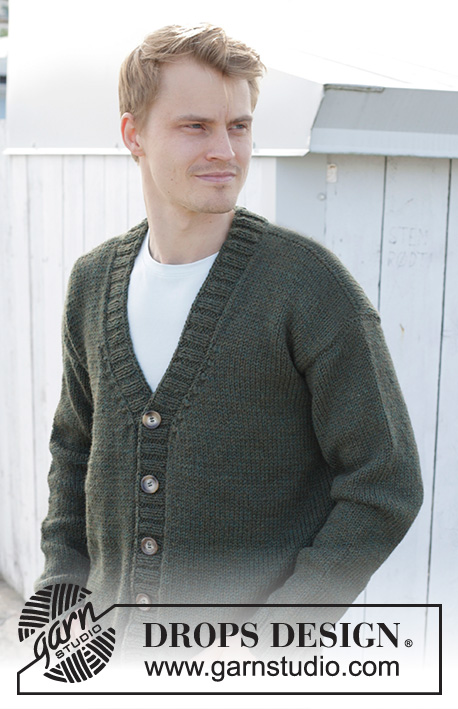
Knitted jacket for men in DROPS Nepal. The piece is worked bottom up with V-neck. Sizes S - XXXL.
DROPS 246-7 |
|||||||||||||
|
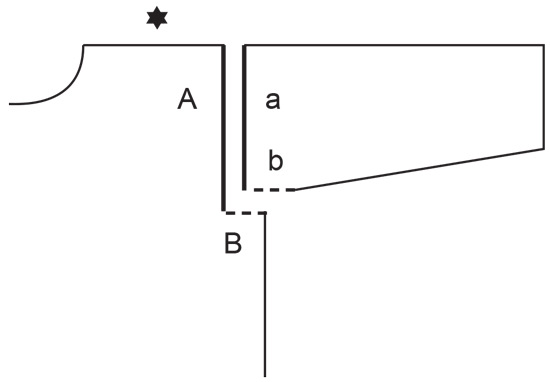
------------------------------------------------------- EXPLANATIONS FOR THE PATTERN: ------------------------------------------------------- GARTER STITCH (worked back and forth): Knit all rows. 1 ridge = knit 2 rows. PATTERN: See diagrams A.1 to A.3. The diagrams show all rows in the pattern from the right side. DECREASE TIP (for V-neck and armholes): All decreases are worked from the right side! DECREASE 2 STITCHES AT BEGINNING OF ROW: Work 1 edge stitch in garter stitch, knit 1, work A.1 over the next 3 stitches. DECREASE 2 STITCHES AT END OF ROW: Work until there are 5 stitches left on the row, work A.1 over the next 3 stitches, knit 1 and 1 edge stitch in garter stitch. DECREASE 1 STITCH AT BEGINNING OF ROW: Work 1 edge stitch in garter stitch, knit 1, A.2 over the next 3 stitches. DECREASE 1 STITCH AT END OF ROW: Work until there are 5 stitches left on the row, work A.3 over the next 3 stitches, knit 1 and 1 edge stitch in garter stitch. INCREASE TIP (for sleeves): Knit to 1 stitch past the marker-thread, make 1 yarn over, knit to 1 stitch before the marker-thread, make 1 yarn over. On the next round knit the yarn overs twisted, then work the new stitches in stocking stitch. BUTTONHOLES: Work 5 buttonholes on the right band. 1 buttonhole = knit 2 together and make 1 yarn over – NOTE: It is neatest, when working the buttonholes, to purl 2 together in each purled section (seen from the right side). Knit the yarn over on the next row to leave a hole. The bottom buttonhole is worked 5 cm from the bottom edge and the top buttonhole 25-27-29-30-31-32 cm below the shoulder. The other 3 buttonholes are worked evenly between these two. ------------------------------------------------------- START THE PIECE HERE: ------------------------------------------------------- JACKET – SHORT OVERVIEW OF THE PIECE: The body is worked back and forth with circular needle, bottom up as far as the armholes, divided and then the front and back pieces are finished separately back and forth with circular needle. The sleeves are worked in the round with double pointed needles/short circular needle, bottom up as far as the sleeve cap, which is then finished back and forth with circular needle. The neck/bands are worked to finish. BODY: Cast on 192-208-224-240-264-280 stitches with circular needle size 4 mm and DROPS Nepal. Purl 1 row from the wrong side. Then work as follows from the right side: 1 GARTER STITCH – read description above, * purl 2, knit 2 *, work from *-* until there are 3 stitches left, purl 2 and 1 garter stitch. Continue this rib back and forth for 4 cm. Knit 1 row from the right side and decrease 30-34-38-38-46-46 stitches evenly spread = 162-174-186-202-218-234 stitches. Change to circular needle size 5.5 mm. Insert 1 marker-thread 41-44-47-51-55-59 stitches in from each side (= 80-86-92-100-108-116 stitches on the back piece between the markers). Allow the threads to follow your work onwards; they mark the sides and are used when working the armholes. Work stocking stitch with 1 garter stitch on each side. REMEMBER THE KNITTING TENSION! OVERVIEW OF THE NEXT SECTION: When the piece measures 38-38-38-39-40-41 cm, start to decrease for the V-neck. AT THE SAME TIME, cast off for the armholes and finish each section separately. Read V-NECK and ARMHOLES before continuing. V-NECK: When the piece measures 38-38-38-39-40-41 cm, decrease for the neck on the next row from the right side – read DECREASE TIP. Decrease 2 stitches on each side every 4th row 4 times in all sizes. Then decrease 1 stitch on each side every 4th row 3-3-4-4-5-5 times. ARMHOLES: AT THE SAME TIME, when the piece measures 43-44-45-46-47-48 cm, cast off for the armholes on the next row from the right side as follows: Work until there are 2-3-4-4-4-5 stitches left before the first marker-thread, cast off 4-6-8-8-8-10 stitches, work until there are 2-3-4-4-4-5 stitches left before the second marker-thread, cast off 4-6-8-8-8-10 stitches and work to end of row. Finish the front and back pieces separately. LEFT FRONT PIECE: Start from the wrong side and work stocking stitch, with 1 garter stitch on each side, and continue to decrease for the V-neck. In addition, work the armhole as follows: ARMHOLES: At the beginning of the next row from the right side decrease 1-1-1-2-2-2 stitches, then decrease 1 stitch every 4th row 0-0-0-1-3-3 times – remember DECREASE TIP. After all the decreases for the neck and armhole there are 27-29-30-32-33-36 stitches on the shoulder. Continue with stocking stitch and 1 garter stitch on each side until the piece measures 62-64-66-68-70-72 cm. Cast off. RIGHT FRONT PIECE: Start from the wrong side and work stocking stitch, with 1 garter stitch on each side, and continue to decrease for the V-neck. In addition, work the armhole as follows: ARMHOLE: At the end of the next row from the right side decrease 1-1-1-2-2-2 stitches, then decrease 1 stitch every 4th row 0-0-0-1-3-3 times – remember DECREASE TIP. After all the decreases for the neck and armhole there are 27-29-30-32-33-36 stitches on the shoulder. Continue with stocking stitch and 1 garter stitch on each side until the piece measures 62-64-66-68-70-72 cm. Cast off. BACK PIECE: = 76-80-84-92-100-106 stitches. Start from the wrong side and work stocking stitch, with 1 garter stitch on each side, and work the armholes as follows: On the next row from the right side, decrease 1-1-1-2-2-2 stitch on each side, then 1 stitch on each side every 4th row, 0-0-0-1-3-3 times – remember DECREASE TIP = 74-78-82-86-90-96 stitches. When the piece measures 59-61-63-65-67-69 cm, cast off the middle 18-18-20-20-22-22 stitches for the neckline (28-30-31-33-34-37 stitches on each shoulder). Finish each shoulder separately. On the next row from the neck cast off 1 stitch by the neck = 27-29-30-32-33-36 stitches. Cast off when the piece measures 62-64-66-68-70-72 cm. Work the other shoulder in the same way. SLEEVES: Cast on 48-48-52-52-56-56 stitches with double pointed needles size 4 mm and DROPS Nepal. Knit 1 round. Then work rib in the round (knit 2, purl 2) for 5 cm. Knit 1 round and decrease 8-6-8-8-10-10 stitches evenly spaced = 40-42-44-44-46-46 stitches. Insert 1 marker-thread at the beginning of the round (mid-under sleeve). Allow the thread to follow your work onwards – it is used when increasing under the sleeve. Change to double pointed needles size 5.5 mm and work stocking stitch. When the sleeve measures 12-12-9-11-9-12 cm, increase 1 stitch on each side of the marker-thread – read INCREASE TIP. Increase like this every 4½-4-4-3-3-2½ cm a total of 10-11-12-13-14-15 times = 60-64-68-70-74-76 stitches. When the sleeve measures 55-55-55-51-50-50 cm, work as follows: Start 2-3-4-4-4-5 stitches before the marker-thread, cast off 4-6-8-8-8-10 stitches and work to the end of the round = 56-58-60-62-66-66 stitches. Start from the wrong side and work the sleeve cap back and forth. Cast off stitches at the beginning of each row as follows: Cast off 9-9-10-5-4-4 stitches 2-2-2-5-6-6 times on each side = 20-22-20-12-18-18 stitches. Cast off. The sleeve measures approx.57-57-57-56-56-56 cm. Work the other sleeve in the same way. ASSEMBLY: Sew the shoulder seams inside the cast-off edge. Sew in the sleeves inside the 1 edge stitch on the armholes. BANDS/NECK: Insert 1 marker, in the middle of the back piece. The bands/neck are knitted up inside 1 edge stitch. Start from the right side at the bottom of the right front piece and knit up 131-135-139-143-149-153 stitches up the front piece to the marker mid-back, with circular needle size 4 mm – leave the marker in place. Knit up 131-135-139-143-149-153 stitches down the left front pieces = a total of 262-270-278-286-298-306 stitches (should be divisible by 4 + 2. It is important that the bands are neither too tight nor too loose. Work as follows from the wrong side: 2 garter stitches, * purl 2, knit 2 *, work from *-* until there are 4 stitches left, purl 2 and 2 garter stitches. Continue this rib for 2 cm. Now work the BUTTONHOLES on the right band – read description above. Continue working until the rib measures 4 cm. Cast off a little loosely. Sew the buttons onto the left band. |
|||||||||||||
Diagram explanations |
|||||||||||||
|
|||||||||||||
 |
|||||||||||||
 |
|||||||||||||
 |
|||||||||||||
Have you finished this pattern?Tag your pictures with #dropspattern #cityrangercardigan or submit them to the #dropsfan gallery. Do you need help with this pattern?You'll find 30 tutorial videos, a Comments/Questions area and more by visiting the pattern on garnstudio.com. © 1982-2026 DROPS Design A/S. We reserve all rights. This document, including all its sub-sections, has copyrights. Read more about what you can do with our patterns at the bottom of each pattern on our site. |
|||||||||||||


With over 40 years in knitting and crochet design, DROPS Design offers one of the most extensive collections of free patterns on the internet - translated to 17 languages. As of today we count 324 catalogues and 12290 patterns translated into English (UK/cm).
We work hard to bring you the best knitting and crochet have to offer, inspiration and advice as well as great quality yarns at incredible prices! Would you like to use our patterns for other than personal use? You can read what you are allowed to do in the Copyright text at the bottom of all our patterns. Happy crafting!
Post a comment to pattern DROPS 246-7
We would love to hear what you have to say about this pattern!
If you want to leave a question, please make sure you select the correct category in the form below, to speed up the answering process. Required fields are marked *.