
Popular categories
Looking for a yarn?


Comments / Questions (19)
![]() Mai wrote:
Mai wrote:
Hi. I'm not sure how to shape the armhole. The pattern says cast off 8 stitches (size M) at the beginning of the next two rows - does this mean casting off 4 stitches on each side for two rows? Thanks
03.06.2026 - 13:51DROPS Design answered:
Hi Mai, You can either cast off 8 stitches at the beginning of the first row, work to end of row, turn and cast off 8 stitches at the beginning of the next row, or you can cast off 8 stitches at the beginning and end of 1 row, turn and work back without cast ing off on the 2nd row. Regards, Drops Team.
04.06.2026 - 07:03
![]() Dominika wrote:
Dominika wrote:
Witam, chciałabym zapytać jaki rozmiar ma na sobie modelka ze zdjęcia? Oraz zastanawiam się czy robić ten wzór na okrągło żeby nie było szwów. Jak to wtedy zrobić?
06.03.2026 - 09:32DROPS Design answered:
Witaj Dominiko, modelka na zdjęciu nosi rozmiar S lub M. Co do przerabiania na okrągło, jest to możliwe od dołu do podkrojów rękawów. Nabierz na druty z żyłką o 4 oczka mniej (czyli oczka brzegowe, są potrzebne tylko do zszywania robótki, więc nie będą już konieczne). Jak zamkniesz oczka na podkroje rękawów, dalej będziesz przerabiać już w tę i z powrotem. Pozdrawiamy!
11.03.2026 - 10:49
![]() Andrea wrote:
Andrea wrote:
Guten Tag , wenn ich die Abnahmen am Ärmelausschnitt berechne 87M insgesamt , 2 abnehmen und dann noch einmal die folgenden Abnahmen (insgesamt 14 Maschen) komme ich auf restliche 71 M...habe ich da einen Fehler in meiner Rechnung ? Gruß Andrea
05.04.2025 - 10:34DROPS Design answered:
Liebe Andrea, es sind insgesamt 14 Maschen abgenommen, so sind es 87 M - 14=73 Maschen übrig. Viel Spaß beim Stricken!
07.04.2025 - 07:44
![]() Anna wrote:
Anna wrote:
Mam pytanie, czy tam gdzie mamy informacje,że długość robótki wyniesie 6 cm to liczymy to ze ściągaczem czy bez? Jeżeli że ściągaczem to mam już ponad 6, nie wiem czy pruć. Dziękuję za odpowiedź i pozdrawiam
27.11.2024 - 11:13DROPS Design answered:
Witaj Aniu, liczysz to razem ze ściągaczem. Pozdrawiamy!
27.11.2024 - 11:19
![]() Pichon Edouige wrote:
Pichon Edouige wrote:
Bonjour, je suis sur le modèle 231/20 et je bloque sur les mesures , sur le patron on demande d’augmenter à partir de 6cm , mais c’est après les 3cm des côtes ou à partir des côtes ?
21.05.2024 - 19:30DROPS Design answered:
Bonjour Mme Pichon, mesurez ces 6 cm à partir du rang de montage. Bon tricot!
22.05.2024 - 14:01
![]() Josephine Genna wrote:
Josephine Genna wrote:
Comment choisir sa taille merci
19.03.2024 - 20:24DROPS Design answered:
Bonjour Mme Genna, mesurez un vêtement similaire que vous avez et dont vous aimez la forme et comparez ces mesures à celles du schéma en bas de page; cette leçon vous en dit encore plus. Bon tricot!
20.03.2024 - 08:01
![]() Mikka Nielsen wrote:
Mikka Nielsen wrote:
Hej, jeg er i tvivl om hvad der menes med “Når arbejdet måler 23-24-25-26-27-28 cm, strikkes næste pind således fra retsiden: 1 kantmaske retstrik, (1 ret / 1 vrang) over de næste 12-14-16-18-20-22 masker”. Skulle der stå RIB over de næste…? Eller hvad hentyder parantesen til?
02.06.2023 - 14:06DROPS Design answered:
Hej Mikka, ja det stemmer, skiftevis 1 ret og 1 vrang over det antal masker der står i din størrelse :)
02.06.2023 - 14:46
![]() Viviana Nappo wrote:
Viviana Nappo wrote:
Buongiorno, vorrei lavorare in tondo, ho visto il primo suggerimento dato ma non capisco perché si consiglia di lavorare la maglia legaccio alla maniera usata per lavorare in tondo....dove sono le maglie legaccio? È tutto maglia rasata! Gli aumenti e le diminuzioni si fanno allo stesso modo? Ai due lati di ogni segnapunti va bene, ma si aumenta e si diminuisce allo strssomodo? Grazie
21.07.2022 - 17:58DROPS Design answered:
Buongiorno Viviana, le maglie di vivagno sono per le cuciture laterali, se lavora in tondo non deve lavorarle. Per gli aumenti può lavorarli nello stesso modo. Buon lavoro!
23.07.2022 - 14:15
![]() Melissa wrote:
Melissa wrote:
Is it also possible to start this top in the round? And if so, do you have a tip on adjusting the pattern to do so? Thanks in advance!
01.07.2022 - 18:15DROPS Design answered:
Dear Melissa, yes, you could work in the round, working the back and the front together. Remember to take out 1 edge stitch from each side of each piece from the number counts. Also remember to work garter stitch as in the round, not as explained in the tips above. Also, the increases on each side need to be worked on both sides of the markers placed in the sides. Happy knitting!
02.07.2022 - 15:57
![]() Mar wrote:
Mar wrote:
Hola! Tanto al principio de este patrón como de otros que he estado mirando, indica que tras montar los puntos se haga una hilera del revés por el lado del revés. Tras montar los puntos estoy en el derecho de la labor, por tanto tengo que hacer revés ida y vuelta o como hago esa primera hilera antes de poder hacer la hilera del revés que se indica?
29.06.2022 - 12:50
|
|||||||
Letters to Juliet#letterstojuliettop |
|||||||
 |
 |
||||||
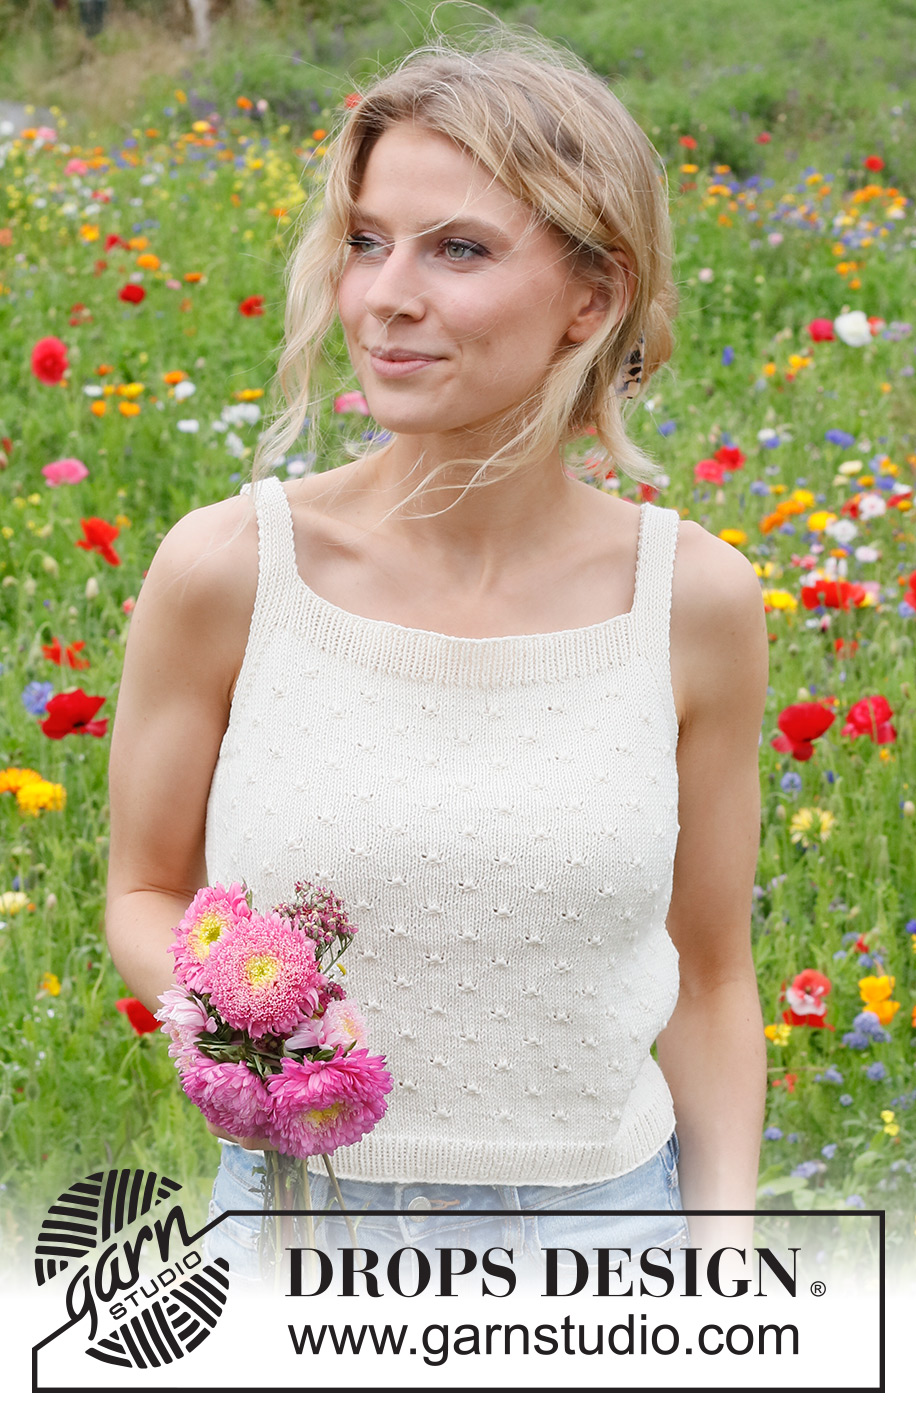
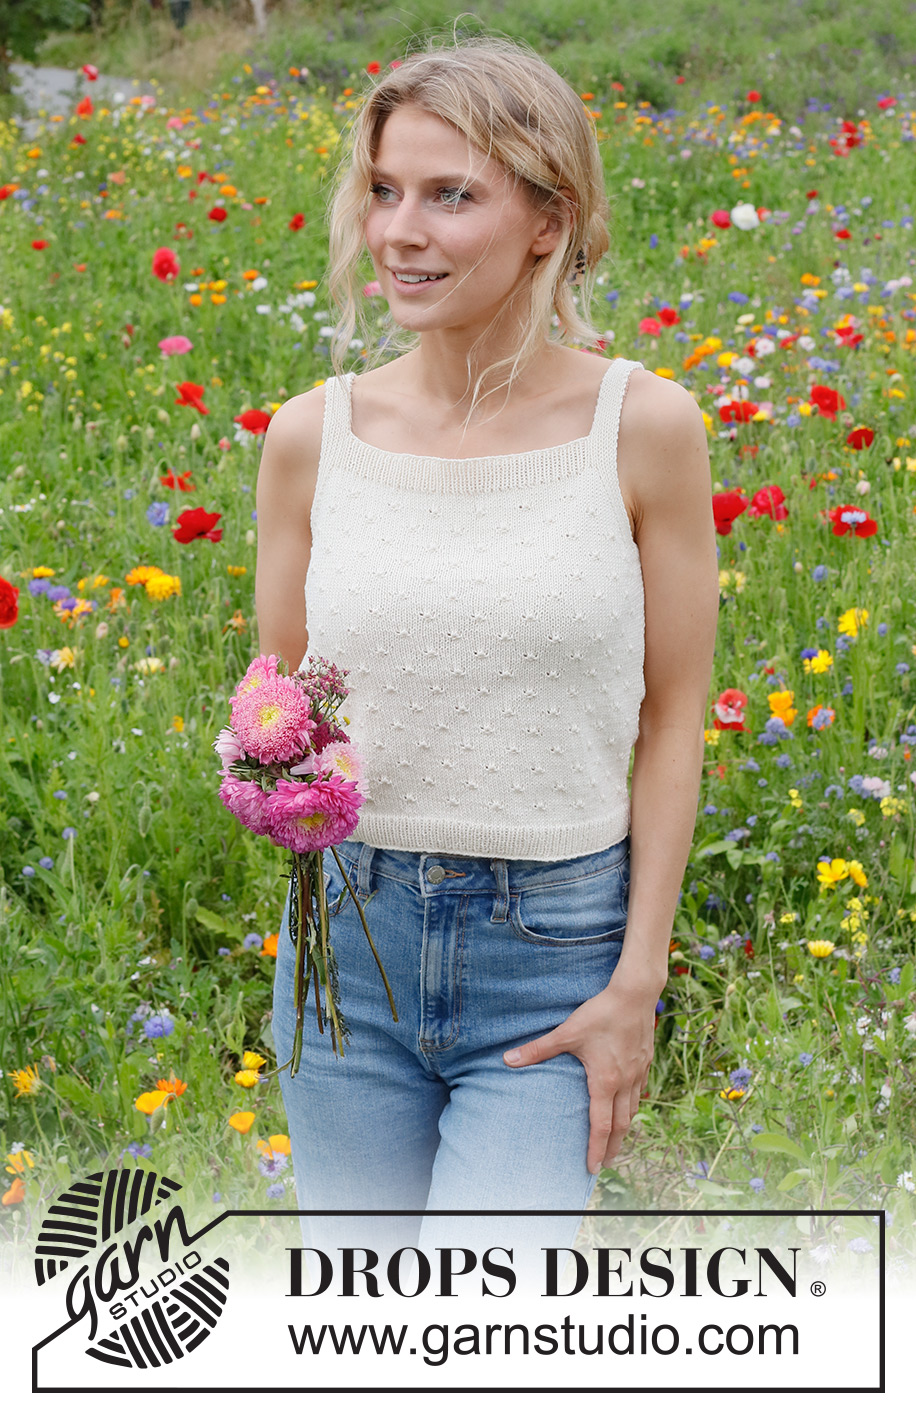
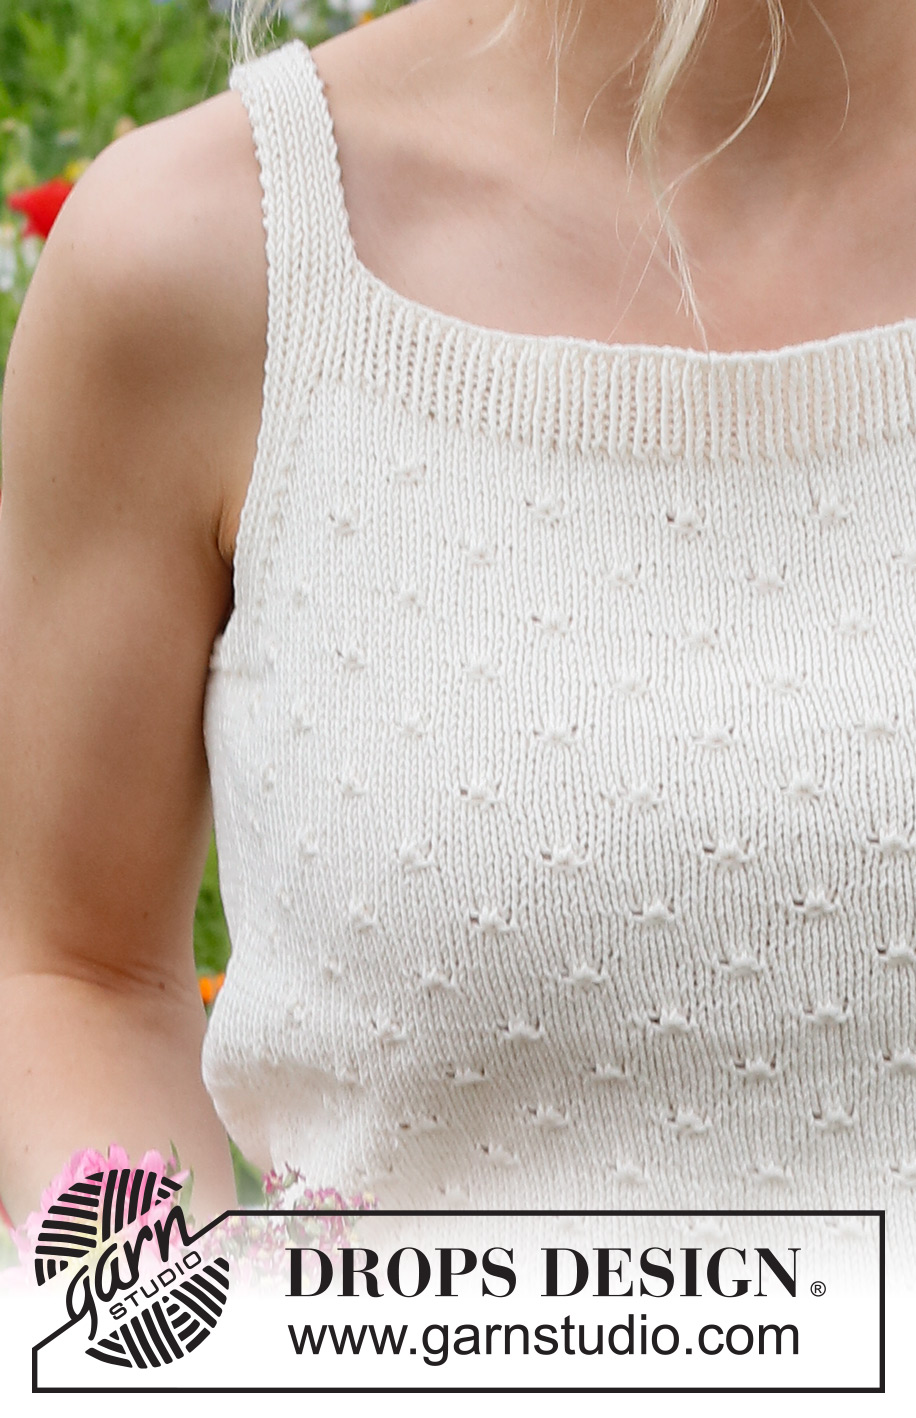
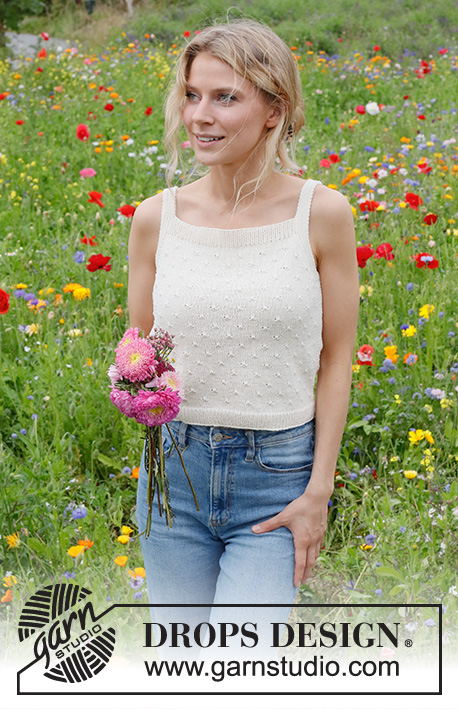
Knitted top in DROPS Safran. The piece is worked bottom up, with small bobbles. Sizes S - XXXL.
DROPS 231-20 |
|||||||
|
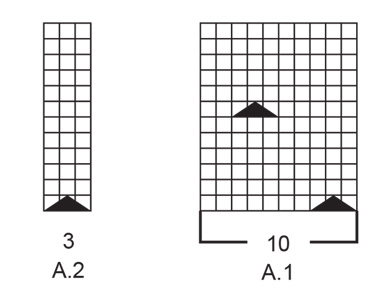
------------------------------------------------------- EXPLANATIONS FOR THE PATTERN: ------------------------------------------------------- RIDGE/GARTER STITCH (worked back and forth): Knit all rows. 1 ridge = knit 2 rows. PATTERN: See diagrams A.1 and A.2. The diagrams show all rows in the pattern from the right side. INCREASE TIP (for sides of front/back piece): All increases are worked from the right side. Increase 1 stitch inside the outermost 2 stitches by making 1 yarn over. On the next row purl the yarn overs twisted to avoid holes, then work the new stitches in stocking stitch. DECREASE TIP (armholes): All decreases are worked from the right side. AFTER THE 1 EDGE STITCH AND THE RIB: Slip 1 stitch as if to knit, knit 1 and pass the slipped stitch over the knitted stitch (= 1 stitch decreased). BEFORE THE RIB AND THE 1 EDGE STITCH: Work until there are 2 stitches left before the rib, knit 2 together (= 1 stitch decreased), work 6-6-8-8-10-10 stitches in rib and 1 edge stitch in garter stitch. ------------------------------------------------------- START THE PIECE HERE: ------------------------------------------------------- TOP – SHORT OVERVIEW OF THE PIECE: The back and front pieces are worked separately, back and forth and bottom up. Straps are worked on the front piece and then sewn to the back piece. BACK PIECE: Cast on 100-112-122-136-150-166 stitches with needle size 2.5 mm and DROPS Safran. Purl 1 row from the wrong side. Then work rib (knit 1, purl 1) with 1 edge stitch in GARTER STITCH on each side – read description above. When the rib measures 3 cm, knit 1 row from the right side where you decrease 9-11-13-15-13-15 stitches evenly spaced = 91-101-109-121-137-151 stitches. Change to needle size 3 mm. Work 5 rows stocking stitch with 1 edge stitch in garter stitch on each side. REMEMBER THE KNITTING TENSION! Work the next row from the right side as follows: 1 edge stitch in garter stitch, 3-3-2-3-1-3 stitches in stocking stitch, work A.1 8-9-10-11-13-14 times, A.2, work 3-3-2-3-1-3 stitches in stocking stitch and 1 edge stitch in garter stitch. Continue this pattern. When the piece measures 6 cm, increase 1 stitch on each side – read INCREASE TIP. Increase like this every 5 cm a total of 4 times on each side = 99-109-117-129-145-159 stitches. When the piece measures 23-24-25-26-27-28 cm, work the next row as follows from the right side: 1 edge stitch in garter stitch, (knit 1, purl 1) over the next 12-14-16-18-20-22 stitches, work as before until 13-15-17-19-21-23 stitches remain, (purl 1, knit 1) over the next 12-14-16-18-20-22 stitches and 1 edge stitch in garter stitch. NOTE: If a knot is close to the rib, work these stitches in stocking stitch instead. Also applies when working the armholes. Continue the pattern with 12-14-16-18-20-22 stitches in rib and 1 edge stitch in garter stitch on each side. When the piece measures 25-26-27-28-29-30 cm, cast off 6-8-8-10-10-12 stitches for the armholes at the beginning of the next 2 rows = 87-93-101-109-125-135 stitches. Continue the pattern with 6-6-8-8-10-10 stitches in rib and 1 edge stitch in garter stitch on each side. AT THE SAME TIME on the first row from the right side decrease 1 stitch on each side for the armholes – read DECREASE TIP. Decrease like this every 2nd row a total of 3-4-4-6-10-13 times, then every 4th row 4-4-5-4-3-2 times = 73-77-83-89-99-105 stitches. When you have worked 3 rows after the last decrease, knit 1 row from the right side where you increase 8-10-10-10-10-14 stitches evenly spaced (do not increase over the 7-7-9-9-11-11 outermost stitches on each side) = 81-87-93-99-109-119 stitches. The piece measures approx. 7-8-9-9-10-11 cm from the bottom of the armholes. Change to needle size 2.5 mm. Work rib from the wrong side as follows: 1 edge stitch in garter stitch, * purl 1, knit 1 *, work from *-* until there are 2 stitches left, purl 1 and 1 edge stitch in garter stitch. Continue this rib for 3 cm. Cast off a little loosely. The piece measures approx. 35-37-39-40-42-44 cm. FRONT PIECE: Cast on and work in the same way as the back piece but, instead of casting off all the stitches after the rib at the top, work straps as follows from the right side: Work the first 11-11-13-13-15-15 stitches and place them on a thread for one strap, cast off 59-65-67-73-79-89 stitches and work the last 11-11-13-13-15-15 stitches as follows: STRAPS: = 11-11-13-13-15-15 stitches on the needle. Continue the rib with 1 edge stitch in garter stitch on each side until the strap measures 14-14-14-16-16-16 cm (half the length will be at the back). Cast off. Work the other strap in the same way. ASSEMBLY: Sew the straps to the back, on the outside edge. Sew the side seams inside the 1 edge stitch. |
|||||||
Diagram explanations |
|||||||
|
|||||||
 |
|||||||
 |
|||||||
Have you finished this pattern?Tag your pictures with #dropspattern #letterstojuliettop or submit them to the #dropsfan gallery. Do you need help with this pattern?You'll find 23 tutorial videos, a Comments/Questions area and more by visiting the pattern on garnstudio.com. © 1982-2026 DROPS Design A/S. We reserve all rights. This document, including all its sub-sections, has copyrights. Read more about what you can do with our patterns at the bottom of each pattern on our site. |
|||||||


With over 40 years in knitting and crochet design, DROPS Design offers one of the most extensive collections of free patterns on the internet - translated to 17 languages. As of today we count 325 catalogues and 12298 patterns translated into English (UK/cm).
We work hard to bring you the best knitting and crochet have to offer, inspiration and advice as well as great quality yarns at incredible prices! Would you like to use our patterns for other than personal use? You can read what you are allowed to do in the Copyright text at the bottom of all our patterns. Happy crafting!
Post a comment to pattern DROPS 231-20
We would love to hear what you have to say about this pattern!
If you want to leave a question, please make sure you select the correct category in the form below, to speed up the answering process. Required fields are marked *.