
Popular categories
Looking for a yarn?


Comments / Questions (70)
![]() Jagna wrote:
Jagna wrote:
TYŁ: = 70-78-84-90-96-102 oczka. Dalej przerabiać dżersejem w tę i z powrotem, aż długość robótki wynosi 44-46-48-50-52-54 cm. W następnym rzędzie zamknąć 28-30-30-32-32-34 oczka środkowe na dekolt i kończyć każde ramię oddzielnie. Czyli przerobić 21 oczek , później zamknąć 28 oczek i znów przerobić 21 oczek ? A co zrobić z oczkami które nie są zamykane ?
21.10.2024 - 08:46DROPS Design answered:
Witaj Jagno, te niezamknięte oczka to oczka na ramiona. Każde ramię będziesz odtąd przerabiać oddzielnie, zgodnie z opisem. Pozdrawiamy!
21.10.2024 - 09:17
![]() Panza wrote:
Panza wrote:
J adore surtout quand tout est expliqué en français. Ce n est pas tj le cas...merci
15.10.2024 - 21:29DROPS Design answered:
Bonjour Mme Panza, tous nos modèles sont disponibles en français, si vous les trouvez dans une autre langue, cliquez sur le menu déroulant pour changer la langue et sélectionner français. Bon tricot!
16.10.2024 - 09:16
![]() Thea wrote:
Thea wrote:
Hvordan kan jeg strikke den her i XS?
24.05.2024 - 19:08
![]() Mila wrote:
Mila wrote:
The instructions about the shoulders are very unclear. I have no clue what to do here.
09.04.2024 - 15:42DROPS Design answered:
Dear Mila, you will work short rows on shoulder stitches to shape diagonal shoulders: slip the first stitches at the beg of row from armhole (from RS on right shoulder back piece/ on left shoulder front piece and from WS on left shoulder back piece/on right shoulder front piece). This video shows (for another pattern, this means with a different number of stitches) how to work such a diagonal shoulder. Happy knitting!
10.04.2024 - 07:57
![]() Sara wrote:
Sara wrote:
Ang sned axel. Jag får hur jag än gör ändå stora hål. Kan ni beskriva mer tydligt vilken tråd som ska lyftas och mellan vilka maskor? Har läst beskrivningen 20 ggr och testat fram och tillbaka men tycker inte det blir bra.
02.04.2024 - 21:03DROPS Design answered:
Hei Sara. Husk å strikke tråden som hentes opp vridd vrang sammen med første maske på venstre pinne. Et lite hull vil det nok alltid bli. mvh DROPS Design
08.04.2024 - 11:54
![]() Sara wrote:
Sara wrote:
Jag förstår inte det här med knapphålet helt. Den beskrivning som finns i mönstret ger inte mig ngt knapphål, har testat flera ggr och repat upp osv osv. Sedan följt instruktion i länkad film, det är då inte samma lösning som står i texten. Den ger ett knapphål men det blir väldigt trångt för rekommenderad knapp. Kan ni förtydliga hur man ska göra? Samt vore bra om mönster och instruktionsfilm matchade. Nu blir det väldigt förvirrande.
08.03.2024 - 16:55DROPS Design answered:
Hej Sara. Det ska bli ett knapphål om du följer mönstret, men det finns väldigt många olika sätt att göra knapphål på. Tycker du inte detta blir bra så kan du testa ett annat sätt. Denna video visar ett annat sätt där du får ett större knapphål. Mvh DROPS Design
13.03.2024 - 09:42
![]() Sara wrote:
Sara wrote:
Har ni missat info på svenska delen med rätstickning. När jag läser den norska och eng så verkar det som man ska sticka dubbla varv eller liknande?
19.02.2024 - 15:21DROPS Design answered:
Hej Sara. Nej det är inget som saknas i den svenska översättningen. I detta mönster används bara uttrycket rätstickning ( i vissa andra används "1 rille" på norska och det översätts med 2 varv rätstickning på svenska), så följ bara mönstret så blir det riktigt. Mvh DROPS Design
21.02.2024 - 08:45
![]() Sara wrote:
Sara wrote:
När ska rundsticka 5 som är 40 Respektive 80 cm användas?
16.02.2024 - 21:35DROPS Design answered:
Hej Sara, du bruger den lange når du strikker fram och bakstycke og den korte til ærmerne :)
23.02.2024 - 10:45
![]() Jagna wrote:
Jagna wrote:
Cześć Jak zamykać oczka na podkroje rękawów? Nigdzie we wzorze tego nie znalazłam. Jaka metodą?
31.01.2024 - 06:43DROPS Design answered:
Cześć Jagno, zamykasz oczka na podkroje rękawów tak samo jakbyś kończyła robótkę. Zobacz video TUTAJ. Pozdrawiamy!
31.01.2024 - 08:03
![]() Lisa wrote:
Lisa wrote:
Hej! Jag har kommit så långt som till ärmen nu, och kan se att det står att man ska sticka ett sprud på 1 cm mitt under ärmen - men borde det inte vara mitt på ärmen? Eller är jeg helt fel på det? Tänker så det blir rätt när man syr fast ärmen med den andra delen.
13.01.2024 - 15:41DROPS Design answered:
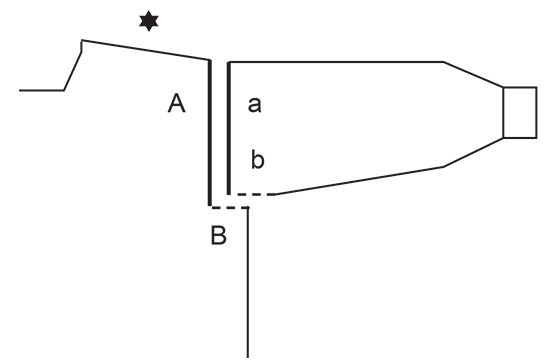
Hej Lisa, sprundet skal passe ind nederst i ærmegabet. Du kan se på skitsen hvor det skal sys sammen :)
16.01.2024 - 12:10
|
||||
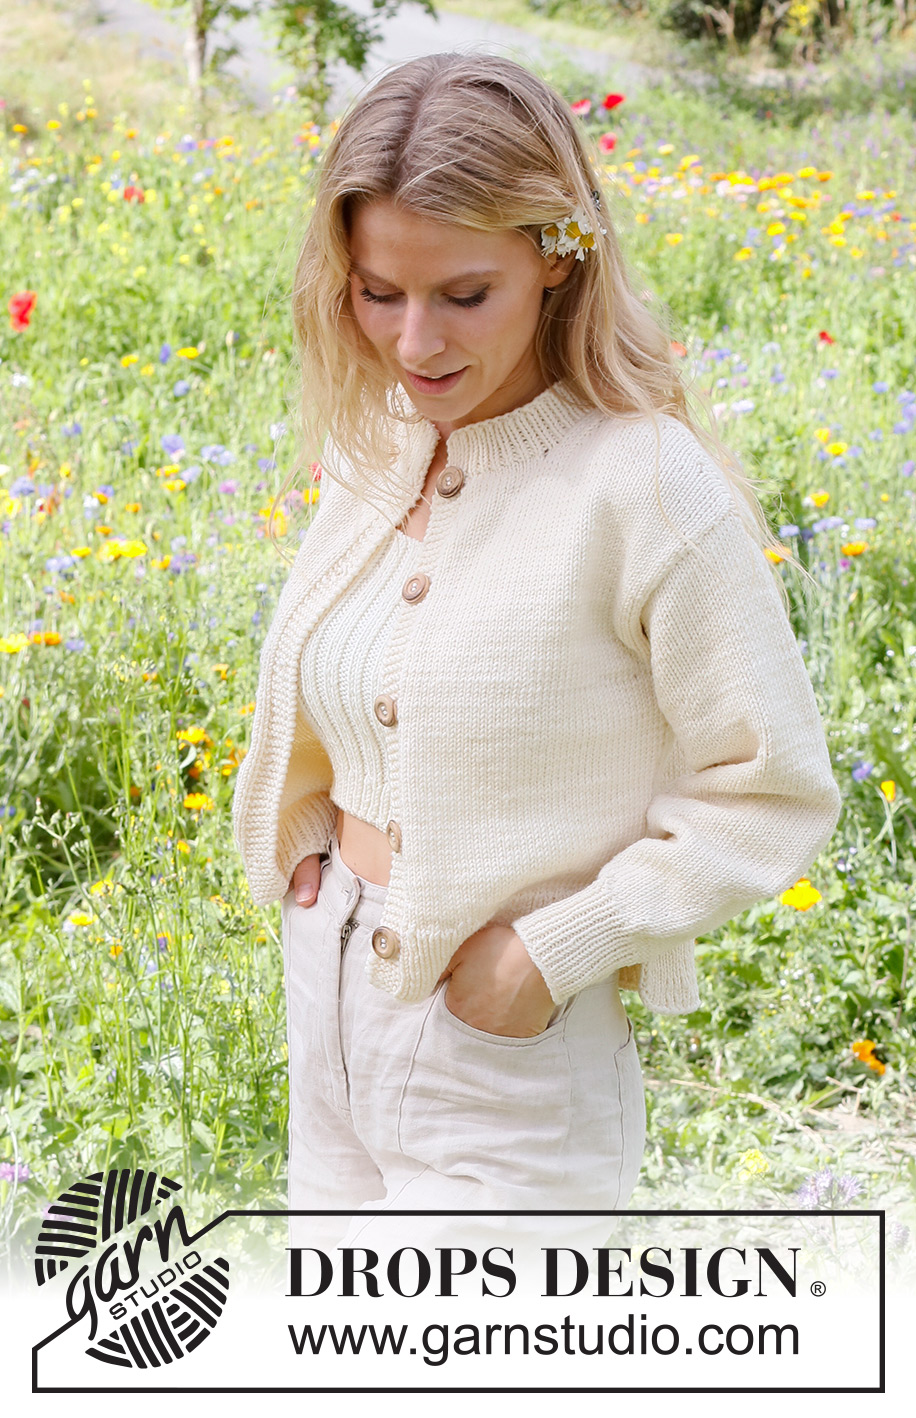
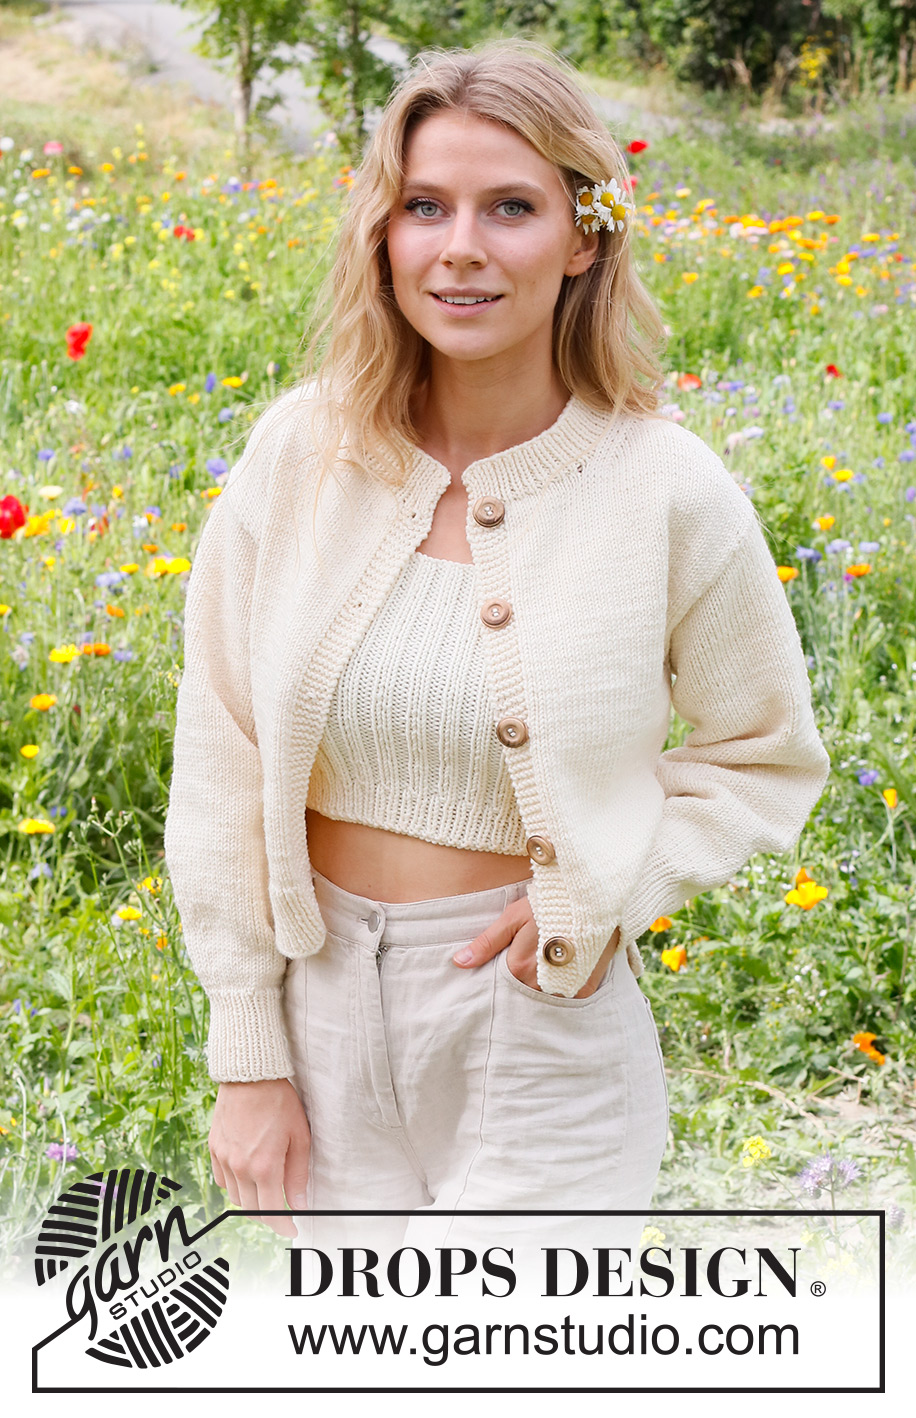
Prairie Rose Cardigan#prairierosecardigan |
||||
 |
 |
|||
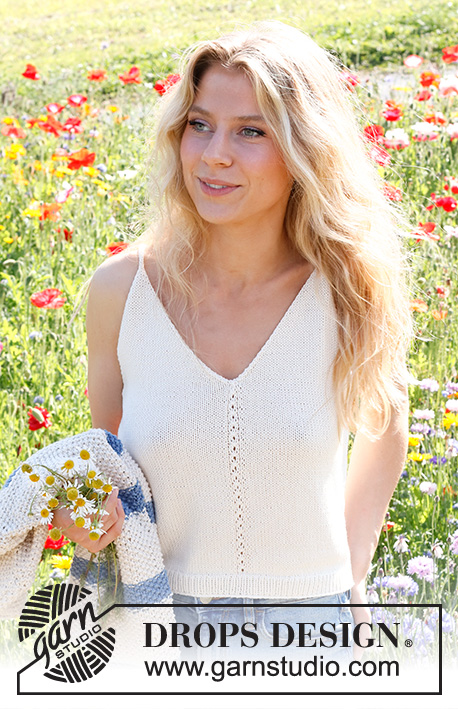
Knitted jacket in DROPS Big Merino. The piece is worked bottom up, with split in the sides. Sizes S - XXXL.
DROPS 230-4 |
||||
|
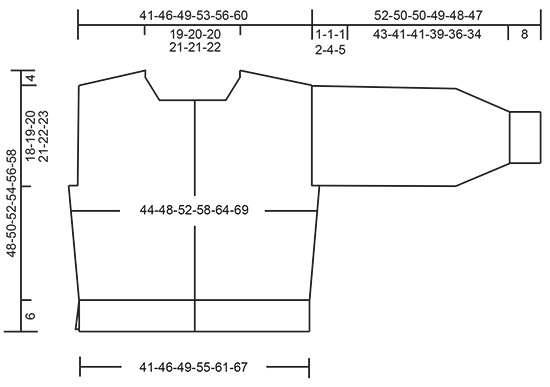
------------------------------------------------------- EXPLANATIONS FOR THE PATTERN: ------------------------------------------------------- RIDGE/GARTER STITCH (worked back and forth): Knit all rows. 1 ridge = knit 2 rows. INCREASE TIP (for body and sleeves): All increases are worked from the right side! Work until there are 2 stitches left before the marker, 1 yarn over, knit 4 (marker sits between these 4 stitches), 1 yarn over. On the next row/round work the yarn overs twisted to avoid holes. Then work the new stitches in stocking stitch. DECREASE TIP (decrease 1 stitch by the neck): Decrease from the right side, inside the 3 stocking stitches. AFTER THE 3 STOCKING STITCHES: Slip 1 stitch as if to knit, knit 1 and pass the slipped stitch over the knitted stitch (= 1 stitch decreased). BEFORE THE 3 STOCKING STITCHES: Work until there are 5 stitches left mid-front, knit 2 together, work the last 3 stitches in stocking stitch (= 1 stitch decreased). BUTTONHOLES: Work the buttonholes on the right band. 1 BUTTONHOLE = 1 yarn over inside the outermost 3 stitches on the row (from the right side). On the next row (wrong side) knit the yarn over together with the 3rd to last stitch on the row. Work the buttonholes when the piece measures: S: 5, 14, 24, 33 and 43 cm. M: 5, 15, 25, 35 and 45 cm. L: 6, 16, 26, 36 and 46 cm. XL: 6, 14, 23, 31, 40 and 48 cm. XXL: 6, 15, 23, 32, 40 and 49 cm. XXXL: 6, 15, 24, 33, 42 and 51 cm. ------------------------------------------------------- START THE PIECE HERE: ------------------------------------------------------- JACKET – SHORT OVERVIEW OF THE PIECE: The back and front pieces are worked separately, back and forth and bottom up until the split is finished. The pieces are joined and the body continued back and forth as far as the armholes. The back and front pieces are then finished separately, back and forth. The sleeves are worked in the round, bottom up. The neck is worked to finish. BACK PIECE: Cast on 95-105-113-127-141-153 stitches with circular needle size 4 mm and DROPS Big Merino. Purl 1 row from the wrong side. Then work rib (knit 1, purl 1) over all stitches – NOTE: The first and last stitches on the row are knitted from the right side and purled from the wrong side. Work this rib for 6 cm, finishing after a row from the wrong side. Lay the piece to one side. LEFT FRONT PIECE: Cast on 55-61-65-71-79-85 stitches with circular needle size 4 mm and DROPS Big Merino. Purl 1 row from the wrong side. Then work rib (knit 1, purl 1) until there are 6 stitches left, finish with 6 band stitches in GARTER STITCH – read description above. Work this rib for 6 cm, finishing after a row from the wrong side. Lay the piece to one side. RIGHT FRONT PIECE: Cast on 55-61-65-71-79-85 stitches with circular needle size 4 mm and DROPS Big Merino. Purl 1 row from the wrong side. Then work rib from the right side as follows: 6 band stitches in garter stitch, work rib (knit 1, purl 1) to the end of the row. Work this rib for 6 cm – remember the BUTTONHOLES on the band and finishing after a row from the wrong side. BODY: Place the right front piece, the back piece and the left front piece on the same circular needle size 5 mm = 205-227-243-269-299-323 stitches. Knit 1 row from the right side and decrease 53-59-63-69-79-83 stitches evenly spaced (do not decrease over the bands) = 152-168-180-200-220-240 stitches. Insert 1 marker 41-45-48-53-58-63 stitches in from each side (= 70-78-84-94-104-114 stitches between the markers on the back piece). Allow the markers to follow your work onwards; they are used when increasing in the sides. Work stocking stitch back and forth with 6 band stitches in garter stitch on each side. REMEMBER THE KNITTING TENSION! When the piece measures 10 cm, increase 1 stitch on each side of both markers – read INCREASE TIP (= 4 stitches increased). Repeat the increase when the piece measures 18-18-19-19-20-20 cm = 160-176-188-208-228-248 stitches. When the piece measures 26-27-28-29-30-31 cm, work the armholes as follows: Work 41-45-48-51-54-57 stitches as before (front piece), cast off 4-4-4-8-12-16 stitches, work 70-78-84-90-96-102 stitches (back piece), cast off 4-4-4-8-12-16 stitches, work 41-45-48-51-54-57 stitches (front piece). The back and front pieces are finished separately. BACK PIECE: = 70-78-84-90-96-102 stitches. Continue with stocking stitch back and forth until the piece measures 44-46-48-50-52-54 cm. On the next row cast off the middle 28-30-30-32-32-34 stitches for the neck and finish each shoulder separately. OVERVIEW OF THE NEXT SECTION: Decrease for the neck and place stitches on a thread for the shoulder as follows. Read NECK and DIAGONAL SHOULDER before continuing. NECK: Decrease 1 stitch for the neck, on each row from the right side, 2 times – read DECREASE TIP. DIAGONAL SHOULDER: Place the outermost stitches by the armhole on a thread, but to avoid cutting the strand, work the stitches before placing them on the thread. Place 5-5-6-7-7-8 stitches on the thread 3 times, then place the last 4-7-7-6-9-8 stitches on the thread. All stitches are now either decreased or placed on the thread. Place the 19-22-25-27-30-32 stitches from the thread back on circular needle size 5 mm. Purl 1 row from the wrong side but, to avoid a hole where you turned in the middle of the piece, pick up the strand between 2 stitches and purl it twisted together with the first stitch on the left needle. Then cast off loosely with knit from the right side. The piece measures approx. 48-50-52-54-56-58 cm from the cast-on edge to the top of the shoulder. Work the other shoulder in the same way. LEFT FRONT PIECE: = 41-45-48-51-54-57 stitches. Work stocking stitch back and forth with 6 band stitches in garter stitch towards mid-front. When the piece measures 42-44-45-47-48-50 cm, place the 13-14-14-15-15-16 stitches towards mid-front on a thread for the neck; to avoid cutting the strand, work the stitches before placing them on the thread. OVERVIEW OF THE NEXT SECTION: Cast off for the neck and place stitches on a thread for the shoulder as follows. Read NECK and DIAGONAL SHOULDER before continuing. NECK: Cast off for the neck at the beginning of each row from the neck as follows: Cast off 3 stitches 1 time and 2 stitches 1 times. Then decrease 1 stitch on each row from the right side 4 times - remember DECREASE TIP. DIAGONAL SHOULDER: AT THE SAME TIME, when the piece measures 44-46-48-50-52-54 cm, place the outermost stitches towards the armhole on a thread for the shoulder in the same way as on the back piece. When all the stitches are either decreased or placed on a thread, place the 19-22-25-27-30-32 stitches from the thread back on circular needle size 5 mm. Purl 1 row from the wrong side in the same way as on the back piece, then cast off loosely with knit from the right side. The piece measures approx. 48-50-52-54-56-58 cm from the cast-on edge to the top of the shoulder. RIGHT FRONT PIECE: Work in the same way as the left front piece. SLEEVES: Cast on 36-38-38-40-42-42 stitches with double pointed needles size 4 mm and DROPS Big Merino. Knit 1 round. Then work rib (knit 1, purl 1) in the round for 8 cm. Knit 1 round and increase 2-2-2-4-4-4 stitches evenly spaced = 38-40-40-44-46-46 stitches. Change to double pointed needles size 5 mm. Insert 1 marker at the beginning of the round and 1 marker after 19-20-20-22-23-23 stitches. These markers mark mid-under and mid-top of the sleeve. Allow the markers to follow your work onwards; they are used when increasing. Work stocking stitch. When you have worked 3 rounds, increase 1 stitch on each side of both markers – read INCREASE TIP (= 4 stitches increased). Increase like this every 4th round a total of 6-6-7-7-7-8 times = 62-64-68-72-74-78 stitches (change to short circular needle size 5 mm when you have enough stitches). Continue with stocking stitch until the sleeve measures 51-49-49-47-44-42 cm. Now continue back and forth with stocking stitch from mid-under the sleeve until the sleeve measures 52-50-50-49-48-47 cm (a split of 1-1-1-2-4-5 cm). Cast off. Work the other sleeve in the same way. ASSEMBLY: Sew the shoulder seams. Sew the sleeve cap to the armhole inside the outermost stitch on the body. Then sew the split to the bottom of the armhole – see sketch. Sew the buttons onto the left band. NECK: Start from the right side and knit up 86 to 100 stitches around the neck (including the stitches from the threads in front) with short circular needle size 4 mm. Purl 1 row from the wrong side where you increase to 103-107-109-111-115-119 stitches (do not increase over the bands). Work rib (knit 1, purl 1) back and forth, with 1 edge stitch in garter stitch on each side, for 4 cm. Cast off a little loosely. |
||||
Diagram explanations |
||||
|
||||
 |
||||
 |
||||
Have you finished this pattern?Tag your pictures with #dropspattern #prairierosecardigan or submit them to the #dropsfan gallery. Do you need help with this pattern?You'll find 29 tutorial videos, a Comments/Questions area and more by visiting the pattern on garnstudio.com. © 1982-2026 DROPS Design A/S. We reserve all rights. This document, including all its sub-sections, has copyrights. Read more about what you can do with our patterns at the bottom of each pattern on our site. |
||||


With over 40 years in knitting and crochet design, DROPS Design offers one of the most extensive collections of free patterns on the internet - translated to 17 languages. As of today we count 324 catalogues and 12290 patterns translated into English (UK/cm).
We work hard to bring you the best knitting and crochet have to offer, inspiration and advice as well as great quality yarns at incredible prices! Would you like to use our patterns for other than personal use? You can read what you are allowed to do in the Copyright text at the bottom of all our patterns. Happy crafting!
Post a comment to pattern DROPS 230-4
We would love to hear what you have to say about this pattern!
If you want to leave a question, please make sure you select the correct category in the form below, to speed up the answering process. Required fields are marked *.