
Popular categories
Looking for a yarn?


Comments / Questions (18)
![]() Monika wrote:
Monika wrote:
Hallo wahrscheinlich stehe ich auf der Leitung wird A1 wie auch A2 fortlaufend über die ganze Reihe gestrickt? A1 Hinreihe A2 Rückreihe LG Monika
11.01.2026 - 19:29DROPS Design answered:
Liebe Monika, A.1 wird bei dem rechten Vorderteil gestrickt und A.2 wird bei dem linken Vorderteil gestrickt; von der Vorderseite gesehen beginnt A.1 mit 1 Masche rechts verschränkt, und A.2 mit 1 Masche links. Viel Spaß beim Stricken!
12.01.2026 - 17:04
![]() Mariette wrote:
Mariette wrote:
Bonjour! J'essaie de faire le devant droit en cotes torsadées et je n'arrive pas comme les cotes du dos. Dois-je faire un nombre de mailles impair au lieu de 58 mailles tel que demandé. Merci
24.12.2025 - 00:53DROPS Design answered:
Bonjour Mariette, notez que pour le devant droit, vous répétez le diagramme A.1 sur l'endroit sans terminer par la 1ère maille de A.1, ainsi, sur l'envers, vous tricotez 1 m point mousse, puis vous lisez le diagramme de gauche à droite = (1 m torse à l'envers, 1 m endroit), répétez de (à). Bon tricot!
05.01.2026 - 11:18
![]() Aletta wrote:
Aletta wrote:
Bij het achterpand zet ik een oneven aantal steken op, bij de voorpanden een even aantal steken. Als ik dit doe, ziet de boord van de voorpanden er anders uit dan het achterpand. Hoe kan dat?
06.12.2025 - 20:09DROPS Design answered:
Dag Aletta,
Aan de achterkant heb je aan het begin en einde een rechte steek bij de boordsteek zodat de boorsteek symmetrisch wordt. Om die reden heb je een oneven aantal steken nodig.
08.12.2025 - 22:27
![]() Dany Zena wrote:
Dany Zena wrote:
Après les 8 Cm de côtes diminuer 33 mailles pour moi. Quand exactement ? A chaque début de rang endroit ? Pour avoir un dos cintré ? Merci de m’éclairer SVP.
12.11.2025 - 22:32DROPS Design answered:
Bonjour Mme Zena, ces diminutions se font (en même temps) au 1er rang endroit tricoté après les côtes, comme il faut davantage de mailles pour les côtes avec les aiguilles 3 que pour le jersey avec les aiguilles 5, on va devoir diminuer ces 33 mailles sur un seul rang, utilisez la calculette en bas de page, à droite, pour savoir comment diminuer à intervalles réguliers ces 33 mailles sur un même rang; Bon tricot!
13.11.2025 - 14:52
![]() Gardien wrote:
Gardien wrote:
Merci pour votre réponse rapide. J'ai la réponse au début de votre commentaire.
20.06.2025 - 08:03
![]() Gardien wrote:
Gardien wrote:
Bonjour, En ce qui concerne les diminutions des épaules, j'aimerais savoir si on diminue les 16 mailles en une fois ou une diminution tous les 2 rangs 16 fois. Merci
19.06.2025 - 21:23DROPS Design answered:
Bonjour Mme Gardien, lorsque l'on termine les épaules du dos séparément, on diminue 1 seule maille pour l'encolure au début du 1er rang tricoté sur les mailles de l'épaule seulement, à partir de l'encolure, il reste 16 mailles en taille M et on tricote ces 16 mailles jusqu'à ce que l'ouvrage mesure 52 cm de hauteur totale. Ou bien tricotez-vous le devant droit en taille L où vous devez diminuer 16 mailles juste après les côtes? Ces 16 mailles sont diminuées à intervalles réguliers au 1er rang après les côtes, il reste ainsi 42 mailles pour le devant droit. Ou bien ai-je mal compris votre question?
20.06.2025 - 07:46
![]() Anne Floor wrote:
Anne Floor wrote:
Jeg vil gerne strikke denne model til min lange og tynde niece på 14 år. Kan jeg bruge opskriften small - eller bliver den for stor?
12.05.2025 - 10:25DROPS Design answered:
Hei Anne. Se på målene som er oppgitt på målskissen til vesten, finn en vest eller et lignende plagg din niese allerede har og liker passformen på. Sammenlign målene i målskissen med det eksisterende plagget for å finne ut om størrelse S vil passe. mvh DROPS Design
19.05.2025 - 13:40
![]() Denise Carnewal wrote:
Denise Carnewal wrote:
Kan dit model met 2 naalden gebreid worden ?
21.11.2024 - 10:33DROPS Design answered:
Dag Denise,
Om een patroon aan te passen om op rechte naalden te breien hebben we een instructie gemaakt. Deze vind je hier.
21.11.2024 - 19:51
![]() Barbara Passo wrote:
Barbara Passo wrote:
Could I knit the entire neckband as one rather than having a seam in the middle?
10.11.2023 - 17:08
![]() Laura Hernandez wrote:
Laura Hernandez wrote:
Hello! I am struggling with the invisible side seam when I get to the ribbed edges of the vest under the armholes. Is there any video or tutorial? Thanks!
16.04.2023 - 21:13DROPS Design answered:
Dear Mrs Hernandez, we show in this video how to make an invisible side seam. Happy assembly!
17.04.2023 - 10:02
|
|||||||
Memories of Monaco#memoriesofmonacovest |
|||||||
 |
 |
||||||
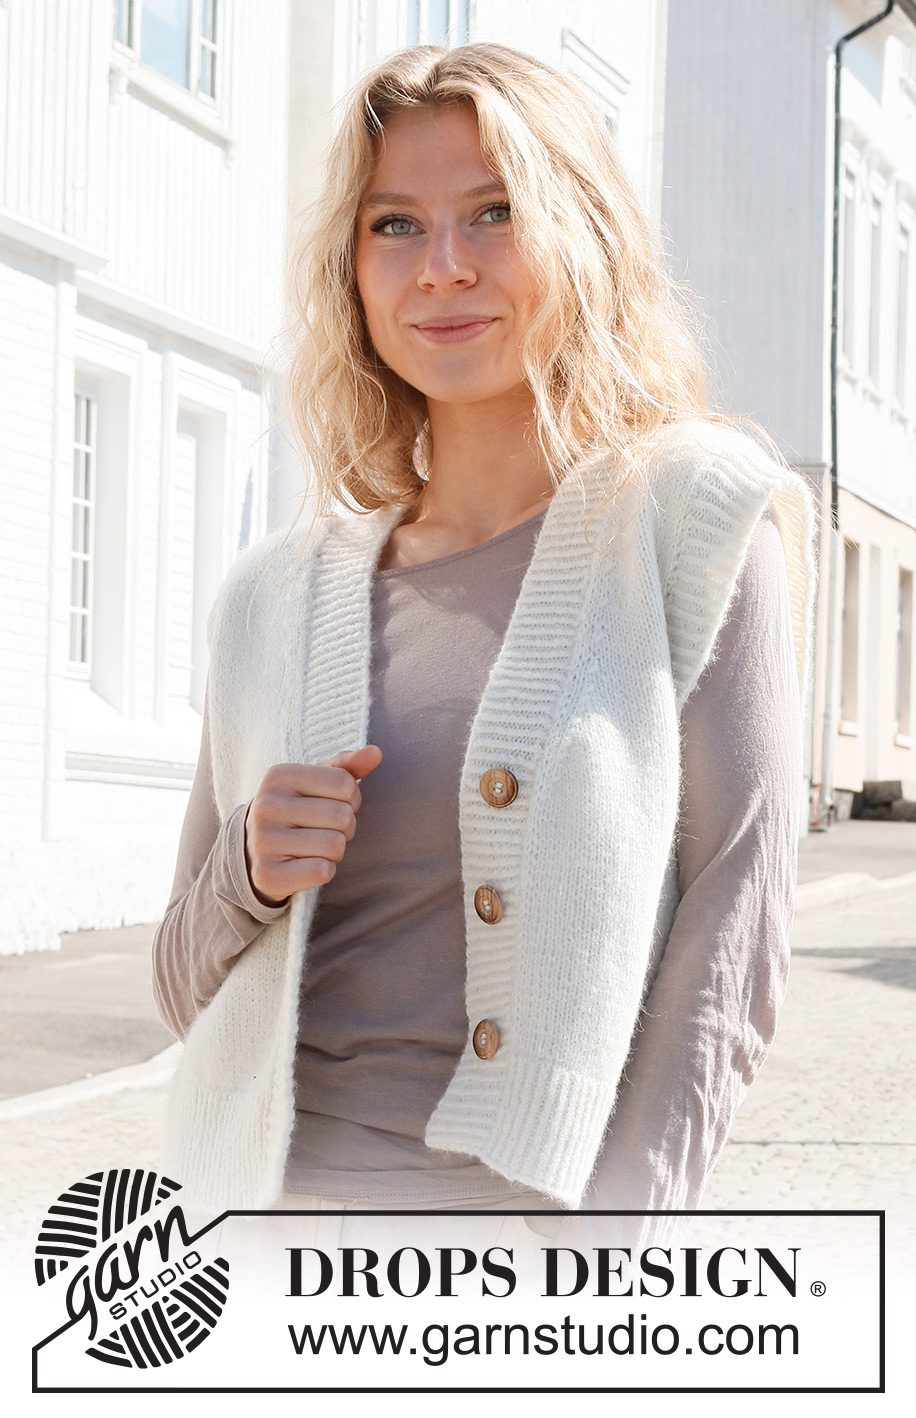
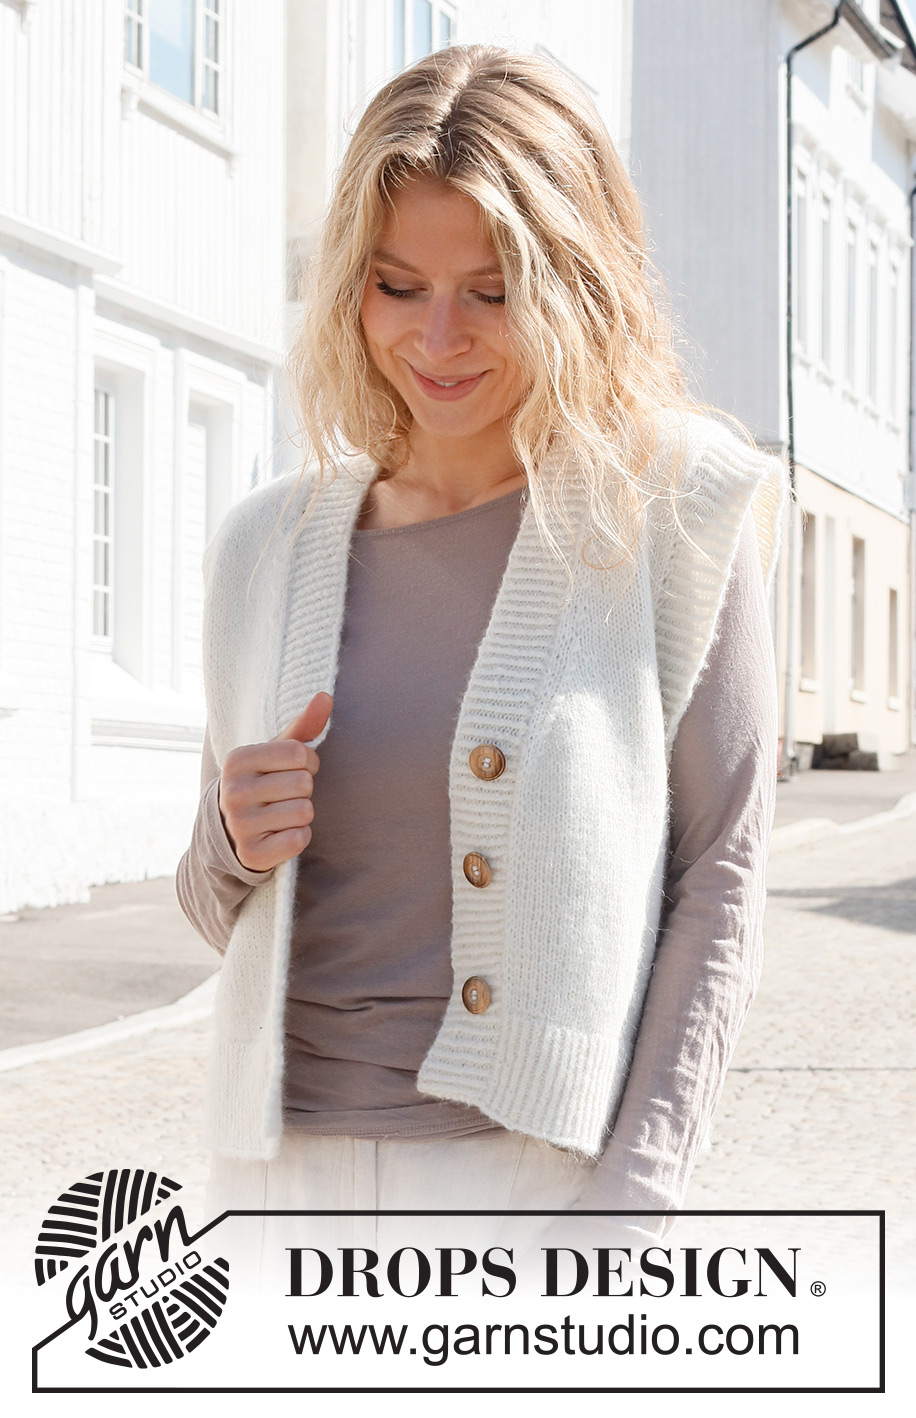
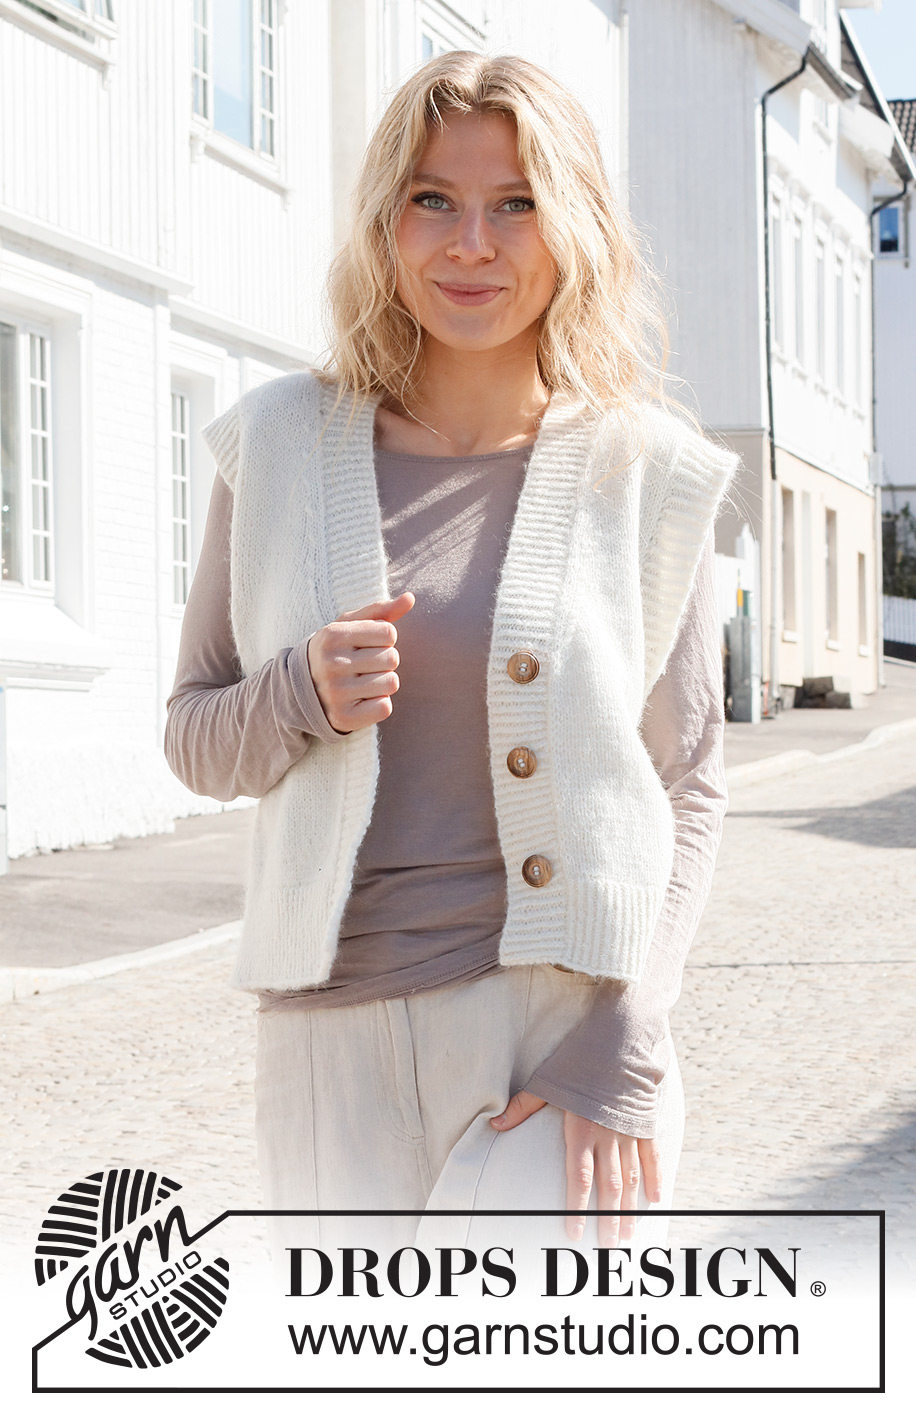
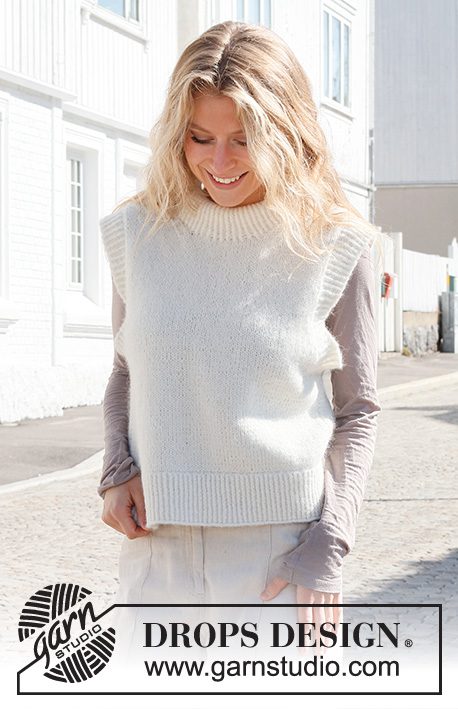
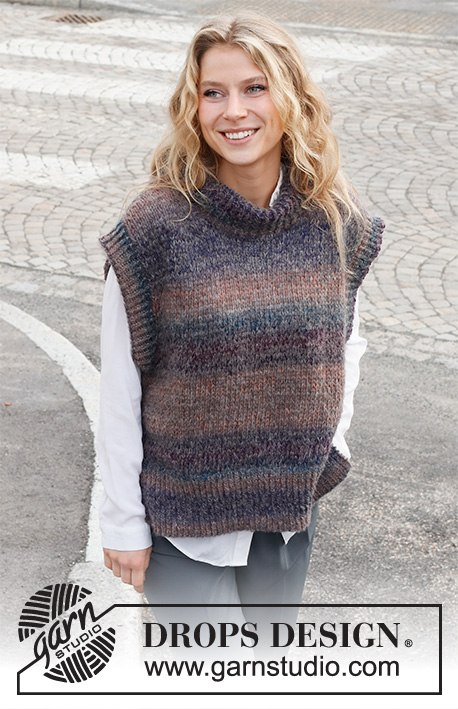
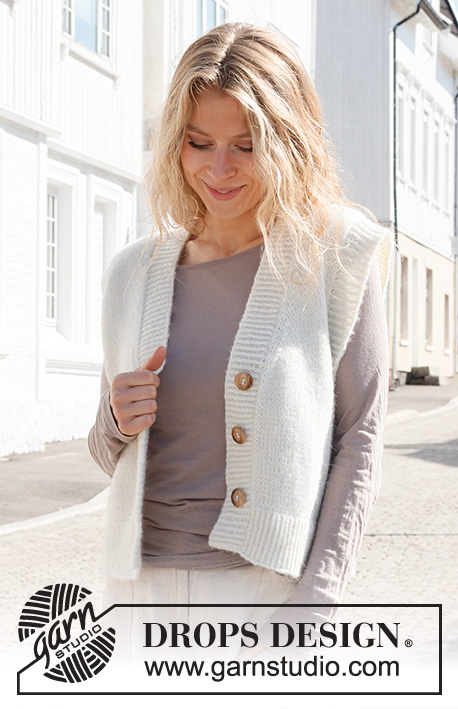
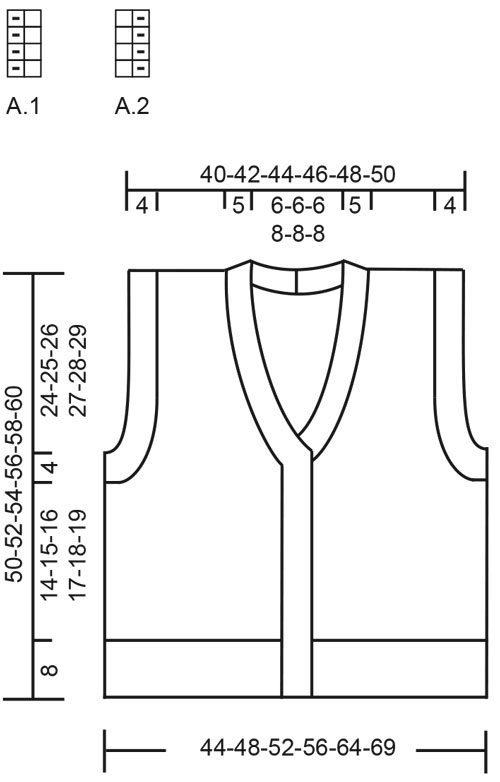
Knitted vest in DROPS Air. The piece is worked with V-neck and ribbed edges. Sizes S - XXXL.
DROPS 227-42 |
|||||||
|
------------------------------------------------------- EXPLANATIONS FOR THE PATTERN: ------------------------------------------------------- RIDGE/GARTER STITCH (worked back and forth): Knit all rows. 1 ridge = knit 2 rows. PATTERN: See diagrams A.1 and A.2. The diagrams show all rows in the pattern from the right side. DECREASE TIP-1 (evenly spaced): To work out how to decrease evenly, count the total number of stitches on needle (e.g. 107 stitches), minus the edge stitches (e.g. 2 stitches) and divide the remaining stitches by the number of decreases to be made (e.g. 31) = 3.4. In this example decrease by knitting together alternately each 2nd and 3rd stitch and each 3rd and 4th stitch (approx.). Do not decrease the edge stitches. DECREASE TIP-2 (for armholes and V-neck): All decreases are worked from the right side! DECREASE AT THE BEGINNING OF THE ROW: 1 edge stitch in garter stitch, knit 2, slip 1 stitch as if to knit, knit 1 and pass the slipped stitch over the knitted stitch (= 1 stitch decreased). DECREASE AT THE END OF THE ROW: Work until there are 5 stitches left, knit 2 together (= 1 stitch decreased), knit 2 and 1 edge stitch in garter stitch. CASTING-OFF TIP: To avoid the cast-off edge being tight you can cast off with a larger size needle. If the edge is still tight, make 1 yarn over after approx. each 4th stitch at the same time as casting off; the yarn overs are cast off as normal stitches. ------------------------------------------------------- START THE PIECE HERE: ------------------------------------------------------- VEST – SHORT OVERVIEW OF THE PIECE: The back and front pieces are worked back and forth separately, then sewn together. Stitches are knitted up for the sleeve-edges and bands. The sleeve-edges are worked in the round and the bands are worked back and forth. BACK PIECE: Cast on 107-117-125-137-153-167 stitches (including 1 edge stitch on each side) with needle size 3 mm and DROPS Air. Purl 1 row from the wrong side. The next row is worked as follows from the right side: 1 edge stitch in GARTER STITCH – read description above, work A.1 until there are 2 stitches left, work the first stitch in A.1 so the pattern is symmetrical and 1 edge stitch in garter stitch. Continue this rib for 8 cm – adjust so the next row is from the right side. Knit 1 row where you decrease 31-33-35-39-43-47 stitches evenly spaced – read DECREASE TIP-1 = 76-84-90-98-110-120 stitches. Change to needle size 5 mm. Purl 1 row with 1 edge stitch in garter stitch on each side. Continue with stocking stitch and 1 edge stitch in garter stitch on each side. REMEMBER THE KNITTING TENSION! When the piece measures 22-23-24-25-26-27 cm, cast off 4-4-5-5-6-7 stitches at the beginning of the next 2 rows for the armholes = 68-76-80-88-98-106 stitches. On the next row from the right side decrease 1 stitch on each side for the armholes – read DECREASE TIP-2. Decrease like this every 2nd row (each row from the right side) a total of 0-2-2-3-6-6 times, then every 4th row 6-6-6-8-8-10 times = 56-60-64-66-70-74 stitches. When the piece measures 48-50-52-54-56-58 cm, cast off the middle 26-26-26-28-28-28 stitches from the right side for the neck and finish each shoulder separately. LEFT SHOULDER (when the garment is worn): Continue with stocking stitch and 1 edge stitch in garter stitch on each side. AT THE SAME TIME on the next row from the right side decrease 1 stitch for the neck at the beginning of the row – remember DECREASE TIP-2 = 14-16-18-18-20-22 stitches. When the piece measures 50-52-54-56-58-60 cm from the cast-on edge, cast off loosely with knit from the right side. RIGHT SHOULDER (when the garment is worn): Continue with stocking stitch and 1 edge stitch in garter stitch on each side. AT THE SAME TIME on the next row from the right side decrease 1 stitch for the neck at the end of the row – remember DECREASE TIP-2 = 14-16-18-18-20-22 stitches. When the piece measures 50-52-54-56-58-60 cm from the cast-on edge, cast off loosely with knit from the right side. RIGHT FRONT PIECE (when the garment is worn): Cast on 48-54-58-64-72-80 stitches (including 1 edge stitch on each side) with needle size 3 mm and DROPS Air. Purl 1 row from the wrong side. The next row is worked as follows from the right side: 1 edge stitch in garter stitch, work A.1 until there is 1 stitch left and 1 edge stitch in garter stitch. Continue this pattern for 8 cm – adjust so the next row is from the right side. Knit 1 row where you decrease 13-15-16-18-20-23 stitches evenly spaced – remember DECREASE TIP-1 = 35-39-42-46-52-57 stitches. Change to needle size 5 mm. Purl 1 row with 1 edge stitch in garter stitch on each side. Continue with stocking stitch and 1 edge stitch in garter stitch on each side. OVERVIEW OF THE NEXT SECTION: When the piece measures 22-23-24-25-26-27 cm, cast off stitches for the armhole. As you decrease for the armhole you also decrease for the V-neck. Read ARMHOLE and V-NECK before continuing. ARMHOLE: Cast off 4-4-5-5-6-7 at the beginning of the next row from the wrong side = 31-35-37-41-46-50 stitches. On the next row decrease 1 stitch at the end of the row – remember DECREASE TIP-2. Decrease like this every 2nd row (each row from the right side) a total of 0-2-2-3-6-6 times then every 4th row 6-6-6-8-8-10 times. V-NECK: When the piece measures 24-25-26-27-28-29 cm, decrease 1 stitch for the neck at the beginning of the next row from the right side – remember DECREASE TIP-2. Decrease like this every 4th row 1 time, every 2nd row 4 times, every 4th row 2 times and every 6th row 4-4-4-5-5-5 times. After all the decreases to armhole and neck there are 14-16-18-18-20-22 stitches on the shoulder. When the piece measures 50-52-54-56-58-60 cm from the cast-on edge, cast off loosely with knit from the right side. LEFT FRONT PIECE (when the garment is worn): Cast on 48-54-58-64-72-80 stitches (including 1 edge stitch on each side) with needle size 3 mm and DROPS Air. Purl 1 row from the wrong side. The next row is worked as follows from the right side: 1 edge stitch in garter stitch, work A.2 until there is 1 stitch left and 1 edge stitch in garter stitch. Continue this pattern for 8 cm – adjust so the next row is from the right side. Knit 1 row where you decrease 13-15-16-18-20-23 stitches evenly spaced = 35-39-42-46-52-57 stitches. Change to needle size 5 mm. Purl 1 row with 1 edge stitch in garter stitch on each side. Continue with stocking stitch and 1 edge stitch in garter stitch on each side. OVERVIEW OF THE NEXT SECTION: When the piece measures 22-23-24-25-26-27 cm, cast off stitches for the armhole. As you decrease for the armhole you also decrease for the V-neck. Read ARMHOLE and V-NECK before continuing. ARMHOLE: Cast off 4-4-5-5-6-7 at the beginning of the next row from the right side = 31-35-37-41-46-50 stitches. Purl 1 row from the wrong side with 1 edge stitch in garter stitch on each side On the next row decrease 1 stitch at the beginning of the row – remember DECREASE TIP-2. Decrease like this every 2nd row (each row from the right side) a total of 0-2-2-3-6-6 times then every 4th row 6-6-6-8-8-10 times. V-NECK: When the piece measures 24-25-26-27-28-29 cm, decrease 1 stitch for the neck at the end of the next row from the right side – remember DECREASE TIP-2. Decrease like this every 4th row 1 time, every 2nd row 4 times, every 4th row 2 times and every 6th row 4-4-4-5-5-5 times. After all the decreases to armhole and neck there are 14-16-18-18-20-22 stitches on the shoulder. When the piece measures 50-52-54-56-58-60 cm from the cast-on edge, cast off loosely with knit from the right side. ASSEMBLY: Sew the shoulder seams inside the cast-off edge. Sew the side seams from the armholes down, inside the 1 edge stitch. Insert 1 marker mid-back of neck – it is used when knitting up stitches for the bands. RIGHT BAND: Use circular needle size 3 mm and DROPS Air. Start from the right side at the bottom of the right front piece and knit up 135-141-145-153-159-163 stitches inside the 1 edge stitch, up the front piece and round the neck to the marker mid-back (the number of stitches must be divisible by 2 + 1). Turn and work rib as follows (wrong side): 1 edge stitch in garter stitch, work A.1 until there are 2 stitches left, work the first stitch in A.1 so the pattern is symmetrical and 1 edge stitch in garter stitch. Continue this pattern back and forth for 2½ cm. Now work 3-3-3-3-4-4 buttonholes evenly spaced. 1 BUTTONHOLE = cast off 2 stitches a little tightly and cast on 2 new stitches on the next row. The bottom buttonhole is 8 cm from the bottom edge and the top buttonhole 1 cm below the beginning of the V-neck. Work until the band measures 5 cm. Cast off from the right side with knit-twisted over knit-twisted and purl over purl – read CASTING-OFF TIP. LEFT BAND: Use circular needle size 3 mm and DROPS Air. Start from the right side at the marker mid-back and knit up the same number of stitches as on the right band, inside the 1 edge stitch, round the neck and down the left front piece. Turn and work rib as follows (wrong side): 1 edge stitch in garter stitch, work A.1 until there are 2 stitches left, work the first stitch in A.1 so the pattern is symmetrical and 1 edge stitch in garter stitch. Continue this pattern back and forth for 5 cm. Cast off from the right side with knit-twisted over knit-twisted and purl over purl – remember CASTING-OFF TIP. ASSEMBLY: Sew the bands together mid-back, in the outermost loop of the outermost stitch so the seam is flat. Sew the buttons onto the left band. SLEEVE EDGES: Use circular needle size 3 mm and DROPS Air. Start from the right side at the bottom of the armhole and knit up 118-122-126-130-134-138 stitches around the armhole, inside the 1 edge stitch (the number of stitches should be divisible by 2). Work A.1 in the round for 4 cm. Cast off from the right side with knit-twisted over knit-twisted and purl over purl – remember CASTING-OFF TIP. Work the other sleeve edge in the same way. |
|||||||
Diagram explanations |
|||||||
|
|||||||
 |
|||||||
Have you finished this pattern?Tag your pictures with #dropspattern #memoriesofmonacovest or submit them to the #dropsfan gallery. Do you need help with this pattern?You'll find 27 tutorial videos, a Comments/Questions area and more by visiting the pattern on garnstudio.com. © 1982-2026 DROPS Design A/S. We reserve all rights. This document, including all its sub-sections, has copyrights. Read more about what you can do with our patterns at the bottom of each pattern on our site. |
|||||||


With over 40 years in knitting and crochet design, DROPS Design offers one of the most extensive collections of free patterns on the internet - translated to 17 languages. As of today we count 324 catalogues and 12290 patterns translated into English (UK/cm).
We work hard to bring you the best knitting and crochet have to offer, inspiration and advice as well as great quality yarns at incredible prices! Would you like to use our patterns for other than personal use? You can read what you are allowed to do in the Copyright text at the bottom of all our patterns. Happy crafting!
Post a comment to pattern DROPS 227-42
We would love to hear what you have to say about this pattern!
If you want to leave a question, please make sure you select the correct category in the form below, to speed up the answering process. Required fields are marked *.