
Popular categories
Looking for a yarn?


Comments / Questions (49)
![]() Malin wrote:
Malin wrote:
Etter å ha strikket vrangborden på ermet så står det at man skal strikke «1kantmaske, *1 r, 1 kast* og at kastene på neste omgang skal strikkes vridd, MEN det står ingen ting om omgangen skal strikkes rett eller vrang. Hvordan skal det strikkes her?
04.08.2018 - 11:28DROPS Design answered:
Hei Malin. Du skal strikke neste omgang rett fra vrangen (vrang fra retten), alle kastene strikkes vridd, og det økes 2-4-0-2-4-0 masker jevnt fordelt. Videre strikkes det vrang (sett fra retten) og mønster etter A.1 som forklart i oppskriften. God fornøyelse.
17.08.2018 - 13:15
![]() Nadine22 wrote:
Nadine22 wrote:
Bonjour Je reviens vers vous concernant ce modèle car je ne comprends pas du tout ce que je dois faire concernant les diminutions du devant aprés avoir rabattues les 13 mailles centrales. Merci de me venir en aide Bien cordialement
15.07.2018 - 11:23DROPS Design answered:
Bonjour Nadine22, on ne rabat pas les 13 m centrales pour l'encolure devant ou dos, on tricote au point mousse sur les 13 m centrales (taille S et M) du dos et on rabat les 9 m centrales pour l'encolure dos - et on tricote au point mousse sur les 13 m centrales (4 grandes tailles) pour l'encolure devant et on rabat les 9 m centrales pour l'encolure. Quand ces mailles sont rabattues, placez les mailles de l'épaule gauche en attente et tricotez l'épaule droite comme indiqué, puis coupez le fil et tricotez l'épaule gauche comme pour l'épaule droite mais en sens inverse. Bon tricot!
16.07.2018 - 08:51
![]() Grażyna wrote:
Grażyna wrote:
Dzień dobry. Dlaczego tak niewiele jest wzorów z tradycyjnym wszywanym rękawem z główką. Nie czuję się najlepiej w sweterkach raglanowych. Pozdrawiam
05.07.2018 - 14:47DROPS Design answered:
Witaj Grażyno! Takich wzorów jest więcej w starszych katalogach. Jeżeli znajdziesz coś interesującego wśród nich, napisz a przetłumaczymy. Pozdrawiamy
05.07.2018 - 19:41
![]() Nadine wrote:
Nadine wrote:
Bonjour Devant la difficulté à travailler seul le fil BRUSHED ALPACA SILK, puis -je l'associer au fil DROPS AIR, c'est-à dire prendre un fil DROPS AIR+un fil BRUSHED ALPACA SILK,pour réaliser ce modèle ?Merci pour votre réponse Cordialement
12.06.2018 - 11:17DROPS Design answered:
Bonjour Nadine, c'est possible. Ou prenez 2 fils de DROPS Air. Bon tricot!
12.06.2018 - 11:40
![]() Nadine 22 wrote:
Nadine 22 wrote:
Bonjour Je ne comprends la diminution que vous indiquez sur le modéle : je tricote 9 mailles point mousse ou 8 mailles ponts mousse. Merci de votre réponse Cordialement
14.05.2018 - 09:29DROPS Design answered:
Bonjour Nadine, au 1er rang avec l'aiguille 9, vous tricotez 9 mailles en diminuant 1 m = il reste 8 m point mousse. Bon tricot!
14.05.2018 - 11:20
![]() Elisabeth wrote:
Elisabeth wrote:
Jeg har nøyaktig samme spørsmål som Elin Skålevik la ut 17.04.2018 : "Hei Når jeg feller til hals i str L så starter jeg med 18 m. Feller to ganger mot hals. Har da igjen 16 m Etter å ha fullført A1 så skal A2 strikkes. Dette er 13m. Da får jeg ikke det til å gå opp. Har da bare 3m igjen mot hals og erme. Ermet har to kantm og to mot hals. Er det jeg som gjør feil?"
22.04.2018 - 20:51DROPS Design answered:
Hei Elisabeth. A.2 skal strikkes over de samme maskene som A.1. Når det legges opp rillekant til hals "tas det" 1 maske fra A.1, og det er derfor kun 12 masker som strikkes i A.2 på skulderen. God fornøyelse
04.05.2018 - 12:06
![]() Elin Skålevik wrote:
Elin Skålevik wrote:
Hei Når jeg feller til hals i str L så starter jeg med 18 m. Feller to ganger mot hals. Har da igjen 16 m Etter å ha fullført A1 så skal A2 strikkes. Dette er 13m. Da får jeg ikke det til å gå opp. Har da bare 3m igjen mot hals og erme. Ermet har to kantm og to mot hals. Er det jeg som gjør feil?
17.04.2018 - 21:45
![]() Christina wrote:
Christina wrote:
Det havde været fint med billeder fra siden og ryg...
23.03.2018 - 23:38
![]() Hilde wrote:
Hilde wrote:
Die Mengenangabe für Drops Air in der deutschen Anleitung ist falsch.
19.03.2018 - 05:36DROPS Design answered:
Liebe Hilde, Sie sind ja recht, man braucht 300-350-400-400-450-500 g Air - Mengeangabe wird korrigiert. Danke für den Hinweis!
19.03.2018 - 11:30
![]() Marita wrote:
Marita wrote:
Hei, holder på å strikke bakstykket til denne genseren og har kommet hit i oppskriften: "Når arbeidet måler 34-35-36-37-38-39 cm (mål langs den ene masken i rille mellom 2 rapporter av A.1) felles det av 3 masker på starten av de neste 2 pinnene = 39-41-45-51-57-63 masker." Hvilken felleteknikk skal jeg bruke? Strikke masker sammen eller felle rett av? Og er det de tre første maskene i rillen? Sorry hvis det er dumt spørsmål, men jeg er litt fersk.
15.03.2018 - 17:35DROPS Design answered:
Hei Marita, Du skal felle rett av og de skal felles på starten av de neste 2 pinnene; så da er det rille-masker, ja. God fornøyelse!
16.03.2018 - 07:54
|
||||||||||
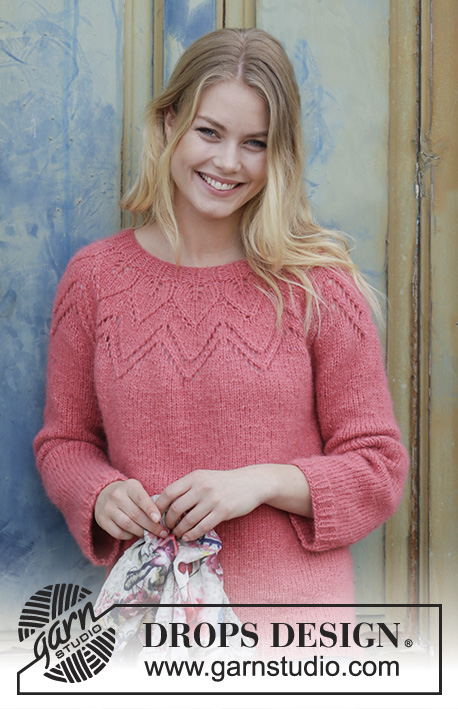
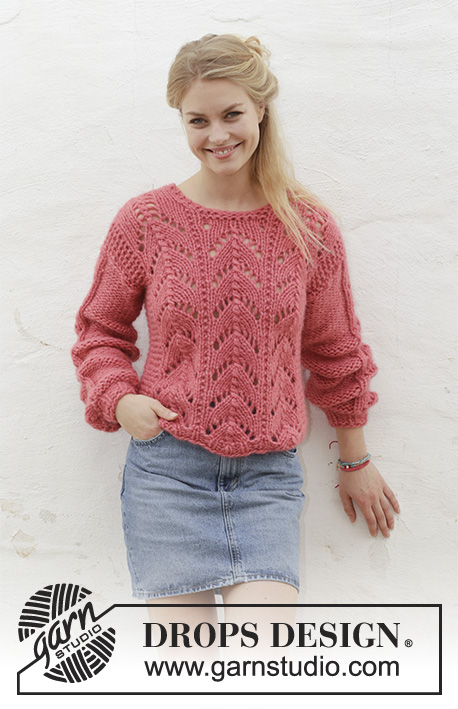
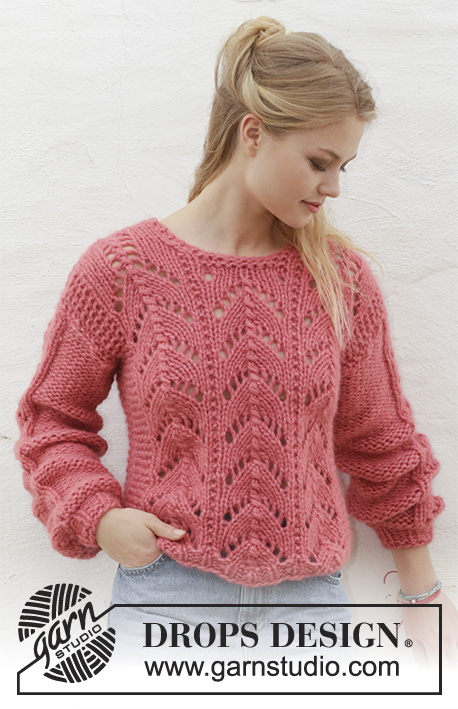
Blushing Beauty#blushingbeautysweater |
||||||||||
 |
 |
|||||||||
Knitted jumper with lace pattern. Sizes S - XXXL. The piece is worked in 2 strands DROPS Air or you can use 2 strands DROPS Brushed Alpaca Silk.
DROPS 186-1 |
||||||||||
|
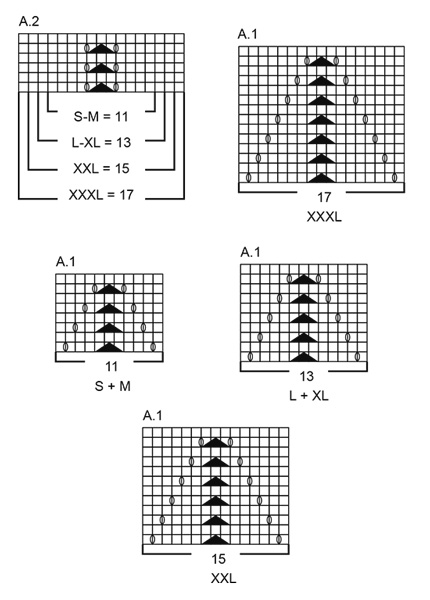
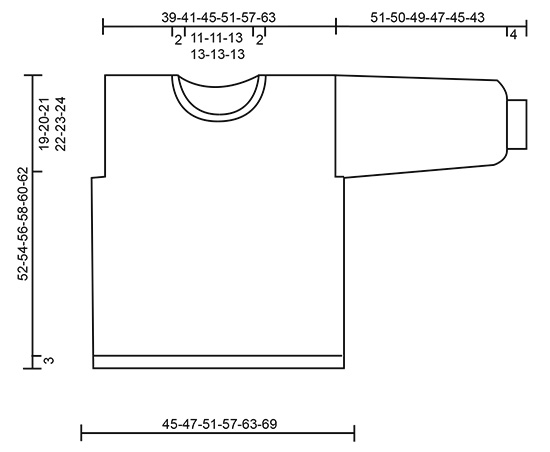
INFORMATION FOR THE PATTERN: RIDGE/GARTER STITCH (worked back and forth): 1 ridge = Knit 2 rows. PATTERN: See diagrams A.1 and A.2. Choose diagram for your size. The diagram shows all the rows in the pattern from the right side. DECREASE TIP (for neck): Decrease for neck inside the 2 edge stitches in garter stitch. All decreases are made from the right side! Decrease as follows after the 2 edge stitches: Slip 1 stitch as if to knit, knit 1, pass the slipped stitch over the knitted stitch. Decrease as follows before the 2 edge stitches: Knit 2 together. INCREASE TIP (for sleeve): Increase 1 stitch inside 1 edge stitch in garter stitch by making 1 yarn over. On next row work the yarn over twisted to avoid a hole. ---------------------------------------------------------- JUMPER: The piece is worked back and forth with circular needle. Front and back pieces are worked separately. The sleeves are worked back and forth with circular needle. BACK PIECE: Cast on 47-47-53-59-65-71 stitches with circular needle size 8 mm and 2 strands Air or 2 strands Brushed Alpaca Silk. Purl 1 row from the wrong side. Then work 4 rows rib (= knit 1 / purl 2) with 1 edge stitch in GARTER STITCH - see description above, in each side. Change to circular needle size 9 mm. On the next row work and decrease as follows - from the right side: Work 6-6-6-9-9-9 stitches in garter stitch - and decrease 1-0-1-1-1-1 stitch over these stitches, * A.1 (= 11-11-13-13-15-17 stitches), 1 stitch in garter stitch *, work from *-* a total of 2 times, work A.1 (= 11-11-13-13-15-17 stitches), 6-6-6-9-9-9 stitches in garter stitch - and decrease 1-0-1-1-1-1 stitch over these stitches = 45-47-51-57-63-69 stitches. Continue the pattern like this - REMEMBER THE KNITTING TENSION! When the piece measures 34-35-36-37-38-39 cm (measure along the one stitch in garter stitch between 2 repeats of A.1) cast off 3 stitches at the beginning of the next 2 rows = 39-41-45-51-57-63 stitches. When the piece measures approx. 42-44-46-47-49-51 cm - adjust so that you have worked the last row in the diagram, work A.2 (= 11-11-13-13-15-17 stitches) over A.1 to finished length. AT THE SAME TIME when the piece measures 49-51-53-55-57-59 cm work 2 ridges over the middle 13-13-15-15-15-15 stitches on the row; the other stitches are worked as before. On the first row from the right side after the 2 ridges, cast off the middle 9-9-11-11-11-11 stitches for neck. Place the 15-16-17-20-23-26 stitches on the right side of the row (seen from the right side) on 1 thread or leave them un-worked on a needle. Continue with pattern back and forth over the remaining 15-16-17-20-23-26 stitches and 2 edge stitches in garter stitch towards the neck - AT THE SAME TIME on the next row from the right side, decrease 1 stitch for the neck - read DECREASE TIP = 14-15-16-19-22-25 stitches on needle. Continue working until piece measures 52-54-56-58-60-62 cm. Then loosely cast off. Work the other shoulder in the same way. FRONT PIECE: Cast on and work in the same way as the back piece until the piece measures 40-42-44-45-47-49 cm. Now work 2 ridges over the middle 11-11-13-13-13-13 stitches on the row, the other stitches are worked as before. On the first row from the right side after the 2 ridges, cast off the middle 7-7-9-9-9-9 stitches for neck. Place 16-17-18-21-24-27 stitches on the right side of the row (seen from the right side) on 1 thread or leave them un-worked on a needle. READ THE WHOLE OF THE NEXT SECTION BEFORE CONTINUING: Continue back and forth with pattern over the remaining 16-17-18-21-24-27 stitches and 2 edge stitches in garter stitch towards the neck. On the next row from the right side, decrease for neck - remember DECREASE TIP. Decrease like this every 2nd row a total of 2 times = 14-15-16-19-22-25 stitches on needle. AT THE SAME TIME work A.1 up to and including the last row in the diagram, then work A.2 (= 11-11-13-13-15-17 stitches) over A.1 to finished length. Continue working until piece measures 52-54-56-58-60-62 cm. Then loosely cast off. Work the other shoulder in the same way. SLEEVE: Cast on 17-17-20-20-20-23 stitches (including 1 edge stitch in each side) with circular needle size 8 mm and 2 strands Air or 2 strands Brushed Alpaca Silk. Purl 1 row from the wrong side. Then work 6 rows rib (= knit 1 / purl 2) with 1 edge stitch in garter stitch in each side. Change to circular needle size 9 mm. The next row is worked as follows - from the right side: Work 1 edge stitch in garter stitch, * knit 1, 1 yarn over *, work from *-* until there are 2 stitches left, knit 1 stitch and work 1 edge stitch in garter stitch = 31-31-37-37-37-43 stitches (on the next row, work the yarn overs twisted to avoid holes). Knit 1 row from the wrong side where you increase 2-4-0-2-4-0 stitches evenly on row = 33-35-37-39-41-43 stitches. The next row is worked as follows - from the right side: 1 edge stitch in garter stitch, purl 10-11-11-12-12-12 (knit from wrong side), A.1 (= 11-11-13-13-15-17 stitches), purl 10-11-11-12-12-12 stitches (knit from wrong side) and 1 edge stitch in garter stitch. Continue the pattern like this. When the piece measures 14 cm increase 1 stitch in each side - read INCREASE TIP (= 2 stitches increased). Increase like this every 16-16-15-14-13-12 cm a total of 3 times = 39-41-43-45-47-49 stitches. Continue working until piece measures 51-50-49-47-45-43 cm (shorter measurements in larger sizes due to broader shoulders). Then loosely cast off. Work the other sleeve in the same way. ASSEMBLY: Sew shoulder seams inside the cast-off edge – make sure the seam is not tight. Sew the side seams in the outermost loop of the outermost stitch. Sew in the sleeves – sew the 2 cm on each side of sleeve so that it fits into the armhole, then sew the sleeve seams inside the 1 edge stitch. |
||||||||||
Diagram explanations |
||||||||||
|
||||||||||
 |
||||||||||
 |
||||||||||
Have you finished this pattern?Tag your pictures with #dropspattern #blushingbeautysweater or submit them to the #dropsfan gallery. Do you need help with this pattern?You'll find 25 tutorial videos, a Comments/Questions area and more by visiting the pattern on garnstudio.com. © 1982-2026 DROPS Design A/S. We reserve all rights. This document, including all its sub-sections, has copyrights. Read more about what you can do with our patterns at the bottom of each pattern on our site. |
||||||||||


With over 40 years in knitting and crochet design, DROPS Design offers one of the most extensive collections of free patterns on the internet - translated to 17 languages. As of today we count 324 catalogues and 12290 patterns translated into English (UK/cm). 12290
We work hard to bring you the best knitting and crochet have to offer, inspiration and advice as well as great quality yarns at incredible prices! Would you like to use our patterns for other than personal use? You can read what you are allowed to do in the Copyright text at the bottom of all our patterns. Happy crafting!
Post a comment to pattern DROPS 186-1
We would love to hear what you have to say about this pattern!
If you want to leave a question, please make sure you select the correct category in the form below, to speed up the answering process. Required fields are marked *.