
Popular categories
Looking for a yarn?


Comments / Questions (34)
![]() Martina Cekada wrote:
Martina Cekada wrote:
Liebes Team! Zu meiner Frage bzgl. Streifen: Ich denke, ich habe jetzt verstanden worum es geht. Dass 6 Maschen angegeben sind ist in Wirklichkeit ohne Bedeutung. Es geht um die weißen und grünen Querstreifen von unten nach oben. Genausogut hätten die Reihen in der entsprechenden Farbe angegeben werden können. Also für XL von unten nach oben ab 17cm: 6 Reihen natur, 14 Reihen grün, 6 R.natur, 10 R.grün, 6 R. natur, 4 R. grün. Ist das so richtig? lg Martina
03.01.2025 - 22:27DROPS Design answered:
Liebe Martina, ja ganz genau so wird das Diagram / die Streifen gestrickt. Viel Spaß beim Stricken!
06.01.2025 - 08:29
![]() Martina Cekada wrote:
Martina Cekada wrote:
Liebes Team: Ich habe eine Frage zu den Streifen lt. Diagramm: Ich stricke den Rückenteil und weiß nicht, wo (in der Breite) die Streifen zu platzieren sind. Der Streifen ist 6 Maschen breit, korrekt? Oder 46 Maschen breit (Diagramm quer zu lesen?)?Die Rückenbreite für XL sind 68 Maschen. Wo werden die Streifen platziert? Am Rand? Rechts und Links am Rand? In der Mitte? Beginn für den Streifen ist klar, das wäre bei 17 cm Höhe. Danke für Hilfe! lg Martina
03.01.2025 - 20:31DROPS Design answered:
Liebe Frau Cekada, die Streifen werden über alle Maschen gestrickt, von der 1. Bis die letzten bei den Hin- sowie bei den Rückreihen gestrickt . Diagram lesen Sie von unten nach oben und hier werden alle Maschen gleich wie im Diagram gestrickt. Viel Spaß beim Stricken!
06.01.2025 - 08:21
![]() Eveline wrote:
Eveline wrote:
Ik heb 450 gram melody, maar nu ik het patroon lees is me niet duidelijk of ik met 2 draden brei of met een. wer staat toch na de opzet " verwijder een draad! en er staat nergens dat het vest met dubbele draad of met 1 draad gebreid wordt.
27.03.2024 - 23:33DROPS Design answered:
Dag Eveline,
Je breit met 1 draad. Je zet alleen op met 2 draden. Na het opzetten brei je verder met 1 draad en knip je de andere draad af (die blijft dus wel in de opzetrand zitten).
28.03.2024 - 17:32
![]() Claudia wrote:
Claudia wrote:
Liebes DROPS-Team, könnt Ihr mir hier bitte sagen, wieviel Garn ich benötige, wenn ich die Jacke einfarbig stricken möchte? Vielen Dank Euch! Liebe Grüße
01.10.2022 - 10:36DROPS Design answered:
Liebe Claudia, leider haben wir keine Erfahrung damit, da diese Jacke mit Streifen gestrickt wurde, und die haben wir nicht mehr um sie auszuwieggen - am besten kalkulieren Sie beide Farben zusammen - sicher brauchen Sie etwas weniger, gerne kann Ihnen Ihr DROPS Laden damit (auch per Telefon oder per E-Mail) weiterhelfen. Viel Spaß beim stricken!
03.10.2022 - 08:31
![]() Mirjam Van Der Panne wrote:
Mirjam Van Der Panne wrote:
Ik ben begonnen met de mouwen op nld. 7 omdat 8 echt te grof werd. Nu heb ik de grootste maat gekozen maar vind de mouw erg smal, klopt dat?
25.03.2021 - 08:31DROPS Design answered:
Dag Mirjam,
Als je een kleinere naald neemt wordt het breiwerk ook kleiner. Het beste kun je een proeflapje maken om te kijken of de stekenverhouding klopt. Pas eventueel de naalddikte aan totdat je de juiste stekenverhouding hebt, zoals aangegeven in het patroon.
26.03.2021 - 15:54
![]() Dania wrote:
Dania wrote:
Ich möchte diese Jacke gern mit Drops Bomull-Lin Stricken in Größe M Stricken. Können Sie mir sagen soviel Wolle ich dann dafür brauchen würde ? Vielen Dank Mit freundlichen Grüßen D. Sult
02.02.2021 - 11:25DROPS Design answered:
Liebe Dania, sorry für die verspäte Antwort, Ihre Frage wurde leider übersehen; Bomull-Lin gehört zur Garngruppe C und diese Jacke wird mit Melody = Garngruppe D gestrickt. So wird hier Bomull-Lin keine Alternative zur Melody sein. Hier lesen Sie mehr über Garnalternativen. Viel Spaß beim stricken!
26.04.2021 - 14:06
![]() Ioana wrote:
Ioana wrote:
Thank you very much for the swift reply! I forgot to also aks: are the measurement in gauge swatch given after the swatch is blocked? I assume so, but just to be sure 🙂
11.01.2021 - 14:32DROPS Design answered:
Dear Ilona, the measurements for the gauge should be the one of the finished garment, you can wash and let your swatch dry before measuring it - and then adjust needle size if required. Happy knitting!
11.01.2021 - 15:19
![]() Ioana wrote:
Ioana wrote:
Hi! I would like to knitt this garnment in Air but unfortunately the yarn converted doesn't give this alternative. I have sufficient yarn for the garnment for sure but I am not sure if I should stick to the measurements in the pattern or alterations should be made.
11.01.2021 - 11:51DROPS Design answered:
Dear Iona, this jacket is worked with Melody, which is Yarn group D while Air is yarn group C - Air isn't therefore a possible alternative to Melody, reason why yarn converter doesn't give any result - you can try out with 2 strands: Air (= yarn group C) + 1 yarn group A (= to match 3 strands yarn group A). Happy knitting!
11.01.2021 - 14:19
![]() Ruth wrote:
Ruth wrote:
Das Melody Garn fusselt sehr stark, gibt es da einen Trick um das zu reduzieren?
09.07.2019 - 09:43DROPS Design answered:
Liebe Ruth, hier finden Sie einige Tipps. Viel Spaß beim stricken!
09.07.2019 - 13:45
![]() Ruth wrote:
Ruth wrote:
Hallo, ich habe die Jacke gestrickt und finde sie super gemütlich! Allerdings fusselt das Garn sehr sehr stark. Gibt es dafür eine Lösung? Viele Grüße Ruth
09.07.2019 - 09:42
|
|||||||||||||
Driftwood#driftwoodcardigan |
|||||||||||||
 |
 |
||||||||||||
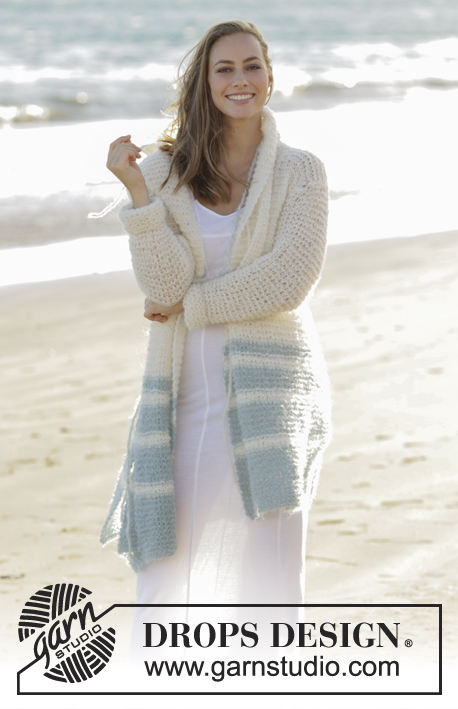
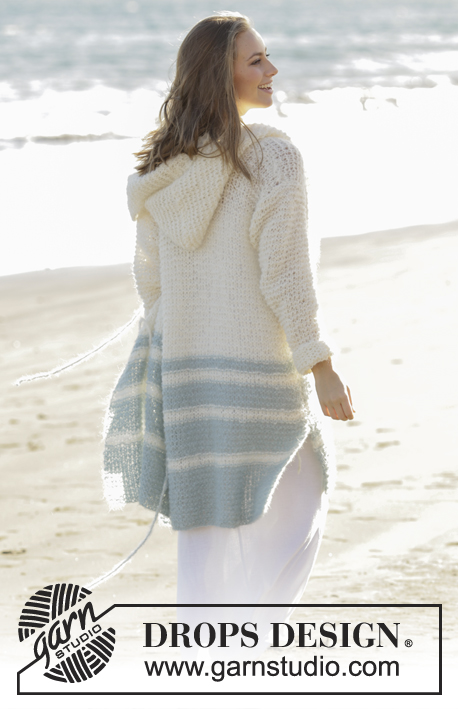
Knitted jacket in garter stitch with stripes and hood in DROPS Melody. Size: S - XXXL
DROPS 175-2 |
|||||||||||||
|
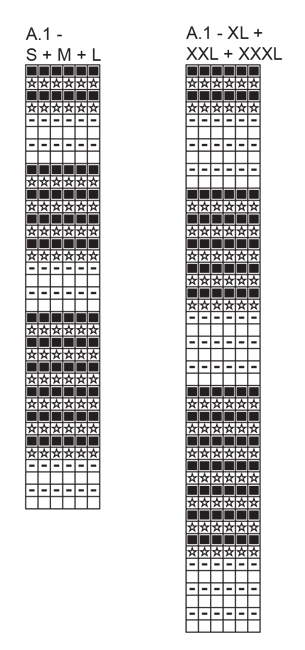
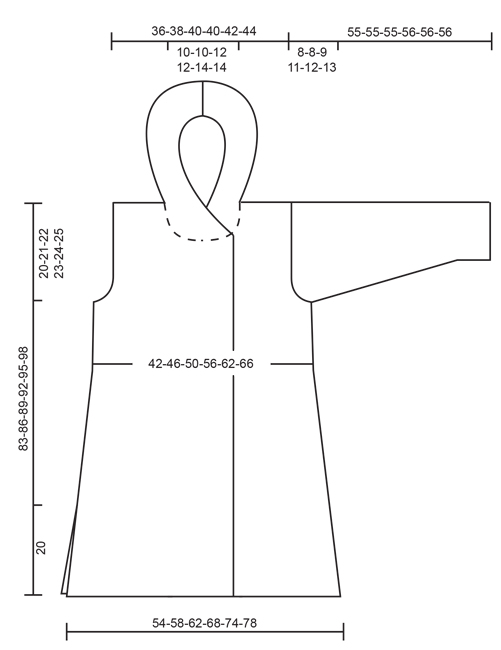
GARTER STITCH (back and forth): 1 ridge = knit 2 rows. STRIPES: See diagram A.1. Diagrams show all rows in pattern seen from the right side. Choose diagram for your size. MEASURING TIP: All length measurements are done when piece is held up, otherwise the jacket will be longer than measurements in chart when worn. This is important because the texture will make the garment longer. DECREASE TIP: Decrease inside 3 edge stitches in garter stitch in each side by knitting 2 stitches together. All decreases are done from the right side. INCREASE TIP-1 (applies to sleeves): Increase 1 stitch inside 2 edge stitches in garter stitch in each side. Increase 1 stitch by making 1 yarn over, on next row knit yarn over twisted to avoid holes. INCREASE TIP-2: To calculate how to increase evenly, use the total number of stitches on row (e.g. 56 stitches), minus 16 band stitches in each side and divide the remaining stitches by number of increases to be done (e.g. 24) = 1.6. In this example increase after alternately approx. every and every other stitch. Increase 1 stitch by making 1 yarn over, on next row knit yarn over twisted to avoid holes. ---------------------------------------------------------- JACKET: Worked back and forth on circular needle in parts and sewn together when finished. BACK PIECE: Cast on 54-58-62-68-74-78 stitches on circular needle size 9 mm with 2 strands light sea green. Remove one strand and work in GARTER STITCH - see explanation above. REMEMBER THE KNITTING TENSION When piece measures 14-15-16-17-18-19 cm - READ MEASURING TIP, work STRIPES as shown in A.1. AT THE SAME TIME when piece measures 24 cm in all sizes, decrease 1 stitch in each side - READ DECREASE TIP (= 2 stitches decreased). Decrease like this every 7-7-7-8-8-8 cm 6 times in total in each side = 42-46-50-56-62-66 stitches. When diagram A.1 has been worked, continue with off white until finished measurements. When piece measures 63-65-67-69-71-73 cm - remember MEASURING TIP, cast off for armholes at the beginning of every row in each side as follows: 3 stitches 0-0-1-1-1-1 time, 2 stitches 1-1-0-1-2-2 times and 1 stitch 1-2-2-3-3-4 times = 36-38-40-40-42-44 stitches. Continue to work until piece measures 81-84-87-90-93-96 cm. Now cast off the middle 8-8-10-10-12-12 stitches for neck and finish each shoulder separately. Cast off 1 stitch on next row from neck = 13-14-14-14-14-15 stitches remain on the shoulder. Work until piece measures 83-86-89-92-95-98 cm – remember MEASURING TIP and cast off with 2 strands off white (this is done to avoid a tight cast-off edge). Work the other shoulder the same way. RIGHT FRONT PIECE: Cast on 43-45-47-50-53-55 stitches (including 16 band stitches towards mid front) on circular needle size 9 mm with 2 strands light sea green. Remove one strand and work in garter stitch. When piece measures 14-15-16-17-18-19 cm, work stripes as shown in A.1 the same way as on back piece. When piece measures 24 cm in all sizes, begin decrease in the side and decrease the same way as on back piece = 37-39-41-44-47-49 stitches. When piece measures 63-65-67-69-71-73 cm, cast off for armholes at the beginning of every row the same way as on back piece = 34-35-36-36-37-38 stitches. When piece measures 77-80-83-86-89-92 cm, slip the outermost 17-17-18-18-19-19 stitches towards mid front on 1 stitch holder for neck (work them before slipping them on stitch holder to avoid cutting the yarn). Continue to cast off for neck at beginning of every row from neck as follows: 2 stitches 1 time and 1 stitch 2 times = 13-14-14-14-14-15 stitches remain for shoulder. Work until piece measures 83-86-89-92-95-98 cm – remember MEASURING TIP and cast off with 2 strands off white. LEFT FRONT PIECE: Cast on and work as right front piece but with decreases in the opposite side. SLEEVE: Cast on 20-22-22-24-24-26 stitches on circular needle size 9 mm with 2 strands off white. Remove one strand and work in garter stitch back and forth. When piece measures 10 cm, increase 1 stitch in each side - READ INCREASE TIP-1! Increase like this every 5-5-4-3½-3-3 cm 8-8-9-10-11-11 times in total = 36-38-40-44-46-48 stitches. When piece measures 47-47-46-45-44-43 cm, cast off for sleeve cap at beginning of every row in each side as follows: 3 stitches 1 time, 2 stitches 1-1-2-2-2-2 times and 1 stitch 3-3-3-5-6-7 times. Then cast off 2 stitches at beginning of every row in each side until piece measures 54-54-54-55-55-55 cm. Cast off 3 stitches at beginning of the next 2 rows before loosely casting off the remaining stitches with 2 strands off white. Entire sleeve measures approx. 55-55-55-56-56-56 cm from top and down. Knit another sleeve the same way. ASSEMBLY: Sew the shoulder seams. Sew in sleeves. Sew underarm seams and side seams in one - sew in outer loops of edge stitches to avoid a chunky seam, but leave approx. 20 cm at the bottom of each side of front and back piece for vents. HOOD: Pick up from right side approx. 56 to 68 stitches around the neck (including stitches on stitch holders at the front) on circular needle size 9 mm with off white. Work in garter stitch back and forth and increase AT THE SAME TIME evenly to 80-82-84-86-88-90 stitches on first row – READ INCREASE TIP-2 (do not increase over the outermost 16 stitches in each side). When hood measures 35-35-36-36-37-37 cm, loosely cast off with 2 strands off white. Place hood double and sew together at the top with grafting/kitchener stitches. TIES: The jacket has 4 ties, 2 ties in 2 strands off white and 2 strands in 1 strand off white + 1 strand light sea green. 1 tie = cut 2 strand of approx. 2.8 meters. Twine the strands tog until they resist, fold the strands double so that they twine. Tie a knot in each end (string should be approx. 1 meter when finished, cut it to correct length if needed). Fasten 1 tie in off white + light sea green on the outside on the left side of jacket approx. 2 cm below armhole (try the jacket on and adjust placement of string). The other tie with off white + light sea green should be fastened to the edge of right front piece approx. 22-23-24-25-26-27 cm from shoulder and down. Fasten 1 tie in off white approx. 2 cm below armhole on the inside of jacket in right side. The other tie in off white should be fastened at the other at the edge of left front piece approx. 22-23-24-25-26-27 cm from shoulder and down. |
|||||||||||||
Diagram explanations |
|||||||||||||
|
|||||||||||||
 |
|||||||||||||
 |
|||||||||||||
Have you finished this pattern?Tag your pictures with #dropspattern #driftwoodcardigan or submit them to the #dropsfan gallery. Do you need help with this pattern?You'll find 16 tutorial videos, a Comments/Questions area and more by visiting the pattern on garnstudio.com. © 1982-2026 DROPS Design A/S. We reserve all rights. This document, including all its sub-sections, has copyrights. Read more about what you can do with our patterns at the bottom of each pattern on our site. |
|||||||||||||


With over 40 years in knitting and crochet design, DROPS Design offers one of the most extensive collections of free patterns on the internet - translated to 17 languages. As of today we count 324 catalogues and 12290 patterns translated into English (UK/cm). 12290
We work hard to bring you the best knitting and crochet have to offer, inspiration and advice as well as great quality yarns at incredible prices! Would you like to use our patterns for other than personal use? You can read what you are allowed to do in the Copyright text at the bottom of all our patterns. Happy crafting!
Post a comment to pattern DROPS 175-2
We would love to hear what you have to say about this pattern!
If you want to leave a question, please make sure you select the correct category in the form below, to speed up the answering process. Required fields are marked *.