
Popular categories
Looking for a yarn?


Comments / Questions (95)
Heather Nicholls wrote:
Want to make this pattern using alternative yarn and one strand only. Which Drops yarn could I substitute please to get the same result? Thanks. I love your designs! Heather
15.03.2016 - 20:39DROPS Design answered:
Dear Mrs Nicholls, 2 strands group A (= Alpaca) = 1 strand group C - you will find here all informations to calculate amount of yarn. Happy knitting!
16.03.2016 - 08:43
![]() Nina Helland wrote:
Nina Helland wrote:
Jeg er en ganske ny strikker og dette er første gang jeg skal strikke noe som dette. Jeg forstår ikke dette med ermene. Jeg har økt masker osv til ermene men jeg finner ikke noe på hvordan selve ermene skal strikkes? skal de strikkes løse for å settes inn i arbeidet? Hva er isåfall målene man skal ha på ermene? Sikkert bare jeg som ikke forstår oppskriften helt.
15.03.2016 - 14:00DROPS Design answered:
Hej. De maskor du lägger upp är det som blir ärmarna när du fortsätter att sticka. När du är färdig syr du ihop under och över ärmarna (se under montering). Lycka till!
15.03.2016 - 14:18
![]() Nina Helland wrote:
Nina Helland wrote:
Jeg er en ganske ny strikker og dette er første gang jeg skal strikke noe som dette. Jeg forstår ikke dette med ermene. Jeg har økt masker osv til ermene men jeg finner ikke noe på hvordan selve ermene skal strikkes? skal de strikkes løse for å settes inn i arbeidet? Hva er isåfall målene man skal ha på ermene? Sikkert bare jeg som ikke forstår oppskriften helt.
15.03.2016 - 13:10DROPS Design answered:
Hej, Når du kommer til "BAKSTK" så vil du se at der står, "legg opp nye m på slutten av hver p i hver side til ermer:" og så hvor mange m du legger op. God fornøjelse!
15.03.2016 - 16:12
![]() Rehan wrote:
Rehan wrote:
I don't understand how to assemble it. Please help me with this section. I have followed the steps correctly but I think something has went wrong. I don't get the armholes and sleeves as i am supposed to get... help please
20.02.2016 - 05:20DROPS Design answered:
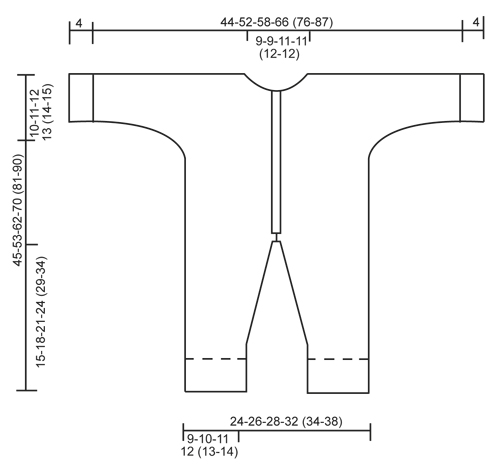
Dear Mrs Rehan, before assembly your work should look like the measurement chart: sew then tog shoulders on right and back piece, sew underarm seam and sew legs tog inside. For any further individual assistance you are welcome to contact your DROPS store even per mail or telephone. Happy knitting!
20.02.2016 - 12:37Rehan wrote:
When piece measures 15-18-21-24 (29-34) cm, cast off 3 sts at the beg of the next 2 rows = 40-44-48-54 (58-64) sts. Does it mean we have to cast off on both sides of our work or on only one side. If it will be on both sides then it means we need to cast off 3 sts on each side and if we ahve to cast off on one side only then it means we need to cast off 6 sts on one side... please help
18.01.2016 - 07:53DROPS Design answered:
Dear Mrs Rehan, at the beg of next row from RS, cast off 3 sts at the beg of this row, work row to the end, turn and cast off the first 3 sts from WS, work to the end of row and put aside - you have cast off 3 sts on each side of piece. Happy knitting!
18.01.2016 - 15:21
![]() Ceci wrote:
Ceci wrote:
Ok, c'est donc comme le point mousse, sauf qu'on double les rangs?!
09.12.2015 - 13:15DROPS Design answered:
Bonjour Ceci, on tricote au point mousse, mais on compte ici en "côtes mousse" pour plus de facilité à compter les rangs, donc 1 côte mousse = 2 rangs endroit, 2 côte mousse = 4 rangs endroit et ainsi de suite. Bon tricot!
10.12.2015 - 09:51
![]() Ceci wrote:
Ceci wrote:
Bonjour, Encore moi!! Je bloque encore au niveau de la combinaison: que signifie "Tricoter 3 côtes mousse en allers et retours"? Merci d'avance pour votre aide
28.11.2015 - 12:02DROPS Design answered:
Bonjour Ceci, pour 1 côte mousse en aller retour (= en "rangs"), on doit tricoter 2 rangs endroit, pour 3 côtes mousse en aller-retour, on tricote 6 rangs endroit. Bon tricot!
30.11.2015 - 10:31
![]() Lisi wrote:
Lisi wrote:
Hallo, Ich stricke zum ersten Mal ein Kleidungsstück mit Ärmel. Ich finde die Anleitung super verständlich nur beim Rückenteil bin ich nicht sicher wie ich die Maschen für die Ärmel zunehmen soll...wie mache ich das genau, dass ich li und rechts gleichmäßig zunehme?Muss ich immer am Anfang und am Ende Maschen aufnehmen?Oder nur am Ende?Aber wie komme ich dann auf 88 Maschen?Ich sehe mich gerade nicht aus!Vielleicht lese ich die Anleitung falsch. Danke und Lg
27.11.2015 - 22:43DROPS Design answered:
Da Sie ja an beiden Seiten für die Ärmel Maschen anschlagen müssen, machen Sie dies am Ende JEDER Reihe, d.h. an der einen Seite schlagen Sie immer am Ende der der Hin-R neue M an, an der anderen Seite immer am Ende der Rück-R. Hilfe dazu, wie Sie zu bereits vorhandenen M neue M anschlagen, finden Sie im Video "Seitlich neue M anschlagen" im Kopf unter Videos. Die genannte Anzahl gilt für jeweils eine Seite, d.h. für Ihre Größe schlagen Sie an beiden Seiten jeweils 1x 3 M an, dann jeweils 1x 5 M, dann jeweils 1x 7 M und dann nochmals jeweils 1x 7 M. Damit haben Sie insgesamt 44 M zugenommen und kommen auf 88 M insgesamt.
30.11.2015 - 13:35
![]() Runa wrote:
Runa wrote:
21+6+5+7+7=46.
25.11.2015 - 09:06
![]() Laila Køteles wrote:
Laila Køteles wrote:
Hei, beklager. Stryk siste kommentar. Jeg telte dobbelt og ikke for en arm, men to ;) Takk for fin oppskrift og hjelp/svar på tidligere spørsmål!
25.11.2015 - 09:03
|
|
Playdate#playdateoverall |
|
 |
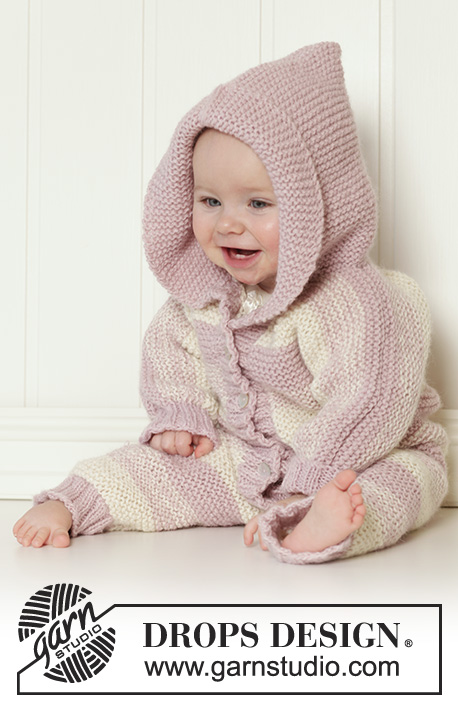 |
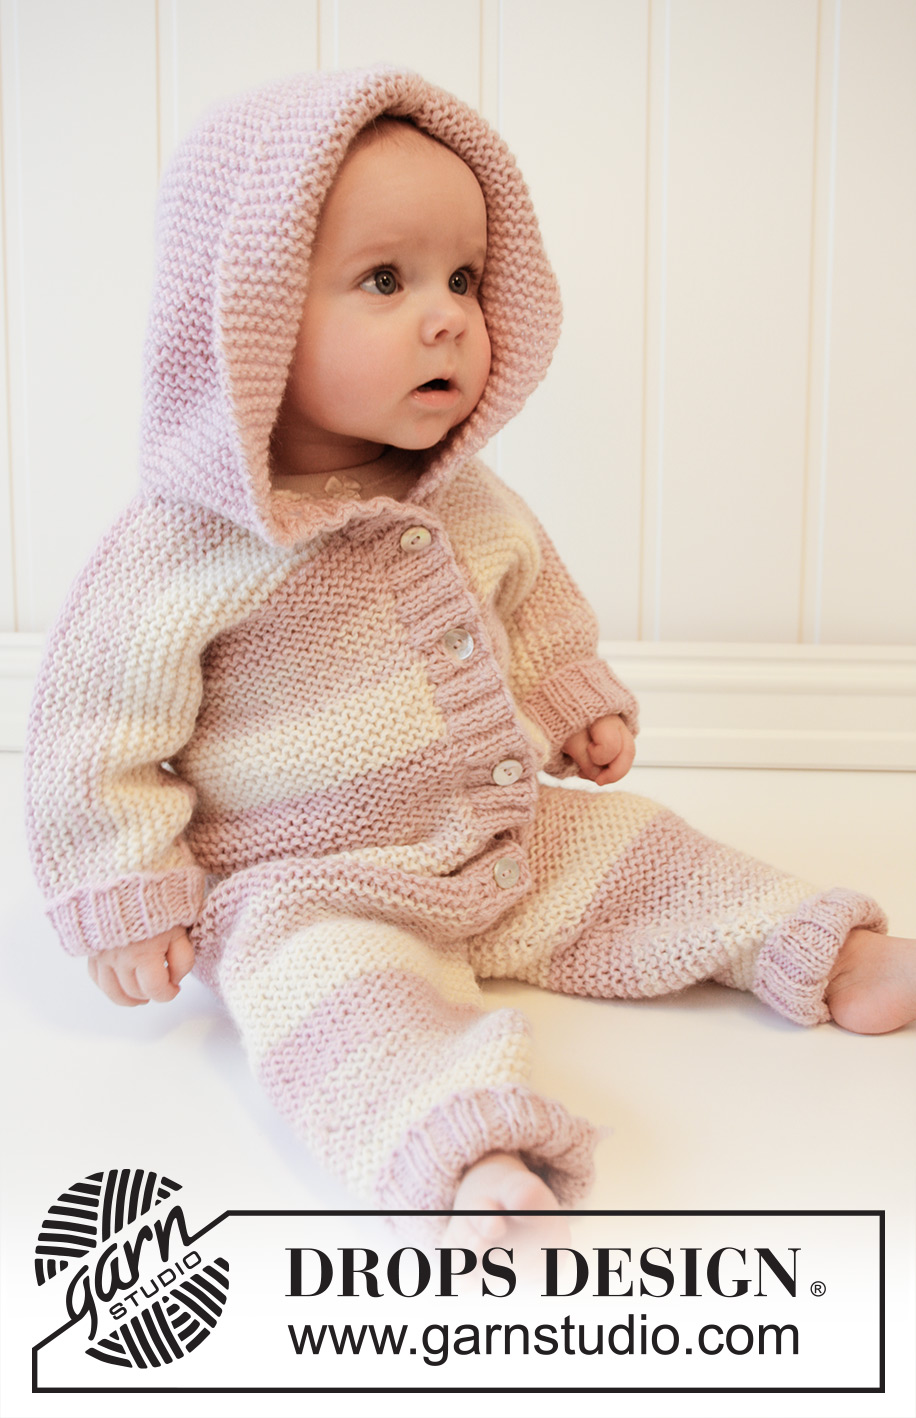
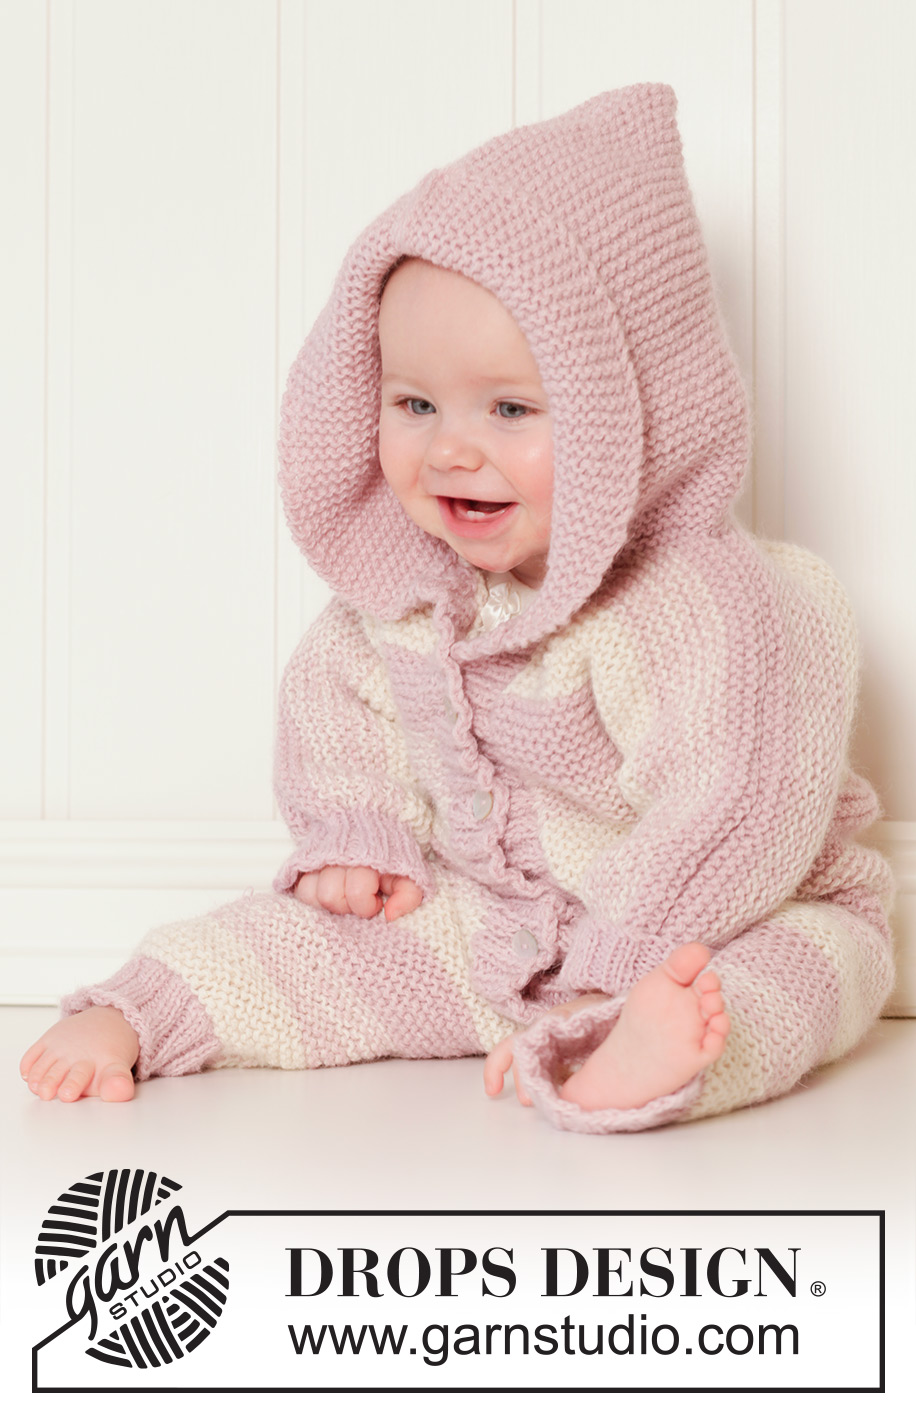
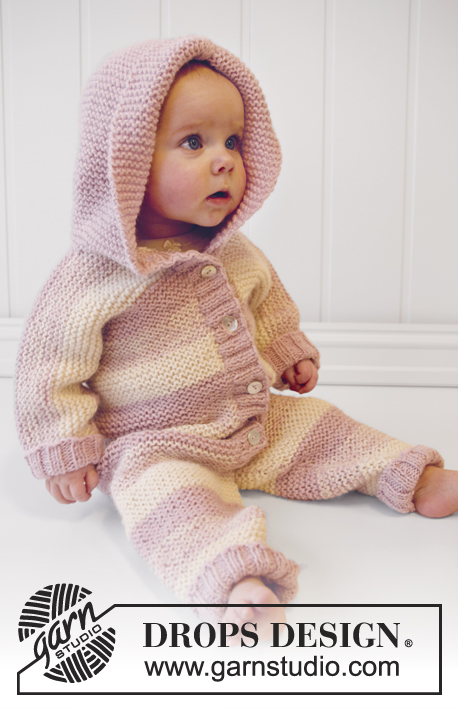
Knitted baby overall with hood in garter st worked in 2 threads DROPS Alpaca. Size 0 – 4 years.
DROPS Baby 25-17 |
|
|
GARTER ST (back and forth on circular needle): K all rows. 1 ridge = 2 rows K. STRIPES: * 4 cm in garter st with 2 strands off white, 4 cm in garter st with 1 strand off white + 1 strand dusty pink, 4 cm in garter st with 2 strands dusty pink *, repeat from *-* until finished measurements. ---------------------------------------------------------- LEG: Worked back and forth on circular needle. LOOSELY cast on 38-42-46-50 (54-58) sts (incl 1 edge st in each side) on circular needle size 4 mm with 2 strands dusty pink. K 1 row from WS, continue with rib K 2/P 2 with 1 edge st in each side. When piece measures 4 cm, K 1 row from RS while AT THE SAME TIME dec 6-6-6-8 (8-8) sts evenly = 32-36-40-42 (46-50) sts. Switch to circular needle size 5 mm. Then work in GARTER ST – see explanation above while AT THE SAME TIME working STRIPES – see explanation above. REMEMBER THE KNITTING TENSION! AT THE SAME TIME when piece measures 6 cm, inc 1 st in each side, repeat inc every 3-5-6-6 (8-9) rows a total of 7-7-7-9 (9-10) times = 46-50-54-60 (64-70) sts. When piece measures 15-18-21-24 (29-34) cm, cast off 3 sts at the beg of the next 2 rows = 40-44-48-54 (58-64) sts. Put piece aside and knit another leg the same way. Make sure that legs have the same no of stripes. SUIT: Slip both legs on to same circular needle size 5 mm with cast off sts towards each other = 80-88-96-108 (116-128) sts. Continue to work back and forth from mid front as follows (1st row = RS and continue stripes where they ended): Work 3 ridges in garter st back and forth. At beg of the next 2 rows cast off 3 sts = 74-82-90-102 (110-122) sts remain on row. Insert 1 marker 17-19-21-24 (26-29) sts in from each side (= 40-44-48-54 (58-64) sts between markers on back piece). Continue in GARTER ST and STRIPES. When piece measures 35-42-50-57 (67-75) cm, divide piece at the 2 markers and finish front and back piece separately. BACK PIECE: = 40-44-48-54 (58-64) sts. Continue in garter st and stripes - AT THE SAME TIME cast on new sts at the end of every row in each side for sleeves: 3 sts 2-1-2-3 (1-2) times, 5 sts 1-1-1-1 (2-2) times, 7 sts 0-1-1-1 (2-2) times and then 6-7-7-8 (9-12) sts 1 time = 74-88-98-112 (130-148) sts on row. When piece measures 44-52-61-69 (80-89) cm, cast off the middle 16-16-18-18 (20-20) sts for neck and finish each shoulder/sleeve separately. Work 2 rows over the 29-36-40-47 (55-64) sts in each side – LOOSELY cast off, piece measures approx. 45-53-62-70 (81-90) cm. LEFT FRONT PIECE: = 17-19-21-24 (26-29) sts. Continue in garter st and stripes - AT THE SAME TIME cast on new sts at the end of row towards the side for sleeve as on back piece = 34-41-46-53 (62-71) sts. When piece measures 41-49-58-65 (76-85) cm, cast off for neck at the beg of every row from neck as follows: 2 sts 2 times in all sizes and then 1 st 1-1-2-2 (3-3) times in total = 29-36-40-47 (55-64) sts remain on row for shoulder/sleeve. Continue to work until piece measures 45-53-62-70 (81-90) cm, LOOSELY cast off. RIGHT FRONT PIECE: Work as left front piece but reversed. ASSEMBLY: Sew overarm seams with grafting/kitchener sts from RS. Sew underarm seams tog edge to edge in front loop of outermost sts. Sew tog legs inside 1 edge st and then sew from opening mid front up to vent. LEFT BAND: Pick up from RS inside 1 edge st approx. 46 to 90 sts along left front piece on circular needle size 4 mm with 2 strands dusty pink. P 1 row from WS while AT THE SAME TIME inc evenly to 64-72-88-96 (108-116) sts. Work next row as follows from RS (i.e. from neck and down): 1 edge st in garter st, * K 2, P 2 *, repeat from *-* until 3 sts remain and finish with K 2 and 1 edge st in garter st. Continue rib like this for 3½-4 cm (adjust according to vent at the bottom) and loosely cast off with K over K and P over P. RIGHT BAND: Work as left but after 1½ cm dec evenly for 5-5-6-6 (6-7) buttonholes. 1 buttonhole = work 2 sts tog and make 1 YO (P 2 tog in a P-section will look more pretty). Upper buttonhole should be max. 1 cm from neck edge, and bottom hole approx. 2-3 cm from vent. Sew the buttons on to the left band. Sew bands right over left at the bottom of vent. HOOD: Pick up from RS approx. 50 to 60 sts around the neck on circular needle size 5 mm with 2 strands dusty pink (also pick up over bands). Work in garter st - AT THE SAME TIME on 2nd row (= from RS) inc evenly to 72-76-80-84 (88-92) sts. (If you do not want a hood, cast off after 2 ridges in garter st.) When piece measures 19-21-23-25 (27-28) cm, cast off all sts. Place hood double and sew tog at the top with grafting/kitchener sts. CUFF: Pick up from RS 32-32-36-36 (40-40) sts on double pointed needles size 4 mm with 2 strands dusty pink at the bottom around one sleeve. Work rib = K 2/P 2 until cuff measures 4 cm, then loosely cast off with K over K and P over P. Work the same way around the edge of the other sleeve. |
|
 |
|
Have you finished this pattern?Tag your pictures with #dropspattern #playdateoverall or submit them to the #dropsfan gallery. Do you need help with this pattern?You'll find 25 tutorial videos, a Comments/Questions area and more by visiting the pattern on garnstudio.com. © 1982-2026 DROPS Design A/S. We reserve all rights. This document, including all its sub-sections, has copyrights. Read more about what you can do with our patterns at the bottom of each pattern on our site. |
|


With over 40 years in knitting and crochet design, DROPS Design offers one of the most extensive collections of free patterns on the internet - translated to 17 languages. As of today we count 324 catalogues and 12291 patterns translated into English (UK/cm). 12291
We work hard to bring you the best knitting and crochet have to offer, inspiration and advice as well as great quality yarns at incredible prices! Would you like to use our patterns for other than personal use? You can read what you are allowed to do in the Copyright text at the bottom of all our patterns. Happy crafting!
Post a comment to pattern DROPS Baby 25-17
We would love to hear what you have to say about this pattern!
If you want to leave a question, please make sure you select the correct category in the form below, to speed up the answering process. Required fields are marked *.