
Popular categories
Looking for a yarn?


Comments / Questions (183)
![]() Maria wrote:
Maria wrote:
Estoy haciendo la mantitacon agujas rectas y con más puntos puesto que la lana que utilizo es más fina y me está quedando preciosa. Solo hay un pequeño detalle que a los lados el punto bobo queda más corto que el dibujo del centro, entonces de vez en cuando hago una pasada más de bobo ( para ir igualando al centro), espero que al finalizarla me quede bien
19.09.2012 - 10:58
![]() Jane Kelso wrote:
Jane Kelso wrote:
I love this pattern, but would like to make it for a throw for my daughter"s 21st birthday. How would I make it bigger- roughly twice the pattern size?
28.06.2012 - 02:25
![]() Su wrote:
Su wrote:
Hola: cuando empieza M.1 y dice dcho por el LD...mi pregunta es cual es el derecho si con el punto musgo que hemos realizado lo veo igual por los dos lados..¿?¿?...es importante esto..¿?... gracias
17.06.2012 - 19:33DROPS Design answered:
Su, después de montar los 127 pts, la primera vta donde empiezas a tejer en pt musgo es el LD de la pieza. Es importante diferenciar el LD del LR para que los aumentos queden por el LR y M.1 por el LD. Saludos!
17.06.2012 - 21:02
![]() Nenoc wrote:
Nenoc wrote:
Es una manta muy bonita pero el patrón indescifrable...yo lo hago con agujas rectas esto de las circulares para este caso no me gustan.....el patrón es el siguiente para los que no ha entendido nada como yo....el borde es punto bobo y dentro punto pavo real .....el otras pago internet están bien explicado...Yo creo que deberían mejorar al menos la traducción el patrón es indescifrable para un español en mi caso
26.04.2012 - 19:56
![]() Pony wrote:
Pony wrote:
Quiero hacer esta mantita pero no entiendo bien el patron ..primero empiezo con aguja circular y luego aumentos¿?¿?¿? no entiendo bien soy un poco principiante pero si aumento donde reduzco luego para que quede plana¿?¿ porque en circular hago el borde exterior y tejo hacia dentro no¿? perdon si no me explico muy bien
26.04.2012 - 10:43DROPS Design answered:
Pony, los aumentos (= 14 pts) se hacen después de haber tejido 14 cm en pt musgo. Estos 14 pts aumentados los vas a dism cuando la pieza mida aprox 65 cm, para tener nuevamente el número original de pts montados, es decir, 127 pts. Saludos cordiales!
27.04.2012 - 23:43Elena Benito wrote:
Is it possible to substitute the Merino ExtraFine yarn for Baby Alpaca Silk for this blanket? I've calculated 8 balls of Merino ExtraFine = approximately 5 balls of Baby Alpaca. Is this correct? Thanks!
14.02.2012 - 12:25DROPS Design answered:
Hi Elena Merino Extra Fine is thicker than Baby Alpaca Silk. Merino is a light worsted, while the Alpaca Silk is a fingering yarn. If using a finer yarn, the blanket will be smaller.
14.02.2012 - 18:04
![]() Michela wrote:
Michela wrote:
I modelli sono semplicemente stupendi. mi sembra che manchi la spiegazione del diag m1 del modello baby 18.30. grazie per la vostra disponibilità
02.02.2012 - 22:36DROPS Design wrote:
Tienes razón, Carlota, Karisma es una de tantas alternativas de lana para esta preciosa frazada. Pero que tal si compartes una fotografía con nosotros en Facebook? Nos encantaría verla. Saludos cariñosos!!
13.05.2011 - 19:42Carlota wrote:
Es una toquilla preciosa, la he tejido en lana DROPS KARISMA porque es más lavable, lo que es muy importante cuando se trata de niños.
13.05.2011 - 00:37
![]() Ingrid wrote:
Ingrid wrote:
Hello again. Só sorry to have bothered you! Had been knitting in garter stitch, so have now achieved a 10x10cm square with 5mm needles in stocking stitch. Kind regards, Ingrid
30.01.2011 - 23:32
|
|||||||||||||
Princess Chantilly#princesschantilly |
|||||||||||||
 |
 |
||||||||||||
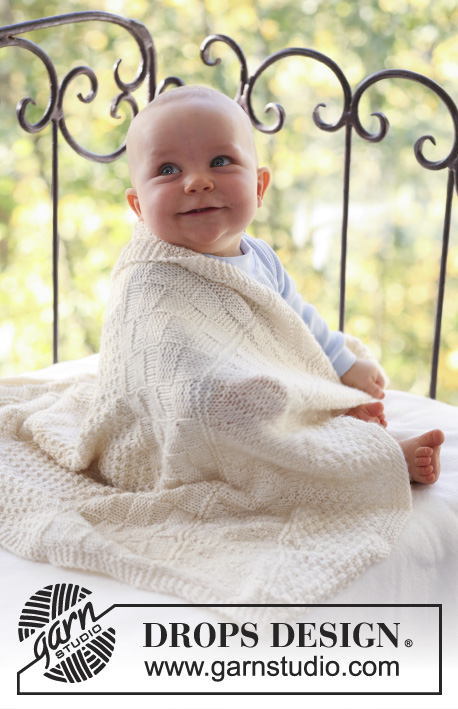
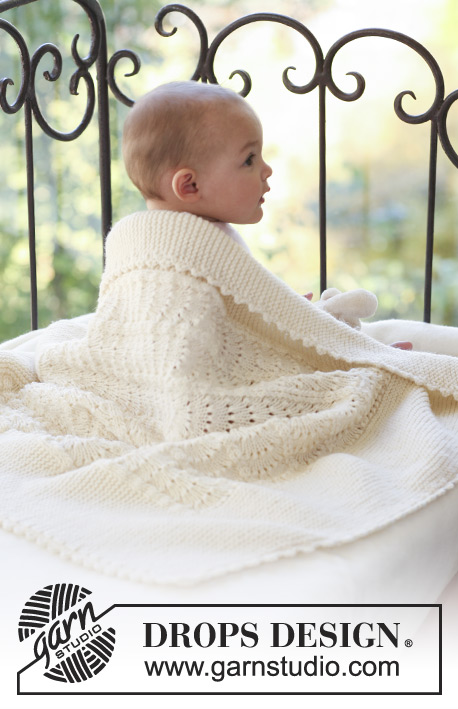
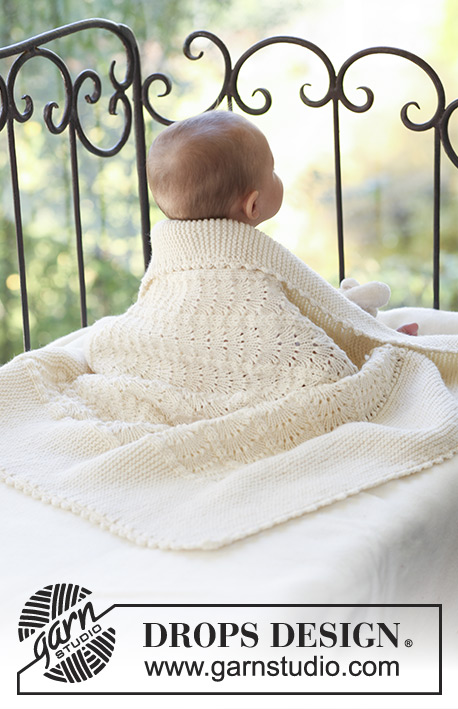
Knitted baby blanket with wave pattern in DROPS Merino Extra Fine or Sky
DROPS Baby 18-30 |
|||||||||||||
|
GARTER ST (back and forth on needle): K all rows. PATTERN: See diagram M.1. Diagram shows the pattern from the RS. Row 1 = RS. NOTE: make sure to count no of sts after row 5 and 6 in M.1. --------------------------------------------------------- BLANKET: To fit in all sts work blanket back and forth on circular needle. Cast on 127 sts on circular needle size 4.5 mm with Merino Extra Fine or Sky and work garter st back and forth on needle – SEE ABOVE. When piece measures 14 cm inc 14 sts evenly on the middle 77 sts – inc from WS by working 2 sts in approx every 5th st = 141 sts. Continue from RS as follows: 24 garter sts, 1 stocking st, M.1 on the next 91 sts (= 7 repeats across the row), 1 stocking st, 24 garter sts. Continue in pattern like this until piece measures approx 65 cm – adjust to a full repeat of M.1 – and now dec 14 sts evenly on the middle 91 sts = 127 sts. Continue in garter st until piece measures 79 cm, cast off. PICOT BORDER: Crochet a border with crochet hook size 3.5 mm and 1 thread round the blanket as follows: * 1 dc, 4 ch, 1 tr in the first of these ch, skip 3 sts/6 rows garter st *, repeat from *-* and finish with 1 sl st in first dc from beg of round. |
|||||||||||||
Diagram explanations |
|||||||||||||
|
|||||||||||||
 |
|||||||||||||
Have you finished this pattern?Tag your pictures with #dropspattern #princesschantilly or submit them to the #dropsfan gallery. Do you need help with this pattern?You'll find 17 tutorial videos, a Comments/Questions area and more by visiting the pattern on garnstudio.com. © 1982-2026 DROPS Design A/S. We reserve all rights. This document, including all its sub-sections, has copyrights. Read more about what you can do with our patterns at the bottom of each pattern on our site. |
|||||||||||||


With over 40 years in knitting and crochet design, DROPS Design offers one of the most extensive collections of free patterns on the internet - translated to 17 languages. As of today we count 324 catalogues and 12291 patterns translated into English (UK/cm). 12291
We work hard to bring you the best knitting and crochet have to offer, inspiration and advice as well as great quality yarns at incredible prices! Would you like to use our patterns for other than personal use? You can read what you are allowed to do in the Copyright text at the bottom of all our patterns. Happy crafting!
Post a comment to pattern DROPS Baby 18-30
We would love to hear what you have to say about this pattern!
If you want to leave a question, please make sure you select the correct category in the form below, to speed up the answering process. Required fields are marked *.