
Popular categories
Looking for a yarn?


Comments / Questions (6)
![]() Josie wrote:
Josie wrote:
The chestnut colour Lima seems to be too dark compared to the photo? Is it almond? Or beige?
26.11.2025 - 02:50DROPS Design answered:
Dear Josie, this might be an effect of light/screen, this jumper has been worked with the given colours. Thanks for your comprehension. Feel free to choose another colour matching what you are expected, your DROPS store will help you finding the desired colours, even per mail or telephone. Happy knitting!
26.11.2025 - 09:23
![]() Josefa wrote:
Josefa wrote:
Buenos días al seguir el patron A1 se empieza del derecho y aumentando los puntos y la siguiente vuelta para aumentar flecha 1 es del reves es correcto?
27.10.2025 - 12:35DROPS Design answered:
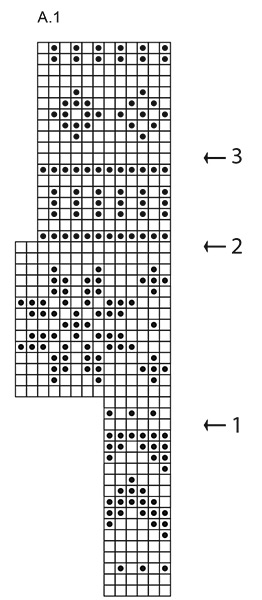
Hi Josefa, you add stitches in the first row (right side) od A.1 diagram (colour Chestnut/Cocoa Bean). The second row is from the left side, colour Chestnut/Cocoa Bean. In the 3rd row you start knitting pattern in 2 colours. In 16th row you will have an arrow and increses (wrong side), this row is one colour to make the increases easier. Happy knitting!
06.11.2025 - 08:31
![]() Chrissi wrote:
Chrissi wrote:
Hallo, ich verstehe die Teilung der Passe für die Ärmel noch nicht ganz und die Weiterführung des Musters. Bei Größe XXL stricke ich 76 Maschen im Muster, dann 82 stilllegen. Dann 14 neu anschlagen. Nur in Kastanie oder führe ich das Muster beim Anschlag weiter? Bei nur Kastanie müsste ich für die Maschen für das Rückenteil den weißen Faden neu ansetzen. Wenn ich die 136 Maschen für den Rücken stricke fange ich A1 wieder von vorne an?
03.10.2025 - 15:46DROPS Design answered:
Liebe Chrissi, schlagen Sie die Maschen am besten im Muster an, damit es rundum weiterläuft und Sie den Faden nicht neu ansetzen müssen. Viel Spaß beim Weiterstricken!
24.10.2025 - 10:09
![]() Annette wrote:
Annette wrote:
Je ne comprends pas l'astuce bordure devant de ce modèle. dois-je commencer une nouvelle pelote? y a t'il un tuto?
30.09.2025 - 18:15DROPS Design answered:
Bonjour Annette, vous pouvez effectivement utiliser une autre pelote et tricoter les mailles de la bordure devant d'un côté uniquement avec cette pelote, lorsque vous change de fil/de couleur, pensez à bien croiser les fils (comme pour du jacquard) pour éviter un trou, ainsi, les bordures sont de la bonne couleur, sans que l'on ait besoin de faire suivre le fil les rangs en coloris jacquard. Bon tricot!
01.10.2025 - 16:27
![]() Gusta wrote:
Gusta wrote:
Heel maak spijtig kan die afprinten
05.09.2025 - 07:39DROPS Design answered:
Dag Gusta,
Helaas begrijp ik je vraag of opmerking niet helemaal, maar al onze patronen zijn gratis af te drukken via het print pictogram rechts boven bij het patroon. Klik op het print pictogram en dan op 'Patroon afdrukken'.
07.09.2025 - 19:27
![]() Helena Miskeiova wrote:
Helena Miskeiova wrote:
Používají se u tohoto modelu zkrácené řady? Děkuji za odpověď
28.08.2025 - 09:56DROPS Design answered:
Dobrý den Heleno, u tohoto modelu se zkrácené řady nepletou. Přejeme hezký den.
28.08.2025 - 17:42
|
||||||||||
Maple Whisper Cardigan#maplewhispercardigan |
||||||||||
 |
 |
|||||||||
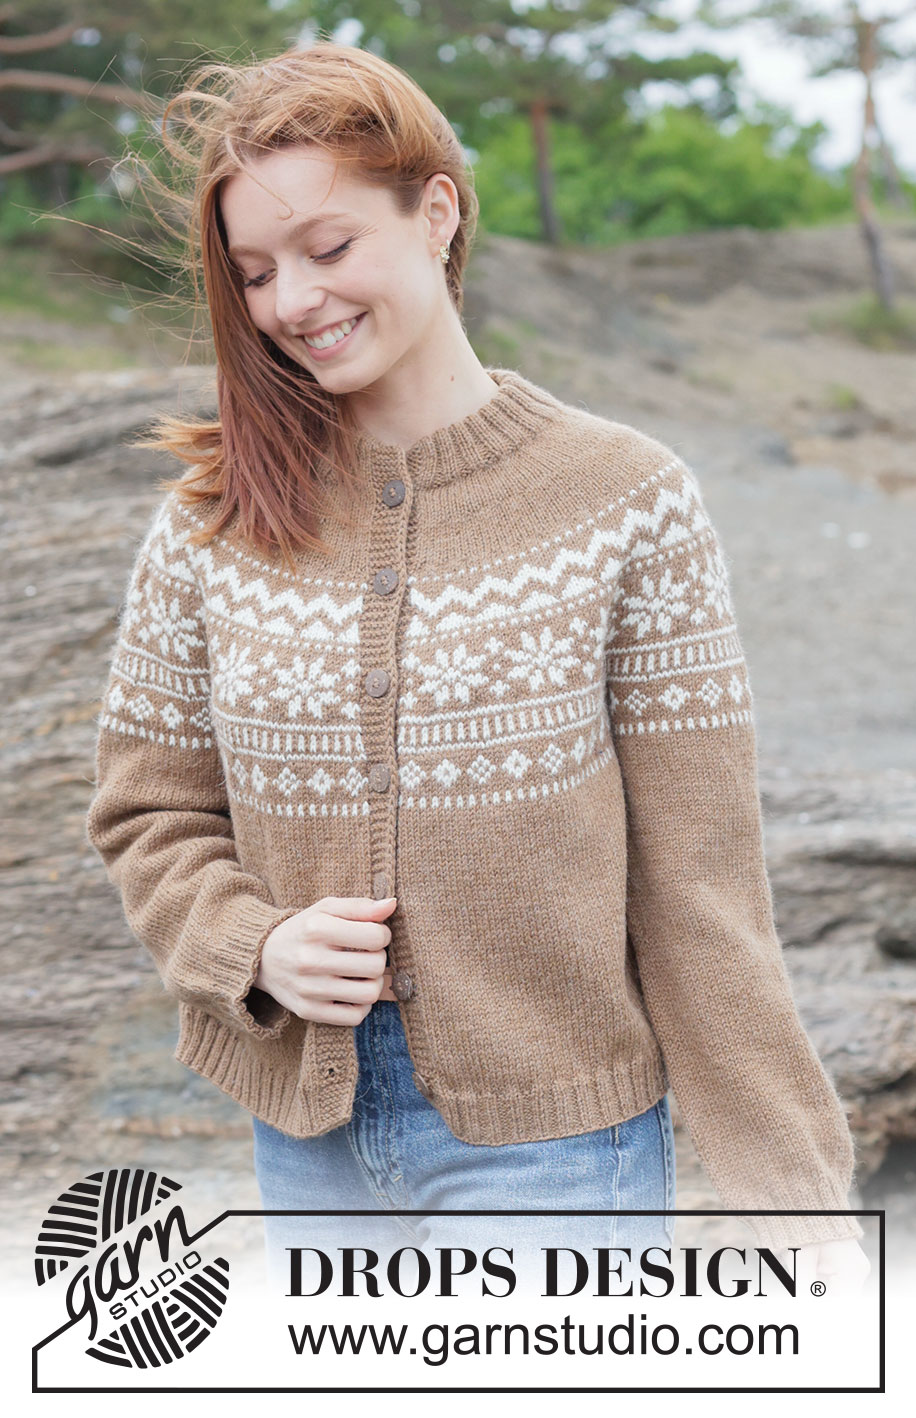
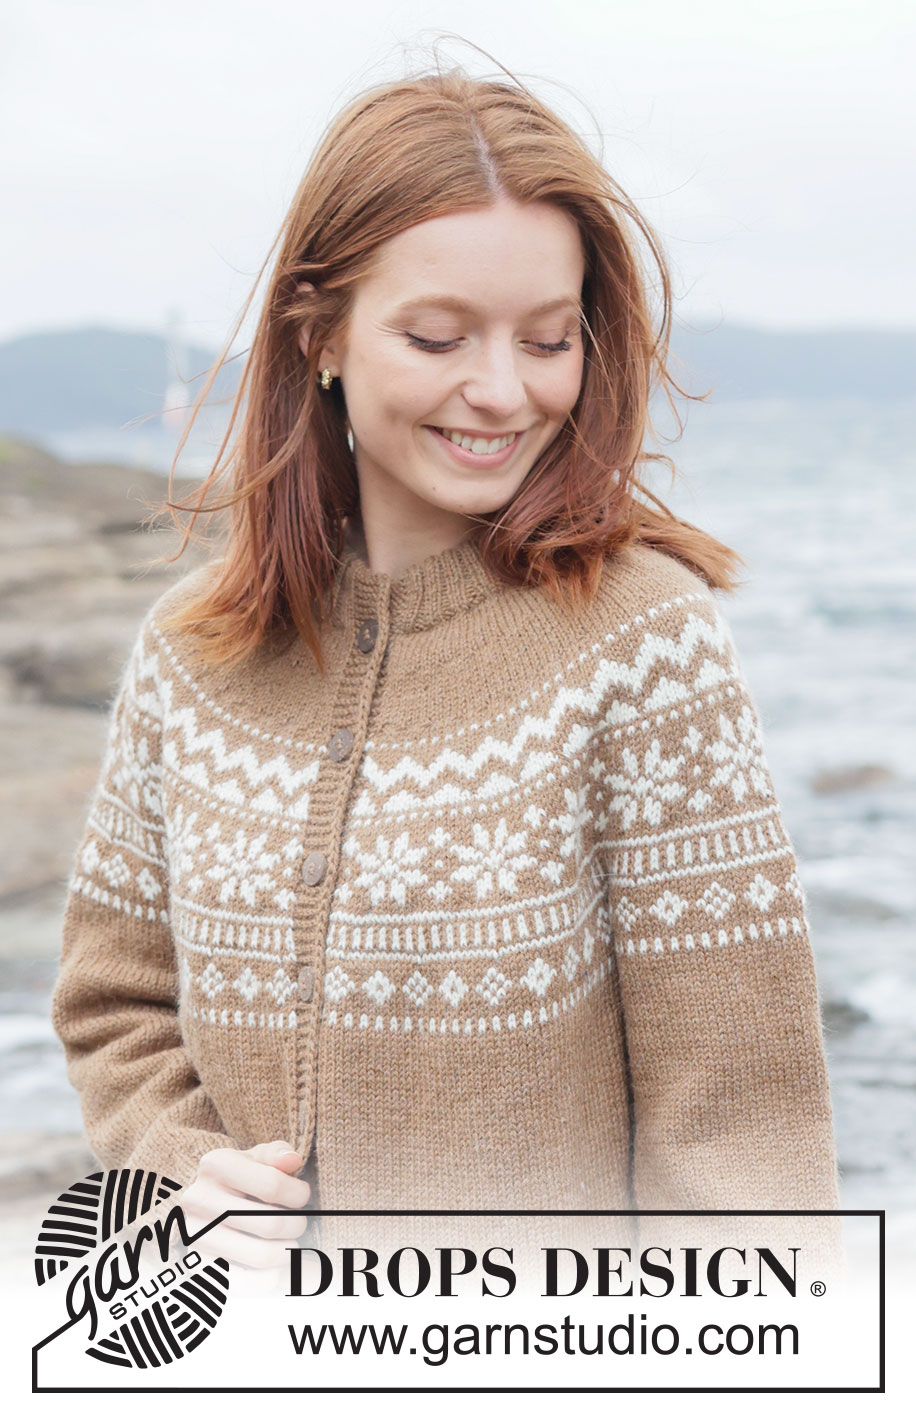
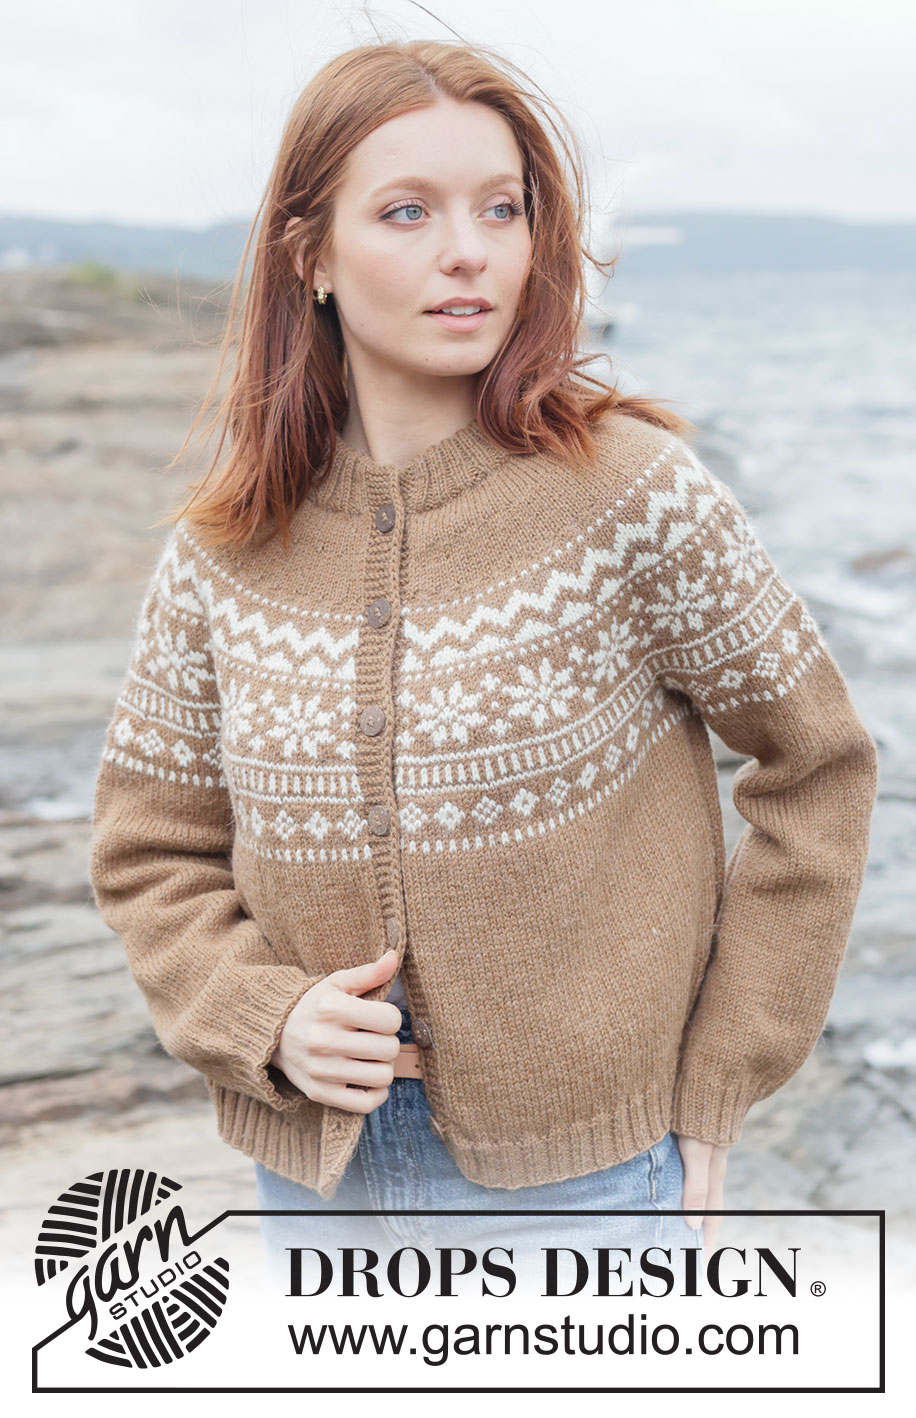
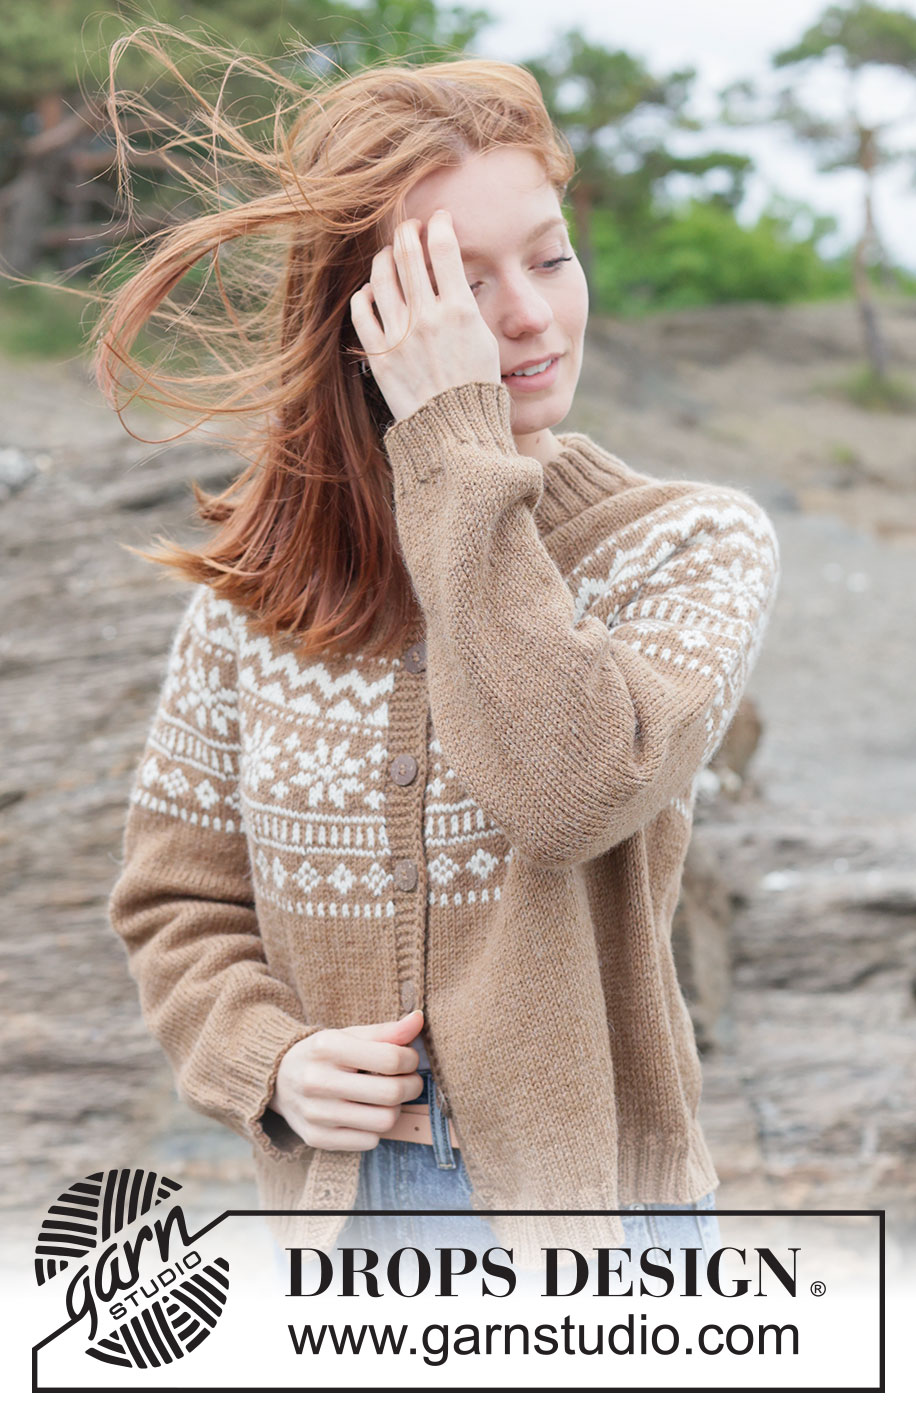
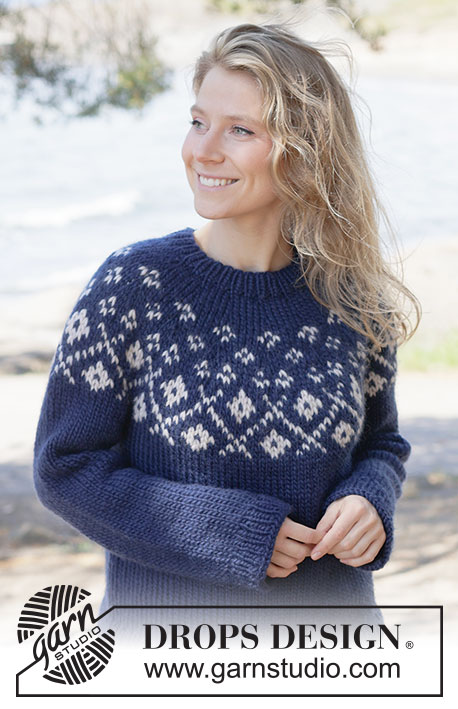
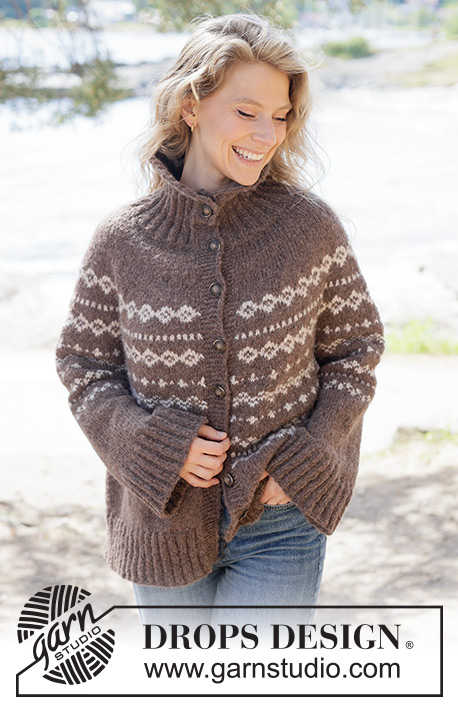
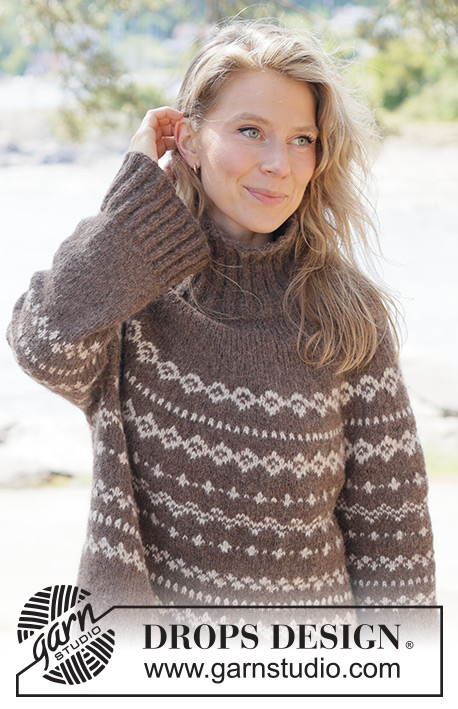
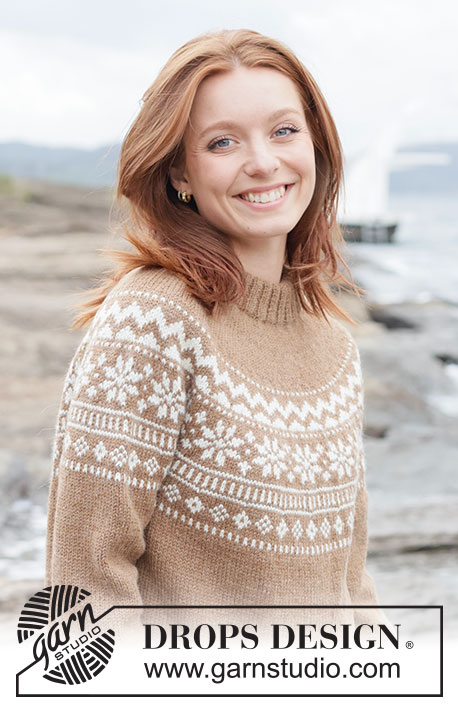
Knitted jacket in DROPS Lima or DROPS Karisma. The piece is worked top down with round yoke, Nordic pattern, double neck and I-cord. Sizes XS - XXXL.
DROPS 262-6 |
||||||||||
|
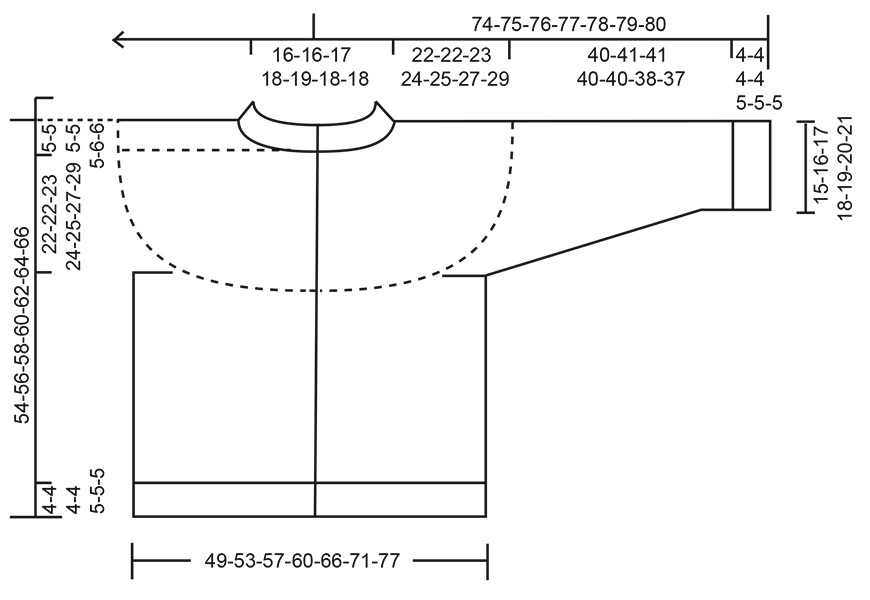
------------------------------------------------------- EXPLANATIONS FOR THE PATTERN: ------------------------------------------------------- GARTER STITCH (worked back and forth): Knit all rows, from both the right and wrong side. 1 ridge in height = knit 2 rows. BANDS WITH I-CORD: BEGINNING OF ROW: Work the band as follows (7 stitches): Slip 1 stitch purl-wise with yarn in front, knit 1, work 5 garter stitches. END OF ROW: Work the band as follows (7 stitches): Work until there are 7 stitches left on the row, work 5 garter stitches, slip 1 stitch purl-wise with yarn in front, knit 1. Work like this from both the right and wrong side. BAND TIP: The bands are worked with colour Chestnut/Cocoa Bean throughout. Use a separate ball of colour Chestnut/Cocoa Bean for the bands, working with the strand from inside and outside the ball for the two different bands. To avoid holes in the transition between the band and the front piece, twist the strands together on the wrong side on every row (both from the right and wrong side). INCREASE TIP (evenly spaced): To work out how to increase evenly, count the total number of stitches on the needle (e.g., 120 stitches) minus bands (e.g., 14 stitches) and divide the remaining stitches by the number of increases to be made (e.g., 14) = 7.6. In this example, increase by making 1 yarn over after alternately each 7th and 8th stitch. Do not increase across the bands. On the next row work the yarn overs twisted to avoid holes. BUTTONHOLES: Work the buttonholes on the right band (when the garment is worn) from the right side, when there are 5 stitches left on the row as follows: ROW 1 (right side): Make 1 yarn over, knit 2 together, knit 1, slip 1 purl-wise with strand in front, knit 1. ROW 2 (wrong side): Work the band as before, knit the yarn over to leave a hole. The first buttonhole is worked on the first row from the right side after the neck is finished. Then work the other 6-6-6-7-7-7-7 buttonholes with 7½-8-8-7-7½-7½-8 cm between each one. The bottom buttonhole is worked in the transition between the stocking stitch and rib. PATTERN: See diagram A.1. The diagram shows the pattern from the right side. The pattern is worked in stocking stitch. KNITTING TIP: To avoid the knitting tension becoming tight when working pattern, it is important that the strands at the back are not tight. Use a size larger needle when working pattern if this is necessary. SLEEVE TIP: When knitting up stitches under the sleeve, you can get a small hole in the transition between stitches on the body and sleeve. This hole can be closed by picking up the strand between 2 stitches and working this strand twisted together with the first stitch between body and sleeve. DECREASE TIP: Decrease 1 stitch on each side of the marker thread as follows: Work until there are 3 stitches left before the marker thread, knit 2 together, knit 2 (marker thread sits between these 2 stitches) slip 1 stitch knit-wise, knit 1 and pass the slipped stitch over the knitted stitch (= 2 stitches decreased). ------------------------------------------------------- START THE PIECE HERE: ------------------------------------------------------- JACKET – SHORT OVERVIEW OF THE PIECE. The pattern uses both long and short needles; start with the length which fits the number of stitches and change when necessary. The double neck and yoke are worked back and forth with circular needle, from mid front and top down. When the yoke is finished, it is divided for body and sleeves and the body continued back and forth, while the sleeves wait. The sleeves are worked in the round, top down. The neck is folded double to the inside and sewn down. NECK: Cast on 108-108-112-116-120-124-128 stitches with circular needle size 4 mm and colour Chestnut DROPS Lima or colour Cocoa Bean DROPS Karisma. Change to circular needle size 3 mm (casting on with a larger needle size makes the cast-on edge elastic). Purl 1 row from the wrong side, then work as follows from the right side: Work 1 GARTER STITCH – read description above, * knit 2, purl 2 *, work from *-* until there are 3 stitches left on the row, knit 2 and work 1 garter stitch. Continue this rib back and forth for 4-4-5-5-5-5-5 cm. Now cast on 6 stitches at the end of the next 2 rows = 120-120-124-128-132-136-140 stitches. Continue the rib but now with 7 stitches on each side worked according to BANDS WITH I-CORD – read description above. Work until the neck measures 8-8-9-9-9-9-9 cm – finishing after a row from the wrong side. The neck is later folded double to the inside, giving a neck of approx. 4-4-5-5-5-5-5 cm. Insert 1 marker inside one band, the piece is now measured from here. YOKE: Change to circular needle size 4 mm. Work the first row from the right side as follows: Work the band as before, knit 106-106-110-114-118-122-126 and increase 14-16-18-18-21-21-23 stitches evenly across these stitches – read INCREASE TIP, work the band as before – remember the first BUTTONHOLE – read explanation above = 134-136-142-146-153-157-163 stitches. Continue with the bands and stocking stitch. Remember to maintain the knitting tension. When the yoke measures 4-4-4-4-4-4-4 cm from the marker, increase 27-31-36-37-44-42-45 stitches evenly spaced – remember INCREASE TIP (do not increase across the bands) = 161-167-178-183-197-199-208 stitches. Continue with the bands and stocking stitch until the yoke measures 8-8-8-8-9-9-9 cm from the marker. On the next row from the right side begin the PATTERN – read explanation above, as follows: Work the band with colour Chestnut/Cocoa Bean – read BAND TIP, work A.1 across the next 147-153-164-169-183-185-194 stitches AT THE SAME TIME, increase 40-46-53-54-58-62-65 stitches evenly across these stitches, work the first stitch in A.1, then the band with colour Chestnut/Cocoa Bean = 201-213-231-237-255-261-273 stitches. Read KNITTING TIP! Continue this pattern. On each row in the diagram marked with an arrow increase as follows – remember INCREASE TIP and do not increase across the bands: Arrow-1: Increase 40-56-52-60-56-64-66 stitches evenly spaced = 241-269-283-297-311-325-339 stitches. Continue A.1, finishing with the first 3 stitches in A.1 before the band. Arrow-2: Increase 42-46-56-56-60-64-68 stitches evenly spaced = 283-315-339-353-371-389-407 stitches. Continue A.1, finishing with the first stitch in A.1 before the band. Arrow-3: Increase 49-53-53-51-57-63-69 stitches evenly spaced = 332-368-392-404-428-452-476 stitches. Continue A.1, finishing with the first 6 stitches in A.1 before the band. AT THE SAME TIME, when the yoke measures 22-22-23-24-25-27-29 cm from the marker mid-front, divide for the body and sleeves. If A.1 is not finished, divide and continue the pattern on the body and sleeves – make sure you divide on a round with pattern (not a round of colour Chestnut/Cocoa Bean). NOTE! All the increases in A.1 should be finished before dividing. DIVIDE FOR BODY AND SLEEVES: Work 56-61-64-66-71-76-81 stitches as before (= front piece), place the next 62-70-76-78-80-82-84 stitches on a thread for the sleeve, cast on 6-6-8-10-12-14-16 stitches (mid-under the sleeve), work 96-106-112-116-126-136-146 stitches as before (= back piece), place the next 62-70-76-78-80-82-84 stitches on a thread for the sleeve, cast on 6-6-8-10-12-14-16 stitches (mid-under the sleeve), work the last 56-61-64-66-71-76-81 stitches as before (= front piece). The body and sleeves are finished separately. BODY: = 220-240-256-268-292-316-340 stitches. If A.1 is not finished, continue the pattern on the body. The pattern will not fit under the sleeves; continue the pattern neatly from the yoke and work it as far as it will go under each sleeve. When the pattern is finished continue the bands and stocking stitch with colour Chestnut/Cocoa Bean until the piece measures 45-47-49-51-52-53-55 cm from the marker mid-front. On the next row from the right side, begin the rib. AT THE SAME TIME increase 20-20-24-24-28-28-28 stitches evenly on the first row as follows (do not increase across the bands) = 240-260-280-292-320-344-368 stitches: Change to circular needle size 3 mm. Work the band as before, rib (knit 2, purl 2 – remember to increase) until there are 9 stitches left, knit 2 and work the band as before. When the rib measures 4-4-4-4-5-5-5 cm, cast off. The jacket measures approx. 49-51-53-55-57-58-60 cm from the marker and 54-56-58-60-62-64-66 cm from the shoulder. SLEEVES: Place the 62-70-76-78-80-82-84 sleeve-stitches from one thread on circular needle size 4 mm and knit up 1 stitch in each of the 6-6-8-10-12-14-16 stitches cast on under the sleeve – read SLEEVE TIP = 68-76-84-88-92-96-100 stitches. Insert a marker-thread in the middle of the 6-6-8-10-12-14-16 stitches under the sleeve- the round starts by the marker-thread. Work stocking stitch in the round. If A.1 is not finished, continue the pattern on the sleeve. The pattern will not fit under the sleeve; continue the pattern neatly from the yoke and work it as far as it will go mid-under sleeve. When the pattern is finished continue with stocking stitch and colour Chestnut/Cocoa Bean. AT THE SAME TIME, when the sleeve measures 3 cm from the division, decrease mid-under the sleeve – read DECREASE TIP as follows: Decrease 2 stitches every 8-8-5-5-5-5-5 cm a total of 2-4-6-6-6-6-6 times = 64-68-72-76-80-84-88 stitches. Continue working until the sleeve measures 40-41-41-40-40-38-37 cm from the division. Change to double pointed needles size 3 mm. Work rib (knit 2, purl 2), AT THE SAME TIME increase 8-8-8-8-8-8-8 stitches evenly on the first round = 72-76-80-84-88-92-96 stitches. When the rib measures 4-4-4-4-5-5-5 cm, cast off. The sleeve measures approx. 44-45-45-44-45-43-42 cm from the division. ASSEMBLY: Fold the neck double to the inside and sew down. To avoid the neck being tight and rolling outwards, it is important that the seam is elastic. Sew the openings on the bands with small stitches. Sew the buttons onto the left band. |
||||||||||
Diagram explanations |
||||||||||
|
||||||||||
 |
||||||||||
 |
||||||||||
Have you finished this pattern?Tag your pictures with #dropspattern #maplewhispercardigan or submit them to the #dropsfan gallery. Do you need help with this pattern?You'll find 36 tutorial videos, a Comments/Questions area and more by visiting the pattern on garnstudio.com. © 1982-2026 DROPS Design A/S. We reserve all rights. This document, including all its sub-sections, has copyrights. Read more about what you can do with our patterns at the bottom of each pattern on our site. |
||||||||||


With over 40 years in knitting and crochet design, DROPS Design offers one of the most extensive collections of free patterns on the internet - translated to 17 languages. As of today we count 324 catalogues and 12285 patterns translated into English (UK/cm). 12285
We work hard to bring you the best knitting and crochet have to offer, inspiration and advice as well as great quality yarns at incredible prices! Would you like to use our patterns for other than personal use? You can read what you are allowed to do in the Copyright text at the bottom of all our patterns. Happy crafting!
Post a comment to pattern DROPS 262-6
We would love to hear what you have to say about this pattern!
If you want to leave a question, please make sure you select the correct category in the form below, to speed up the answering process. Required fields are marked *.