
Popular categories
Looking for a yarn?


Comments / Questions (16)
![]() Monica wrote:
Monica wrote:
Buona sera,per favore ho bisogno di aiuto,non riesco realisare il motivo che si fa sul 21 maglie nella misura S (A.2A,A.2B,A.2C)Non capisco il motivo ,ce qualche tutorial riga a riga? Grazie
13.01.2026 - 22:42DROPS Design answered:
Buonasera Monica, non ci sono spiegazioni riga per riga, ma se ci spiega bene in che punto trova difficoltà possiamo provare ad aiutarla. Buon lavoro!
16.01.2026 - 20:01
![]() Jennifer wrote:
Jennifer wrote:
I woulc like to use a different wool as I don't like drops silk( too itchy). Can I use a yarn from e.g. group c. Which one would be best and how would I work out how much to buy?
09.01.2026 - 15:59DROPS Design answered:
Hi Jennifer, I suggest DROPS Air. You will need 350-550 g of yarns (it depends on your size). Remember to make a swatch to adjust your needle size if necessary. Happy knitting!
12.01.2026 - 07:19
![]() Brigitte wrote:
Brigitte wrote:
Bonjour. Je ne saisis comment procéder pour le 1er rang du diagramme A.2B lorsqu'on demande de glisser l'aiguille droite entre les deux mailles de l'aiguille auxiliaire de l'arrière vers l'avant pour ensuite tricoter la maille gauche puis la droite. Auriez-vous une vidéo s.v.p.? Merci.
09.03.2025 - 04:54DROPS Design answered:
Bonjour Brigitte, dans cette vidéo, nous montrons comment tricoter ce type de point fantaisie A.2 / A.5 (la différence des diagrammes est le début et la fin du motif: diagrammes A et C). Bon tricot!
10.03.2025 - 09:20
![]() Civario wrote:
Civario wrote:
Daisy drops groupe B+ kid silk groupe A= C . Flora groupe A + kid silk A = C Pourquoi ?
23.10.2024 - 15:21DROPS Design answered:
Bonjour Mme Civario, on tricote ici avec 1 laine du groupe de fils B + 1 laine du groupe de fils A avec une tension légèrement plus serrée qu'avec 2 fils du groupe A ou 1 fil du groupe C, mais c'est l'échantillon qui compte avant tout (la taille des aiguilles est à adapter si besoin); pour obtenir le résultat/la texture du modèle photographié. Bon tricot!
23.10.2024 - 16:01
![]() Dorota Lagoda wrote:
Dorota Lagoda wrote:
Witam Mam problem ze zrozumieniem opisu. Dopiero zaczynam projekt i już pojawił się kłopot . Nie rozumiem, który schemat należy powtórzyć 6 razy( rozmiar S)- A2A czy A2B? Żaden nich mi nie pasuje przy liczbie 177 oczek i ilosci 6 powtórzeń. Pozdrawiam
29.01.2024 - 16:57DROPS Design answered:
Witaj Doroto, musisz powtórzyć 6 razy schemat A.2B. Powodzenia!
29.01.2024 - 18:36
![]() Florence Garrigues wrote:
Florence Garrigues wrote:
Bonjour, je voudrais tricoter le modèle 243-32 mais je ne comprends pas l'explication du diagramme A2B. merci beaucoup de votre aide.
01.01.2024 - 14:35DROPS Design answered:
Bonjour Mme Garrigues, vous commencez le diagramme A.2 par A.2A, au 7ème rang, tricotez les 2 dernières mailles de A.2A avec la 1ère maille de A.2B: les 2 mailles glissée sont celles de A.2A, la maille tricotée celle de B, ainsi, la dernière des 2 mailles de l'aiguille à torsades est maintenant la 1ère maille de B. De même quand on répète A.2B: les 2 dernières mailles de A.2B vont être tricotées avec la 1ère du A.2B suivant (de A.2C). Placez des marqueurs entre chaque motif peut vous aider à bien suivre le motif. Bon tricot!
02.01.2024 - 12:06
![]() Juana Idigoras wrote:
Juana Idigoras wrote:
Realice el sueter Snow Flake fue muy facil seguir las instrucciones, me quedo muy lindo, muchas gracias, aunque noto diferencia en A.1 con el modelo y el mio, lo hice tal y como decian las indicaciones.
10.12.2023 - 14:14
![]() Annemieke Tijsseling wrote:
Annemieke Tijsseling wrote:
IK zou graag een kruispatroon breien en heb tientallen keren de instructievideo bekeken. er wordt uitgelegd hoe je schuin van rechts naar links gaat, maar niet schuin van links naar rechts! Moet dat op de achterkant van het werk? En hoe dan? Kunnen jullie daar ook nog een video van maken? Nu ben ik genoodzaakt een ander breipatroon te kiezen. Ik kom hier niet uit.
19.11.2023 - 10:50DROPS Design answered:
Dag Annemieke,
Wat bedoel je precies met een kruispatroon. In de telpatronen staat precies aangegeven wat je moet doen bij de symboolverklaring. Je kabelt steeds aan de goede kant, niet aan de verkeerde kant. De telpatronen lees je van onder naar boven en iedere naald staat aangegeven in de telpatronen, dus zowel de goede als de verkeerde kant
21.11.2023 - 23:15
![]() Helene wrote:
Helene wrote:
Bonjour, J'aime beaucoup la forme du pull mais les motif sont encore trop complexe pour moi. Existe-t-il un modèle similaire plus simple ? Merci
09.10.2023 - 13:43DROPS Design answered:
Bonjour Hélène, retrouvez nos pulls tricotés traversalement ici, ou bien modifiez les filtres pour trouver votre modèle préféré. Bon tricot!
09.10.2023 - 16:17
![]() Cha wrote:
Cha wrote:
Hello me again!.. I have a question about the diamond shape pattern for the sleeves. Is the patten supposed to continue all around the whole sleeve? Or is the increase section meant to just be a stockinette stitch for the whole arm because I am trying to keep up with the diamond pattern but the stitch requirement do not match and I am left with a zigzag like stockinette section. Just wondering if I am doing it wrong or if it is supposed to be like this. Thankyou
20.09.2023 - 02:58DROPS Design answered:
Dear Cha, the new stitches increased on each side of sleeves are worked in stocking stitch, not in the diamond pattern as explained under INCREASE TIP (for sleeves):, this means the diamond pattern will be worked over the same stitches all the way, insert markers to mark where to start each diagram, this might help when there are always more sts at the beg or end of rows. Happy knitting!
20.09.2023 - 07:52
|
||||||||||||||||||||||||||||||||||
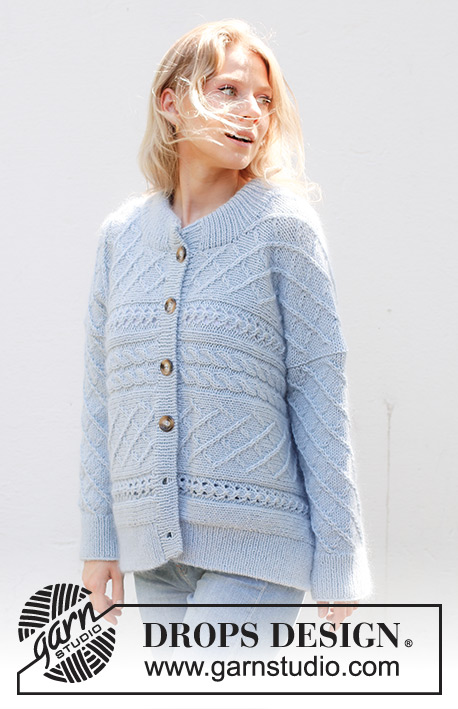
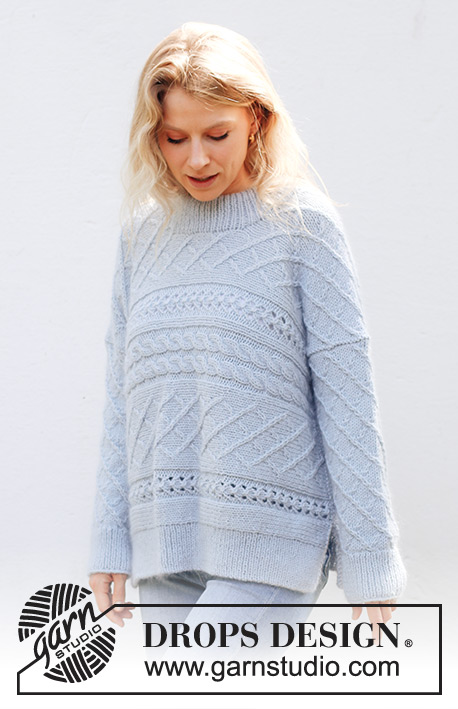
Snow Flake Sweater#snowflakesweater |
||||||||||||||||||||||||||||||||||
 |
 |
|||||||||||||||||||||||||||||||||
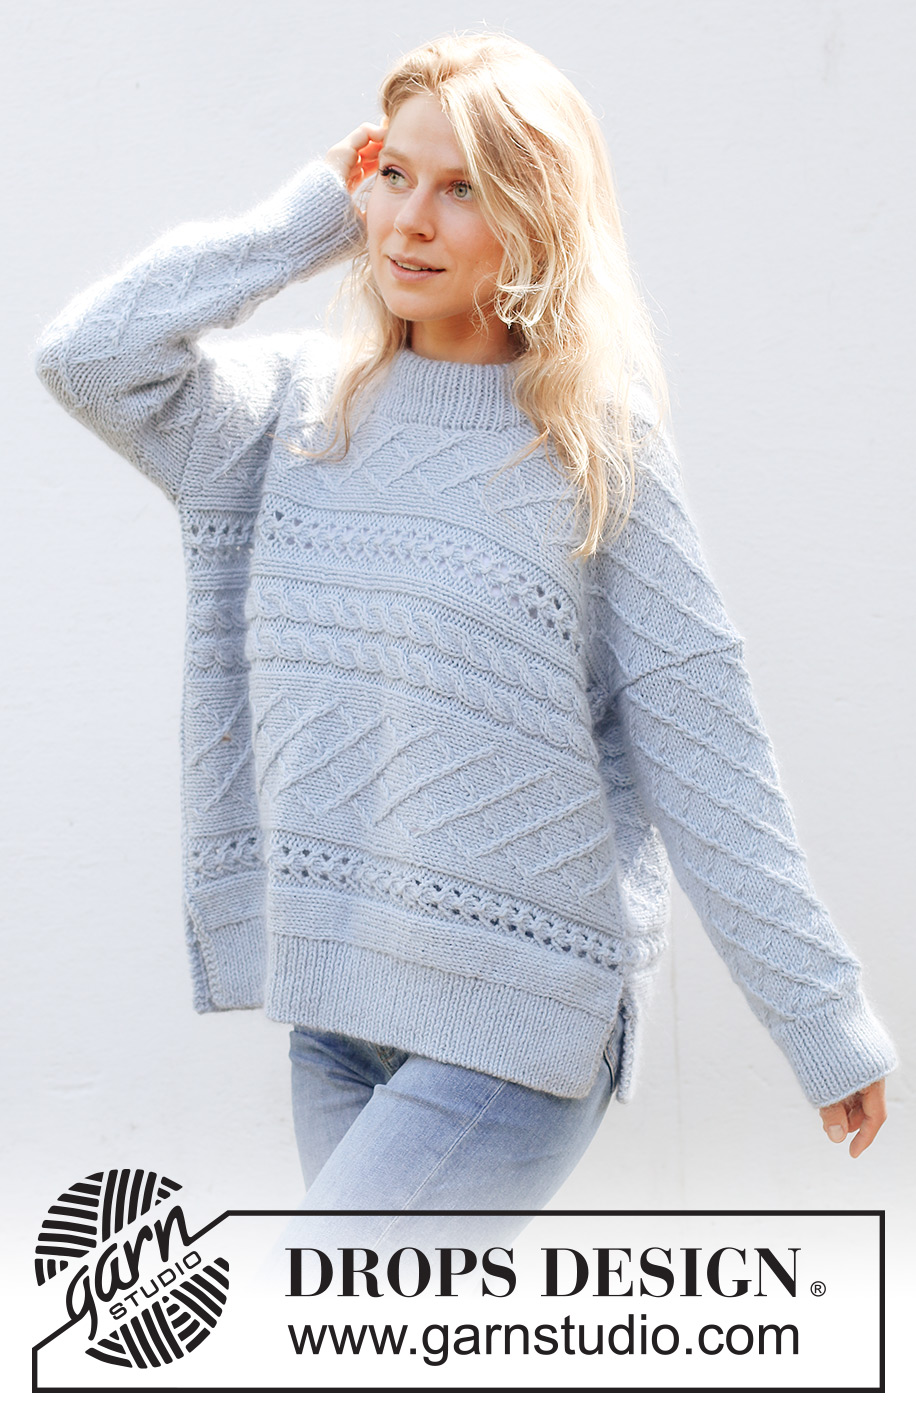
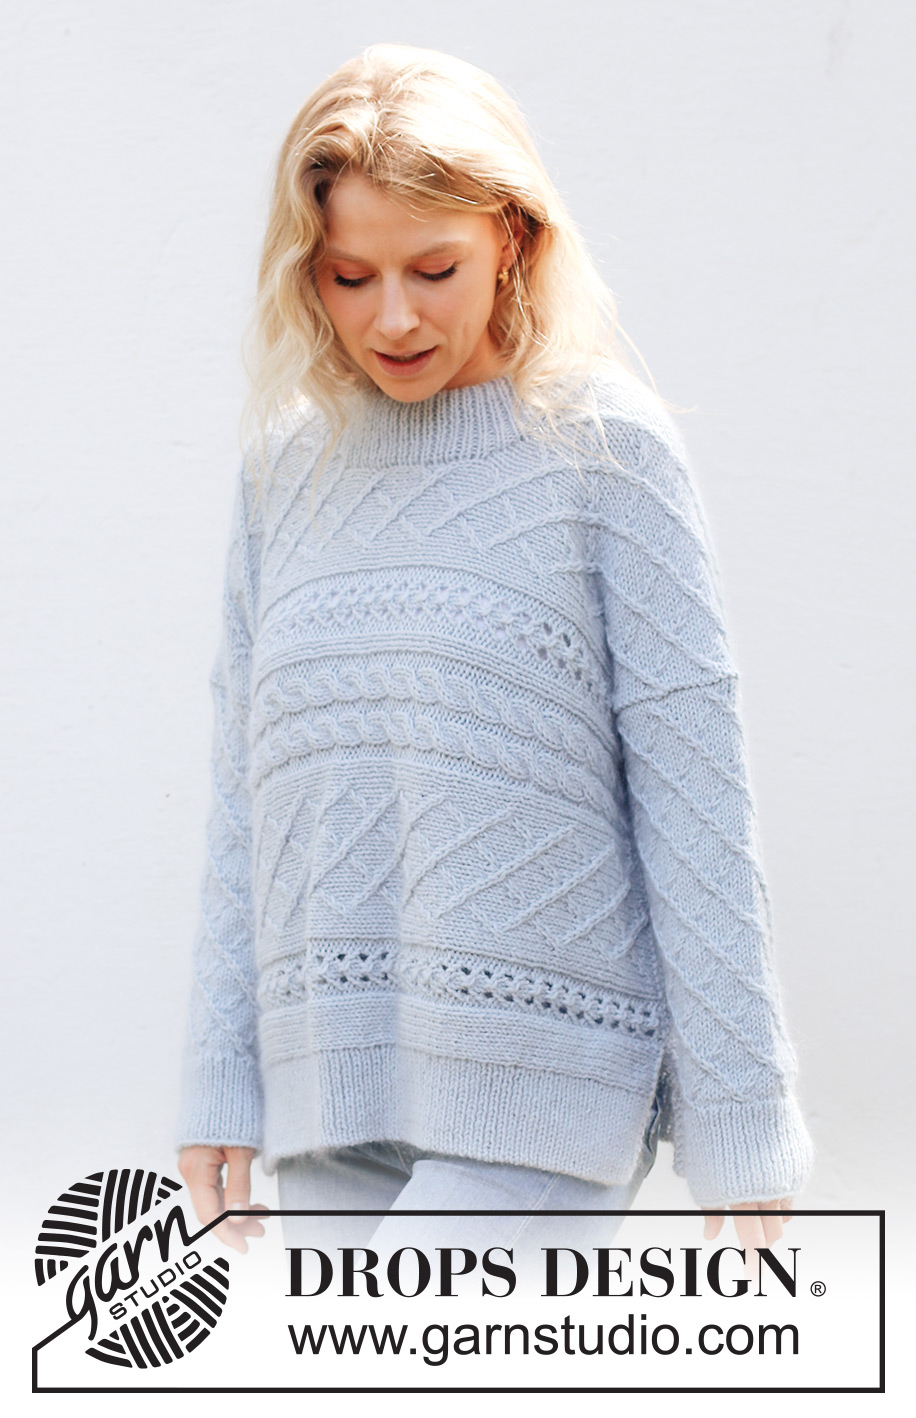
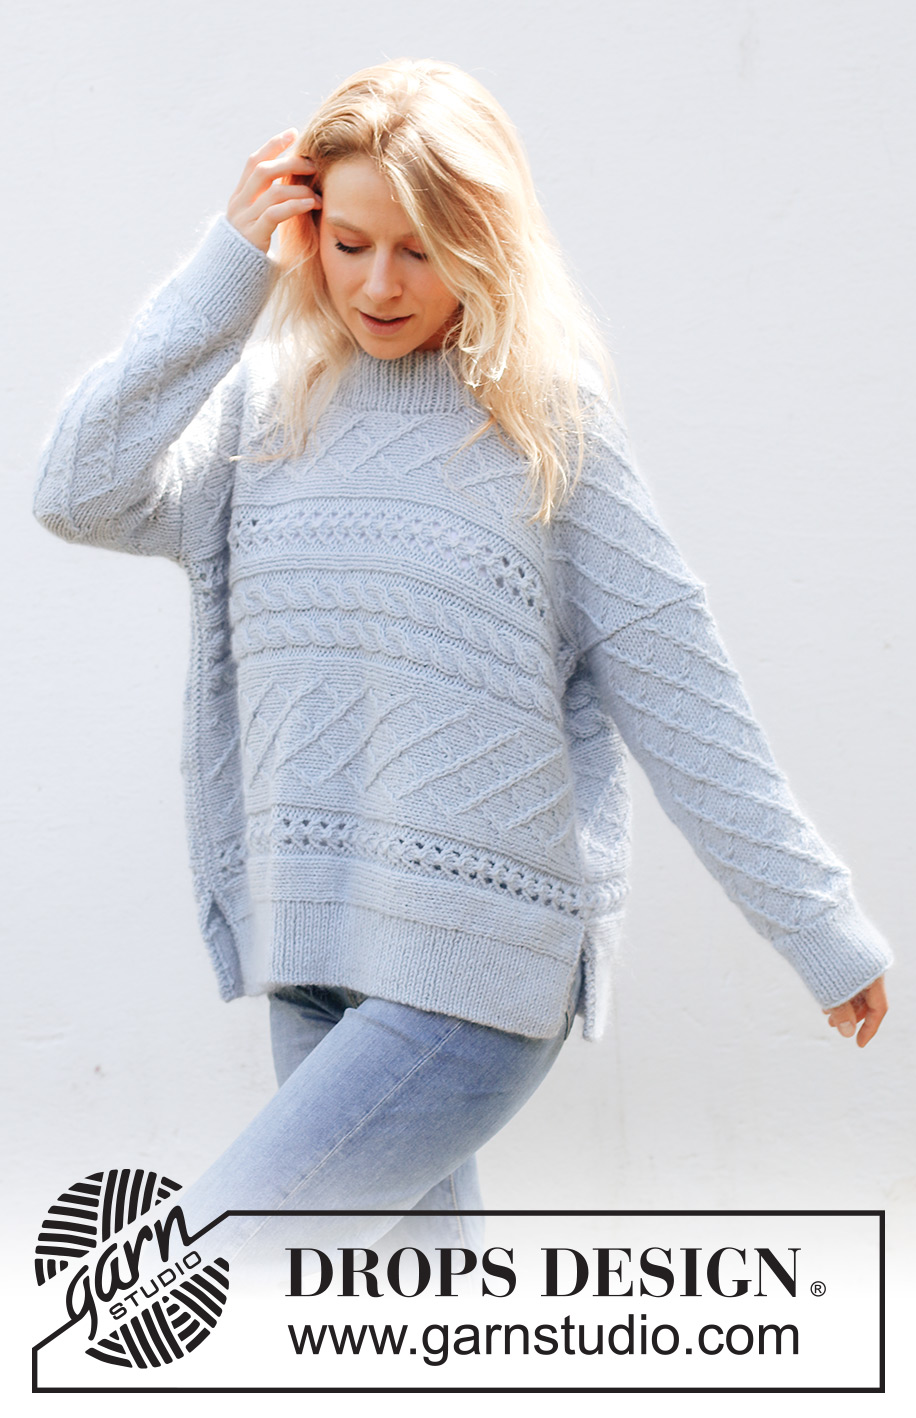
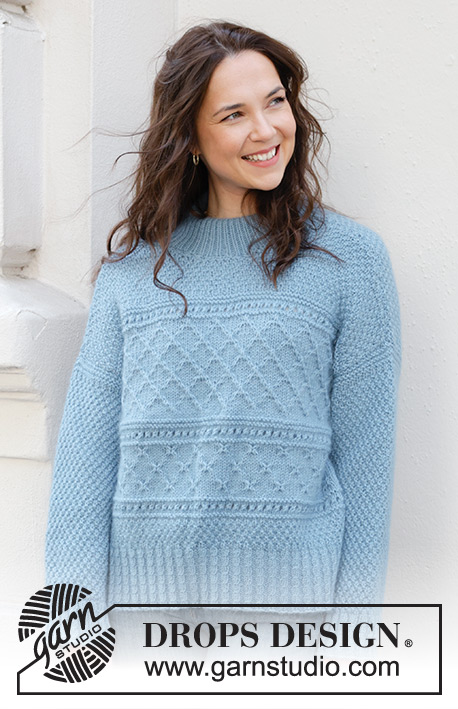
Knitted jumper in DROPS Merino Extra Fine and DROPS Kid-Silk. The piece is worked sideways with cables, lace pattern, double neck and split in sides. Sizes XS - XXL.
DROPS 243-32 |
||||||||||||||||||||||||||||||||||
|
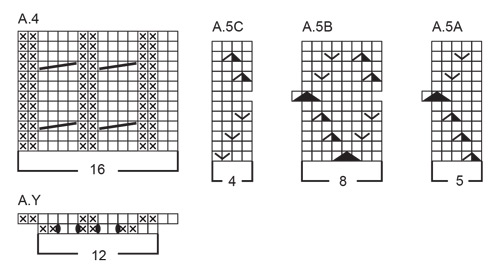
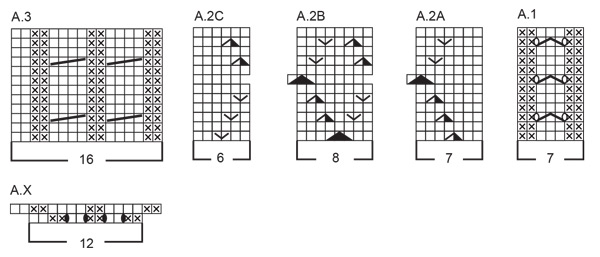
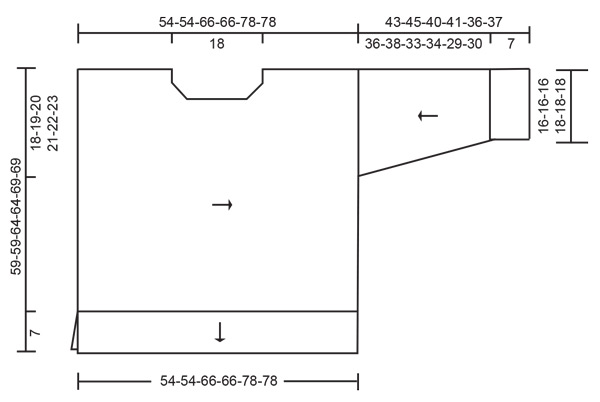
------------------------------------------------------- EXPLANATIONS FOR THE PATTERN: ------------------------------------------------------- EDGE STITCH (worked back and forth): Work either 1 or 2 edge stitches at the beginning and end of the rows as described in the text. These stitches are knitted from both the right and wrong side (garter stitch). PATTERN: See diagrams A.1 to A.5. The diagrams show all rows in the pattern from the right side. A.X and A.Y show the increases for the cables. INCREASE TIP (for sleeves): Start 1 stitch before the marker-thread, 1 yarn over, knit 2 (marker-thread sits between these 2 stitches), 1 yarn over. On the next round knit the yarn overs twisted to avoid holes. Then work the new stitches in stocking stitch. ITALIAN CAST-OFF: Sew Italian cast-off to give an elastic edge. The strand-ends that are used for this must be a least 4 times longer than the piece which is to be cast off. Start by “locking” the 1st stitch as follows: Insert the needle into the 1st stitch as if to purl and tighten. Do not slip the stitch from the needle. Insert the needle from the back between the 1st and 2nd stitch so that the strand comes to the front, pull the strand through, insert the needle into the 2nd stitch as if to knit, pull the strand through. Insert the needle into the into the 1st stitch as if to knit, pull the strand through, then slip the 1st stich off the needle. Insert the needle into the 2nd stitch as if to purl, pull the strand through, insert the needle into the 1st stitch as if to purl, pull the thread through then slip the 1st stitch off the needle (the strand is now at the back of the work). From the back, insert the needle between the 1st and 2nd stitch, pull the strand through. From the front, insert the needle into the 2nd stitch as if to knit, pull the strand through, insert the needle into the 1st stitch as if to knit, pull the strand through, slip the 1st stitch from the needle. Now start casting off in rib. 1: When casting off a purled stitch, sew as follows: Insert the needle into the 2nd stitch (a knitted stitch) as if to purl, pull the strand through, Insert the needle into the 1st stitch (a purled stitch) as if to purl, pull the strand through, slip 1st stitch from the needle (the strand is now at back of piece). 2: When casting off a knitted stitch, sew as follows: From the back, insert the needle between 1st and 2nd stitch, pull the strand through. From the front, insert the needle into the 2nd stitch (a purled stitch) as if to knit, pull the strand through, insert the needle into the 1st stitch as if to knit, pull the strand through, slip 1st stitch from the needle. Repeat directions 1 and 2 until all stitches are cast off (the last 2 stitches are cast off in the same way even though they are both knitted stitches). Pull the strand through the last stitch. ------------------------------------------------------- START THE PIECE HERE: ------------------------------------------------------- JUMPER - SHORT OVERVIEW OF THE PIECE: The front and back pieces are worked as one large piece, sideways from right to left. Stitches are cast off for the neckline in the middle and the front and back pieces continued separately until the neckline is finished, then joined again and finished as one piece. The sleeves are worked in the round, bottom up. The piece is sewn together and stitches knitted up for the rib around the bottom. The neck is worked to finish. RIGHT SIDE OF PIECE (when the garment is worn): Cast on 169-169-185-185-201-201 stitches with circular needle size 5 mm, 1 strand DROPS Merino Extra Fine and 1 strand DROPS Kid-Silk (2 strands). Knit 1 row from the right side, then knit 1 row from the wrong side. Insert 1 marker in the 85th-85th-93rd-93rd-101st-101st stitch on the row. The first 84-84-92-92-100-100 stitches from the right side are the front piece, the last 84-84-92-92-100-100 stitches are the back piece. The marker-stitch marks the top of the shoulder – allow it to follow your work onwards. Work as follows from the right side: 1 EDGE STITCH – read description above, 6 stocking stitches, A.1, 21-21-21-21-29-29 stocking stitches, A.X, A.1, 61-61-77-77-77-77 stocking stitches (marker sits in the 31st-31st-39th-39th-39th-39th of these stitches), A.1, A.Y, 21-21-21-21-29-29 stocking stitches, A.1, 6 stocking stitches, 1 edge stitch = 177-177-193-193-209-209 stitches. Work back from the wrong side with knit over knit and purl over purl. Work as follows from the right side: 1 edge stitch, 6 stocking stitches, A.1, A.2A, work A.2B 1-1-1-1-2-2 times, A.2C, A.3, A.1, A.2A, work A.2B 6-6-8-8-8-8 times, A.2C, A.1, A.4, A.2A, work A.2B 1-1-1-1-2-2 times, A.2C, A.1, 6 stocking stitches, 1 edge stitch. Continue this pattern back and forth until there is 1 row left in the 3rd-3rd-4th-4th-5th-5th repeat in height of A.2 (the row from wrong side still unworked). On the next row cast off for the neckline as follows: Work as before until there are 6 stitches left before the marker-stitch, cast off 16 stitches (6 stitches before the marker-stitch on the back piece, the stitch with the marker and 9 stitches after the marker-stitch on the front piece), work to end of row. The piece measures approx. 19-19-25-25-31-31 cm from the cast-on edge. Continue the front and back pieces separately. FRONT PIECE: = 79-79-87-87-95-95 stitches. Continue the pattern back and forth and cast off for the neck at the beginning of each row from the wrong side as follows: 2 stitches 3 times = 73-73-81-81-89-89 stitches. Continue the pattern back and forth until there are 6 rows left on the 6th-6th-7th-7th-8th-8th repeat in height of A.2 from the cast-on edge. Now increase for the neckline by casting on 2 stitches at the end of each row from the right side 3 times = 79-79-87-87-95-95 stitches. Work back from the wrong side. Place the stitches on a stitch holder. BACK PIECE: = 82-82-90-90-98-98 stitches. Start from the right side and continue the pattern back and forth. After having worked 2 rows, cast off 2 stitches for the neckline on the next row from the right side = 80-80-88-88-96-96 stitches. Continue the pattern back and forth until there are 3 rows left on the 6th-6th-7th-7th-8th-8th repeat of A.2 from the cast-on edge (with the next row from the wrong side). On the next row cast on 2 stitches at the end of the row for the neckline = 82-82-90-90-98-98 stitches. On the next row from the wrong side cast on 16 stitches at the end of the row = 98-98-106-106-114-114 stitches. A.2 has now been worked 6-6-7-7-8-8 times in height. LEFT SIDE OF THE PIECE (when the garment is worn): Place the front and back piece on the same needle = 177-177-193-193-209-209 stitches. Start from the right side and continue the pattern. Continue until A.2 has been worked 3-3-4-4-5-5 times in height after the neckline (9-9-11-11-13-13 times from the cast-on edge on the right side of the piece). Work 1 row as before from the right side, so the squares in A.2 are closed at the top – AT THE SAME TIME on this row decrease 2 stitches over each cable in A.3 and A.4 by knitting the stitches together 2 and 2 = 169-169-185-185-201-201 stitches. Work back from the wrong side with knit over knit and purl over purl. Cast off with knit from right side. The piece measures approx. 54-54-66-66-78-78 cm from the cast-on edge. RIB ON BOTTOM OF BACK PIECE: Knit up from the right side 113-113-139-139-163-163 stitches inside 1 edge stitch with circular needle size 3.5 mm and 1 strand of each quality (2 strands). The stitch number should be divisible by 2 + 1. Work as follows from the wrong side: 2 edge stitches, * purl 1, knit 1 *, work from *-* until there are 3 stitches left, purl 1 and 2 edge stitches. Work this rib back and forth for 7 cm. Sew ITALIAN CAST-OFF – read description above (or cast off with knit over knit and purl over purl). The piece measures approx. 59-59-64-64-69-69 cm from the marker on the shoulder. RIB ON BOTTOM OF FRONT PIECE: Work in the same way as the back piece. SLEEVES: Cast on 62-64-66-68-72-74 stitches with double pointed needles size 3.5 mm and 1 strand of each quality (2 strand). Knit 1 round. Work rib in the round (knit 1, purl 1) for 7 cm. Knit 1 round and decrease 11-13-15-9-13-15 stitches evenly spaced = 51-51-51-59-59-59 stitches. Insert a marker thread at the beginning of the round and allow it to follow the piece onwards. Change to double pointed needles size 5 mm. Knit 1 round, then work the next round as follows: 1 stocking stitch, A.5A, work A.5B 5-5-5-6-6-6 times, A.5C, 1 stocking stitch. Continue this pattern. When the sleeve measures 10 cm, increase 1 stitch on each side of the marker-thread – read INCREASE TIP. Increase like this every 12-6-4-7-3-3 cm a total of 3-5-6-4-6-7 times = 57-61-63-67-71-73 stitches. Work until the sleeve measures approx. 43-45-40-41-36-37 cm – it is neatest to finish after round 2 or 8 in A.5. Cast off a little loosely with knit. Work the other sleeve in the same way. ASSEMBLY: Insert 1 marker in both the front and back pieces, 18-19-20-21-22-23 cm down from the marker on the shoulder = armhole (measure the top of the sleeve – the armhole should match). Sew the side seams inside the cast-off/cast-on edges (the ridge should be visible) – start under the armhole and sew down to the rib = 7 cm split in each side. Sew in the sleeves between the markers, inside the cast-off/cast-on edges on the body (the ridge should be visible). DOUBLE NECK: Use short circular needle size 3.5 mm and 1 strand of each quality (2 strands). Knit up from the right side 104 to 116 stitches around the neck, inside 1 edge stitch. The stitch count should be divisible by 2. Work rib in the round (knit 1, purl 1) for 14-14-15-15-16-16 cm. Cast off with rib. Fold the neck double to the inside and sew down. To avoid the neck being tight and rolling outwards, it is important that the seam is elastic. |
||||||||||||||||||||||||||||||||||
Diagram explanations |
||||||||||||||||||||||||||||||||||
|
||||||||||||||||||||||||||||||||||
 |
||||||||||||||||||||||||||||||||||
 |
||||||||||||||||||||||||||||||||||
 |
||||||||||||||||||||||||||||||||||
 |
||||||||||||||||||||||||||||||||||
Have you finished this pattern?Tag your pictures with #dropspattern #snowflakesweater or submit them to the #dropsfan gallery. Do you need help with this pattern?You'll find 35 tutorial videos, a Comments/Questions area and more by visiting the pattern on garnstudio.com. © 1982-2026 DROPS Design A/S. We reserve all rights. This document, including all its sub-sections, has copyrights. Read more about what you can do with our patterns at the bottom of each pattern on our site. |
||||||||||||||||||||||||||||||||||


With over 40 years in knitting and crochet design, DROPS Design offers one of the most extensive collections of free patterns on the internet - translated to 17 languages. As of today we count 324 catalogues and 12290 patterns translated into English (UK/cm). 12290
We work hard to bring you the best knitting and crochet have to offer, inspiration and advice as well as great quality yarns at incredible prices! Would you like to use our patterns for other than personal use? You can read what you are allowed to do in the Copyright text at the bottom of all our patterns. Happy crafting!
Post a comment to pattern DROPS 243-32
We would love to hear what you have to say about this pattern!
If you want to leave a question, please make sure you select the correct category in the form below, to speed up the answering process. Required fields are marked *.