
Popular categories
Looking for a yarn?


Comments / Questions (101)
![]() Marit Ovesen wrote:
Marit Ovesen wrote:
Hei. Jeg strikker i str Xl. Nå er jeg ferdig med alle fellinger og har 240 masker, men pluss di fire merke maskene. Strikket tidligere en i M og det samme skjedde. Kan ikke se att jeg har gjort noe feil. Hvordan gjør jeg det når jeg nå skal dele opp?
18.04.2026 - 22:54DROPS Design answered:
Hei Marit. Du mener kanskje økningene? Oppskriften er oversendt til Design avd. slik at de kan dobbeltsjekke. mvh DROPS Design
20.04.2026 - 13:15
![]() Natalia wrote:
Natalia wrote:
Me encanta este diseño y me gustaría tejerlo, pero tengo lana merino extra, 60% lana y 40% acrílico (240 metros por 100 gramos). ¿Me podría decir por favor cuántos puntos necesito para empezar para la talla M y qué número de aguja? ¡Muchas gracias!
29.03.2026 - 22:09DROPS Design answered:
Hola Natalia, DROPS Melody es un hilo con una textura muy concreta, para que el hilo sea algo gordo, pero ligero. Sin embargo, el hilo indicado no tiene esta ligereza, por lo que la textura quedará muy pesada y la forma no se mantendrá correctamente. En todo caso, si quieres usar el hilo indicado, tendrías que hacer una muestra, compararla a la de la labor y hacer una regla de 3 para recalcular el patrón o probar con otro número de aguja puedes leer cómo hacerlo aquí.
29.03.2026 - 23:39
![]() Katharina wrote:
Katharina wrote:
Wird der Pullover ein- oder zweifädig gestrickt?
15.03.2026 - 12:08DROPS Design answered:
Hallo Katharina, der Pullover wird einfädig gestrickt. Viel Spaß beim Stricken!
15.03.2026 - 12:41
![]() Monica wrote:
Monica wrote:
I videoen ser det ud som om der på vrangsiden ved raglan bliver lavet drejet vrang, før og efter maskemarkøren, men det står ikke i opskriften, ligesom der laves drejet ret fra ret siden. Er det korrekt eller noget ser jeg forkert?
23.02.2026 - 01:08DROPS Design answered:
Hei Monica. Mange av våre videoer er generelle videoer. Så ofte kan det være fint å se videoen som viser en teknikk, men man må følge teksten i den oppskriften man strikker etter (se godt øverst i oppskriften under f.eks RAGLAN, der står det som regel hvordan økningen skal strikkes). mvh DROPS Design
03.03.2026 - 14:12
![]() Grace wrote:
Grace wrote:
Hi, I'm at the yoke in size L. Once I've increased a total of 12 times, I ended up with 140 stitches. Is this correct? There's no mention of this in the pattern, so I just want to make sure I'm on the right track. Thank you.
14.02.2026 - 03:50DROPS Design answered:
Hi Grace, In your size, after all the increases for raglan you should have 220 stitches: Start with 76 stitches, increase 8 stitches x 12 = 96 increased stitches, then increase 8x4 stitches (on body) + 4 x 4 stitches (on sleeves) = 48 increased stitches. 76 + 96 + 48 = 220 stitches. Hope this helps, Regards, Drops Team.
18.02.2026 - 07:17
![]() Grace wrote:
Grace wrote:
Hi, I'm at the short rows of the neckline. For the raglan increases, am I supposed to be increasing on the wrong side as well? It's not specified in the pattern, but in the video that's what is shown.
13.02.2026 - 12:49
![]() Britt-marie wrote:
Britt-marie wrote:
Varför måste jag klippa av tråden som det står i mönstret?
04.02.2026 - 21:16DROPS Design answered:
Hej Britt-Marie, du klipper tråden da du skal starte næste stykke et andet sted :) ... du bestemmer jo selv og du vælger at strikke frem til der hvor du skal starte :)
05.02.2026 - 11:21
![]() Shelley wrote:
Shelley wrote:
Hello I am knitting the Blueberry Cream sweater in size large the pattern states “Work until the sleeve measures 39-36-35-32-31-28 cm from the division. Knit 1 round where you decrease 15-17-19-19-19-23 stitches” …does this mean that is the only decrease round for the whole sleeve? Meaning 35 cm from division I would decrease evenly 19 stitches on that round only? There are no other decrease rows on the sleeve? Can you please clarify. Thanks, Shelley
02.02.2026 - 17:00DROPS Design answered:
Hi Shelley, Yes, the pattern is for wide sleeves which narrow at the cuff giving the shape you see in the photo and, in your size, this means no decreases until the bottom of the sleeve. This is of course optional and you can decrease as described for the larger sizes if you wish. Regards, Drops Team.
03.02.2026 - 07:25
![]() Stephanie wrote:
Stephanie wrote:
Hi, ich bin jetzt soweit das alle Raglanmaschen zugenommen wurden und bis zu der korrekten Länge weiter gestrickt werden soll. Allerdings fehlt mir ziemlich viel bis zu der gewünschten Länge (25cm bei Größe L). Nach allen Zunahmen habe ich nur ca. 18cm ab der Doppelhalsblende, heißt ich müsste 7cm ohne Zunahmen weiterstricken. Das kommt mir ziemlich viel vor. Kann es trotzdem korrekt sein? Meine Maschenprobe hat genau gestimmt und ich arbeite mit Drops Melody und 6mm Nadeln.
24.01.2026 - 13:17DROPS Design answered:
Liebe Stephanie, leider hat sich ein Fehler in der Anleitung eingeschlichen - Sie müssen an der vorderen Mitte messen, nicht an der hinteren. Dann sollte es passen - Sie stricken 40 Runden mit Zunahmen, das ergibt laut Maschenprobe 25 cm. Wenn die Maschenprobe bei Ihnen in der Höhe stimmt, sollten Sie die 25 cm dann erreichen. Zumindest sollten es dann nicht mehr 7 cm Unterschied sein. Viel Spaß beim Weiterstricken!
25.01.2026 - 11:44
![]() Gabriela wrote:
Gabriela wrote:
Hi! I'm working on size L and I'm about to separate the body from the sleeves. I have a total of 220 stitches on my needles but, adding up the stitches I must knit and place (35+43+67+43+32), the total is 240 stitches. What should I do?
24.01.2026 - 05:14DROPS Design answered:
Hi Gabriela, You work 35 stitches, place 43 on a stitch holder, cast on 12 stitches, work 67, place 43 on a stitch holder, cast on 12 and work 32 stitches. Not counting the cast-on stitches, you work 35 + 43, + 67 + 43 + 32 = 220 stitches. Regards, Drops Team.
24.01.2026 - 08:42
|
|
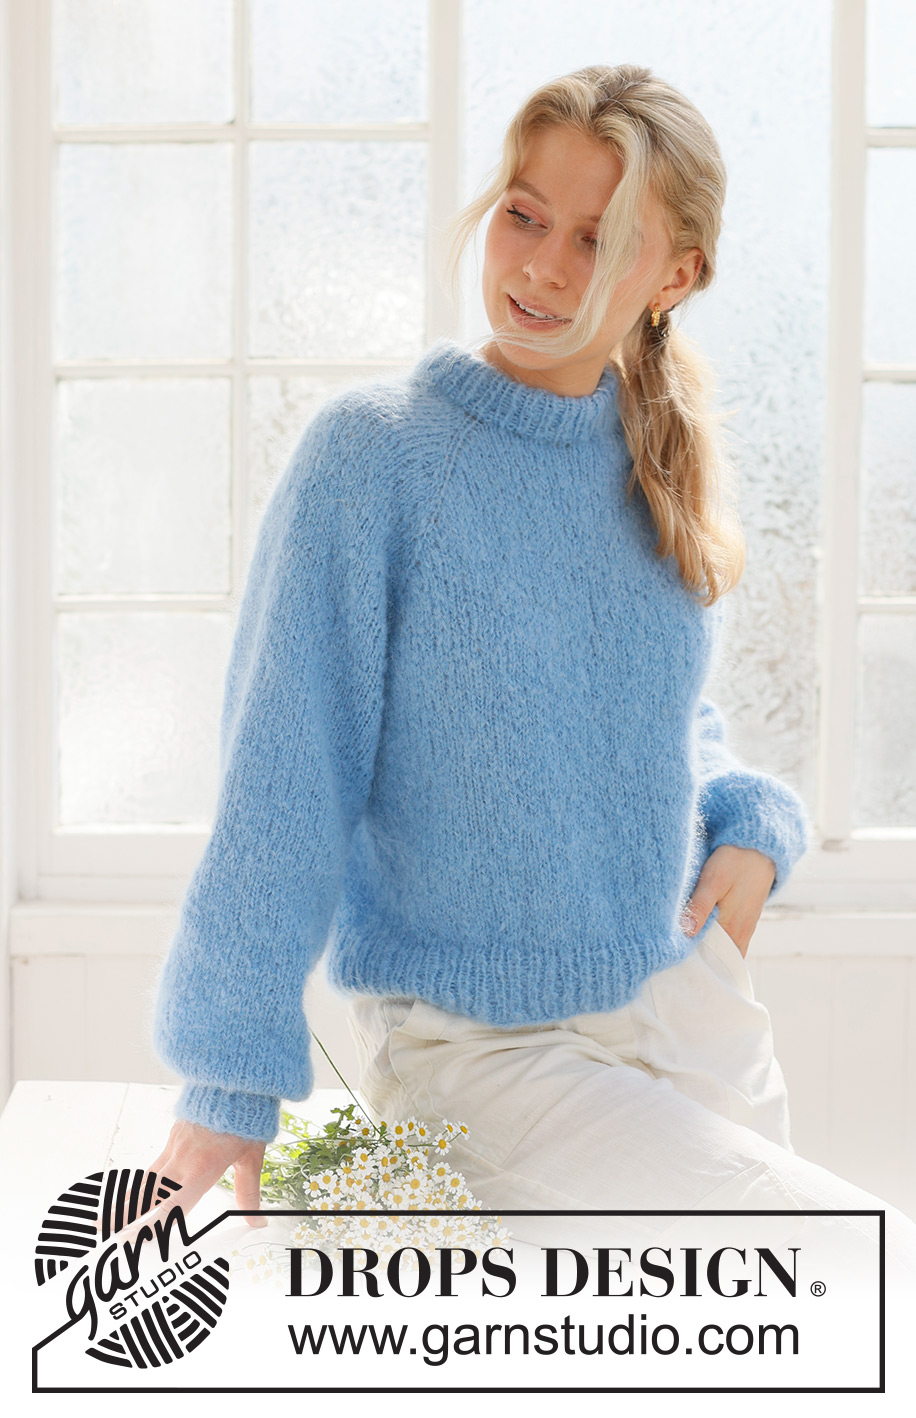
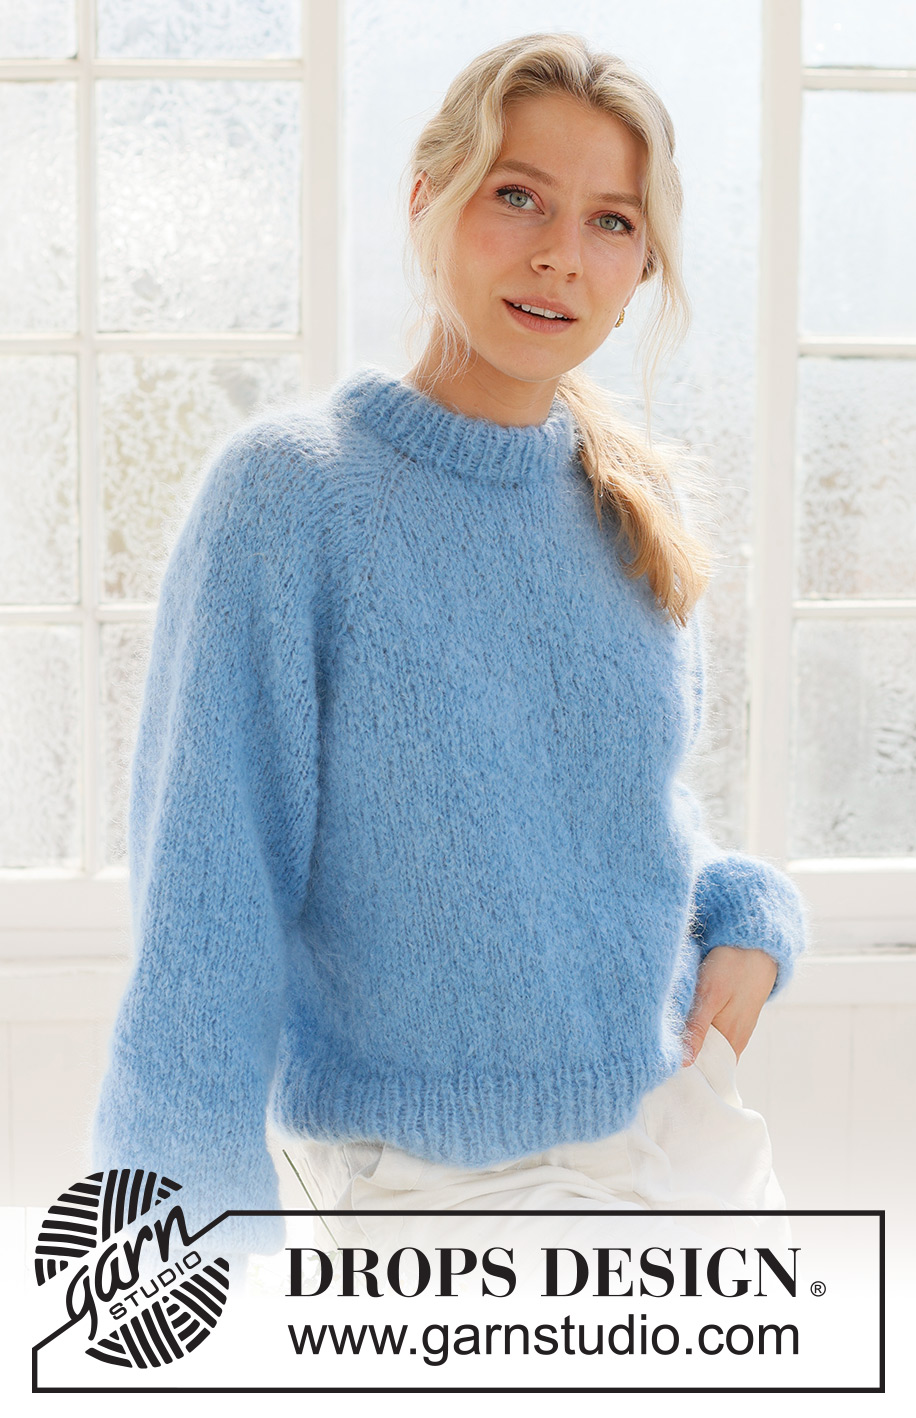
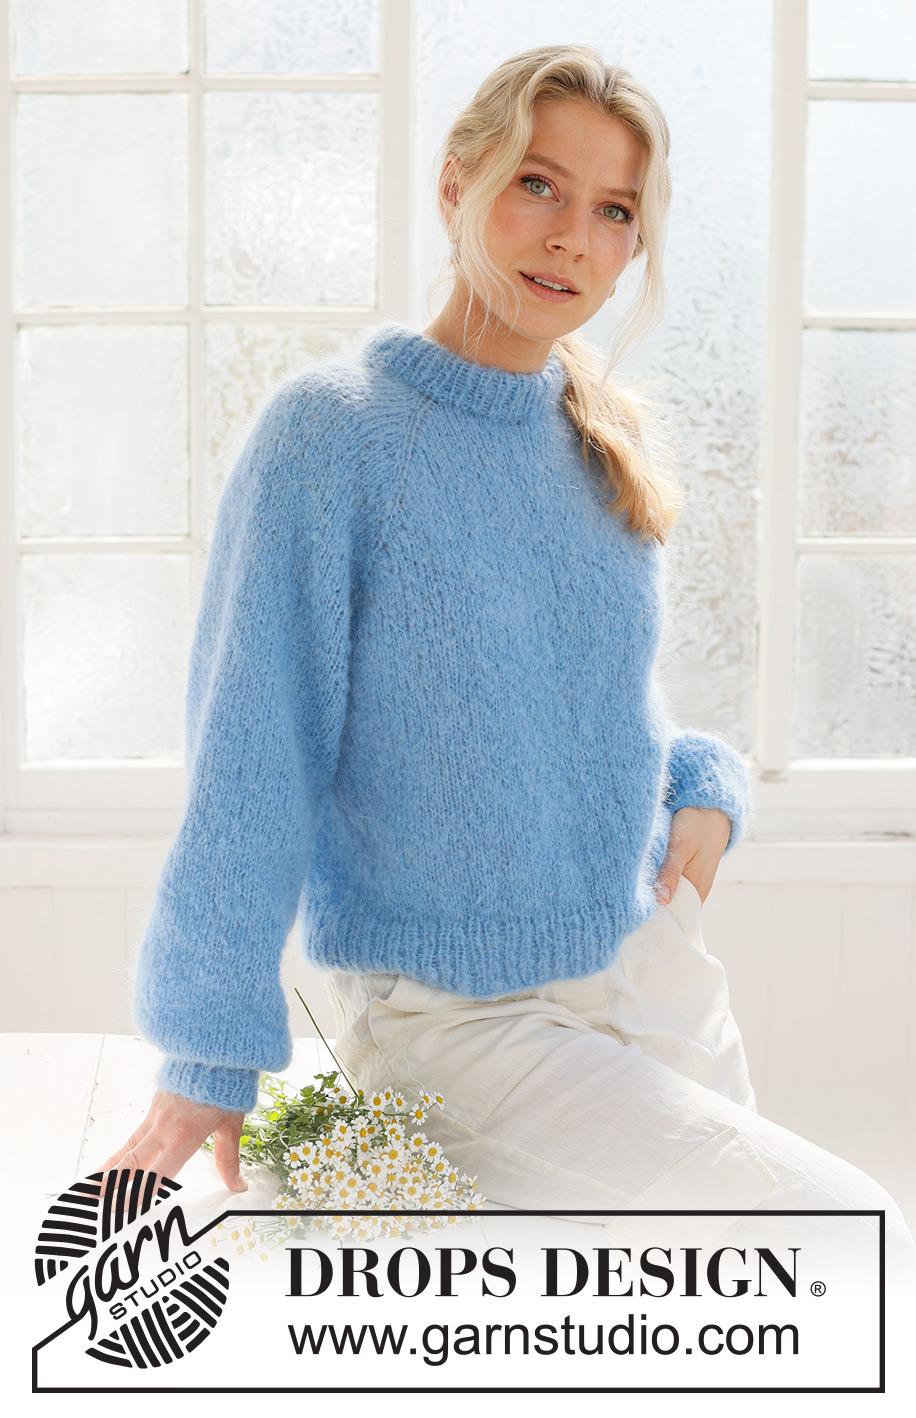
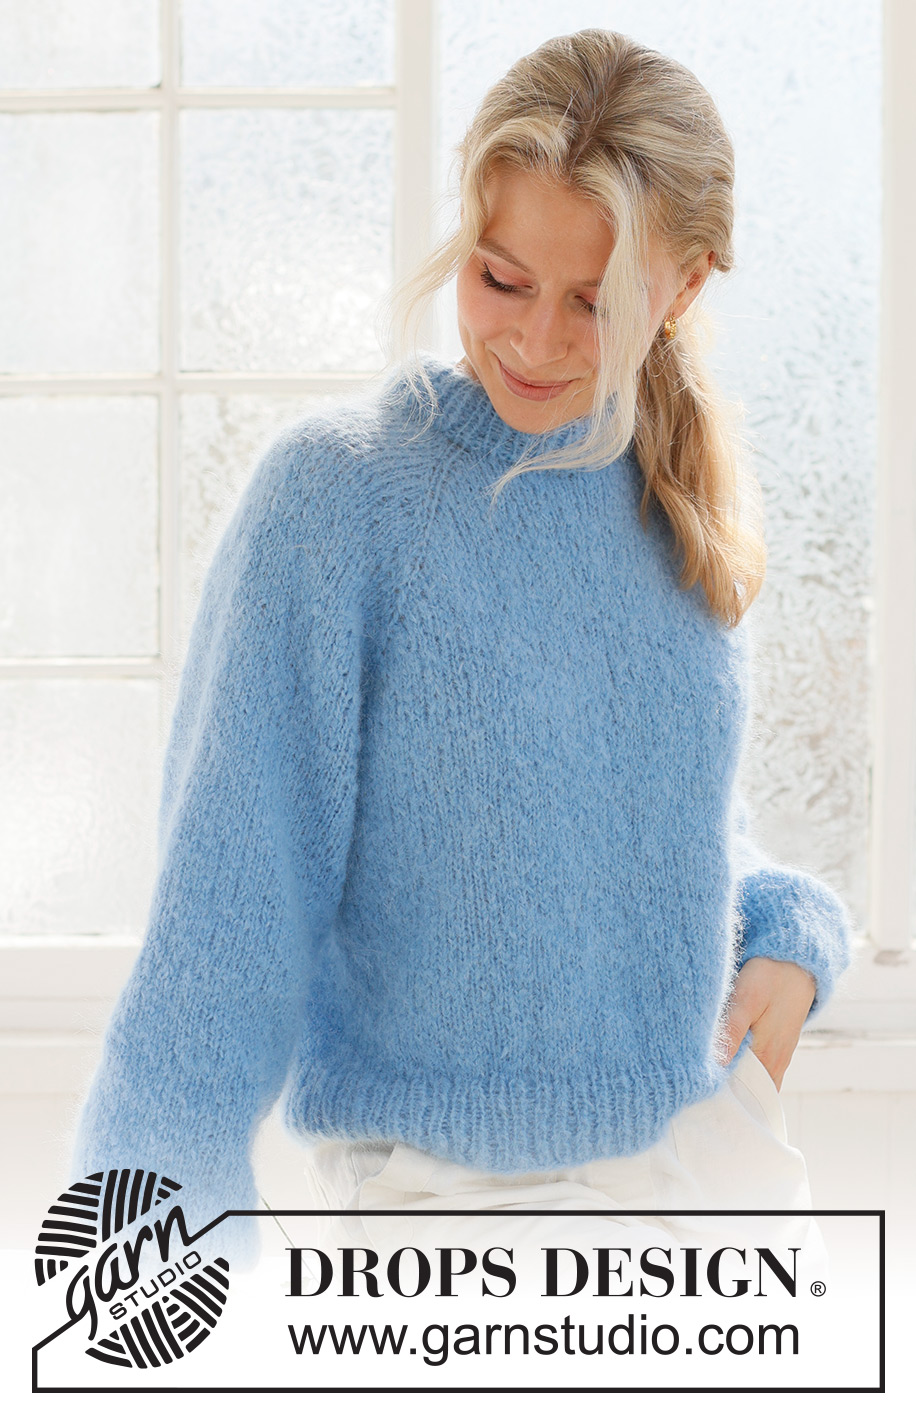
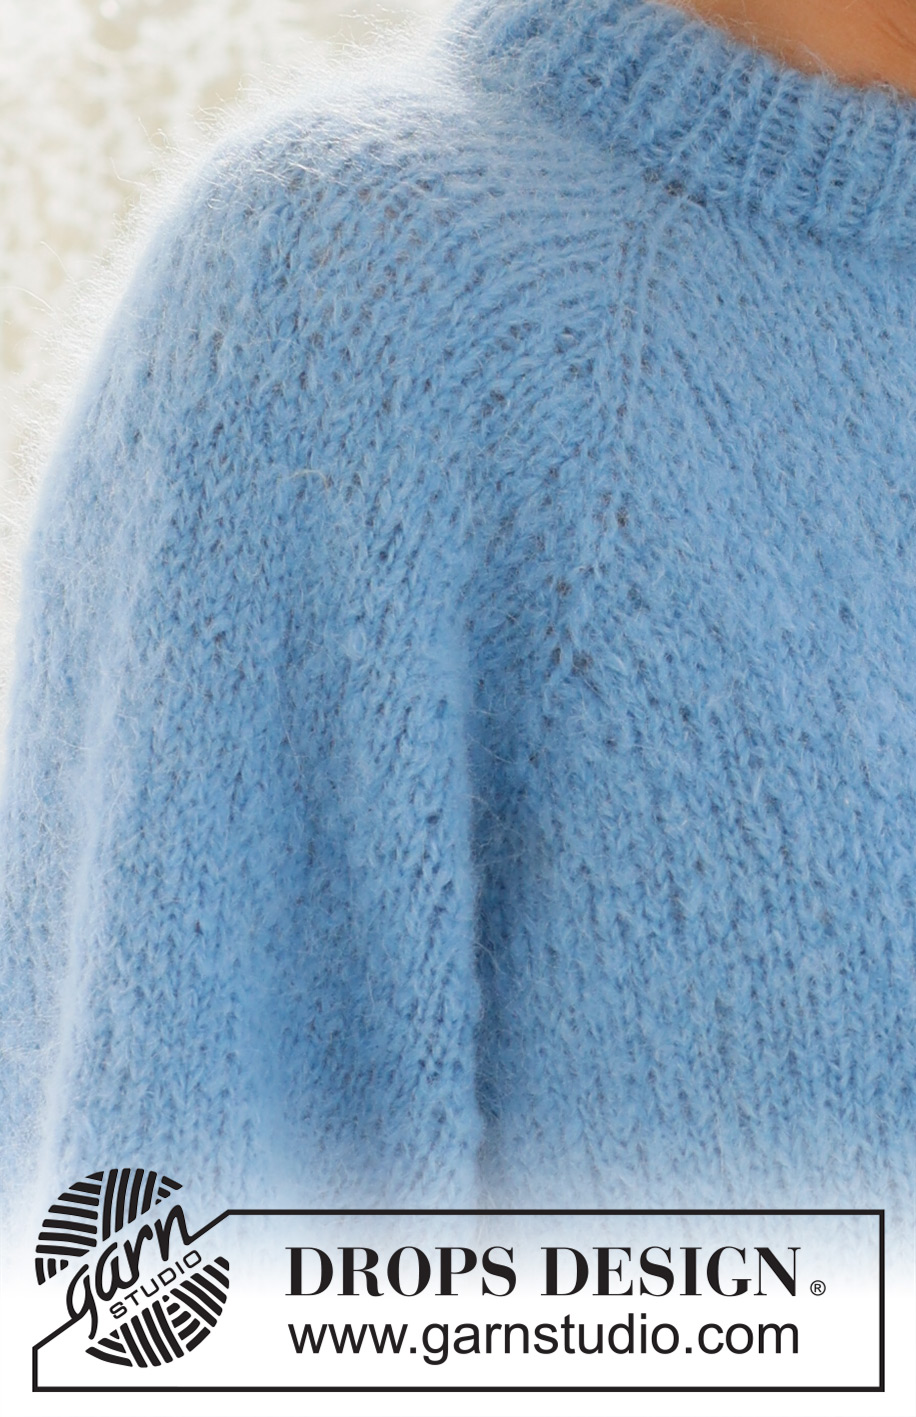
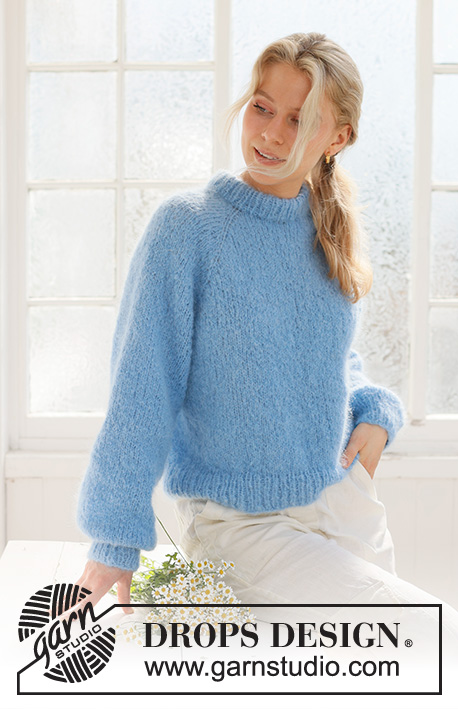
Blueberry Cream Sweater#blueberrycreamsweater |
|
 |
 |
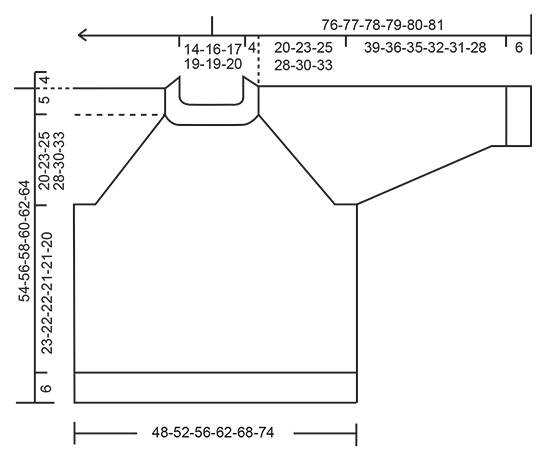
Knitted jumper in DROPS Melody. The piece is worked top down, with raglan and double neck. Sizes S - XXXL.
DROPS 231-57 |
|
|
------------------------------------------------------- EXPLANATIONS FOR THE PATTERN: ------------------------------------------------------- RAGLAN: Increase 1 stitch on each side of the stitches with a marker (8 stitches increased on the round). Increase 1 stitch by making 1 yarn over; on the next row/round work the yarn overs twisted to avoid holes. Then work the new stitches in stocking stitch. DECREASE TIP (mid-under sleeves): Start 3 stitches before the marker, knit 2 together, knit 2 (marker sits between these 2 stitches), slip 1 stitch as if to knit, knit 1 and pass the slipped stitch over the knitted stitch. ------------------------------------------------------- START THE PIECE HERE: ------------------------------------------------------- JUMPER - SHORT OVERVIEW OF THE PIECE: The neck and yoke are worked in the round with circular needle, top down. The yoke is divided for the body and sleeves and the body is continued in the round. The sleeves are worked in the round with double pointed needles/short circular needle. DOUBLE NECK: Cast on 68-72-76-80-80-84 stitches with DROPS Melody, using a short 4.5 mm and a short 6 mm circular needle held together. Pull out the needle size 6 mm and continue with size 4.5 mm (this makes the cast-on edge elastic). Work rib in the round (knit 1, purl 1) for 9 cm. Fold the neck double to the inside – work the next round of rib as before, working every other stitch together with every other stitch on the cast-on edge. Change to circular needle size 6 mm On the next round insert 4 markers as described below. Each marker is inserted in a knitted stitch and will be used when increasing to raglan. Insert a marker thread at the beginning of the round = approx. mid-back. Work the next round as follows from the marker thread: Knit 10-10-12-12-12-14, make 1 yarn over, insert marker 1 in the next stitch, knit this stitch, make 1 yarn over, knit 15 (sleeve), 1 yarn over, insert marker 2 in the next stitch, knit this stitch, 1 yarn over, knit 17-19-21-23-23-25 (front piece), 1 yarn over, insert marker 3 in the next stitch, knit this stitch, 1 yarn over, knit 15 (sleeve), 1 yarn over, insert marker 4 in the next stitch, knit this stitch, 1 yarn over, knit 7-9-9-11-11-11 = 76-80-84-88-88-92 stitches. Knit 1 round, with the yarn overs knitted twisted. Cut the strand. NECK-LINE: Now work a neck-line with short rows as follows. Start from the right side, 3 stitches before marker 3 (i.e. on the left-hand side of the front neck, when garment is worn), knit until you are 3 stitches past marker 2 (= right-hand side of the front neck) – AT THE SAME TIME on this row increase to RAGLAN – read description above. Turn, tighten the strand and purl back from the wrong side to 7 stitches past marker 3. Turn, tighten the strand and knit to 7 stitches past marker 2 – remember to increase to raglan. Turn, tighten the strand and purl to 3 stitches past marker 3. Cut the strand and work the yoke as described below. YOKE: Start at the marker thread mid-back and work stocking stitch in the round over all stitches. AT THE SAME TIME continue to increase to raglan every 2nd round until you have increased a total of 8-10-12-14-20-22 times (including the increases on the short rows). Continue with stocking stitch and increases to raglan, but every second increase, increase only on the body (4 increased stitches); i.e. increase every 2nd round on the body and every 4th round on the sleeves. Increase like this 8-8-8-8-4-4 times on the body (4-4-4-4-2-2 times on the sleeves). It has been now increased a total of 16-18-20-22-24-26 times on the body and 12-14-16-18-22-24 times on the sleeves. After the final increase there are 180-200-220-240-264-284 stitches. The piece measures approx. 20-23-25-28-30-33 cm measured mid-front; continue working, if necessary, to the correct length. On the next round divide for the body and sleeves as follows: Work 29-31-35-37-41-45 stitches as before (approx. ½ back piece), place the next 35-39-43-47-51-55 stitches on a thread for the sleeve, cast on 12-12-12-14-14-16 stitches (in side under sleeve), work 55-61-67-73-81-87 stitches (front piece), place the next 35-39-43-47-51-55 stitches on a thread for the sleeve, cast on 12-12-12-14-14-16 stitches (in side under sleeve), work the last 26-30-32-36-40-42 stitches (approx. ½ back piece). The body and sleeves are finished separately. The body is measured from here! BODY: = 134-146-158-174-190-206 stitches. Work stocking stitch in the round for a further 23-22-22-21-21-20 cm. Change to circular needle size 4.5 mm. Work rib (knit 1, purl 1) for 6 cm. Cast off. The jumper measures approx. 54-56-58-60-62-64 cm from the shoulder down. SLEEVES: Place the 35-39-43-47-51-55 stitches from the thread on the one side of the piece on double pointed needles/short circular needle size 6 mm and knit up 1 stitch in each of the 12-12-12-14-14-16 stitches cast on under the sleeve = 47-51-55-61-65-71 stitches. Insert a marker in the middle of the new stitches under the sleeve. Allow the marker to follow your work onwards; it is used when decreasing under the sleeve. Start at the marker and work stocking stitch in the round. SIZES XL-XXL-XXXL: When the sleeve measures 4-4-4 cm from the division, decrease 2 stitches under the sleeve – read DECREASE TIP. Decrease like this every 15-10-10 cm a total of 2-3-3 times (do not decrease in sizes S, M and L) ALL SIZES: = 47-51-55-57-59-65 stitches. Work until the sleeve measures 39-36-35-32-31-28 cm from the division. Knit 1 round where you decrease 15-17-19-19-19-23 stitches evenly spaced = 32-34-36-38-40-42 stitches. Change to double pointed needles size 4.5 mm. Work rib (knit 1, purl 1) for 6 cm. Cast off. The sleeve measures approx. 45-42-41-38-37-34 cm. Work the other sleeve in the same way. |
|
 |
|
Have you finished this pattern?Tag your pictures with #dropspattern #blueberrycreamsweater or submit them to the #dropsfan gallery. Do you need help with this pattern?You'll find 31 tutorial videos, a Comments/Questions area and more by visiting the pattern on garnstudio.com. © 1982-2026 DROPS Design A/S. We reserve all rights. This document, including all its sub-sections, has copyrights. Read more about what you can do with our patterns at the bottom of each pattern on our site. |
|


With over 40 years in knitting and crochet design, DROPS Design offers one of the most extensive collections of free patterns on the internet - translated to 17 languages. As of today we count 324 catalogues and 12290 patterns translated into English (UK/cm). 12290
We work hard to bring you the best knitting and crochet have to offer, inspiration and advice as well as great quality yarns at incredible prices! Would you like to use our patterns for other than personal use? You can read what you are allowed to do in the Copyright text at the bottom of all our patterns. Happy crafting!
Post a comment to pattern DROPS 231-57
We would love to hear what you have to say about this pattern!
If you want to leave a question, please make sure you select the correct category in the form below, to speed up the answering process. Required fields are marked *.