
Popular categories
Looking for a yarn?


Comments / Questions (15)
![]() Carola Kaandorp wrote:
Carola Kaandorp wrote:
Deze trui van katoengaren werd bij mij niet mooi, doordat de verschillende onderdelen sterk in dichtheid wisselden: rondgebreid met of zonder gaatjes-patroon, heen-en-weer gebreid op lange (schouders) of korte (mouwen) naalden. Had ik verschillende naalddiktes moeten gebruiken? Waarom staat dat niet in het patroon beschreven?
27.12.2024 - 23:09DROPS Design answered:
Dag Carola,
In principe zou je hetzelfde effect moeten krijgen met dezelfde naalddikte, ook als je heen en weer breit en daarnaast ook in de rondte. Het is niet de bedoeling om verschillende naalddiktes te gebruiken omdat dan de stekenverhouding ook anders is.
01.01.2025 - 17:01
![]() Patty Walk wrote:
Patty Walk wrote:
I do not like the look of the baggy cuff for the sleeve of this sweater. Could I cast on less stitches to make it not look so baggy? The number to cast on has to be divisible by three, correct?
15.12.2023 - 07:06DROPS Design answered:
Dear Mrs Walk, correct, the number of stitches to cast on has to be divisible by 3, you can adjust that way to the desire circumference. Happy knitting!
15.12.2023 - 08:31
![]() Patty Walk wrote:
Patty Walk wrote:
Good morning, On the body of the sweater it says to work A2 over all stitches. When A2 has been completed in height.......does this mean I do the 5 rows of A2 from the diagram once then continue on ? Thank you
29.10.2023 - 06:37DROPS Design answered:
Dear Patty, when A.2 has been completed in height means that you have worked all 5 rounds of A.2. So, after the 5 round, on the next round, continue as indicated in the pattern. Happy knitting!
29.10.2023 - 20:08
![]() Dorthe Kolster wrote:
Dorthe Kolster wrote:
Forklaring på ændring af pindestørrelse under strikkefasthed er forkert- der er byttet rundt på større og mindre pinde….
27.06.2023 - 08:59
![]() Noa wrote:
Noa wrote:
Hello can i use drops nepal?
25.02.2023 - 02:55DROPS Design answered:
Hi, yes, DROPS Nepal will work very good with this pattern. Happy knitting!
25.02.2023 - 10:41
![]() Sylvie Lachance wrote:
Sylvie Lachance wrote:
Diagramme A.3A, au premier rang: est ce qu'il existe une vidéo pour expliquer quoi faire avec les 3 mailles en torsade? Aussi, je dois vraiment laisser tomber 2 mailles de l'aiguille dans ma main gauche? Comment puis-je garder un motif à 10 mailles de cette façon, en laissant tomber 2 m? Ça va faire des trous?
13.10.2022 - 00:16DROPS Design answered:
Bonjour Mme Lachance, au 1er rang de A.3 vous allez tricoter les 2 dernières m de A.3A avec la 1ère de A.3B, les 2 dernières de A.3B avec la 1ère m du A.3B suivant/de A.3C; mettez 2 m sur l'aiguille auxiliaire devant l'ouvrage, tricotez 1 maille endroit, tricotez ensuite les mailles de l'aiguille à torsades en commençant par la 2ème puis la 1ère - comme dans cette vidéo, 2ème torsade au time code 1:03. Bon tricot!
13.10.2022 - 09:22
![]() Mark Cameron wrote:
Mark Cameron wrote:
Can someone tell me why the sleeves are transferred from DPN to circular? I don't understand the sleeve cap instruction. Why can't it just continue on DPNs?
22.09.2022 - 13:21DROPS Design answered:
Dear Mrs Cameron, the sleeve cap is worked back and forth reason why stitches are transfered from DPN to circular needle, but you can also keep them on the DPN and continue back and forth - this video might help you; we show there how to work the sleeve cap on DPN in the round then how to sew sleeve onto armhole. Happy knitting!
23.09.2022 - 07:59
![]() Claudia Wächtler wrote:
Claudia Wächtler wrote:
Hallo liebes Drops Team Ich möchte mich ganz lieb bei Euch bedanken.Ihr habt mir immer geholfen wenn ich nicht weiter wußte.Bin sehr froh darüber.Kaufe seit Jahren Wolle von Drops und sehr zufrieden. Liebe Grüße Claudia
24.06.2022 - 10:38
![]() Claudia wrote:
Claudia wrote:
Hallo Wie ist das gemeint 4Maschen vor dem Markierungsfaden.Ich habe das Vorderteil ,die erste Masche bis zur 81 Masche die letzte.Das sind die Maschen mit Diagramm.Da die 4Maschen abketten.Das Rückenteil sind nur rechte Maschen .Danke für eure Hilfe Claudia
24.06.2022 - 07:25DROPS Design answered:
Liebe Claudia, die letzte gerade Reihe in Diagram stricken Sie bis 4 Maschen vor der Rundebeginn übrig sind, dann ketten Sie Maschen für die Armausschnitte so ab: die 4 M vor der Markierung (= die 4 letzten Maschen der Runde) + die 4 ersten Maschen nach der Markierung, dann stricken Sie wie zuvor bis 4 Maschen vor der nächsten Markierung übrig sind, und ketten die nächsten 8 Maschen für den 2. Armausschnitt ab, und dann bis zur Ende der Runde stricken. Viel Spaß beim stricken!
24.06.2022 - 09:05
![]() Claudia wrote:
Claudia wrote:
Hallo Habe eine Frage an Sie.Ich kenne normales Zopfmuster zu Stricken aber das verstehe ich garnicht.Können Sie mir bitte ganz einfach erklären wie den Zopf mit 3Maschen Stricken soll.2Maschen auf eine Zopfnadel vor die Arbeit legen,1Masche rechts die rechte Nadel von hinten zwischen die 2Maschen auf der Zopfnadel stechen u.s.w.Ich verstehe dies nicht so richtig
10.05.2022 - 23:23DROPS Design answered:
Liebe Claudia, dieses Zopf stricken Sie so, daß die erste dieser 3 Maschen wird am Ende gestrickt und liegt vor den 2 anderen: die 2 M legen Sie auf die Zopfnadel vor die Arbeit, stricken Sie die nächste Masche rechts, dann stricken Sie die 2 Maschen auf der Zopfnadel aber zuerst die 2. dann die 1. wie man die 2 Maschen in diesem Video (time code 0:38) strickt. Viel Spaß beim stricken!
11.05.2022 - 08:33
|
|||||||||||||||||||||||||||||||
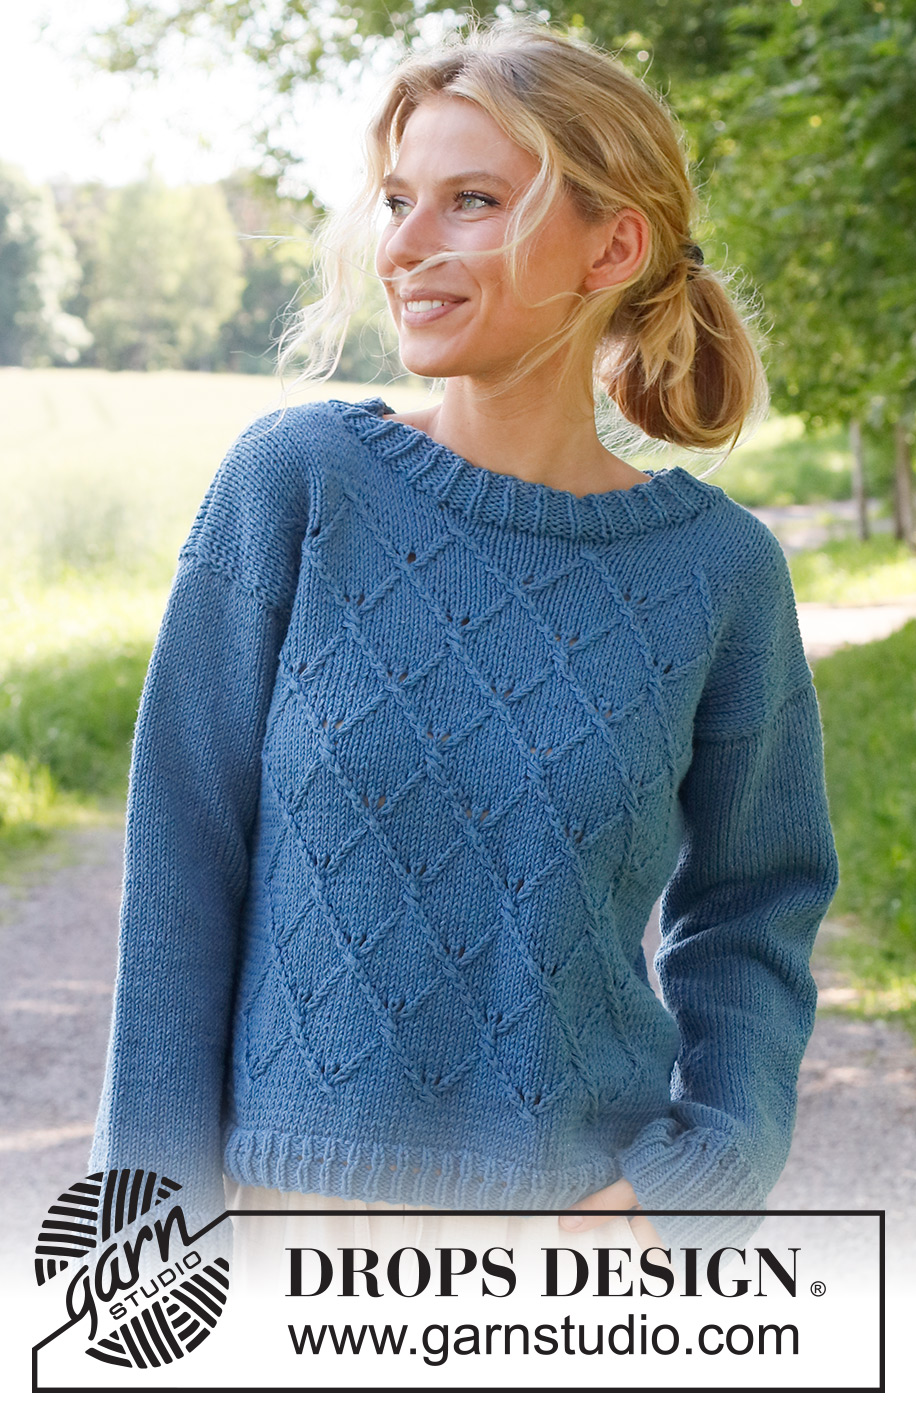
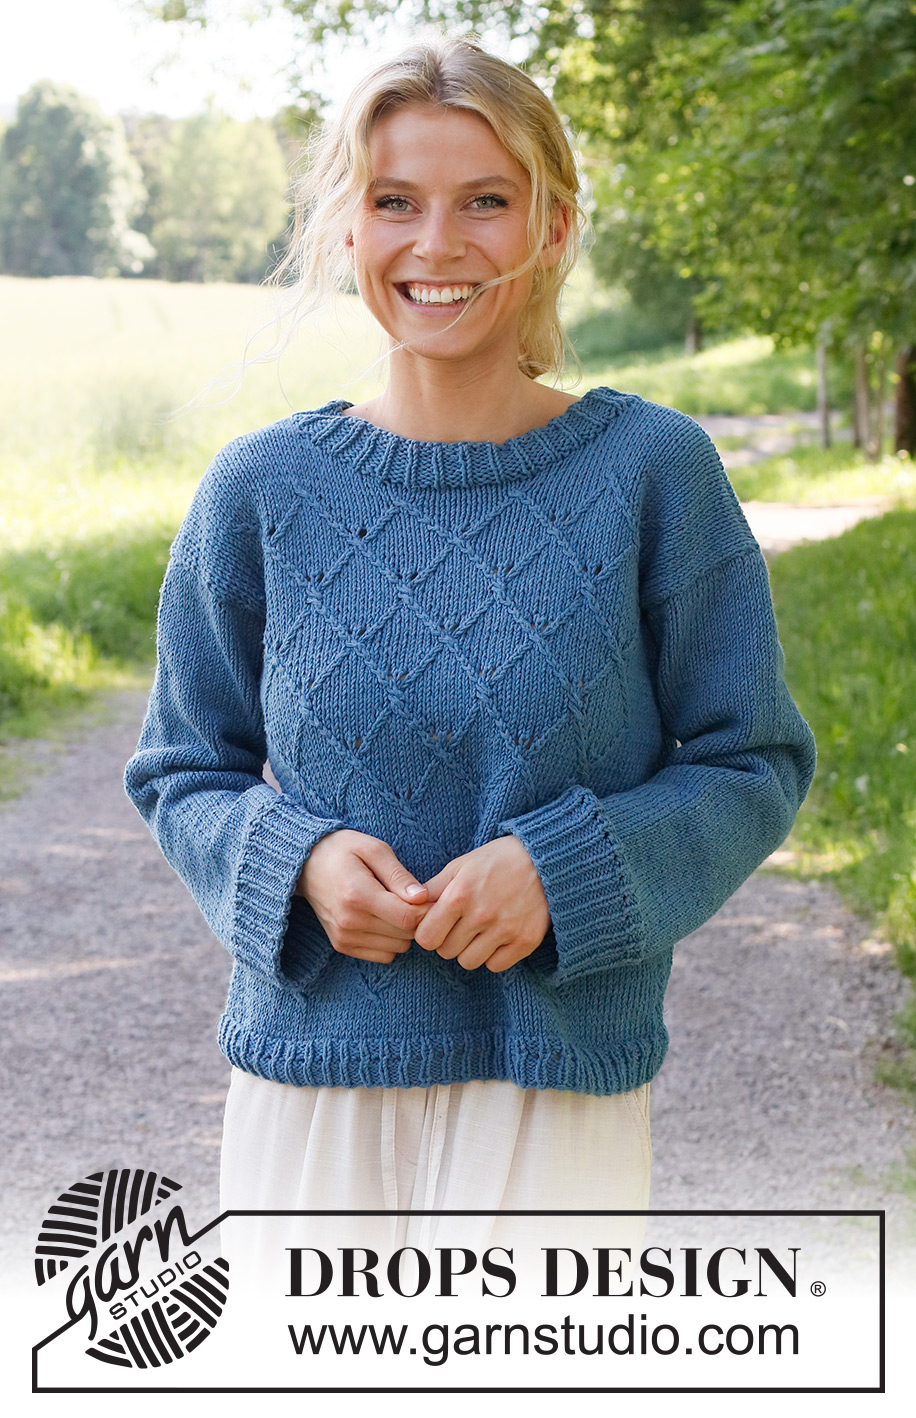
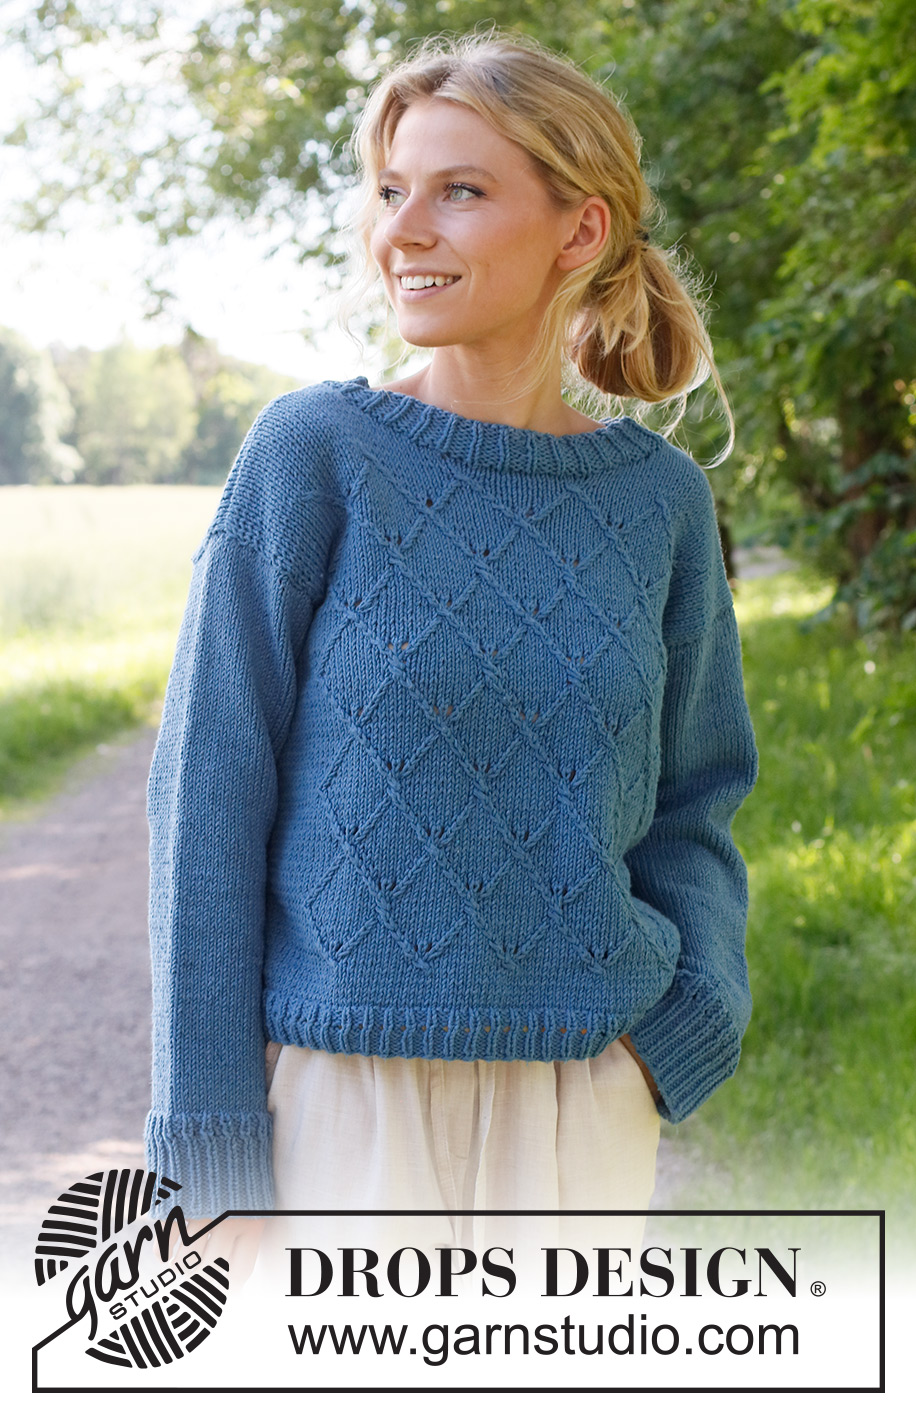
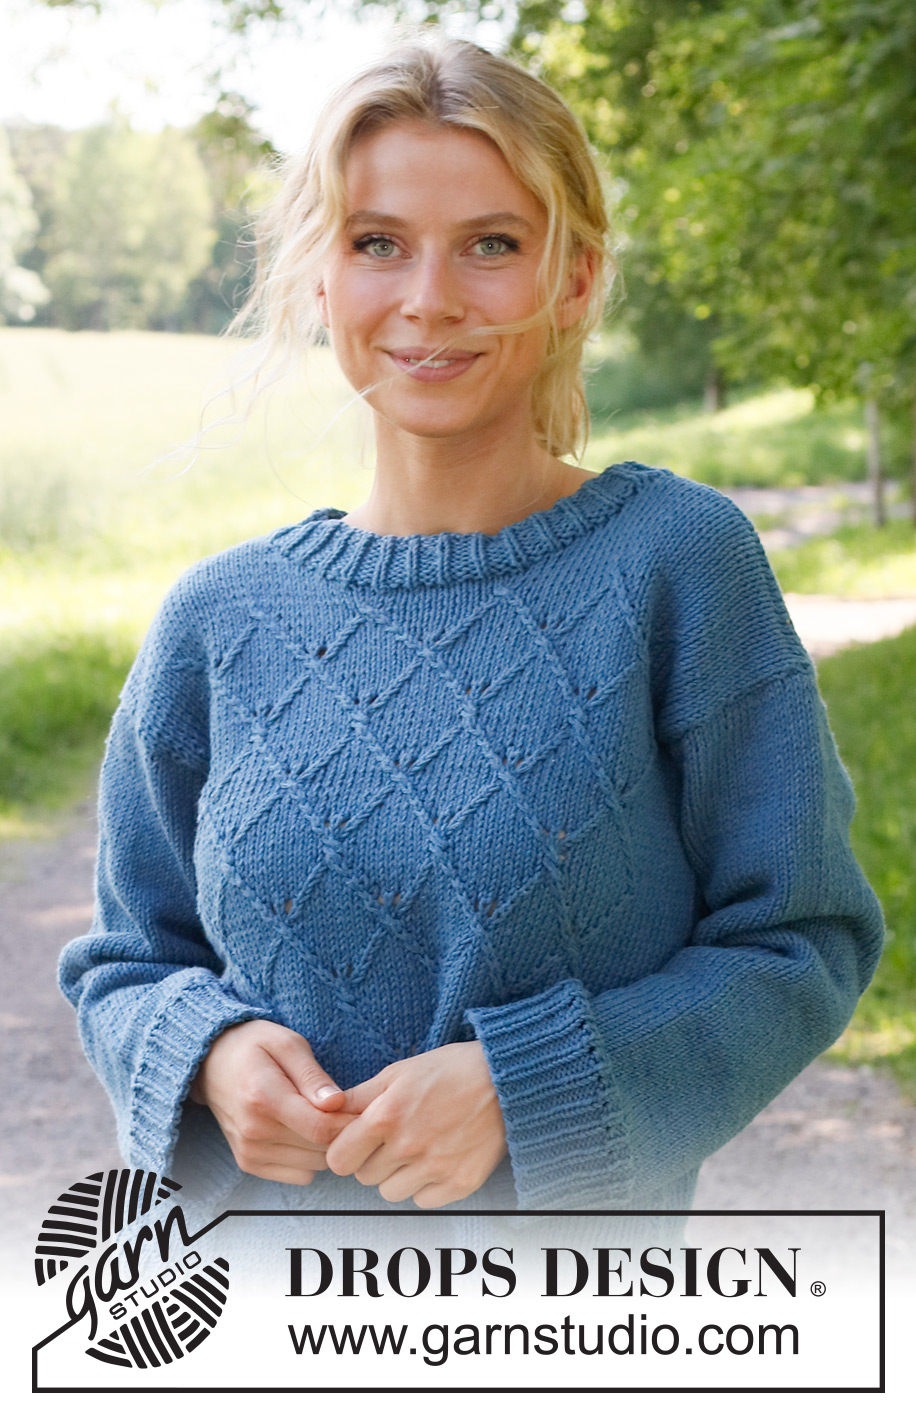
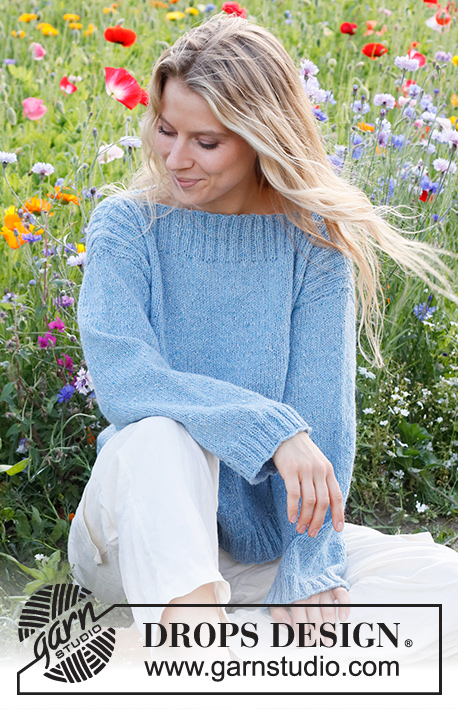
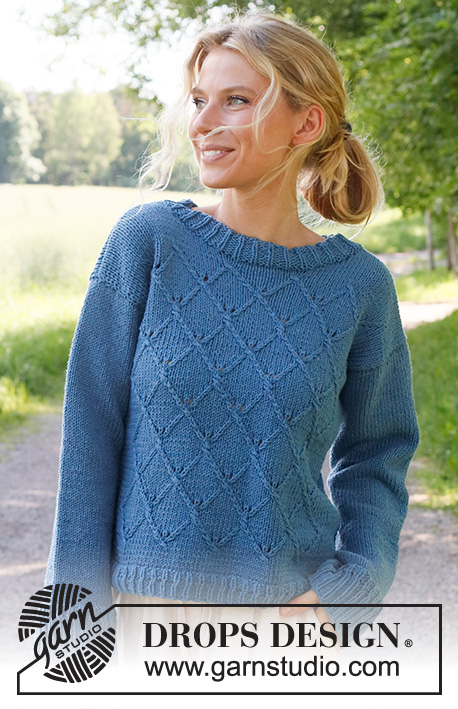
Blue Glass#blueglasssweater |
|||||||||||||||||||||||||||||||
 |
 |
||||||||||||||||||||||||||||||
Knitted jumper in DROPS Paris. The piece is worked bottom up, with relief-pattern. Sizes S - XXXL.
DROPS 230-34 |
|||||||||||||||||||||||||||||||
|
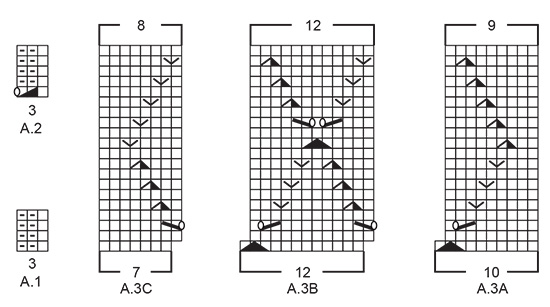
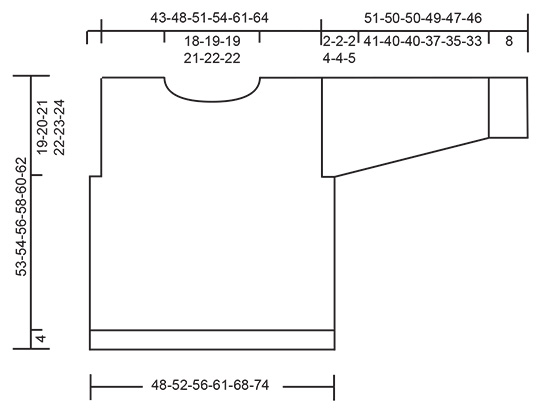
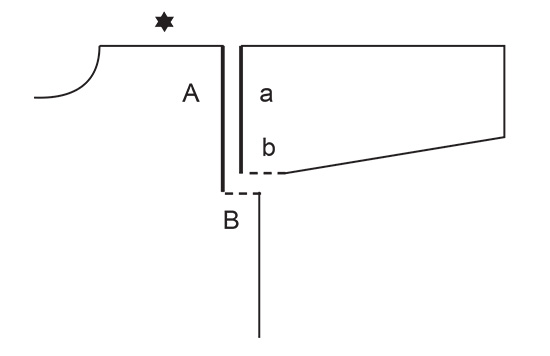
------------------------------------------------------- EXPLANATIONS FOR THE PATTERN: ------------------------------------------------------- PATTERN: See diagrams A.1 to A.3. The diagrams show all rows in the pattern from the right side. INCREASE TIP (for sleeves): Work until there is 1 stitch left before the marker, make 1 yarn over, knit 2 (marker sits between these 2 stitches), 1 yarn over. On the next round knit the yarn overs twisted to avoid holes. Then work the new stitches in stocking stitch. ------------------------------------------------------- START THE PIECE HERE: ------------------------------------------------------- JUMPER – SHORT OVERVIEW OF THE PIECE: The body is worked in the round with circular needle bottom up, as far as the armholes, then the front and back pieces are finished separately back and forth. The sleeves are worked in the round with double pointed needles/short circular needle, bottom up. The piece is sewn together and the neck is worked to finish. BODY: Cast on 180-198-210-228-252-276 stitches with circular needle size 4 mm and DROPS Paris. Work A.1 in the round over all stitches for 2 cm, then work A.2 over all stitches. When A.2 has been completed in height, knit 1 round where you decrease 18-20-20-22-22-26 stitches evenly spaced = 162-178-190-206-230-250 stitches. Insert 1 marker at the beginning of the round and 1 marker after 81-89-95-103-115-125 stitches (sides). Allow the markers to follow your work onwards. Change to circular needle size 5 mm. Work stocking stitch in the round until the piece measures 6-6-6-8-8-10 cm. Work the next round as follows: 8-12-9-13-13-12 stitches in stocking stitch, A.3A, A.3B 4-4-5-5-6-7 times, A.3C, then stocking stitch to the end of the round. Continue this pattern. REMEMBER THE KNITTING TENSION! When the piece measures 34-34-35-36-37-38 cm, cast off for the armholes on the next odd-round in the diagrams as follows: Start 4-4-4-6-6-8 stitches before the first marker at the beginning of the round, cast off 8-8-8-12-12-16 stitches, work as before until there are 4-4-4-6-6-8 stitches left before the second marker, cast off 8-8-8-12-12-16 stitches and work stocking stitch to the end of the round. Place the 73-81-87-91-103-109 front-piece stitches on a thread/extra needle and work the back piece. BACK PIECE: = 73-81-87-91-103-109 stitches. Work stocking stitch back and forth until the piece measures 49-50-52-54-56-58 cm, cast off the middle 23-25-25-27-29-29 stitches for the neck and finish each shoulder separately. Cast off at the beginning of each row from the neck as follows: 2 stitches 1 time and 1 stitch 2 times = 21-24-27-28-33-36 stitches on the shoulder. Work until the piece measures 53-54-56-58-60-62 cm. Cast off. Work the other shoulder in the same way. FRONT PIECE: = 73-81-87-91-103-109 stitches. Continue the pattern back and forth (the first row is from the wrong side). When A.3 has been worked 4½ times in height – finish after row 12 in the diagrams, continue with stocking stitch until the piece measures 48-48-49-51-52-54 cm (approx. 1-2-2-2-3-3 cm stocking stitch). On the next row place the middle 19-21-21-23-25-25 stitches on a thread for the neck. Cast off at the beginning of each row from the neck as follows: 2 stitches 2 times and 1 stitch 2 times = 21-24-27-28-33-36 stitches on the shoulder. Work until the piece measures 53-54-56-58-60-62 cm. Cast off. Work the other shoulder in the same way. SLEEVES: Cast on 63-66-66-69-69-72 stitches with double pointed needle size 4 mm and DROPS Paris. Work A.1 in the round over all stitches for 6 cm, then work A.2 over all stitches. When A.2 has been completed in height, knit 1 round where you decrease 13-14-14-15-13-14 stitches evenly spaced = 50-52-52-54-56-58 stitches. Insert 1 marker at the beginning of the round. Allow the marker to follow your work onwards. Change to double pointed needles size 5 mm and work stocking stitch. When the piece measures 10-10-10-10-12-12 cm, increase 2 stitches under the sleeve – read INCREASE TIP. Increase like this every 6-5-4½-4-3-2½ cm a total of 7-8-9-9-10-11 times = 64-68-70-72-76-80 stitches. Continue working until the sleeve measures 49-48-48-45-43-41 cm. Place the stitches on circular needle size 5 mm and work stocking stitch back and forth for the sleeve cap (from mid-under the sleeve) for 2-2-2-4-4-5 cm. Cast off. Work the other sleeve in the same way. ASSEMBLY: Sew the shoulder seams. Sew the sleeve cap to the armhole inside 1 stitch on the front/back pieces. Sew the split to the bottom of the armhole – see sketch. NECK: Start on one shoulder and knit up from the right side 81 to 99 stitches around the neck (including the stitches from the thread and the stitch-number divisible by 3) with short circular needle size 4 mm. Work A.1 in the round over all stitches for 4 cm. Cast off a little loosely. |
|||||||||||||||||||||||||||||||
Diagram explanations |
|||||||||||||||||||||||||||||||
|
|||||||||||||||||||||||||||||||
 |
|||||||||||||||||||||||||||||||
 |
|||||||||||||||||||||||||||||||
 |
|||||||||||||||||||||||||||||||
Have you finished this pattern?Tag your pictures with #dropspattern #blueglasssweater or submit them to the #dropsfan gallery. Do you need help with this pattern?You'll find 29 tutorial videos, a Comments/Questions area and more by visiting the pattern on garnstudio.com. © 1982-2026 DROPS Design A/S. We reserve all rights. This document, including all its sub-sections, has copyrights. Read more about what you can do with our patterns at the bottom of each pattern on our site. |
|||||||||||||||||||||||||||||||


With over 40 years in knitting and crochet design, DROPS Design offers one of the most extensive collections of free patterns on the internet - translated to 17 languages. As of today we count 324 catalogues and 12290 patterns translated into English (UK/cm). 12290
We work hard to bring you the best knitting and crochet have to offer, inspiration and advice as well as great quality yarns at incredible prices! Would you like to use our patterns for other than personal use? You can read what you are allowed to do in the Copyright text at the bottom of all our patterns. Happy crafting!
Post a comment to pattern DROPS 230-34
We would love to hear what you have to say about this pattern!
If you want to leave a question, please make sure you select the correct category in the form below, to speed up the answering process. Required fields are marked *.