
Popular categories
Looking for a yarn?


Comments / Questions (81)
![]() Brigitte wrote:
Brigitte wrote:
Hallo.... Ich habe soviel restwolle und würde die gerne als eine ganz bunte Jacje nach dieser Anleitung verhäkeln. Wenn meine wolle dünner ist kann ich das Muster einfach solange weiterführen bis die benötigten Masse erreicht sind ? Die Jacke ist toll. Vielen dank für die vielen Anleitungen.
20.08.2014 - 11:56
![]() Brigitte wrote:
Brigitte wrote:
Hallo.... Ich habe soviel restwolle und würde die gerne als eine ganz bunte Jacje nach dieser Anleitung verhäkeln. Wenn meine wolle dünner ist kann ich das Muster einfach solange weiterführen bis die benötigten Masse erreicht sind ? Die Jacke ist toll. Vielen dank für die vielen Anleitungen.
20.08.2014 - 11:55DROPS Design answered:
Liebe Brigitte, erst mal danke für das Lob! Bei dieser Jacke ist es möglich, mit dünnerer Wolle und anderer Maschenprobe zu häkeln, da Sie in erster Linie die Maße erreichen müssen. Etwas komplizierter ist es bei den Ärmeln, weil die auf die Maschenprobe angepasst sind. Hier müssten Sie also entsprechend mehr M anschlagen und ggf. etwas öfter zunehmen, das müssten Sie dann gemäß Ihrer Maschenprobe ausprobieren.
21.08.2014 - 09:28
![]() Lesley wrote:
Lesley wrote:
Hallo! Ich bin jetzt bei den Hin-& Rückreihen. Allerdings ist mir jetzt nicht ganz klar, wo ich diese genau ansetze. Liebe Grüße Lesley
16.05.2014 - 22:54DROPS Design answered:
Liebe Lesley, Sie wollen ja nun die Vorderteile häkeln. Zwischen der 1. u. 2. Ecke befindet sich ein Armausschnitt (hier soll das 1. Vorderteil entstehen), zwischen der 2. u. 3. Ecke der untere Rand, zwischen der 3. u. 4. Ecke der 2. Armausschnitt (hier soll das 2. Vorderteil entstehen) und zwischen der 4. u. 1. Ecke der Halsrand. Sie beginnen das 1. Vorderteil mit einer Hin-R an der 1. Ecke (d.h. vom Halsrand nach unten), das zweite mit einer Hin-R an der 3. Ecke (d.h. von unten zum Halsrand).
17.05.2014 - 01:16
![]() Julia wrote:
Julia wrote:
I've just finished making this cardigan but in different colours (teal and magenta). Pattern easy to follow, and I am really pleased with the finished result.
08.02.2014 - 18:41
![]() Elsa wrote:
Elsa wrote:
Bonjour J'ai remarqué une erreur dans le 6e tour : au lieu de 4 ml, 2 ml dans le même arceau, il s'agit de 4ml, 2 B dans le même arceau. Je tiens néanmoins à vous remercier pour ces beaux patrons, gratuits en plus !
03.12.2013 - 12:48DROPS Design answered:
Bonjour Elsa et merci, la correction a été faite. Bon crochet !
04.12.2013 - 09:47
![]() Youmna wrote:
Youmna wrote:
Bonjour Madames, Pouvez-vour m'aider comment fair les emmanchures? (Quand le carré mesure-. . .ajuster pour que ce tour soit crocheté comme le tour 5 :) c'est à dire que je travaille comme le tour 5? (. . Crocheter ensuite des . . – crocheter 1 ml au-dessus de chaque B/ml) tous les mailles au-dessoux sont B/comme le rond 6? ( Au tour suivant, continuer comme avant, dans les arceaux des emmanchures. . ) est-je travaille ce tour comme le tour 6? Merci beacoup pour m'aider
14.11.2013 - 04:14DROPS Design answered:
Bonjour Youmna, quand le carré a la bonne dimension, ajustez pour que le dernier tour soit un tour 6 du motif. Continuez ensuite en suivant le tour 5 comme avant, mais pour créer les emmanchures, on saute les mailles d'un côté jusqu'au milieu, comptez le nbe de mailles sautées et remplacez-les par autant de ml. Au tour suivant, crochetez le tour 6 autour du carré et dans les chaînettes des emmanchures. Bon crochet!
14.11.2013 - 08:56
![]() Ronja wrote:
Ronja wrote:
Hallo, diesen Satz verstehe ich leider nicht: "Zum Schluss 1 Rd mit camel um das ganze Viereck häkeln, dabei 1 Stb in jedes Stb und 4 Stb. in den Lm-Bogen in jeder Ecke häkeln", welchen Luftmaschenbogen in der Ecke? Habe das Quadrat nun fertig und wollte nun mit den Seiten anfangen... ich starte jede Reihe doch nun mit 2 Stäbchen, da gibt es dann doch keine Luftmaschenbögen mehr in den Ecken, oder? Danke
13.06.2013 - 17:52DROPS Design answered:
Liebe Ronja, ich glaube es liegt ein Missverständnis vor: es gibt keine separaten Seiten, der ganze Rumpfteil wird als Viereck gehäkelt und die Armlöcher werden als Schlitze eingearbeitet. Daher haben Sie bis zum Schluss Lm-Bogen an den Ecken.
14.06.2013 - 09:28
![]() Aila wrote:
Aila wrote:
Hallo liebes DROPS Team, ich möchte die Jacke gerne als ärmellose Weste ganz in weiß und in Größe S häkeln. Können Sie mir einen Tipp geben, wie viel weiße Wolle ich dafür in etwa brauchen werde? Ich finde die weiße Nepal Uni Colour Wolle super, möchte aber nicht zu wenig bestellen. Lieben Dank im Voraus!
25.05.2013 - 19:49DROPS Design answered:
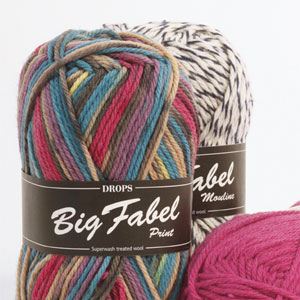
Liebe Aila, um sicher zu gehen, müssten Sie die Gesamtmenge aller Farben und Garne für die betreffende Grösse kaufen. Nepal und Big Fabel laufen gleich weit, aber bei Alpaca Bouclé müssen Sie die Menge verdoppeln (also 200 g Nepal stattdessen) , da es 140 m auf 50 g läuft.
26.05.2013 - 13:24
![]() Femy wrote:
Femy wrote:
Oh ik denk dat ik al een fout gemaakt heb bij de armsgaten! De lossen maak je direct na de eerste hoek, ga je met deze lossenrij om hoek 2 heen en daarna naar het middelste stokje?
10.04.2013 - 22:04DROPS Design answered:
De lossen maak je direct na de hoek: Haak dan een ketting van l tot het midden van de zijkant – haak 1 l voor elk stk/l tot het middelste stk. Je haakt dus lossen tot het middelste stk van de zijkant. Je kan het ook een beetje zien hoe het zit op de foto.
06.05.2013 - 11:29
![]() Femy wrote:
Femy wrote:
En hoe weet ik wat de 2e,3e en 4e hoek is?
10.04.2013 - 21:31DROPS Design answered:
1e hoek is de eerste die je haakt, 2e hoek de tweede die je haakt en zo voort.
06.05.2013 - 11:27
|
|
Jennifer#jennifervest |
|
 |
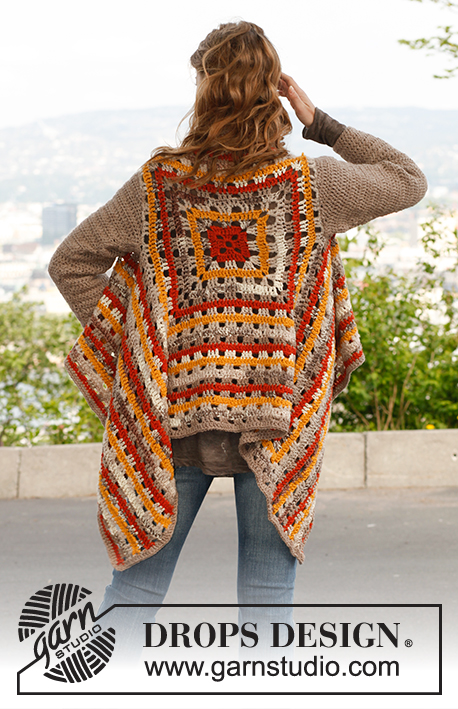 |
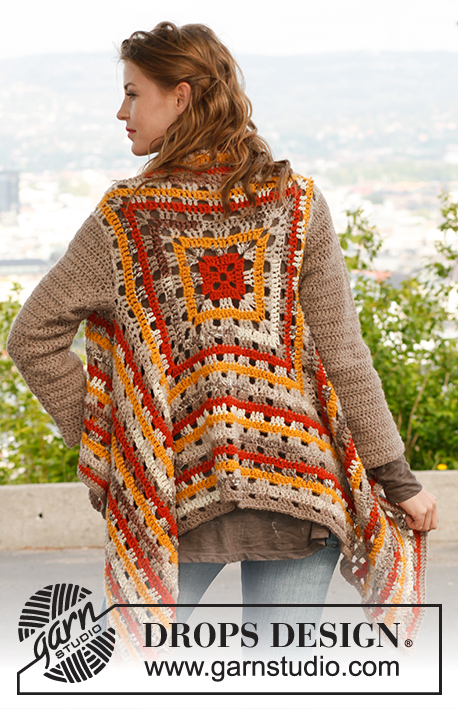
Crochet DROPS jacket in ”Nepal”, ”Big Fabel” and ”Alpaca Bouclé”. Size: S - XXXL.
DROPS 143-38 |
|
|
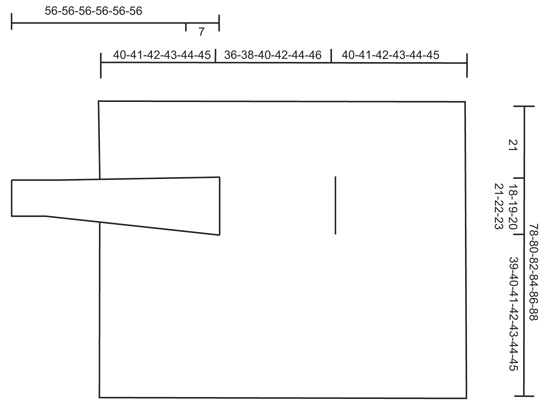
STRIPES: Work stripes as follows: * 1 round orange Nepal, 1 round Big Fabel, 1 round goldenrod Nepal, 1 round Alpaca Bouclé, 1 round Big Fabel, 1 round camel Nepal *, repeat from *-* until garment is finished. CROCHET INFO (applies to sleeve): Replace first dc on every row with ch 3. DECREASE TIP (applies to sleeve): Dec at beg of row by working sl sts over the no of dc to be dec. Dec at end of row by working until same no of dc to be dec remains, turn piece. ---------------------------------------------------------- BODY: Work in the round from mid back. Ch 8 with orange Nepal on hook size 5 mm / H/8 and form a ring with 1 sl st in first ch. ROUND 1: Work with orange Nepal. Ch 3 (= 1 dc), 2 dc in ch-ring, * ch 4, 3 dc in ch-ring *, repeat from *-* a total of 3 times and finish with ch 4 and 1 sl st in 3rd ch from beg of round. ROUND 2: READ STRIPES. ch 3 (= 1 dc), 1 dc in each of the next 2 dc, * 2 dc in next ch-space, ch 4, 2 dc in same ch-space, 1 dc in each of the next 3 dc *, repeat from *-* a total of 3 times, 2 dc in next ch-space, ch 4, 2 dc in same ch-space, finish with 1 sl st in 3rd ch from beg of round. ROUND 3: ch 3 (= 1 dc), 1 dc in each of the next 2 dc, * ch 2, skip 2 dc, 2 dc in next ch-space, ch 4, 2 dc in same ch-space, ch 2, skip 2 dc, 1 dc in each of the next 3 dc *, repeat from *-* a total of 3 times, ch 2, skip 2 dc, 2 dc in next ch-space, ch 4, 2 dc in same ch-space, ch 2, skip 2 dc, finish with 1 sl st in 3rd ch from beg of round. ROUND 4: ch 3 (= 1 dc), 1 dc in each of the next 2 dc, * 2 dc in next ch-space, 1 dc in each of the next 2 dc, 2 dc in next ch-space, ch 4, 2 dc in same ch-space, 1 dc in each of the next 2 dc, 2 dc in next ch-space, 1 dc in each of the next 3 dc *, repeat from *-* a total of 3 times, 2 dc in next ch-space, 1 dc in each of the next 2 dc, 2 dc in next ch-space, ch 4, 2 dc in same ch-space, 1 dc in each of the next 2 dc, 2 dc in next ch-space, finish with 1 sl st in 3rd ch from beg of round. ROUND 5: ch 3 (= 1 dc), 1 dc in each of the next 2 dc, * ch 2, skip 2 dc, 1 dc in each of the next 3 dc, ch 2, skip 1 dc, 2 dc in next ch-space, ch 4, 2 dc in same ch-space, ch 2, skip 1 dc, 1 dc in each of the next 3 dc, ch 2, skip 2 dc, 1 dc in each of the next 3 dc *, repeat from *-* a total of 3 times, ch 2, skip 2 dc, 1 dc in each of the next 3 dc, ch 2, skip 1 dc, 2 dc in next ch-space, ch 4, 2 dc in same ch-space, ch 2, skip 1 dc, 1 dc in each of the next 3 dc, ch 2, skip 2 dc, finish with 1 sl st in 3rd ch from beg of round. ROUND 6: ch 3 (= 1 dc), 1 dc in each of the next 2 dc, * 2 dc in next ch-space, 1 dc in each of the next 3 dc, 2 dc in next ch-space, 1 dc in each of the next 2 dc, 2 dc in next ch-space, ch 4, 2 dc in same ch-space, 1 dc in each of the next 2 dc, 2 dc in next ch-space, 1 dc in each of the next 3 dc, 2 dc in next ch-space, 1 dc in each of the next 3 dc *, repeat from *-* a total of 3 times, 2 dc in next ch-space, 1 dc in each of the next 3 dc, 2 dc in next ch-space, 1 dc in each of the next 2 dc, 2 dc in next ch-space, ch 4, 2 dc in same ch-space, 1 dc in each of the next 2 dc, 2 dc in next ch-space, 1 dc in each of the next 3 dc, 2 dc in next ch-space, finish with 1 sl st in 3rd ch from beg of round. Repeat 5th and 6th round, with inc, there are 2 dc-groups more between every corner every other round. ARMHOLE: When square measures 36-38-40-42-44-46 cm x 36-38-40-42-44-46 cm / 14¼"-15"-15¾"-16½"-17¼"-18" x 14¼"-15"-15¾"-16½"-17¼"-18", work as follows – adjust so that this is a round worked as 5th round: Work as before until first corner, work 2 dc, ch 4, 2 dc in the corner. Then ch until the middle of next side – ch 1 over every dc/ch until the middle dc, work 1 dc in the middle dc and work until the third corner as before, work until the middle of next side, then ch 1 over every dc/ch until the fourth corner, work 2 dc, ch 4, 2 dc in the corner and work until beg of round as before. On next round work as before, in ch-spaces for armholes work 1 dc in every ch. Continue as before until square measures 78-80-82-84-86-88 cm x 78-80-82-84-86-88 cm / 30¾"-31½"-32¼"-33"-33⅞"-34⅝" x 30¾"-31½"-32¼"-33"-33⅞"-34⅝" (i.e. 21 cm / 8¼" in all sizes from armhole), adjust so that last row is worked as 5th round. Cut the thread, now work back and forth between first and second corner. Work from the first corner as follows: 2 dc in ch-space in the corner, 1 dc in every dc/ch until second corner, 2 dc in ch-space in the corner. Turn and work back, continue pattern as on 5th and 6th round. Continue like this until 19-20-21-22-23-24 cm / 7½"-8"-8¼"-8¾"-9"-9½" have been worked back and forth (without inc), cut the thread. Repeat on the other side, now work back and forth from third to fourth corner. Finally work a round with camel around the entire square, work 1 dc in every dc, in ch-space in every corner work 4 dc. SLEEVE: The entire sleeve is worked back and forth with camel. Read crochet info! Ch 44-44-46-46-49-49 loosely (includes 4 ch to turn with) on hook size 5 mm / H/8 with Nepal. ROW 1: 1 dc in 4th ch from hook (= 2 dc), * skip ch 1, 1 dc in each of the next 6 ch *, repeat from *-* until 5-5-0-0-3-3 ch remain, skip 1 ch and work 1 dc in each of the last 4-4-0-0-2-2 ch = 36-36-38-38-40-40 dc. Then work 1 dc in every dc. When piece measures 7 cm / 2¾", inc 1 dc in each side, repeat inc every 6-5-5-4-4-3½ cm / 2⅜"-2"-2"-1½"-1½"-1¼" 6-8-8-9-10-11 more times = 50-54-56-58-62-64 dc. Work until piece measures 49 cm / 19¼" (same in all sizes because of wider shoulders on body in the larger sizes). Now dec at beg and end of every row for sleeve cap – SEE DECREASE TIP: 3 dc 1 time, 2 dc 2 times and 3 dc 1 time = 30-34-36-38-42-44 dc remain. Cut and fasten the thread, sleeve measures approx. 56 cm / 22" in all sizes. Work another sleeve. ASSEMBLY: Sew underarm seams. Sew in sleeves. |
|
 |
|
Have you finished this pattern?Tag your pictures with #dropspattern #jennifervest or submit them to the #dropsfan gallery. Do you need help with this pattern?You'll find 5 tutorial videos, a Comments/Questions area and more by visiting the pattern on garnstudio.com. © 1982-2026 DROPS Design A/S. We reserve all rights. This document, including all its sub-sections, has copyrights. Read more about what you can do with our patterns at the bottom of each pattern on our site. |
|


With over 40 years in knitting and crochet design, DROPS Design offers one of the most extensive collections of free patterns on the internet - translated to 17 languages. As of today we count 324 catalogs and 12290 patterns - 12280 of which are translated into English (US/in).
We work hard to bring you the best knitting and crochet have to offer, inspiration and advice as well as great quality yarns at incredible prices! Would you like to use our patterns for other than personal use? You can read what you are allowed to do in the Copyright text at the bottom of all our patterns. Happy crafting!
Post a comment to pattern DROPS 143-38
We would love to hear what you have to say about this pattern!
If you want to leave a question, please make sure you select the correct category in the form below, to speed up the answering process. Required fields are marked *.