
Popular categories
Looking for a yarn?


Comments / Questions (272)
![]() Delia wrote:
Delia wrote:
In der Anleitung steht, dass die Kapuze nach 21 cm abzuketten ist. Wo misst man denn die 21 cm? Hinten am Ansatz oder vorne, was ja durch die verkürzten Reihen höher ist?
28.01.2014 - 18:34DROPS Design answered:
Liebe Delia, die 21 cm werden an dem geraden Stück gemessen.
30.01.2014 - 07:59
![]() Oxana wrote:
Oxana wrote:
Liebes Drops Team, ich möchte mich bei Ihnen herzlich bedanken für Ihre Ideen und Anleitungen. Alles prima erklärt! Bin grade mit dem Jäckchen fertig. Sehr süß und sehr chick!!! Vielen Dank
24.01.2014 - 15:58
![]() Lea wrote:
Lea wrote:
Liebes Drops Team Ich wollte gerade mit der Kapuze anfangen. Ich verstehe nicht ganz wie ich diese 106 Maschen nun aufnehmen soll. Ich nehme die 24 Blendenmaschen auf, dann müsste ich nach meiner Rechnung 58 Maschen aus dem Mittelteil aufnehmen. Nur schaffe ich es nie 58 Maschen aufzunehmen. Ich komme nur auf 34. Muss ich dann weitere 24 Maschen zunehmen? Ich hoffe, ich hab mich verständlich ausgedrückt. Ich steh grad ziemlich auf dem Schlauch... Danke für eure Hilfe. Liebe Grüsse Lea
19.01.2014 - 23:19DROPS Design answered:
Liebe Lea, für diese lockere Kapuze brauchen Sie tatsächlich so viele Maschen. Fassen Sie so viele M wie möglich auf (neben den Blendenmaschen und den M an der rückwärten Mitte) und ergänzen Sie die fehlenden M in der nächsten Hin-R indem Sie so oft wie nötig 2 M in 1 M str.
21.01.2014 - 09:11Lili Vandal wrote:
Bonjour...devant gauche ...est-ce qu'on continue les rangs jusqu' au bout des manches rendu a encolure ou jusq'au marqueur merci du Quebec
27.11.2013 - 21:23DROPS Design answered:
Bonjour Mme Vandal, après avoir mis les m de la bordure en attente, on continue sur toutes les mailles comme avant, et, en même temps, on augmente côté encolure. Bon tricot!
28.11.2013 - 09:09
![]() Ebba Meier wrote:
Ebba Meier wrote:
Jeg kunne desværre ikke få 150 g lys gul til at slå til til den mindste størrelse.
17.11.2013 - 20:47
![]() Barbara wrote:
Barbara wrote:
Why is it necessary to switch to circular needles? Can I use straight needles only?
09.11.2013 - 23:34DROPS Design answered:
Dear Barbara, you work back piece on circular needle because of the large number of sts. You can continue with straight needles, your sts will just be more "tight" on needle. Happy knitting!
11.11.2013 - 10:39
![]() Gitte Møller Jacobsen wrote:
Gitte Møller Jacobsen wrote:
Hejsa, Spørgsmål til model 21,1 - skal bare lige høre om jeg har forstået det rigtigt at det faktisk er i den retstrikkede kan der går op omkring hætten at man laver de forkortede pinde, altså i forkanten, håber I kan hjælpe mig
30.10.2013 - 19:13DROPS Design answered:
Hej Gitte. Haetten bliver strikket helt i retstrik og du strikker de forkortede pinde i begyndelsen af p i hver side = altsaa langs forkanten. God fornöjelse.
31.10.2013 - 13:36
![]() Elin wrote:
Elin wrote:
Hej. När man mäter längden på huvan, ska man mäta mitt bak från nacken, eller längs framkanten av huvan?
09.09.2013 - 21:54DROPS Design answered:
Du mäter huvan bak i nacken! Lycka till!
18.09.2013 - 13:26
![]() Trish wrote:
Trish wrote:
I am really having a hard time understanding the pattern.. So far I have knit the left panel to 4cms and am on the right side. Do I now knit and turn to wrong side, garter the 24 sts, turn back ( using a wrap and turn), garter back 24 sts, turn back to right side, garter to end, turn to wrong side, garter 12 sts, wrap and turn, garter to end, turn to wrong side, garter 12, wrap and turn?
18.08.2013 - 17:11DROPS Design answered:
Dear Trish, for short rows on bands, you will work each side : *2 rows on the 24 sts, 2 rows on the 12 sts*, 1 row on all sts and start again from *-*. Repeat as often as indicated in pattern. Happy knitting!
20.08.2013 - 11:01
![]() Nashmil wrote:
Nashmil wrote:
Dum fråga men vad betyder *-* ? Stjärnan vet jag står för "förkortad rad" men vad står bindestrecket för?
14.08.2013 - 10:47DROPS Design answered:
Hej Nashmil. Det betyder at du skal gentage beskrivelsen som staar mellem stjernerne i mönstret: * Sticka 2 v rätst över de 24-24-26 (28-28) framkantsm, sticka 2 v rätst över endast de yttersta 12-12-13 (14-14) m. OBS: för varje gång man vänder mitt på v lyfts 1:a m. Strama tråden och sticka sedan som förut. Detta görs för att slippa hål i övergångarna *.
14.08.2013 - 12:32
|
|
Buttercup#buttercupset |
|
 |
 |
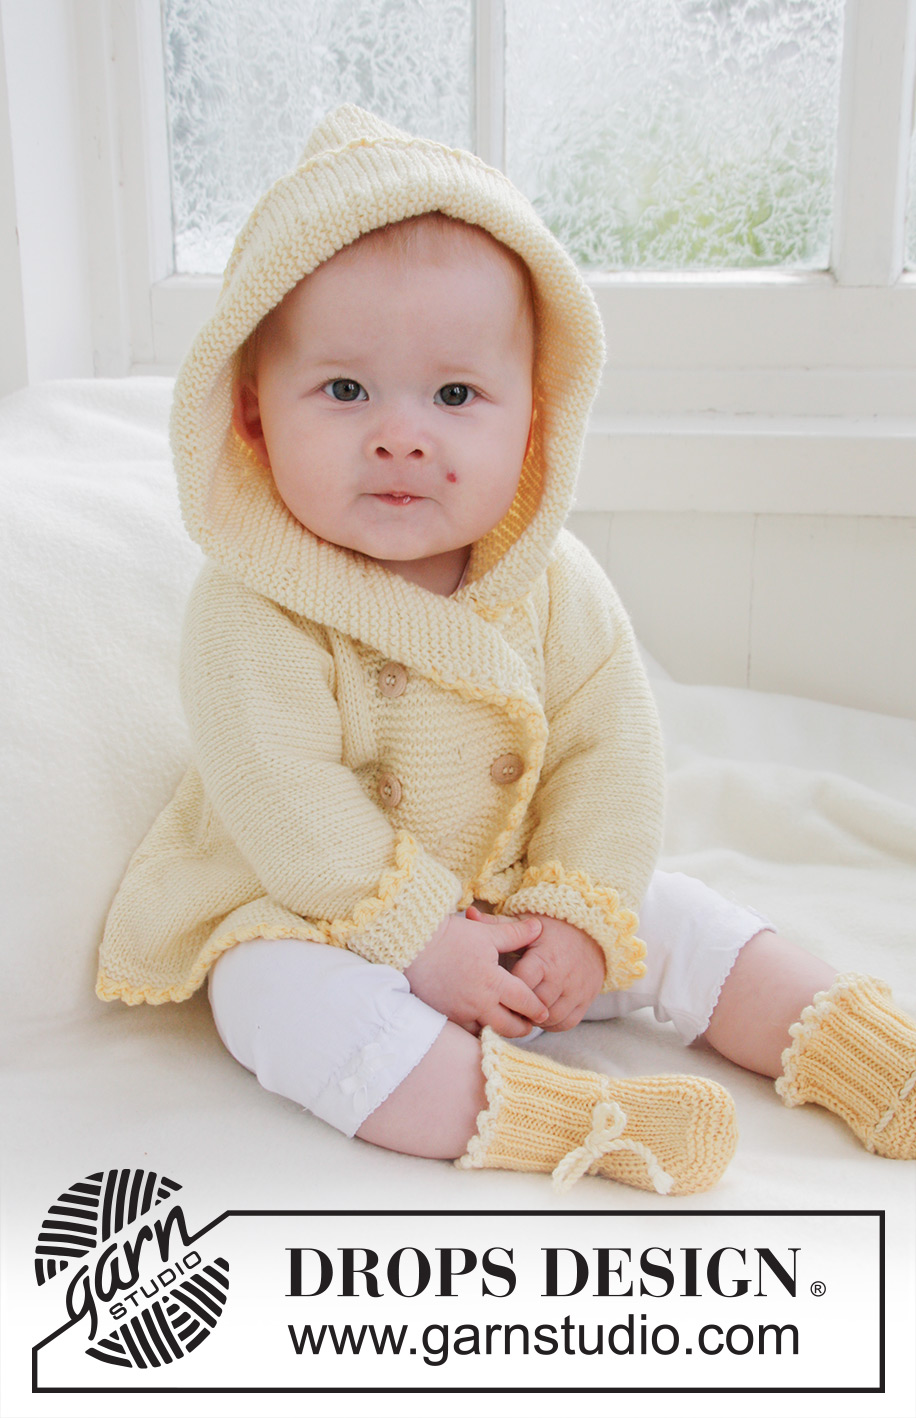
Knitted jacket with hood and booties for baby and children in DROPS BabyMerino
DROPS Baby 21-1 |
|
|
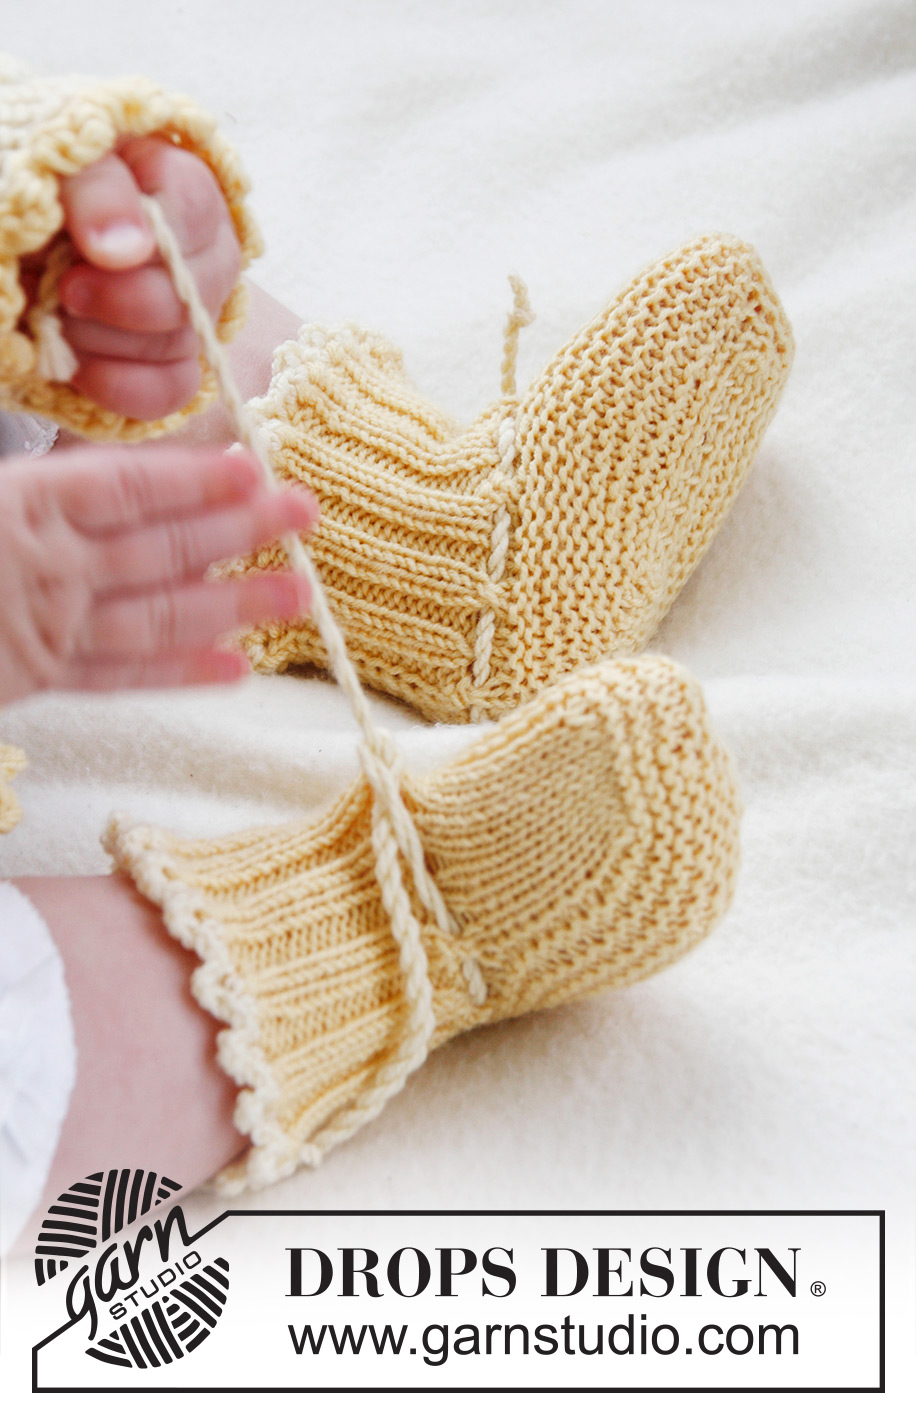
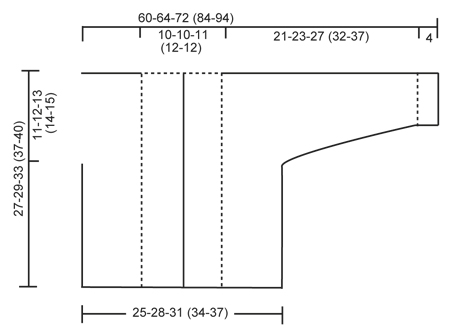
GARTER ST (back and forth on needle): K all rows. SHORT ROWS: * Work 2 rows in garter st over the 24-24-26 (28-28) band sts, work 2 rows in garter st only over the outermost 12-12-13 (14-14) sts. NOTE: When turning mid piece, slip first st. Tighten yarn and continue as before. This is done to avoid holes in the transitions *. BUTTON HOLES: The jacket is double-breasted. Bind off for 4 button holes on right band. 1 BUTTON HOLE = K tog fourth and fifth st from edge and make 1 YO. On same row also K tog fourth and fifth LAST st on band, make 1 YO. Bind off for 2 button holes when piece measures: SIZE 1/3 MONTHS: 14 and 19 cm / 5½" and 7½" SIZE 6/9 MONTHS: 16 and 21 cm / 6 1/4"- and 8 1/4" SIZE 12/18 MONTHS: 18 and 24 cm / 7" and 9½" SIZE 2 YEARS: 20 and 27 cm / 8" and 10½" SIZE 3/4 YEARS: 22 and 30 cm / 8 3/4" and 11 3/4" ---------------------------------------------------------- JACKET: Worked back and forth on circular needle. Beg on front piece, cast on sts for sleeve and work up to the shoulder. Knit the other front piece, place both front pieces tog and work down the back piece. LEFT FRONT PIECE: Read all of the following section before continuing! Cast on 43-47-51 (56-59) sts (includes 1 edge st in the side and 24-24-26 (28-28) band sts towards mid front) on needle size 2.5 mm / US 1or2 with Baby Merino. Work 6 rows in GARTER ST - see explanation above. Switch to circular needle size 3 mm / US 2or3 and work in stockinette st but continue to work the 24-24-26 (28-28) band sts towards mid front in Garter st. When piece measures 4 cm / 1½'', work SHORT ROWS - see explanation above (1st row = from WS). Repeat from *-* 1 time every 4 cm / 1½'' until piece measures 19-21-24 (27-30) cm / 7½"-8 1/4"-9½" (10 5/8"-11 3/4"), then repeat from *-* 1 time every 2 cm / 3/4'' until finished measurements. AT THE SAME TIME when piece measures 16-17-20 (23-25) cm / 6¼''-6¾''-8'' (9''-9¾''), cast on new sts at the end of every row from WS (towards the side of sleeve): 6 sts 2-2-3 (3-3) times, 8 sts 1-1-1 (2-3) times and 21-22-22 (25-26) sts 1 time = 84-89-99 (115-127) sts for shoulder/sleeve. Work inc sts in stockinette st. When all sts have been cast on, continue in stockinette st and Garter st as before while AT THE SAME TIME also working the outermost 10 sts on sleeve in garter st. When piece measures 27-29-33 (37-40) cm / 10 5/8''-11 3/8''-13'' (14½''-15¾''), insert a marker = mid on top of shoulder. Now slip the 24-24-26 (28-28) band sts towards mid front on a stitch holder. Then cast on 2 new sts at the end of row from RS (towards neck), repeat inc on next row towards neck = 64-69-77 (91-103) sts on needle. Work 1 row from WS. Put all sts on a stitch holder. RIGHT FRONT PIECE: Cast on and work as left front piece but reversed. In addition bind off for BUTTON HOLES on band - see explanation above. NOTE! Slip sts on a stitch holder after the last row with inc (i.e. last row = from WS). BACK PIECE: Work left front piece on to circular needle, cast on 16-16-18 (20-20) new sts (= back of neck) and work right front piece on to circular needle = 144-154-172 (202-226) sts. NOW MEASURE PIECE FROM MARKERS ON SHOULDERS. Continue in stockinette st and Garter st at the end on each sleeve back and forth on needle. When piece measures 8½-9½-10 (10-11) cm / 3 1/4"-3 3/4"-4" (4"-4 3/8"), beg to bind off sleeve sts. Bind off at beg of every row in each side as follows: 21-22-22 (25-26) sts 1 time, 8 sts 1-1-1 (2-3) times and 6 sts 2-2-3 (3-3) times = 62-70-76 (84-90) sts on needle. Continue in stockinette st with 1 edge st in garter st each side. When piece measures approx. 26-28-32 (36-39) cm / 10 1/4"-11"-12½" (14 1/4"-15 1/4") – fold the piece double at the markers on shoulders and make sure that the back piece is as long as front piece down to rows in garter st, switch to needle size 2.5 mm / US 1or2 and work 6 rows in garter st, then bind off. ASSEMBLY: Sew the sleeve and side seams inside 1 edge st. Sew on buttons. HOOD: Knit up approx. 102-106-112 (118-122) sts (including sts from stitch holders at the front – NOTE: If more/fewer sts have been knitted up, dec/inc evenly on 1st row. Continue in garter st over all sts while AT THE SAME TIME working short rows in each side every 2 cm / 3/4'' – SEE EXPLANATION ABOVE. Bind off when hood measures approx. 21-23-25 (27-28) cm / 8 1/4"-9"-9 3/4" (10 5/8"-11"). Sew hood neatly tog at the top - sew in outer loop of edge st to avoid a chunky seam. CROCHET BORDER: Crochet a border around the entire jacket. Beg at the bottom on right front piece and crochet with 2 strands yellow Baby Merino and hook size 3 mm / C as follows: Work 1 sc, * ch 3, 1 dc in 1st ch, skip approx. ½ cm / 1/4'', 1 sc in next st *, repeat from *-*. Crochet the same way around the openings on sleeves. ----------------------------------------------------------- BOOTEE: The bootee is worked back and forth from mid back. Cast on 48-52-56 (56) sts on needle size 2.5 mm / US 1or2 with 2 strands yellow Baby Merino. Remove 1 strand and work rib (= K 2/P 2) for 5-6-6 (7) cm / 2"-2 3/8"-2 3/8" (2 3/4") – adjust so that next row is worked from WS. P 1 row from WS while at the same time dec 14-14-18 (14) sts evenly = 34-38-38 (42) sts. On next row work eyelet row as follows from RS: K 1, *K 2 tog, 1 YO *, repeat from *-* and finish with K 1. P 1 row from WS. Now slip the outermost 12-13-13 (15) sts in each side on a stitch holder. Work 4-4½-5½ (6½) cm / 1½"-1 3/4"-2 1/4" (2½") in stockinette st over the middle 10-12-12 (12) sts. Slip sts from stitch holders back on needle and knit up 10-11-13 (16) sts on each side of mid piece = 54-60-64 (74) sts on needle. K every row over all sts for 3-4-5 (5) cm / 1 1/8"-1½"-2" (2") while at the same time after 1½-2-2½ (3) cm / ½"-3/4"-7/8" (1 1/8"), start dec on every other row as follows until completed: Dec 1 st at the beg and the end of row and K 2 tog on each side of the 2 mid sts. bind off and sew tog mid under foot and continue up mid back in outer loop of edge sts to avoid a chunky seam. Knit another bootee the same way. TIES: Cut 3 strands light yellow of approx. 1 meter / 1.1 yds each, twine them tightly tog, fold them double and they will twine again, tie a knot in each end. Thread tie up and down through the eyelet row on bootee. CROCHET BORDER: Crochet a border at the top of bootee on hook size 2 mm/US B with light yellow as follows: 1 sc in first st, * ch 3, 1 dc in 1st ch, skip approx. ½ cm / 1/4'', 1 sc in next st *, repeat from *-* and finish with 1 sl st in sc from beg of round. |
|
 |
|
Have you finished this pattern?Tag your pictures with #dropspattern #buttercupset or submit them to the #dropsfan gallery. Do you need help with this pattern?You'll find 21 tutorial videos, a Comments/Questions area and more by visiting the pattern on garnstudio.com. © 1982-2026 DROPS Design A/S. We reserve all rights. This document, including all its sub-sections, has copyrights. Read more about what you can do with our patterns at the bottom of each pattern on our site. |
|


With over 40 years in knitting and crochet design, DROPS Design offers one of the most extensive collections of free patterns on the internet - translated to 17 languages. As of today we count 324 catalogs and 12290 patterns - 12280 of which are translated into English (US/in).
We work hard to bring you the best knitting and crochet have to offer, inspiration and advice as well as great quality yarns at incredible prices! Would you like to use our patterns for other than personal use? You can read what you are allowed to do in the Copyright text at the bottom of all our patterns. Happy crafting!
Post a comment to pattern DROPS Baby 21-1
We would love to hear what you have to say about this pattern!
If you want to leave a question, please make sure you select the correct category in the form below, to speed up the answering process. Required fields are marked *.