
Popular categories
Looking for a yarn?


Comments / Questions (66)
![]() Shelley wrote:
Shelley wrote:
Thank you for your help! I now have another question. On Leftshoulderback near the end says "repeat the other side"-is this actually repeating the 6ch,etc on the next row? I can't do 6ch and extra dcs at the end of a row, right? Thank you for your help! :)
06.06.2014 - 15:26DROPS Design answered:
Dear Shelley, when you have inc with 6 ch at the end of one side, work 1 row and inc with 6 ch at the end of other side to get a total of 78-134 sts (see size) these inc are both for underarm, ie on both sides. Happy crocheting!
06.06.2014 - 17:22
![]() Shelley wrote:
Shelley wrote:
How do I need to tie off the first should piece before starting the second shoulder piece that I will connect later with dc?
24.05.2014 - 01:35DROPS Design answered:
Dear Shelley, work the first 3 rows for the left shoulder (back piece), cut the thread and work the same 3 rows for the right shoulder, on next row work then sts for right shoulder, then 30-43 ch (see size) for neckline, and work 4th row over the left shoulder. Happy crocheting!
26.05.2014 - 10:09
![]() Fatima wrote:
Fatima wrote:
HALLO,ich verstehen diesen Satz nicht ganz"Die Arbeit zur Seite legen und das rechte hintere Rückenteil wie die linke hintere Schulter häkeln. Die Arbeit drehen"heiß t das ich dann zwei Teile habe?könnten Sie mir das bitte erklären.
07.03.2014 - 18:32DROPS Design answered:
Liebe Fatima, ja genau, Sie häkeln zunächst die beiden Schulterteile separat genau gleich. Dann wenden Sie das rechte Schulterteil, bevor Sie die Lm für den Halsausschnitt direkt an das rechte Schulterstück häkeln und dann das linke Schulterteil wie beschrieben anhäkeln. Damit sind die beiden Teile dann verbunden.
08.03.2014 - 11:00
![]() Maria wrote:
Maria wrote:
Podrian hacer un video con el paso a paso de como hacer el jacket por favor porq yo no en tiendo Las instruciones
30.12.2013 - 21:50DROPS Design answered:
Hola Maria. No es posible hacer videos para todos los patrones, pero puedes ver los videos tutoriales para este patrón (barra de arriba de patrón - videos)
03.01.2014 - 19:12
![]() Maria wrote:
Maria wrote:
Podrian hacer un video con el paso a paso de como hacer el jacket por favor porq yo no en tiendo Las instruciones
30.12.2013 - 21:50
![]() Maria wrote:
Maria wrote:
Can you make a video of how to do it
30.12.2013 - 06:15DROPS Design answered:
Dear Maria, you will find some videos to help you in the different step and techniques under tab "videos" on the right side of the picture. Do not hesitate to contact your DROPS Store for any further individual assistance. Happy crocheting!
30.12.2013 - 16:16Doris Warren wrote:
Hi,can you please tell me if the sleeves are crocheted top down or bottom up as I,ve just noticed if top down there,s no way the sleeve will fit the armhole.I,ve finished the jacket & it,s really lovely& fits the 3rd size perfectly.Can you help me,Doris
21.06.2013 - 04:46DROPS Design answered:
Dear Mrs Warren, sleeve are worked from bottom up, fan edge is worked afterwards. Happy crocheting!
21.06.2013 - 09:47
![]() Valeria Ferri wrote:
Valeria Ferri wrote:
Taglia xl. davanti destro. dopo tutti gli aumenti ci sono 55mA, ma 23+4 per lo scollo+6 aumento scalfi+ 15 lato fa 48mA. dove sbaglio? siete stupendi
15.02.2013 - 11:14DROPS Design answered:
Ho controllato e anch'io arrivo a una risposta sbagliata. Chiederò ancora consulenza dai designer e farò sapere.
21.02.2013 - 00:26Sumana wrote:
I like your pattern very much. It's nice.Please tell me. How many yarn for this?
01.02.2013 - 06:32DROPS Design answered:
Dear Sumana, the quantity of yarn required for this jacket is indicated in grams at the very top of the pattern, on the left side of the picture. Divide the indicated amount for your size by 50 g a ball Muskat to have the number of balls required. Happy crocheting !
01.02.2013 - 10:06
![]() Laila wrote:
Laila wrote:
Jeg har problemer med forsykket. Når jeg er færdig med at tage ud har jeg kun 46, men i opskriften er der 55. Bud på hvor jeg evt. kan ha lavet fejl?
03.10.2012 - 16:41DROPS Design answered:
Du har 23+4+1+13+ ærmegab = 1+1+6+1+5=55 m ialt på forstykket.
04.10.2012 - 09:35
|
|
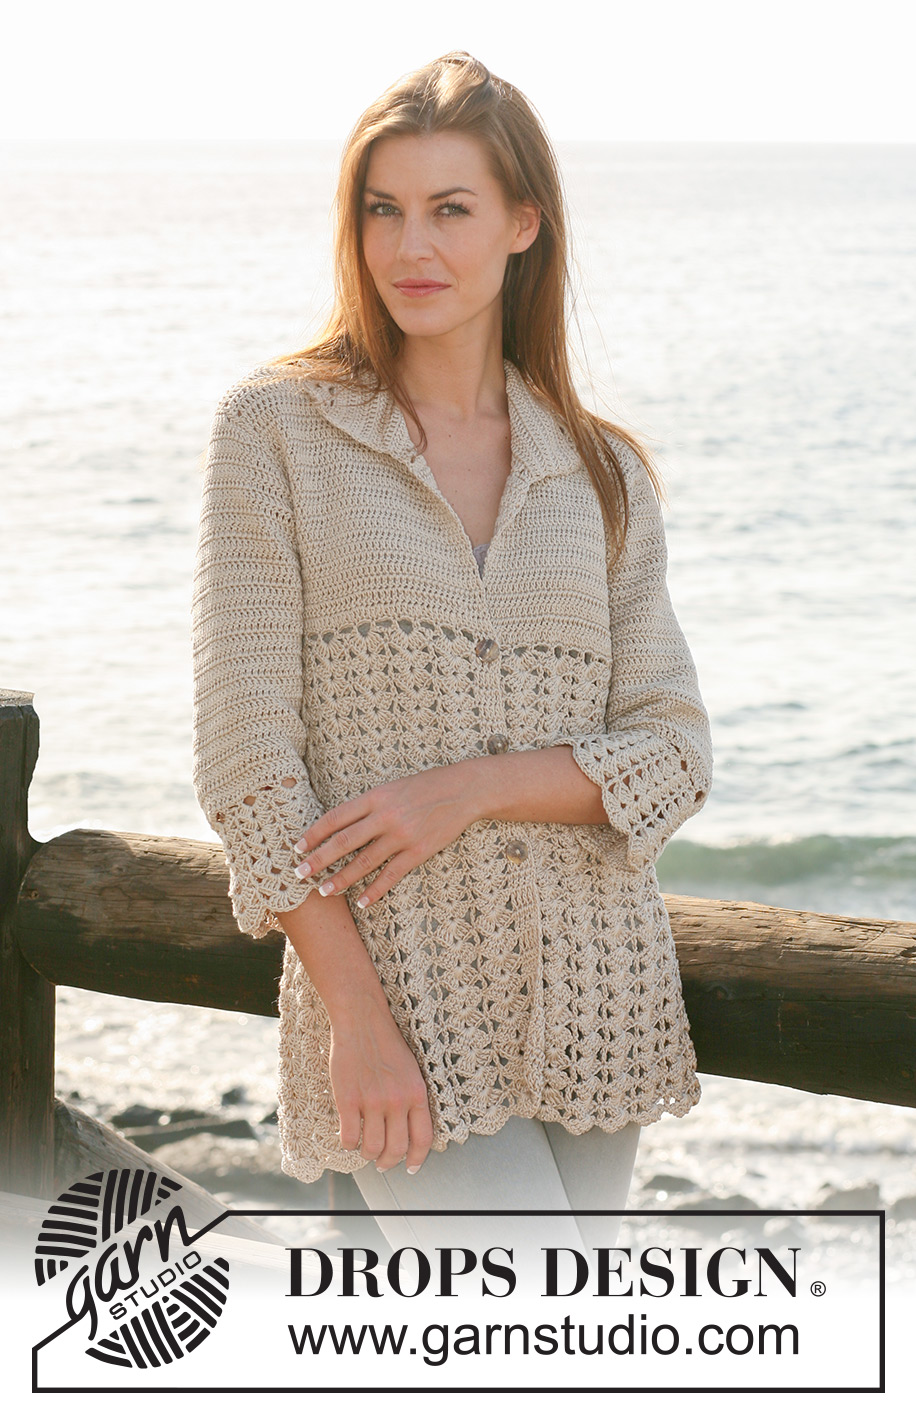
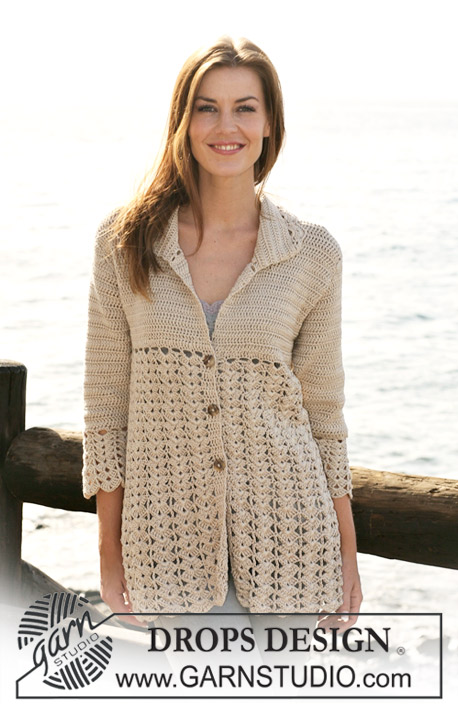
Waves and Shells#wavesandshellscardigan |
|
 |
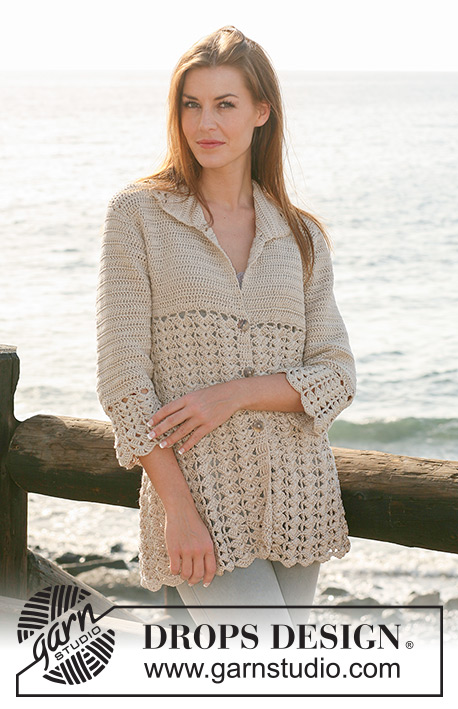 |
Crochet DROPS jacket with fan pattern in ”Muskat”. Size S - XXXL.
DROPS 118-25 |
|
|
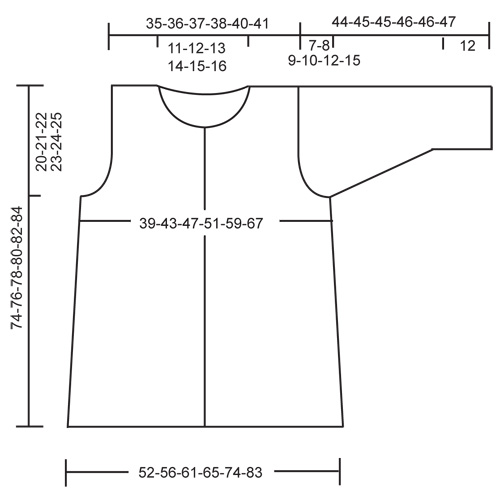
CROCHET TIP: Replace first dc on row with 3 ch and finish row with 1 dc in 3rd ch from previous row. Replace first tr on row with 4 ch and finish row with 1 tr in 4th ch from previous row. DECREASING TIP: Dec as follows at beg of row: replace 1 dc with 1 sl st. Dec as follows at the end of row: Turn piece when no of dc to be dec remain, turn and work return row. ---------------------------------------------------------- ---------------------------------------------------------- JACKET: Back piece and both front pieces crochet from shoulder and down. Then the pieces are sewn tog and the body piece of jacket is crochet in fan pattern from the yoke towards bottom edge. LEFT SHOULDER BACK PIECE (when placed flat): Crochet 31-31-31-31-32-32 LOOSE ch with crochet hook size 3.5 mm/E/4 and Muskat. ROW 1: Crochet 1 dc in 4th ch from hook, * skip 1 ch, 1 dc in each of the next 4 ch *, repeat from *-* and finish with skip 1 ch and 1 dc in each of the last 1-1-1-1-2-2 ch = 23-23-23-23-24-24 dc. ROW 2: See CROCHET TIP! Crochet 1 dc in each dc. ROW 3: Crochet 1 dc in each dc. Put piece aside and crochet RIGHT SHOULDER on back piece in the same way, turn piece. ROW 4: 1 dc in each dc as before, at the end of row on right back piece crochet 30-33-35-38-40-43 ch (= neckline mid back), then 1 dc in each dc on left back piece, turn piece. ROW 5: 1 dc in each dc on left back piece, 1 dc in each of the first 2-1-2-1-2-1 ch, * skip 1 ch, 1 dc in each of the next 4 ch *, repeat from *-* a total of 5-6-6-7-7-8 times, skip 1 ch, 1 dc in each of the last 2-1-2-1-2-1 ch, crochet 1 dc in each dc from right back piece. There are now 70-72-74-76-80-82 dc on row. Continue with 1 dc in each dc. AT THE SAME TIME when piece measures 18-16-16-15-13-9 cm / 7"-6¼"-6¼"-6"-5½"-3½" inc for armhole each side. Inc 1 dc at the beg and at the end of every row, and repeat the inc a total of 0-3-4-6-9-13 times each side by working 2 dc in the outermost dc (no inc in size S). On next row crochet 6-6-8-9-12-15 ch at the end of row, turn and crochet 1 dc in 4th ch from hook and 1 dc in each of the next 2-2-4-5-8-11 ch. Repeat the other side = 78-86-94-102-118-134 dc. Continue with 1 dc in each dc until back piece measures 25-27-29-31-33-35 cm / 9¾"-10⅝"-11⅜"-12¼"-13"-13¾". RIGHT FRONT PIECE: Crochet 31-31-31-31-32-32 LOOSE ch on crochet hook size 3.5 mm/E/4 with Muskat. ROW 1: Crochet 1 dc in 4th ch from hook, * skip 1 ch, 1 dc in each of the next 4 ch *, repeat from *-* and finish with skip 1 ch and crochet 1 dc in each of the last 1-1-1-1-2-2 ch = 23-23-23-23-24-24 dc. ROW 2: Crochet 1 dc in each dc. Continue with 1 dc in each dc, AT THE SAME TIME when piece measures 6 cm / 2⅜" inc for neckline towards mid front. Inc 1 dc at the end of every row towards mid front by working 2 dc in outermost dc a total of 3-3-3-4-4-4 times. On next row crochet 15-16-17-17-18-19 ch towards mid front, turn and crochet 1 dc in 4th ch from hook and 1 dc in each of the next 11-12-13-13-14-15 ch. AT THE SAME TIME when piece measures 18-16-16-15-13-9 cm / 7"-6¼"-6¼"-6"-5½"-3½" inc for armhole at the side as described for back piece. When all inc are complete there are 43-47-51-55-63-71 dc on row. Continue with 1 dc in each dc until piece measures 25-27-29-31-33-35 cm / 9¾"-10⅝"-11⅜"-12¼"-13"-13¾" – adjust to back piece. Put piece aside and crochet left front piece. LEFT FRONT PIECE: Like right front piece. ASSEMBLY: Sew shoulder seams edge to edge. Sew side seams edge to edge. There are now 164-180-196-212-244-276 dc along bottom edge. FAN PATTERN: Continue back and forth from mid front as follows – see CROCHET TIP! ROW 1: 1 dc in each dc = 164-180-196-212-244-276 dc, turn piece. ROW 2: 1 dc in each dc, AT THE SAME TIME inc 32 dc evenly = 196-212-228-244-276-308 dc. ROW 3: 1 sc in each of the first 4 dc, * ch 4, skip 3 dc, 1 sc in next dc *, repeat from *-* until 4 dc remain, 1 sc in each of the last 4 dc = 47-51-55-59-67-75 ch-loops, turn piece. ROW 4: 1 dc in each of the first 4 sc, 1 dc in next ch-loop, * 4 dc + ch 2 + 4 dc in next ch-loop, 1 dc in next ch-loop *, repeat from *-* until 4 sc remain, and finish with 1 dc in each of the last 4 sc = 23-25-27-29-33-37 fans with 4 dc (= front band) each side towards mid front, turn piece. ROW 5: 1 dc in each of the first 4 dc (= front band), 1 dc in next dc, * 4 dc + ch 2 + 4 dc in the middle of next dc-group (i.e. in 2 ch in dc-group), 1 dc in next dc *, repeat from *-* until 4 dc remain, and finish with 1 dc in each dc (= front band). Repeat row 5 until piece measures approx 50-52-54-56-58-60 cm / 19¾"-20½"-21¼"-22"-22¾"-23⅝" from shoulder. NEXT ROW: 1 tr in each of the first 4 dc, 1 tr in next dc, * 4 tr + ch 2 + 4 tr in the middle of next dc-group, 1 tr in next dc *, repeat from *-* until 4 dc remain, and finish with 1 tr in each dc. Repeat this row until piece measures approx 74-76-78-80-82-84 cm / 29⅛"-30"-30¾"-31½"-32¼"-33" from shoulder. Cut and fasten thread. SLEEVE: Crochet 67-67-67-72-72-77 LOOSE ch with crochet hook size 3.5 mm/E/4 and Muskat. ROW 1: Crochet 1 dc in 4th ch from hook, * skip 1 ch, 1 dc in each of the next 4 ch *, repeat from *-* and finish with skip 1 ch and 1 dc in the last 2 ch = 52-52-52-56-56-60 dc. See CROCHET TIP! Crochet 1 dc in each dc, AT THE SAME TIME inc 1 dc each side on every 2-2-1.5-1.5-1-1 cm / ¾"-¾"-½"-½"-⅜"-⅜" a total of 9-11-14-15-17-18 times, inc by crochet 2 dc in outermost dc = 70-74-80-86-90-96 dc. When piece measures 25-25-24-24-22-20 cm / 9¾"-9¾"-9½"-9½"-8¾"-8" - NOTE! Less for the larger sizes because of longer sleeve cap and wider shoulder- dec for sleeve cap each side on every row as follows – see DECREASING TIP: 4 dc 1 time, then 3-3-3-3-2-2 dc each side until piece measures 31-32-32-33-33-34 cm / 12¼"-12½"-12½"-13"-13"-13⅜", dec 4 dc each side. Cut and fasten thread. ASSEMBLY: Set in sleeves and sew under arm seams edge to edge. Sew buttons on left front piece, place the top button in transition between dc and fan pattern and the 2 other buttons with approx 8 cm / 3⅛" between each. Use dc on front band as buttonholes. COLLAR: Crochet round neck as follows: ROW 1: 1 sc in first st towards mid front, * ch 3, skip approx 1 cm / ⅜", 1 sc *, repeat from *-*. ROW 2: Crochet 3 dc in each ch-loop = approx 84 to 111 dc. Insert 3 markers in piece, 1 in each shoulder seam and 1 mid back. Continue with 1 dc in each dc, AT THE SAME TIME when piece measures 3 cm / 1⅛" inc 1 dc each side of all markers, and repeat the inc when piece measures 7 cm / 2¾". Inc by crochet 2 dc in 1 dc. Continue until piece measures 8 cm / 3⅛", and now crochet as follows: ROW 1: 1 sc, * ch 4, skip 3 sts, 1 sc in next st *, repeat from *-*, adjust so that number of ch-loops is divisible by 2 + 1. ROW 2: ch 3, * 4 dc + ch 2 + 4 dc in next ch-loop, 1 dc in next ch-loop *, repeat from *-* until 1 ch-loop remain, crochet 4 dc + ch 2 + 4 dc in the last ch-loop and finish with 1 dc in sc from beg of previous row, turn piece. ROW 3: 1 dc in first dc, * 4 dc + ch 2 + 4 dc in the middle of next dc-group (i.e. in 2 ch in dc-group), 1 dc in next dc *, repeat from *-*. CROCHET BORDER: Crochet round sleeve edges as follows: ROUND 1: 1 sc in first dc, * ch 4, skip 3 sts, 1 sc in next st*, repeat from *-* - adjust to 14 ch-loops (it may be necessary to skip 2 or 4 dc at the end of piece in some sizes to get the right no of ch-loops) and finish with 1 sl st in first sc. ROUND 2: Crochet sl sts to the middle of first ch-loop, ch 3 (= 1 dc), * 4 dc + ch 2 + 4 dc in next ch-loop, 1 dc in next ch-loop *, repeat from *-* and finish with 1 sl st in 3rd ch on round = 7 fans. ROUND 3: ch 3, * 4 dc + ch 2 + 4 dc in the middle of next dc-group (i.e. in 2 ch in dc-group), 1 dc in next dc *, repeat from *-* and finish with 1 sl st in 3rd ch from beg of round. Repeat row 3 until border measures approx 7 cm / 2¾". NEXT ROW: ch 4, * 4 tr + ch 2 + 4 tr in the middle of next dc-group, 1 tr in next dc *, repeat from *-* and finish with 1 sl st in 4th ch from beg of round. Repeat this row until border measures approx 12 cm / 4¾". Cut and fasten thread. |
|
 |
|
Have you finished this pattern?Tag your pictures with #dropspattern #wavesandshellscardigan or submit them to the #dropsfan gallery. Do you need help with this pattern?You'll find 5 tutorial videos, a Comments/Questions area and more by visiting the pattern on garnstudio.com. © 1982-2026 DROPS Design A/S. We reserve all rights. This document, including all its sub-sections, has copyrights. Read more about what you can do with our patterns at the bottom of each pattern on our site. |
|


With over 40 years in knitting and crochet design, DROPS Design offers one of the most extensive collections of free patterns on the internet - translated to 17 languages. As of today we count 324 catalogs and 12290 patterns - 12280 of which are translated into English (US/in).
We work hard to bring you the best knitting and crochet have to offer, inspiration and advice as well as great quality yarns at incredible prices! Would you like to use our patterns for other than personal use? You can read what you are allowed to do in the Copyright text at the bottom of all our patterns. Happy crafting!
Post a comment to pattern DROPS 118-25
We would love to hear what you have to say about this pattern!
If you want to leave a question, please make sure you select the correct category in the form below, to speed up the answering process. Required fields are marked *.