Comments / Questions (60)
![]() Rosemarie wrote:
Rosemarie wrote:
Hej. Jeg forstår ikke helt masketallet på rygstykket. M1 strækker sig over 16 masker mens der i str. S er 71 m på pinden (69 uden kantmasker). Dette går ikke op i de 16 masker i diagrammet?
28.12.2022 - 18:28DROPS Design answered:
Hei Rosemari. Det skal ikke opp i de 16 maskene i diagrammet. Du strikker M.1 over 69 masker = 4 rapporter av M.1 + de 5 første maskene av M.1 = 16+16+16+16+5 = 69 masker. Når arbeidet måler 4 cm økes det masker i hver side og disse maskene strikkes fortløpende inn i mønsteret. Husk når du skal strikke venstre forstykke så start ved pilen i diagrammet slik at det blir likt med høyre forstykke. mvh DROPS Design
02.01.2023 - 14:28
![]() Glesni OSullivan wrote:
Glesni OSullivan wrote:
Can you clarify decrease at armhole on sleeves please is it 1 stitch each side meaning at beginning and end of right side rows ?
15.07.2022 - 11:07DROPS Design answered:
Dear Glesni, if you mean the sleeve cap, you need to decrease 1 stitch at the beginning of every row, that is, both right side and wrong side rows. Happy knitting!
15.07.2022 - 13:02
![]() Celine wrote:
Celine wrote:
Je suis débutante et je ne comprends pas comment on fait le deux dessins pouvez vous faire une vidéo ou me donner le nom du point du diagramme. Svp.
01.04.2019 - 22:04DROPS Design answered:
Bonjour Céline, le motif du diagramme se tricote ainsi: tricotez les 3 mailles indiquées ensemble à l'envers, puis, sans les lâcher de l'aiguille gauche, tricotez-les encore une fois ensemble à l'endroit cette fois ci, puis, toujours sans lâcher les 3 mailles de l'aiguille gauche, tricotez ces 3 mailles encore 1 fois ensemble à l'envers, lâchez les 3 mailles de l'aiguille gauche, vous avez maintenant 3 mailles sur l'aiguille droite = le nombre de mailles reste le même. N'hésitez pas à vous entraîner sur un échantillon au préalable. Voir aussi la vidéo. Bon tricot!
02.04.2019 - 10:08
![]() DONATELLA DONATI wrote:
DONATELLA DONATI wrote:
è possibile sostituire la parte in cotone con il kid silk preso a 2 fili?
29.03.2019 - 09:03DROPS Design answered:
Buongiorno Donatella. Può sostituire cotton viscose con kid silk e lavorare la parte del corpo con 2 capi di kid silk. Il risultato avrà un effetto più vaporoso e più morbido. Verifichi sempre la correttezza del campione. Per ogni ulteriore consiglio sulla sostituzione dei filati, può contattare, anche per mail, il suo rivenditore Drops di fiducia. Buon lavoro!
29.03.2019 - 09:33
![]() Carmen wrote:
Carmen wrote:
No entiendo el dibujo a realizar, los de los 3 puntos juntos y luego la explicación que le sigue. Gracias
20.01.2019 - 20:11DROPS Design answered:
Hola Carmen. Para hacer estas motas se trabajan primero 3 puntos juntos de revés, sin deslizar a la aguja derecha; se trabajan 3 puntos juntos de derecho sobre los mismos puntos, y ,de la misma manera, otra vez 3 puntos juntos de revés sobre los mismos puntos. Ahora deslizamos 3 puntos a la aguja derecha. De está manera, se forma una mota y no hay un cambio en el número de puntos ( 3 puntos disminuidos = 3 puntos formados)
03.02.2019 - 19:29
![]() Odile Machado wrote:
Odile Machado wrote:
Erreur couleur : j'ai commande exactement les fils de l'explication ; il y a une erreur le coton est blanc et pas écru, je suis très déçue ! !!!!
20.07.2014 - 17:58DROPS Design answered:
Bonjour Mme Machado, DROPS Cotton Viscose 01 est blanc, le 02 est écru. Pour toute information complémentaire, vous pouvez prendre contact avec votre magasin DROPS. Bon tricot!
21.07.2014 - 15:36
![]() Karin B. wrote:
Karin B. wrote:
Hallo, ich würde gerne dieses Modell als längere Version also als normal lange Strickjacke (Größe M). Kann man dann einfach so weiter stricken oder wäre es möglich eine Anleitung dazu zu bekommen oder ein paar Hilfen? Wieviel Garn benötige ich dann zusätzlich? Würde mich über eine Antwort freuen. Liebe Grüße Karin
13.07.2014 - 17:34DROPS Design answered:
Liebe Karin, die Jacke umzuarbeiten ist etwas komplizierter, da Sie nicht gerade hoch stricken (Sie stricken ja von unten nach oben), sondern Zunahmen an den Seiten arbeiten. Am besten lassen Sie sich in dem Geschäft, in dem Sie die Wolle gekauft haben, beraten, wie Sie die Jacke umarbeiten können.
14.07.2014 - 20:47Nana wrote:
"Manches bouffantes"
29.05.2013 - 09:11
![]() Versavaud wrote:
Versavaud wrote:
Il doit y avoir une erreur dans les explications de la manche du modèle 118-24, car on se retrouve avec 91 mailles (modèle XS) à assembler avec une emmanchure beaucoup plus grande. Merci de me répondre.
28.05.2013 - 15:29DROPS Design answered:
Bonjour Mme Versavaud, après calcul et vérification auprès de notre service Design, le modèle est correct ainsi et a déjà été par ailleurs réalisé maintes fois avec succès. N'hésitez pas à contacter votre magasin pour une aide personnalisée si nécessaire. Bon tricot!
30.05.2013 - 13:23
![]() Versavaud wrote:
Versavaud wrote:
Je ne sais comment assembler les manches aux devants, étant donné que le dernier rang se fait avec 3 mailles ensemble donc çà rétrécit le haut des manches, les emmanchures étant beaucoup plus grandes. Merci de m'indiquer comment procéder.
28.05.2013 - 11:35DROPS Design answered:
Bonjour Mme Versavaud, l'arrondi des manches se rabat ainsi pour volontairement rétrécir l'arrondi et former l'effet bouffant du haut des manches. Bon tricot !
28.05.2013 - 13:46
Lady Like#ladylikecardigan |
||||||||||
 |
 |
|||||||||
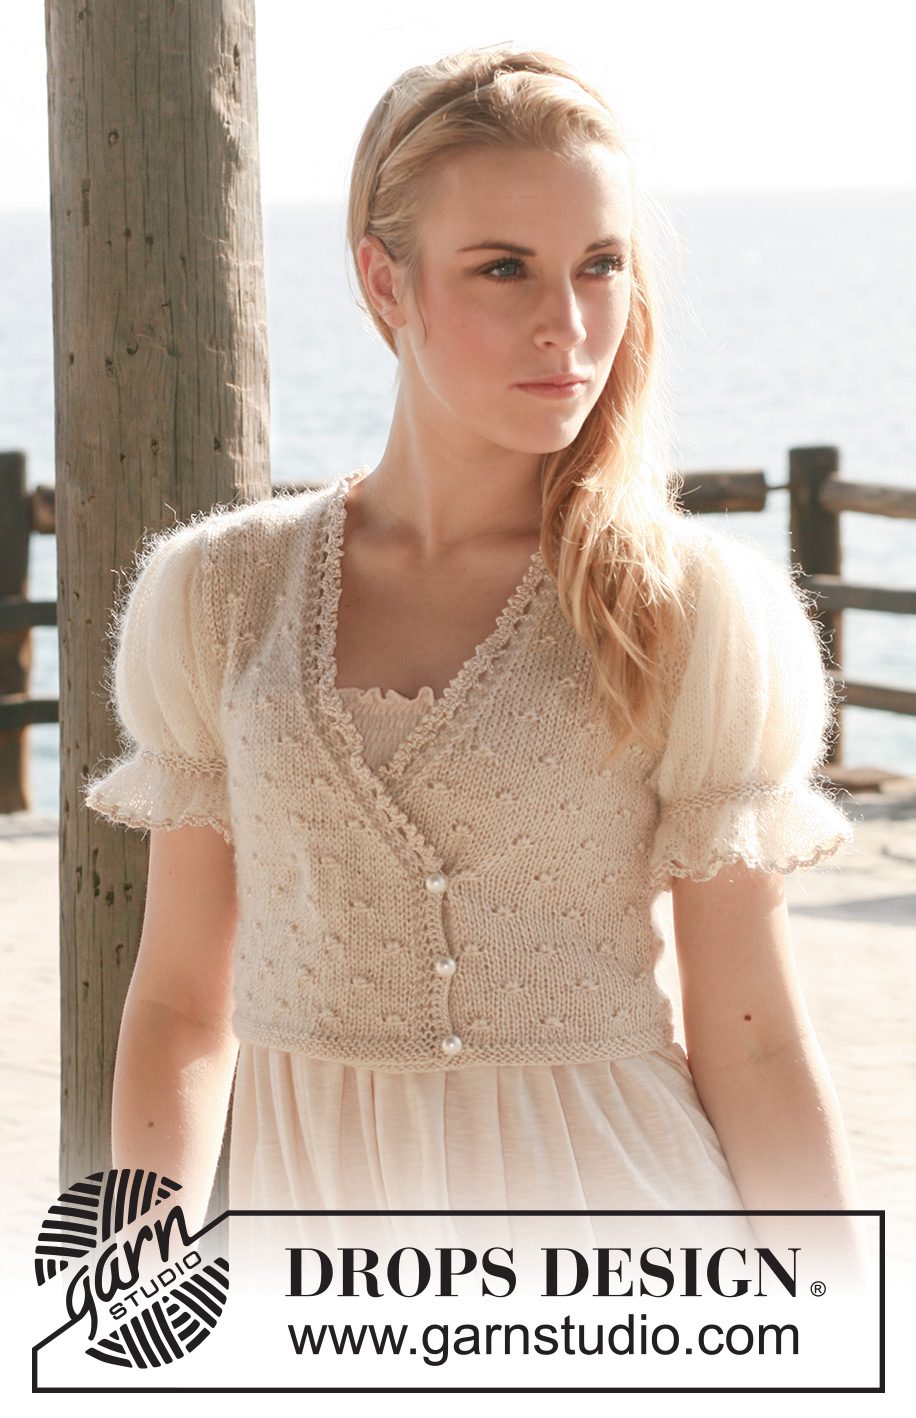
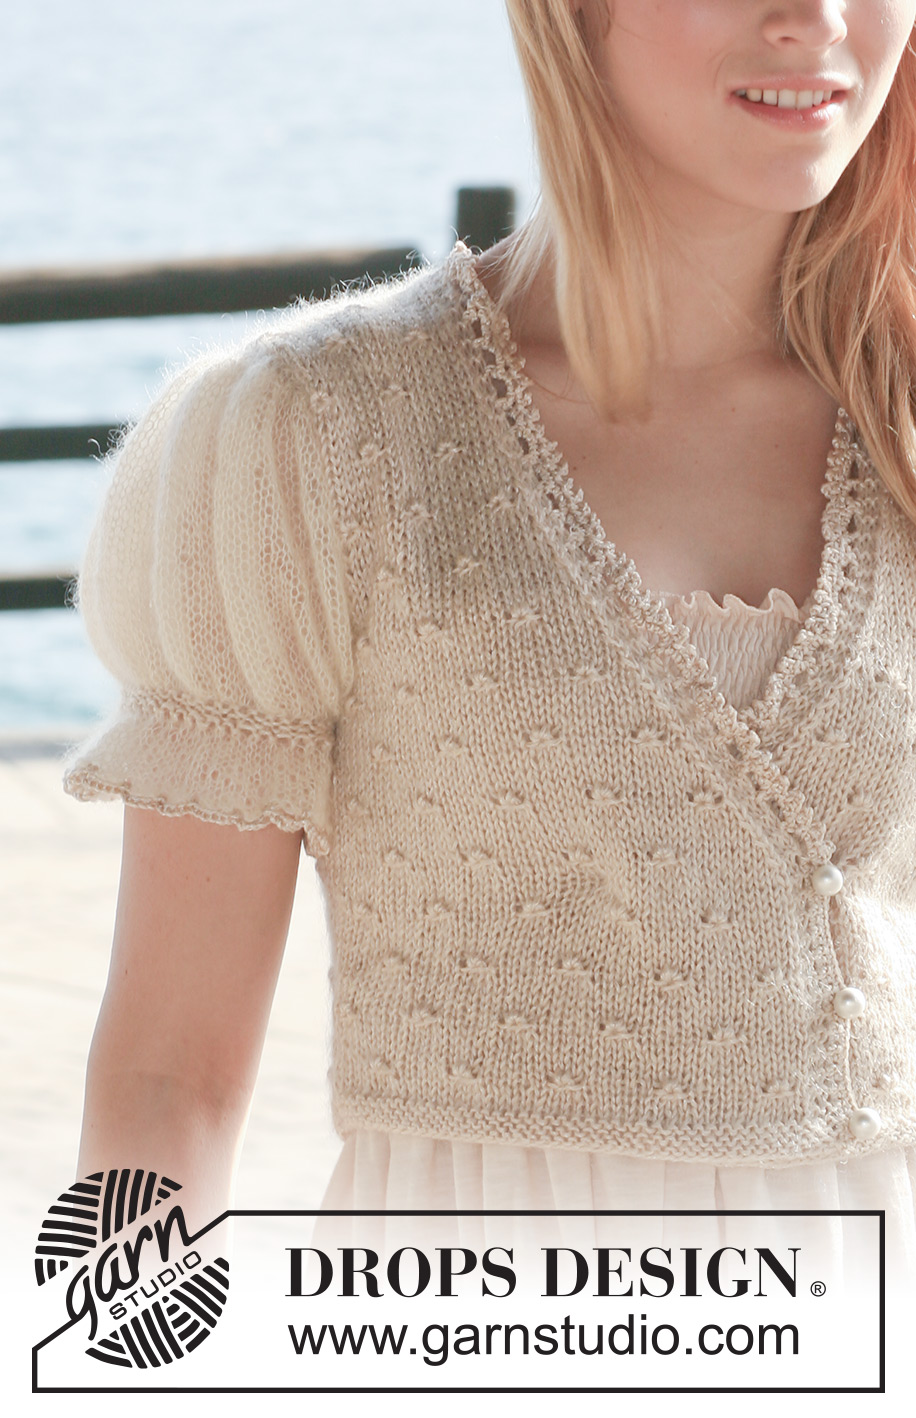
DROPS wrap-round jacket with short puff sleeves in Cotton Viscose and Kid-Silk or Safran and Kid-Silk. Size: XS to XXL.
DROPS 118-24 |
||||||||||
|
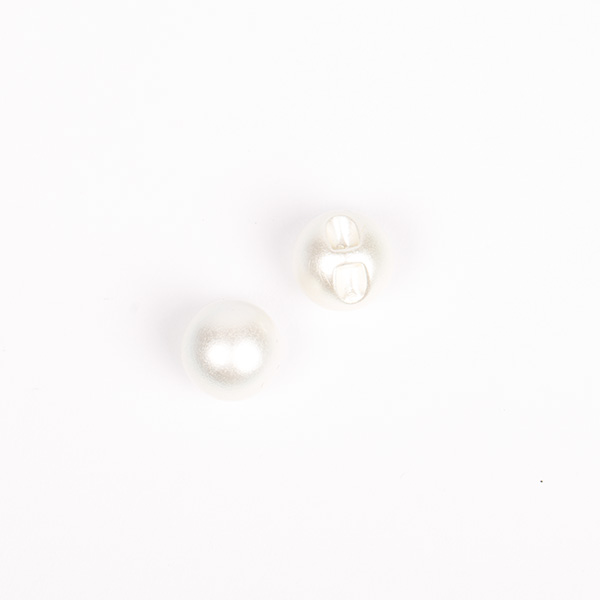
GARTER ST (back and forth on needle): K all rows. PATTERN: See diagram M.1 – pattern in diagram is seen from RS. DECREASING TIP (applies to neckline): Make all dec from RS inside 3 garter sts. Dec as follows AFTER 3 sts: slip 1 st as if to K, K1, psso. Dec as follows BEFORE 3 sts: K2 tog. -------------------------------------------------------- -------------------------------------------------------- BACK PIECE: Worked back and forth on needle. Cast on 63-71-79-87-95-103 sts (includes 1 edge st each side) on needle size 3.5 mm / US 4 with 1 thread Cotton Viscose/Safran + 1 thread Kid-Silk. Work 6 rows GARTER ST – see above! Change to needle size 4.5 mm / US 7 and continue in M.1 (first row = RS) with 1 edge st each side in garter st. REMEMBER THE GAUGE! When piece measures 4-4-5-5-6-6 cm / 1½"-1½"-2"-2"-2⅜"-2⅜" inc 1 st each side inside 1 edge st, and repeat the inc on every 4 cm / 1½" a total of 4 times = 71-79-87-95-103-111 sts (incorporate inc sts in pattern as you go along). When piece measures 18-19-20-21-22-23 cm / 7"-7½"-8"-8¼"-8¾"-9" bind off for armhole each side at the beg of every row: 4 sts 1-1-1-1-2-2 times, 2 sts 1-1-2-3-3-4 times and 1 st 1-3-5-5-5-5 times = 57-61-61-65-65-69 sts. Continue in pattern with 1 edge st in garter st each side (work sts inside edge st not fitting into pattern in stockinette st). When piece measures 33-35-37-39-41-43 cm / 13"-13¾"-14½"-15¼"-16⅛"-17" work 4 rows garter st on the middle 23-23-23-27-27-27 sts (work remaining sts as before), and now bind off the middle 17-17-17-21-21-21 sts for neck and complete each shoulder (= 20-22-22-22-22-24 sts) separately. Continue in M.1 with 3 garter sts towards neck until piece measures 36-38-40-42-44-46 cm / 14¼"-15"-15¾"-16½"-17¼"-18", bind off. RIGHT FRONT PIECE: Worked back and forth on needle. Cast on 40-44-48-52-56-60 sts (includes 1 edge st at the side) on needle size 3.5 mm / US 4 with 1 thread of each quality. Work 6 rows garter st. Change to needle size 4.5 mm / US 7 and continue in M.1 (first row = RS) with 3 garter sts towards mid front and 1 edge st in garter st towards the side. When piece measures 4-4-5-5-6-6 cm / 1½"-1½"-2"-2"-2⅜"-2⅜" inc at the side as described for back piece. When piece measures 12 cm / 4¾" dec 1 st towards mid front – SEE DECREASING TIP, and repeat the dec on every other row a total of 11-11-11-13-13-13 times and then on every 4th row 6 times (work sts not fitting into M.1 in stockinette st). AT THE SAME TIME when piece measures 18-19-20-21-22-23 cm / 7"-7½"-8"-8¼"-8¾"-9" bind off for armhole at the side as described for back piece. When all dec are complete there are 20-22-22-22-22-24 sts left on shoulder. Continue until piece measures 36-38-40-42-44-46 cm / 14¼"-15"-15¾"-16½"-17¼"-18", bind off. LEFT FRONT PIECE: Like right front piece, but mirrored, i.e. to make pattern identical on both front pieces, beg in square 6 in diagram – see arrow. SLEEVE: Worked back and forth on needle. Cast on 80-84-92-96-104-112 sts (includes 1 edge st each side) on needle size 4.5 mm / US 7 with 1 thread Kid-Silk. K 1 row from WS and continue in stockinette st for 4 cm / 1½" – adjust so that next row is from RS. Change to needle size 3.5 mm / US 4 and 1 thread of each quality and K2 tog across the row = 40-42-46-48-52-56 sts. K 5 rows, remove the Viscose thread and work next row as follows from RS: * K1, 1 YO *, repeat from *-* and finish with K1 = 79-83-91-95-103-111 sts. Change to needle size 4.5 mm / US 7, P 1 row from WS (P YO into back of loop to avoid a hole), and work next row as follows from RS: * K3, 1 YO *, repeat from *-*, finish with K 1-2-1-2-1-3 = 105-110-121-126-137-147 sts. Continue in stockinette st (on first row P YO into back of loop to avoid a hole). When piece measures 11 cm / 4⅜" (for all sizes) bind off for sleeve cap each side at the beg and every row: 4 sts 1 time, 2 sts 1 time and then 1 st each side until piece measures 19-20-21-22-23-24 cm / 7½"-8"-8¼"-8¾"-9"-9½" – adjust so that next row is from RS. K3 tog across the row and bind off in P sts from WS. ASSEMBLY: Sew shoulder seams. Set in sleeves and sew sleeve and side seams inside 1 edge st. CROCHET BORDERS: Crochet with Cotton Viscose and crochet hook size 3 mm / C along the opening of jacket as follows, beg at the bottom of left front band: ROW 1 (crochet from WS): 1 sc in each garter st up to where dec beg, * ch 5, skip approx 1 cm / ⅜", 1 sc *, repeat from *-* up along the rest of front piece, round neckline on back piece and down along right front piece to where dec beg, then crochet 1 sc in each garter st to the bottom of right front piece. ROW 2: Turn with ch 1, 1 sc in each of the first 2 sc, ch 3, skip 1 sc, 1 sc in next sc, 1 sc in each sc for 5 cm / 2", ch 3, skip 1 sc, 1 sc in next sc, 1 sc in each sc until 3 sc remain before the ch-loops, ch 3, skip 1 sc, 1 sc in each of the last 2 sc, 1 picot (=ch 3, 1 sc in first ch), 1 sc in first ch-loop from row below, 1 picot, 1 sc in same ch-loop, * 1 picot, 1 sc in next ch-loop, 1 picot, 1 sc in same ch-loop *, repeat from *-* in all ch-loops down to the dec on left front piece, now crochet 1 sc in each of the first 2 sc from previous row, ch 3, skip 1 sc, 1 sc in each sc down to bottom of left front piece (there is only 1 buttonhole loop on the inside of jacket). Crochet a border round sleeve edges with Cotton Viscose and crochet hook size 3 mm / C as follows: 1 sc in first st, * ch 5, skip 2 sts, 1 sc in next st *, repeat from *-*, finish with 1 sl st in first sc. Sew on buttons, sew the 3 mother-of-pearl buttons to the RS of left front piece and the small flat button to the WS of right front piece – try the jacket on for the right fit, and make sure the sts are not visible from RS. |
||||||||||
Diagram explanations |
||||||||||
|
||||||||||

|
||||||||||
Have you finished this pattern?Tag your pictures with #dropspattern #ladylikecardigan or submit them to the #dropsfan gallery. Do you need help with this pattern?You'll find 4 tutorial videos, a Comments/Questions area and more by visiting the pattern on garnstudio.com. © 1982-2025 DROPS Design A/S. We reserve all rights. This document, including all its sub-sections, has copyrights. Read more about what you can do with our patterns at the bottom of each pattern on our site. |
||||||||||


Post a comment to pattern DROPS 118-24
We would love to hear what you have to say about this pattern!
If you want to leave a question, please make sure you select the correct category in the form below, to speed up the answering process. Required fields are marked *.