
Popular categories
Looking for a yarn?


Comments / Questions (164)
![]() Martyna wrote:
Martyna wrote:
Hi, i am nit entirely sure about this part “ When the piece measures approx. 6¾" [8¾"-10⅝"-12½"-13¾"] bind off for armhole each side on every row – see bind off tips 2: 5 dc 1 time, 2 dc 1 time and 1 dc 3 times = 35 [42-50-57-64] dc. ”
23.01.2026 - 19:55DROPS Design answered:
Hi Martyna, You bind off equally on each side. You bind off first 5 dcs at the beginning and end of the first row, then 2 dcs at the beginning and end of the next row. Finally 1 dc at the beginning and end of each of the next 3 rows. Regards, Drops Team.
24.01.2026 - 08:53
![]() Lyda wrote:
Lyda wrote:
Hoi, ik zie bij de tweede toer, dat je een stokje in de 4 e losse haakt. Dan staat er l1 osse over 1 stokje in de 3 losse… Dan is het toch dat je het stokje in de 4 e losse haakt, en dit herhaalt. Zoals ik het begrijp is de herhaling 1 stokje en de volgende stokje in de 4e losse . ( tussen de stokje zitten 3 losse)
18.03.2025 - 08:36DROPS Design answered:
Dag Lyda,
Je haakt eerst 1 stokje in de 4e losse vanaf de haaknaald, dan sla je een losse over, dan haak je 1 stokje in elk van de volgende 3 lossen. Wat tussen sterretjes staat herhaal je vervolgens.
18.03.2025 - 20:12
![]() Nadia wrote:
Nadia wrote:
No coincide lo escrito con el patrón que se muestra en la foto :( en idioma español, el comienzo de la espalda dice: *saltar 1 cad, 1 p.a. en las 3 cad sig* pero no se forma el dibujo de la foto. Tambien las medidas son poco claras
15.10.2024 - 16:00
![]() Vårin wrote:
Vårin wrote:
Så søt beby
25.08.2024 - 19:00
![]() Lianne wrote:
Lianne wrote:
What does it mean when it says "Crochet in each dc (not in between)?" When I crochet there is a loop or hole right next to the standing part of the stitch, which actually is part of the stitch but it falls between the stitches. Normally I put my hook through it to crochet my next stitch. Is this considered "in the dc"? or "in between"? Is there a video tutorial for this dress (so I can see where they put their hook through)?
09.12.2023 - 07:11DROPS Design answered:
Dear Lianne, there are several ways you can crochet a stitch. The two most used ones are "in between the stitches" when you put the hook between the two "bars" of the stitches, and then crochet your stitch, or "in the top of the stitches" where you are putting your needle below the the two threads forming the top of the stitches, I hope this helps. (BTW you can find all the relevant videos below the instructions and the diagrams.) Happy Crocheting!
10.12.2023 - 21:23
![]() Michele Daigle wrote:
Michele Daigle wrote:
What does this part mean in the front piece? 5 dc 1 time, 2 dc 1 time and 1 dc 3 times = 35 [42-50-57-64] dc I am at 62 st for 6/9 mos and need to be at 42. Is that direction saying 10 stitches (5+2+1+1+1) or 5 st in first st, 2 in second st, then 3 in next three sts?
29.07.2023 - 02:18DROPS Design answered:
Dear Michele, on the first row, work the first 5 dc as sl st and leave the last 5dc unworked. Work back normally. On the next row, work the first 2dc as sl st and leave the last 2dc unworked. Work back normally. On the next 3 rows from the RS (work back normally from the WS) work the 1st dc as a sl st and leave the last dc unworked. Happy crocheting!
29.07.2023 - 16:53
![]() Leonie wrote:
Leonie wrote:
Liebes Team, Wie gesagt, ich arbeite nach Anleitung und häkel in der dritten Runde keine Zunahmen. Trotzdem entsteht keine Spitze. Könnt Ihr mir bitte sagen, was ich machen soll, damit eine Spitze entsteht?
31.10.2022 - 09:23DROPS Design answered:
Liebe Leonie, per Ferndiagnose ist es etwas schwierig, einen Fehler zu erkennen. Am besten zeigen Sie Ihre Arbeit Ihrem Wollladen, dort kann man so Ihnen am besten weiterhelfen, wenn sie Ihre Arbeit sehen (auch ein Foto per E-Mail können Sie auch gerne senden). Danke im voraus für Ihr Verständnis. Viel Spaß beim häkeln!
31.10.2022 - 09:36
![]() Leonie wrote:
Leonie wrote:
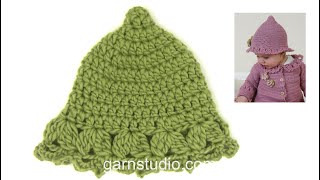
Beim Hut entsteht bei mir keine Spitze oben, so wie auf dem Bild. Es wird immer flach oben, obwohl ich nach Anleitung arbeite. Was mache ich falsch?
30.10.2022 - 13:22DROPS Design answered:
Liebe Leonie, die kleine Spitze bekommt man dan der 3. Reihe, wo keine Zunahme gehäkekt wird. Viel Spaß beim häkeln!
31.10.2022 - 09:05
![]() Brith-Eline Øye wrote:
Brith-Eline Øye wrote:
Hei. Det ser ut til at det mangler en del av oppskriften til kjolen. "Blondekant: Hekle en blondekant nederst på kjolen på nål 3 med gammel-rosa slik:". Mer står det ikke her. Finner man "slik" blondekanten skal hekles en annen plass? Mvh Brith-Eline Øye
17.04.2022 - 20:30
![]() Brith-Eline Øye wrote:
Brith-Eline Øye wrote:
Hei. Det ser ut til at det mangler en del av oppskriften til kjolen. "Blondekant: Hekle en blondekant nederst på kjolen på nål 3 med gammel-rosa slik:". Mer står det ikke her. Finner man "slik" blondekanten skal hekles en annen plass? Mvh Brith-Eline Øye
17.04.2022 - 20:28
|
|
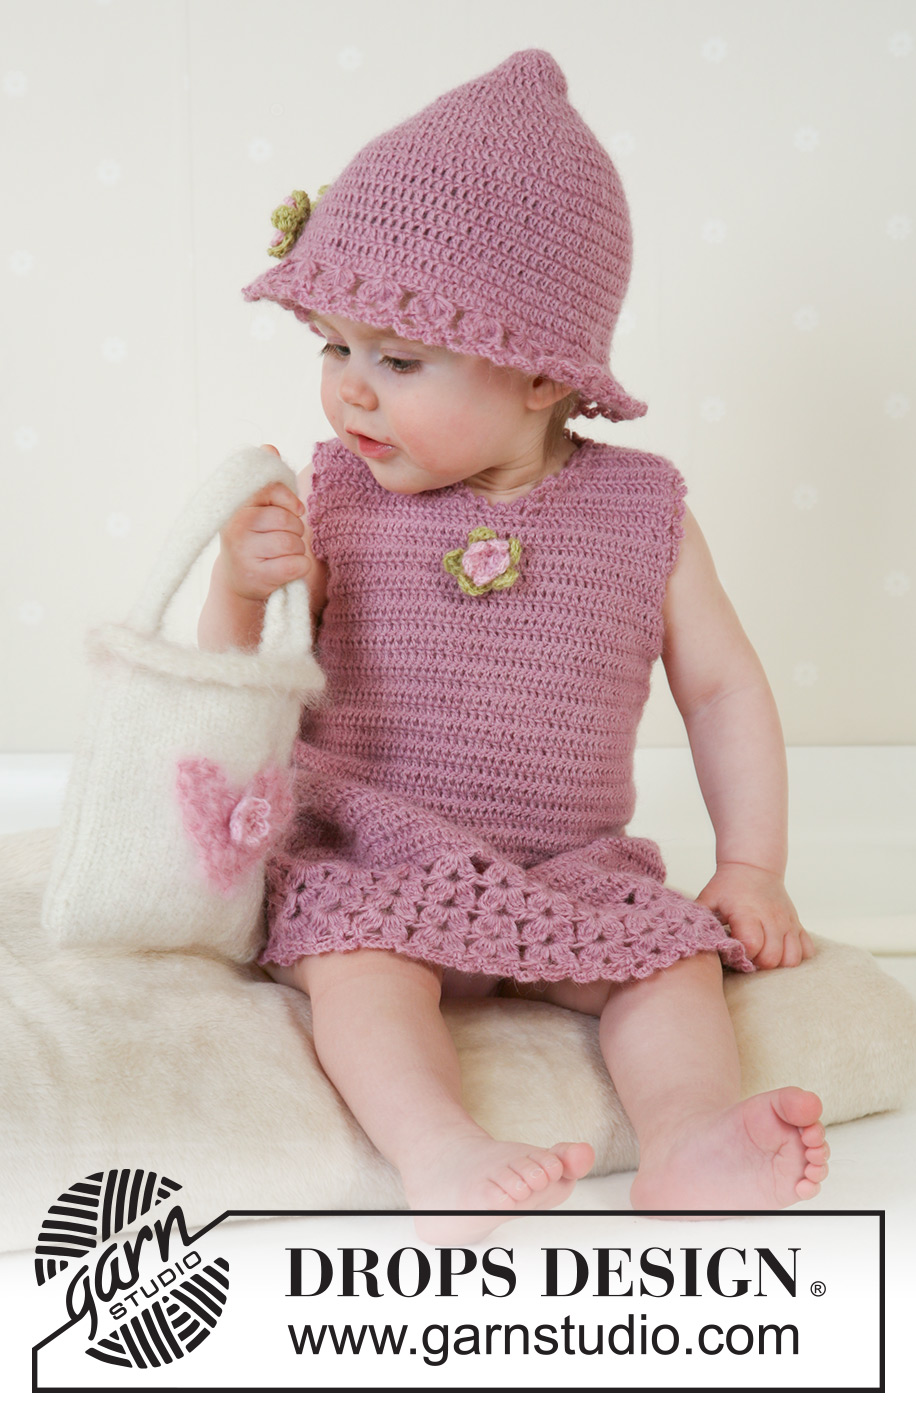
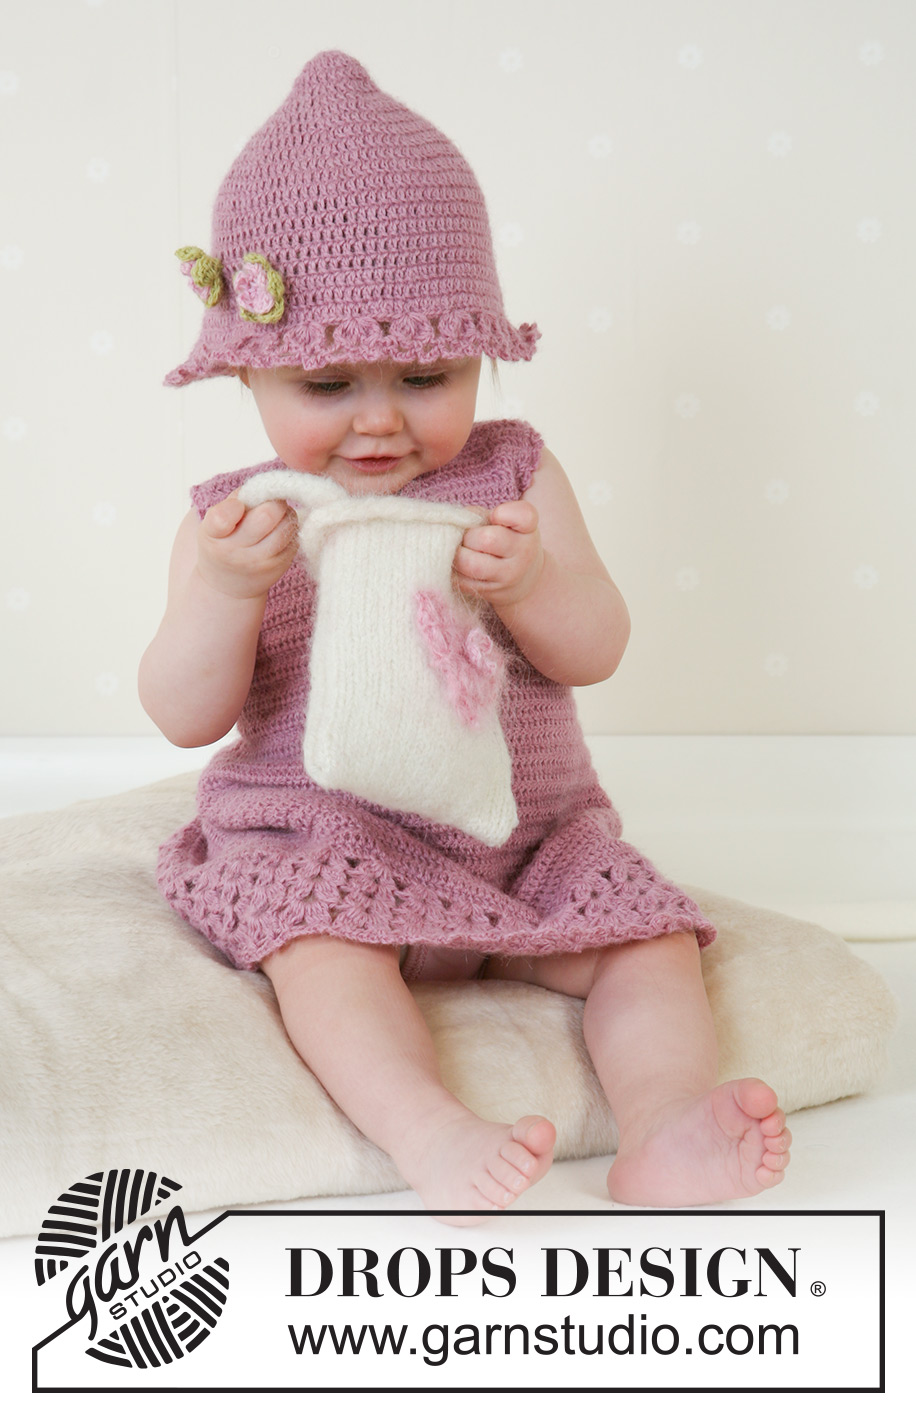
Little Miss Berry#littlemissberrydress |
|
 |
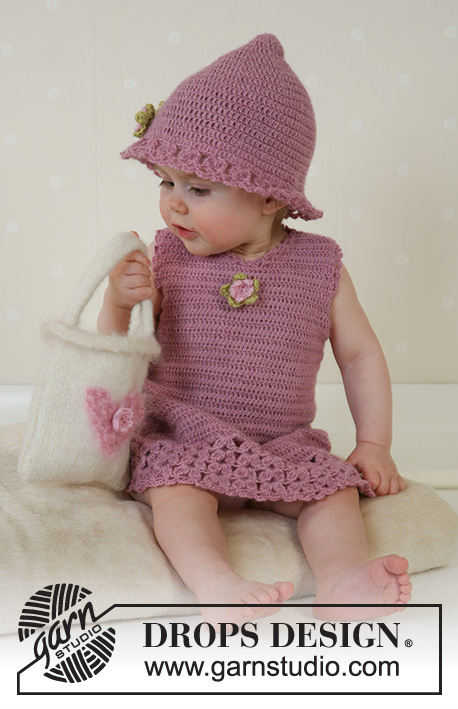 |
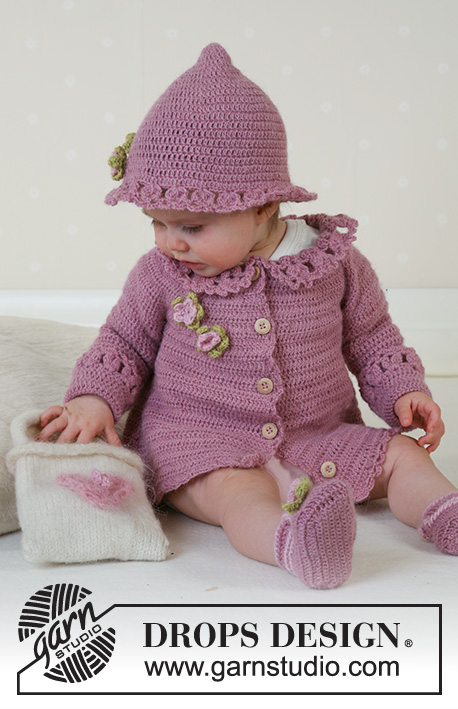
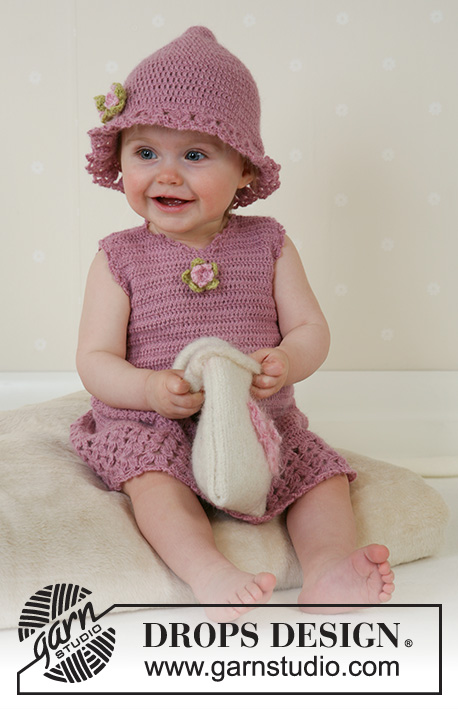
Crochet dress and summer hat in DROPS Alpaca. Knitted and felted bag in DROPS Alaska. Sizes for baby and children, 1 month to 4 years.
DROPS Baby 14-4 |
|
|
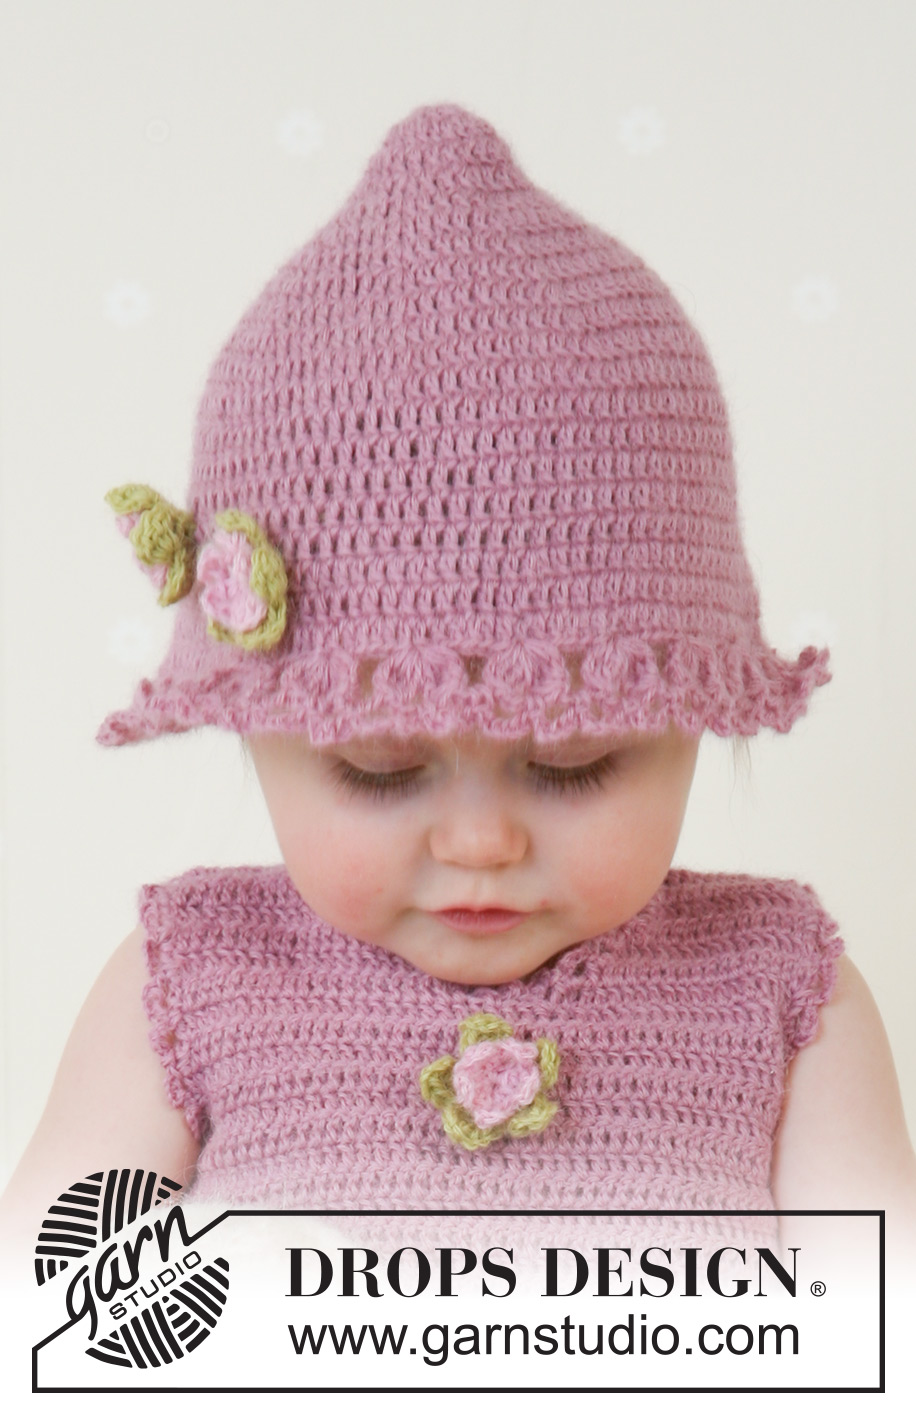
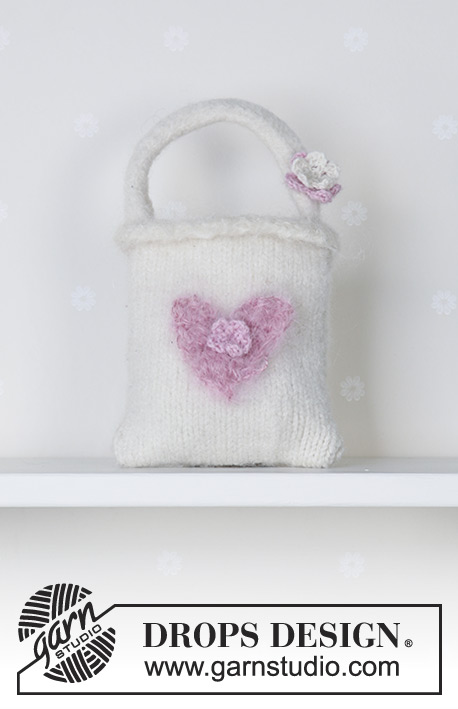
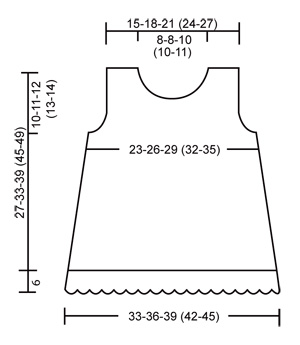
DRESS: GAUGE 24 dc x 13 rows = 4" x 4" Take time to check gauge. PATTERN NOTES Binding off tips-1: Bind off 1 dc as follows: Crochet 2 dc tog. This means crochet 1 dc but wait with the last yrh and pull through (= 2 sts on hook), crochet 1 dc in the next dc and pull the last yrh through all 3 sts on hook. Binding off tips-2: Bind off as follows at beginning of row: Replace 1 sc/dc with a sl st. Bind off as follows at the end of row: Turn the piece when number of sc/dc left on row = number of st to bind off and crochet back. Crochet info: Chain-3 at beginning of row counts as first dc unless otherwise stated. Finish the round with a sl st in the 3rd ch from beginning of round. Crochet in each dc (not in between) DRESS Front piece: Read Crochet info! Crochet 106 [116-126-135-145] ch loosely (includes 3 ch to turn with). Crochet first row as follows: 1 dc in the 4th ch from hook, *skip 1 ch, 1 dc in the next 3 ch* , repeat from *-* until end of row –Note: In size 1/3 month + 12/18 month finish with a dc in each of the last 5 ch (instead of the last 3 ch) in Size 2 years finish with a dc in each of the last 6 ch (instead of the last 3 ch) ) and in Size 3/4 years finish with a dc in each of the last 4 ch = 79 [86-94-101-108] dc, turn the piece. Continue to crochet 1 dc into each dc at the same time bind off 1 dc each side a total of 12 times – see bind off tips 1: Size 1/3 month: alternate between every and every other row, Size 6/9+ 12/18 month: On every other row, Size 2 + 3 /4 years: On every 3rd row = 55 [62-70-77-84] dc. When the piece measures approx. 6¾" [8¾"-10⅝"-12½"-13¾"] bind off for armhole each side on every row – see bind off tips 2: 5 dc 1 time, 2 dc 1 time and 1 dc 3 times = 35 [42-50-57-64] dc. When the piece measures 9" [11⅜"-13¾"-15¾"-17¼"] insert a marker in the middle of the piece (For size 1/3 month and 2 years insert a marker in the middle st). Then bind off for the neck as follows: Crochet from the shoulder and in towards the neck until 2 [3-5-5-6] dc left before the marking thread (for size 1/3 month and 2 years the number of dc is before the dc with the marking thread) turn the piece. Continue to bind off for the neck on every row –read bind off tips 2: 2 dc 2 times and 1 dc 3 times = 8 [11-13-16-19] dc left for shoulder. Cut and sew the thread when the piece measures approx. 10⅝" [13"-15¼"-17¾"-19¼"] and repeat for the other side of the neck. Back piece: Crochet as front piece - insert a marking thread in the middle of the piece (For size 1/3 month and 2 years insert a marking thread in the middle st). Bind off for armholes as for the front but when the piece measures 7½" [9¾"-12¼"-14½"-16⅛"] split the piece mid back to a slit and continue to crochet each part separately (For size 1/3 month and 2 years do not crochet the middle dc with the marking thread). When the piece measures approx. 9¾" [12¼"-14½"-17"-18½"] bind off for the neck as follows: crochet 9 [12-14-17-20] dc from the shoulder in towards the neck, turn the piece and bind off 1 dc on the next row – read Bind off tips 2. Crochet until end of row and cut and sew the thread when the piece measures approx. 10⅝" [13"-15¼"-17¾"-19¼"]. Repeat for the other side. Assembly: Sew the shoulder seams. Sew the side seams edge against edge, with small neat sts. Crochet edge: At last crochet an edge along the neck opening (and the slit at the back) and around both armholes as follows: 1 sc in the first st, *6 ch, skip approx. ½", 1 sc in the next st*, repeat from *-* and finish with 6 ch and 1 sl st in the first sc from beginning of round. Sew 2 buttons along the right slit at the back (approx. ¼" from the slit edge) –the top button should be placed ¼"-½" from the top edge, and use the ch loops at the opposite slit edge as button holes. Lace Border: Crochet a lace border along the bottom edge of the dress as follows: Crochet tips: When crocheting more tr tog do as follows: Crochet 1 tr but wait with the last yrh and pull through (= 2 sts on hook), crochet the next tr but wait with the last yrh and pull through (= 3 sts on hook) , continue this way until crochet the no of tr which need to be crochet tog and pull the last yrh through all sts on hook. 1st round: Begin at the side. 1 sc in the 1st dc, 4 ch (= 1 tr), crochet 2 tr tog in the same dc, 3 ch and 3 tr tog still in the same dc, *skip approx. ¾"-1", crochet 3 tr tog in the next dc, 3 ch and 3 tr tog*, repeat from *-* until end of round and finish with a sl st in the 4th ch crochet at beginning of round. 2nd round: Crochet sl st until first ch-loop, 4 ch (=1 tr), crochet 3 tr tog around the same ch-loop, 4 ch, 4 tr tog around the same ch-loop, *in the next ch-loop crochet 4 tr tog, 4 ch and 4 tr tog*, repeat from *-* until end of round and finish with a sl st in the 4th ch at beginning of round. 3rd round: Crochet as 2nd round. 4th round: Crochet as 2nd round but crochet 5 ch in each ch-loop (instead of 4 ch). 5th round: Crochet 1 sc in the top of the first tr group, *6 ch, 1 sc in the next tr group*, repeat from *-* until end of round and finish with 6 ch and 1 sl st in 1st sc at beginning of round. Crochet flower: Crochet 3 ch with light rose and make a loop with a sl st in 1st ch. 1st round: Crochet 5 sc around the loop and finish with a sl st in the sc from beginning of round. 2nd round: *4 ch, 1 dc in the 1st of the 4 ch, 1 sc in the next st*, repeat from *-* = 5 leaves, cut the thread. Crochet 3 ch with lime and make a loop with a sl st in 1st ch. 1st round: Crochet 5 sc around the loop and finish with a sl st in the sc from beginning of round. 2nd round: *4 ch, 3 dc in the 1st of the 4 ch, 1 sc in the next st*, repeat from *-* = 5 leaves, cut the thread. Sew the light rose flower on to the lime flower and sew the flower to the dress at mid front. ______________________________________________________________________ HAT: PATTERN NOTES Chain-3 at beginning of row counts as first dc unless otherwise stated. Finish the round with a sl st in the 3rd ch from beginning of round. Crochet in each dc (not in between) HAT Crochet 4 ch with hook C and old rose and make a loop with a sl st in 1st ch. 1st round: Crochet 12 dc around the loop –read Crochet info! 2nd round: Crochet 2 dc in each dc = 24 dc 3rd round: Crochet 1 dc in each dc = 24 dc 4th round: *1 dc in each of the 2 first dc, 2 dc in the next dc*, repeat from *-* until end of round = 32 dc. 5th round: *1 dc in each of the 3 first dc, 2 dc in the next dc*, repeat from *-* until end of round = 40 dc. 6th round: *1 dc in each of the 4 first dc, 2 dc in the next dc*, repeat from *-* until end of round = 48 dc. 7th round: *1 dc in each of the 5 first dc, 2 dc in the next dc*, repeat from *-* until end of round = 56 dc. 8th round: *1 dc in each of the 6 first dc, 2 dc in the next dc*, repeat from *-* until end of round = 64 dc. 9th round: *1 dc in each of the 7 first dc, 2 dc in the next dc*, repeat from *-* until end of round = 72 dc. 10th round: *1 dc in each of the 8 first dc, 2 dc in the next dc*, repeat from *-* until end of round = 80 dc. Finish the increases here for size 1/3 month 11th round: *1 dc in each of the 9 first dc, 2 dc in the next dc*, repeat from *-* until finish round = 88 dc. Finish the increases here for size 6/18 month 12th round: *1 dc in each of the 10 first dc, 2 dc in the next dc*, repeat from *-* until finish round = 96 dc. All sizes: Continue round with dc without any increases until the piece measures 5" [5½"-6¼"] from the top. Crochet 1 round as follows: 1 dc in each dc but 2 dc in every 8th dc = 90 [99-108] dc on round. Crochet 1 round of dc without any increases and continue to crochet 1 round of dc with 2 dc in every 6th dc (for the middle size 3 dc left on round after the last increase instead of 6) = 105 [115-126] dc on round. Lace border: 1st round: Crochet 4 ch (= 1 tr), crochet 2 tr tog. –see crochet tips under dress, 3 ch and 3 tr tog in the first dc, *skip approx. ¾"-1", crochet 3 tr tog in the next dc, 3 ch and 3 tr tog*, repeat from *-* until end of round and finish with a sl st in the 4th ch at beginning of round. 2nd round: Crochet 1 sc in the top of the first tr group, *6 ch, 1 sc in the next tr group*, repeat from *-* until end of round and finish with 6 ch and 1 sl st in the 1st sc at beginning of round. Cut and sew the thread, the hat measures approx. 7" [7½"-8¼"] from the top. Crochet flower: Crochet 2 flowers as explained under the dress and sew the flowers to the hat. ______________________________________________________________________ BAG Materials: DROPS Alaska from Garnstudio 50 g, color no 02, off-white + a remnant of DROPS Vienna color no 21, off-white and no 36, pink + a remnant of DROPS Alpaca color no 3140, baby pink. DROPS crochet hook no. 3 mm/ US C DROPS crochet hook no. 6 mm/ J/10 (for the heart on the bag) DROPS pointed needle size 5.5 mm/ US 9 (for the bag) Measures: Before felting: Approx. 16 cm / 6¼" wide and 24 cm / 9½" long After felting: Approx. 12 cm / 4¾" wide and 15 cm / 6" long. Bag: Cast on loosely 27 sts (inclusive of an edge st each side) on needles size 5.5 mm / US 9 and off white Vienna. Knit 2 rows of garter sts and change to Alaska and work in stockinette sts until the piece measures approx. 47 cm / 18½" – Adjust so that the next row is worked from the wrong side. Change back to off white Vienna, and knit 2 rows of garter sts. Bind off loosely. Strap: Cast on 5 sts on needle size 5.5 mm/ US 9 with Alaska and work in stockinette sts until the strap measures approx. 25 cm / 9¾", bind off. Fold the strap double – lengthwise and purl side against purl side and sew it tog. in the most outer part of the outer st. Assembly: Fold the bag double and sew the side seams inside the edge st. Sew the strap to the bag each side. FELTING: The piece can be felted either in the washing machine or the tumble dryer – read description below. Remember: Subsequent washes are as for a normal wool garment. IN WASHING MACHINE: Washing machines will vary when felting. If the piece is not felted enough, it can be felted again. If it is felted too much, it can be stretched to the correct size while still wet. DO THE FOLLOWING: Lay the piece in the washing machine, using a programme of approx. 40 minutes (not a wool programme). Wash at 40 degrees C = 104 degrees F without pre-wash, detergent is optional. After washing, shape the piece while it is still wet. IN TUMBLE DRYER: Felting in a tumble dryer gives good control over the degree of felting. The tumble dryer can be opened during drying to check the size of the piece. If it is not felted enough it can be thoroughly wetted and felted again. If it is felted too much it can be stretched to the correct size while still wet. DO THE FOLLOWING: Lay the piece in water so it becomes completely wet, then place it in the tumble dryer and begin the drying process. Dry to the desired size, checking regularly. Crochet Heart: Ch 2 on hook size 6 mm/ with rose Vienna and crochet 1 sc in the first of the 2 ch, turn the piece. Ch 1, crochet 3 sc in sc from previous row, turn the piece. Ch 1, 2 sc in the first sc, 1 sc in the next sc and 2 sc in the last sc = 5 sc, turn with 1 ch, 2 sc in the first sc, 1 sc in the next sc, 2 sc in the following sc, 1 sc in the next sc and 2 sc in the last sc = 8 sc, turn the piece. *Ch 1, skip a sc, 1 sc in each of the next 3 sc, turn the piece. Ch 1, skip 1 sc, 1 sc in each of the next 2 sc, turn the piece. Ch 1, 1 sc in each of the 2 sc, turn the piece. Ch 1 and 1 sl st in the ch from beginning of previous row, cut and sew the thread*. Repeat from *-* for the other side of the heart and sew the heart to the bag. Crochet flower: Ch 3 with hook no. 3 mm/ US C and light rose Alpaca and make a ring with a sl st in 1st ch. 1st round: Crochet 5 sc around the ring and finish with a sl st in the sc from beginning of round. 2nd round: *ch 4, 1 dc in the 1st of the 4 ch, 1 sc in the next st*, repeat from *-* = 5 leaves, cut the thread. Sew the flower to the heart. |
|
 |
|
Have you finished this pattern?Tag your pictures with #dropspattern #littlemissberrydress or submit them to the #dropsfan gallery. Do you need help with this pattern?You'll find 18 tutorial videos, a Comments/Questions area and more by visiting the pattern on garnstudio.com. © 1982-2026 DROPS Design A/S. We reserve all rights. This document, including all its sub-sections, has copyrights. Read more about what you can do with our patterns at the bottom of each pattern on our site. |
|


With over 40 years in knitting and crochet design, DROPS Design offers one of the most extensive collections of free patterns on the internet - translated to 17 languages. As of today we count 324 catalogs and 12290 patterns - 12280 of which are translated into English (US/in).
We work hard to bring you the best knitting and crochet have to offer, inspiration and advice as well as great quality yarns at incredible prices! Would you like to use our patterns for other than personal use? You can read what you are allowed to do in the Copyright text at the bottom of all our patterns. Happy crafting!
Post a comment to pattern DROPS Baby 14-4
We would love to hear what you have to say about this pattern!
If you want to leave a question, please make sure you select the correct category in the form below, to speed up the answering process. Required fields are marked *.