
Popular categories
Looking for a yarn?


Comments / Questions (28)
![]() Gerry wrote:
Gerry wrote:
Drops 229-7 shawl Is the instruction to increase/decrease every 6 th row correct ? I knitted the shawl, which was 25 cms wide as it should be , but 220 cms long where it should be 139 cms.
28.04.2026 - 10:59DROPS Design answered:
Dear Gerry, is your tension correct? You should get 39 rows garter stitch = 10 cm? When increasing you should increase from 2 sts before A.1 to 46 sts after A.1 every 6th row after the first 9 rows. Can this help?
28.04.2026 - 16:25
![]() Małgorzata wrote:
Małgorzata wrote:
Ile motkow włóczki potrzeba na ten szalik
14.04.2026 - 14:16DROPS Design answered:
Witaj Małgorzato, potrzebujesz 50 g włóczki DROPS Kid-Silk, co jest podane w części MATERIAŁ w opisie. Ta włóczka występuje w motkach po 25 g więc będziesz potrzebować 2 motków. Pozdrawiamy!
15.04.2026 - 11:18
![]() Tarja wrote:
Tarja wrote:
Lankaa meni vain 1 kerä.
18.02.2026 - 18:50
![]() Karin Brenden wrote:
Karin Brenden wrote:
Hvorfor bør dette strikkes på settpinnner ?
26.09.2025 - 07:22DROPS Design answered:
Hi Karin, nowadays circular needles are commonly used because of their versatility, one can use them when working in the round and back and forth. If you prefer straight needles you can make this shaw with them of course. Happy knitting!
26.09.2025 - 07:35
![]() Amanda wrote:
Amanda wrote:
Hi, can I do this as a video tutorial and some more of your free patterns for my YouTube community please? To help new knitters learn techniques, find your yarn and great patterns! Many thanks Amanda
31.08.2025 - 09:46DROPS Design answered:
Dear Amanda, yes, as long as the video tutorials are free and you indicate clearly where the patterns come from, linking to the pattern written instructions and mentioning that it's a DROPS Design pattern in the video. Also, the pattern should be worked as in the written instructions, without modifying it. Happy knitting!
31.08.2025 - 18:43
![]() Elisabeth wrote:
Elisabeth wrote:
Hvorfor skal det på midten før felling bare være 4 pinner mellom hullene? I økningene er det hver 6.pinne, og videre i fellingen er det hver 6.pinne, men på midten et det 1 pinne med hull uten felling, og deretter 3 pinner med mønster før man skal felle på 4.pinnen. De to hullene på midten blir da en rille nærmere hverandre enn alle andre.
06.04.2025 - 17:38DROPS Design answered:
Hej Elisabeth, tænker du på selve picotkanten? Prøv at strikke en prøve så du kan se hvordan det kommer til at se ud :)
10.04.2025 - 08:25
![]() Beatrice B wrote:
Beatrice B wrote:
Suite message précédent, les aiguilles utilisées sont bien du 4,5 et non 3,5, et le maillage est vraiment très aéré. je recommence donc en 4,5 avec 2 fils.
25.03.2025 - 09:41
![]() Beatrice B wrote:
Beatrice B wrote:
Il me semble qu'il faudrait 2 fils Kid Silk car 1 seul est beaucoup trop fin pour avoir les bonnes mesures du modèle avec des aiguilles 3,5. En général mes échantillons correspondent. Je recommence avec 2 fils.
25.03.2025 - 09:36DROPS Design answered:
Bonjour Béatrice, pour ce châle il faut bien tricoter avec 1 seul fil sur la base de 20 mailles x 39 rangs point mousse = 10 x 10 cm; notez que vous pouvez tout à fait tricoter avec 2 fils, mais pensez à bien adapter les explications en fonction de votre échantillon - notez également que la quantité nécessaire pourrait être différente. Bon tricot!
25.03.2025 - 10:18
![]() Christin Granlund wrote:
Christin Granlund wrote:
Ska sticka sjal med picotkant, börjar med 6 m ska avmaska och sticka ett omslag som inte finns . Förstår inte. Pink Soda Shalw heter mönstret.
15.01.2025 - 14:00DROPS Design answered:
Hej Christin, jo du starter diagrammet nederst i højre hjørne, strikker 2 m sammen, 1 omslag, 2 m i 1 m, 2 m i 1 m, nu har du 8 m på pinden :)
16.01.2025 - 14:31
![]() Korina wrote:
Korina wrote:
Then would this mean that I the next row I would increase would be row 14, then 19, 24, 29 and so on?
22.06.2024 - 16:35
|
||||||||||||||||||||||
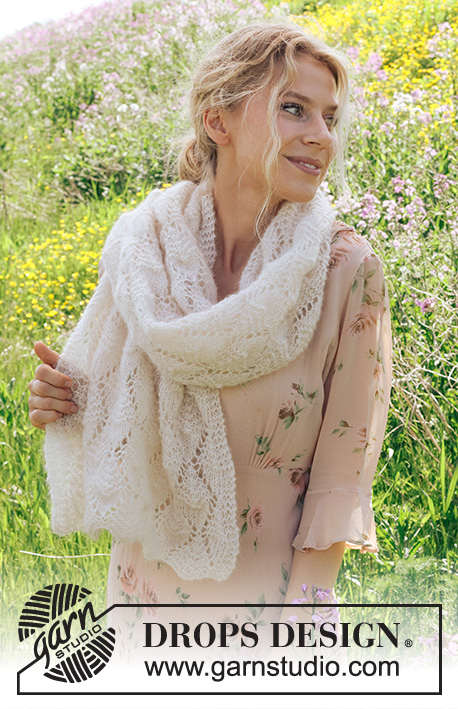
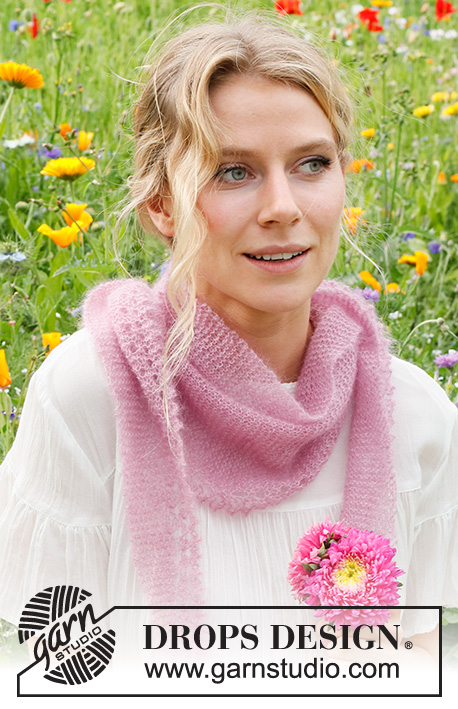
Pink Soda Shawl#pinksodashawl |
||||||||||||||||||||||
 |
 |
|||||||||||||||||||||
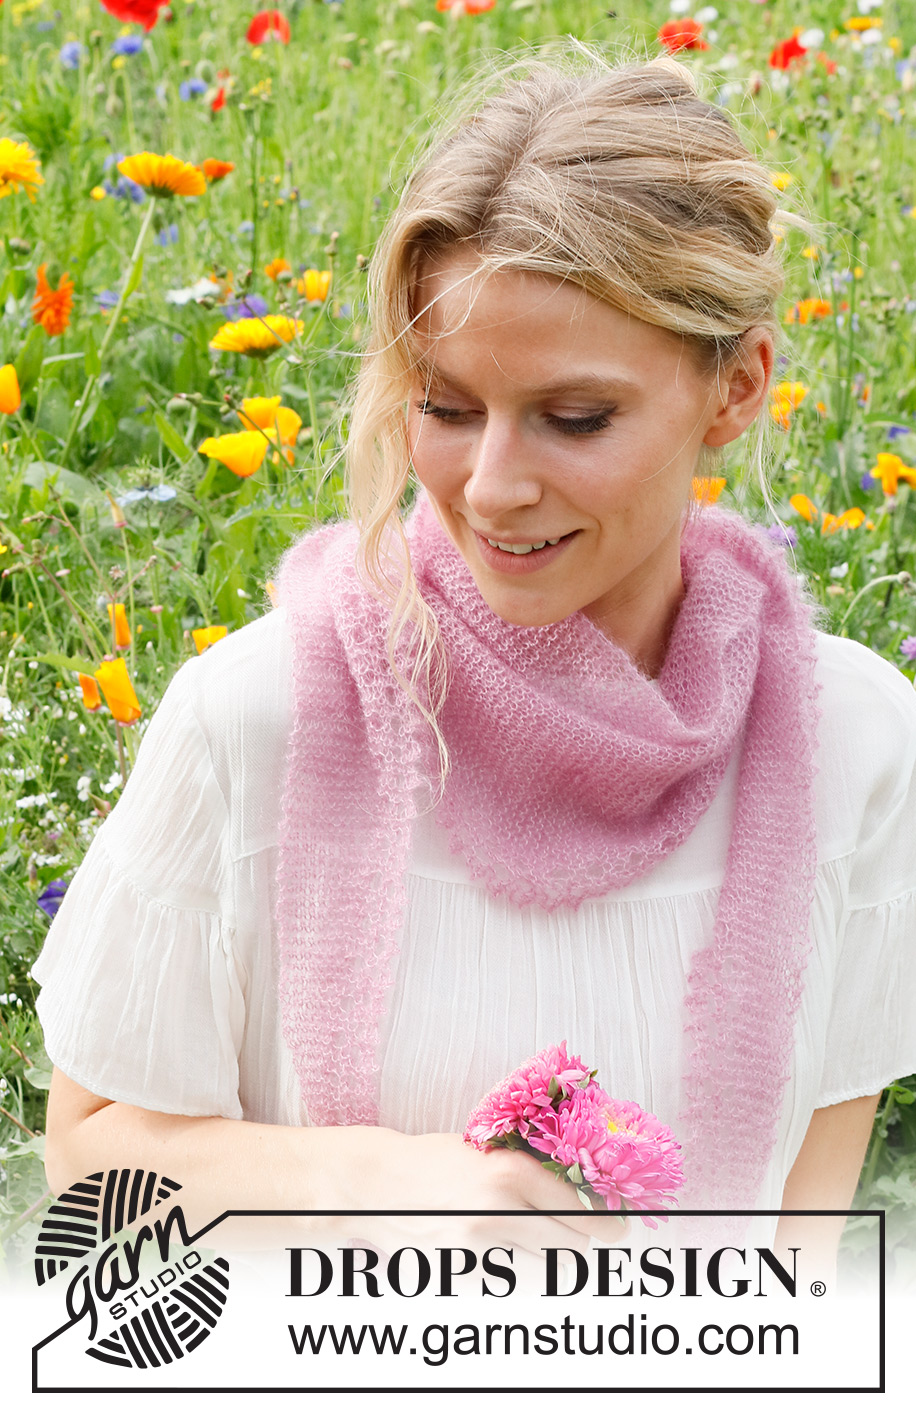
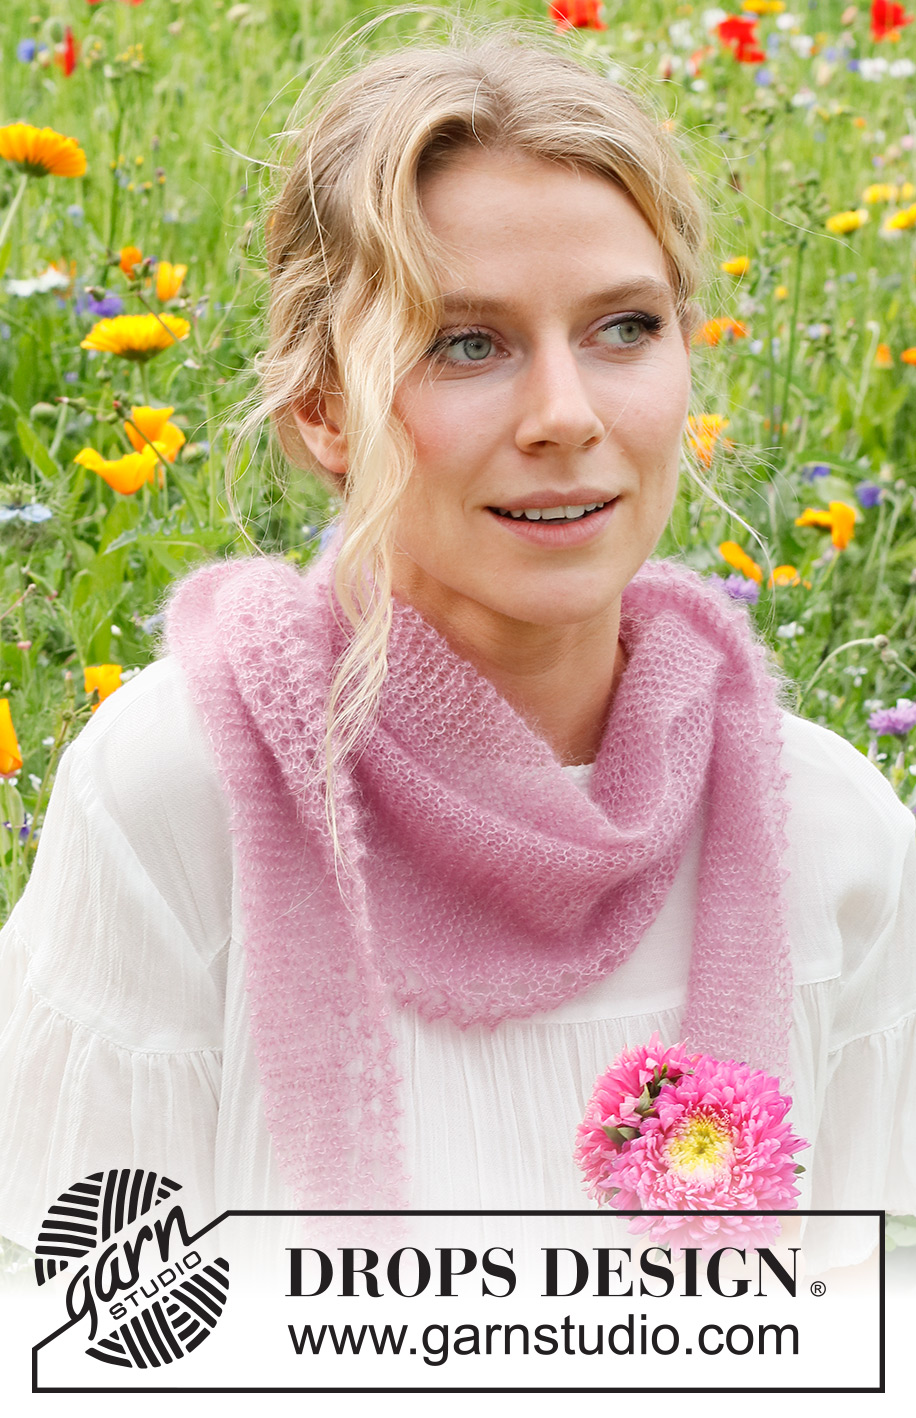
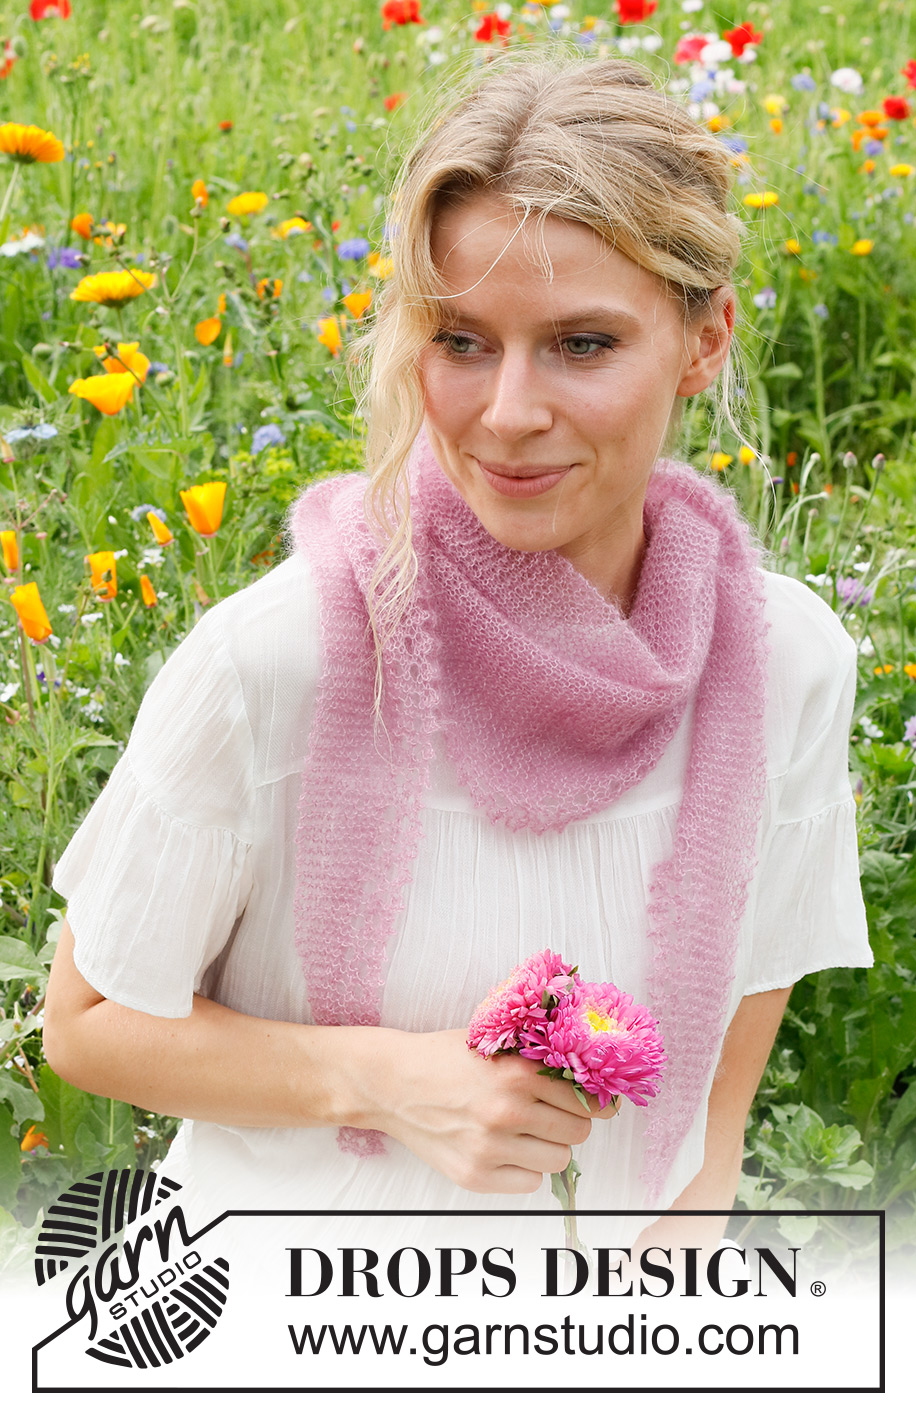
Knitted shawl in DROPS Kid-Silk. The piece is worked sideways, with garter stitch and picot-edge.
DROPS 229-7 |
||||||||||||||||||||||
|
------------------------------------------------------- EXPLANATIONS FOR THE PATTERN: ------------------------------------------------------- RIDGE/GARTER STITCH (worked back and forth): Knit all rows. 1 ridge = knit 2 rows. PATTERN: See diagram A.1. The diagram shows all rows in the pattern from the right side. ------------------------------------------------------- START THE PIECE HERE: ------------------------------------------------------- SHAWL – SHORT OVERVIEW OF THE PIECE: The piece is worked back and forth, sideways in GARTER STITCH – read description above, with a picot-edge along the one side. SHAWL: Cast on 6 stitches with needle size 4.5 MM = US 7 and DROPS Kid-Silk. Insert 1 marker after the first 2 stitches (from the right side) and allow the marker to follow the picot-edge as follows: ROW 1 (= right side): Knit. ROW 2 (= wrong side): Knit. ROW 3 (= right side): Knit until there are 4 stitches left, work A.1 (= picot-edge). 2 stitches increased. ROW 4 (= wrong side): Work A.1 (= picot-edge), knit to end of row. 2 stitches decreased. Repeat rows 1 to 4, AT THE SAME TIME on row 9, increase 1 stitch by making 1 yarn over before the marker. On the next row knit the yarn over to leave a hole. Repeat the increase every 6th row – increase each time before the marker so there are more and more garter stitches to the right of the marker (seen from the right side). REMEMBER THE KNITTING GAUGE! Continue until you have increased 46 stitches before the marker, the piece measures approx. 25 cm = 9¾" in width and 68 cm = 26¾" along the straight edge. Work 4 rows of pattern as before, but without increasing. The next row is worked from the right side: Work until there are 2 stitches left before the marker, knit 2 together and make 1 yarn over; this allows the row of holes to continue without further increases. Work 3 rows of pattern as before, but without increasing. On the next row decrease before the marker as follows: Start 3 stitches before the marker, knit 3 together, make 1 yarn over. Repeat this decrease every 6th row until there are only 2 stitches left before the marker (seen from the right side). Work 8 rows as before, but without decreasing. Bind off. The shawl measures approx. 139 cm = 54¾" from side to side. |
||||||||||||||||||||||
Diagram explanations |
||||||||||||||||||||||
|
||||||||||||||||||||||
 |
||||||||||||||||||||||
Have you finished this pattern?Tag your pictures with #dropspattern #pinksodashawl or submit them to the #dropsfan gallery. Do you need help with this pattern?You'll find 14 tutorial videos, a Comments/Questions area and more by visiting the pattern on garnstudio.com. © 1982-2026 DROPS Design A/S. We reserve all rights. This document, including all its sub-sections, has copyrights. Read more about what you can do with our patterns at the bottom of each pattern on our site. |
||||||||||||||||||||||


With over 40 years in knitting and crochet design, DROPS Design offers one of the most extensive collections of free patterns on the internet - translated to 17 languages. As of today we count 324 catalogs and 12290 patterns - 12280 of which are translated into English (US/in).
We work hard to bring you the best knitting and crochet have to offer, inspiration and advice as well as great quality yarns at incredible prices! Would you like to use our patterns for other than personal use? You can read what you are allowed to do in the Copyright text at the bottom of all our patterns. Happy crafting!
Post a comment to pattern DROPS 229-7
We would love to hear what you have to say about this pattern!
If you want to leave a question, please make sure you select the correct category in the form below, to speed up the answering process. Required fields are marked *.