
Popular categories
Looking for a yarn?


Comments / Questions (3)
![]() Johanna Jagt wrote:
Johanna Jagt wrote:
Ik weet niet hoe ik de sjaal met liefdesknopen, na de 1ste driehoek, een rechte kant omhoog moet krijgen. Hoe doe je dat? Dus het middengedeelte
07.08.2023 - 16:59DROPS Design answered:
Dag Johanna,
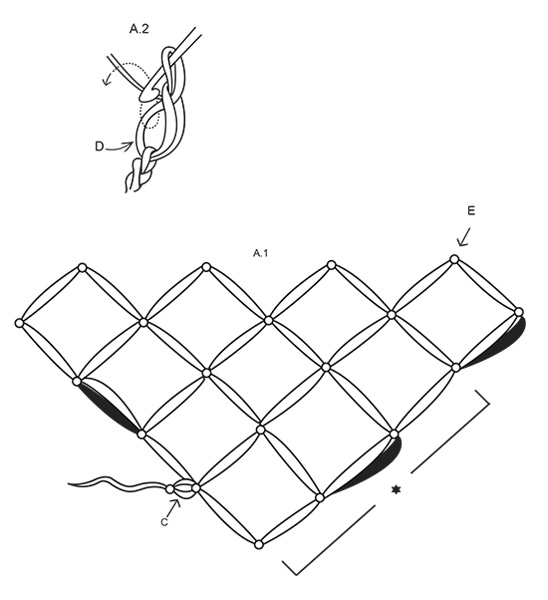
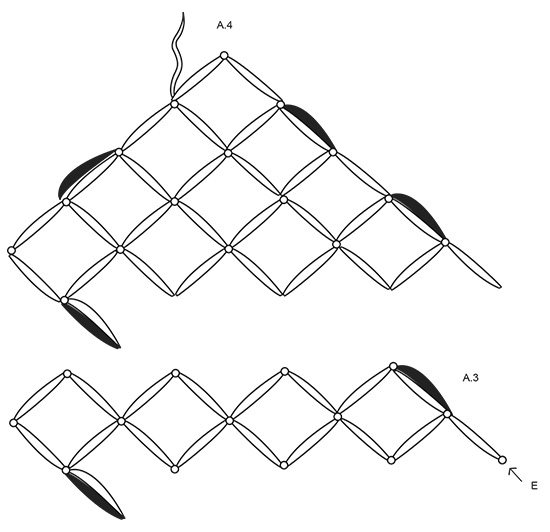
Bij A.1 zie je punt E aangewezen met een pijltje. Vanaf daar haak je telpatroon A.3 steeds heen en weer. Je blijft dus als het ware in diagonale richting haken.
08.08.2023 - 20:06
![]() Anne Roget wrote:
Anne Roget wrote:
Besoin d\'aide pour passer au milieu, après un joli début. Terminer par E : cad terminer par 3 nœuds d\'amour, 1 maille serrée dans le 1er nœud d\'amour du carré du rang précédent? On se retrouve alors sur un côté du triangle? Ou on avance en diagonale? Au diagramme A3 , la pointe du triangle est en bas? Merci de votre aide, car perdue.
27.03.2022 - 00:28DROPS Design answered:
Bonjour Mme Roget, pour le dernier rang, lisez de gauche à droite, autrement dit, vous terminez par le point E sans le relier au point suivant (celui tout à droite dans le schéma): vous avez fait le 1er coin en bas à gauche du schéma ( pointe du début); continuez maintenant avec A.3 pour la partie en diagonale (partie principale de l''écharpe). Bon crochet!
28.03.2022 - 09:12
![]() Sylvie LB wrote:
Sylvie LB wrote:
Elle a l'air souple et douce
05.06.2018 - 20:12
|
|||||||
Le Rouge#lerougescarf |
|||||||
 |
 |
||||||
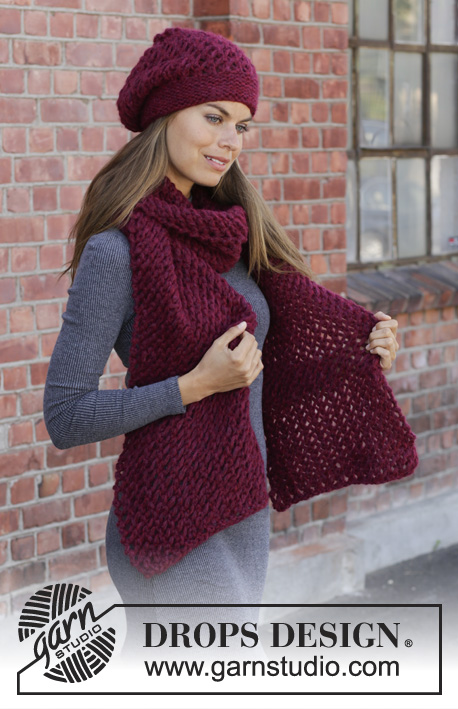
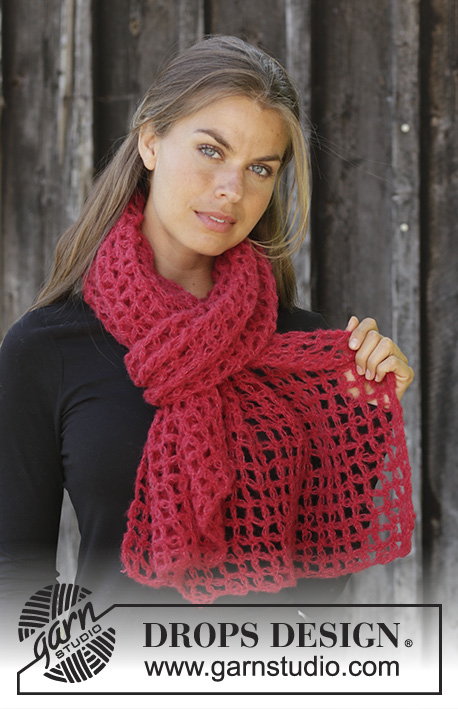
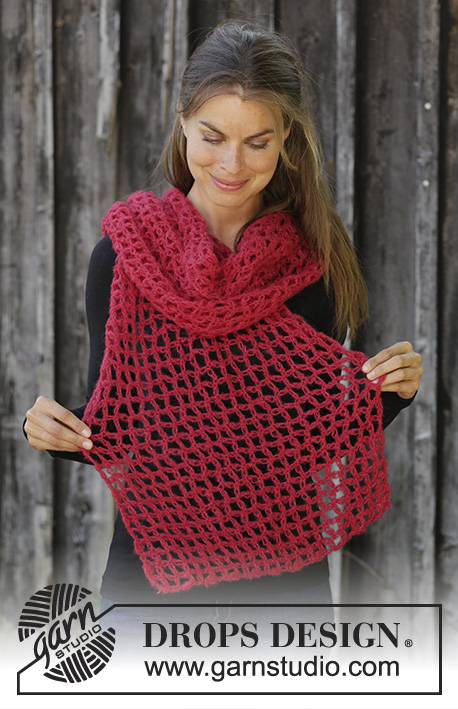
Crocheted stole in DROPS Brushed Alpaca Silk. Piece is crocheted with love knots.
DROPS 192-49 |
|||||||
|
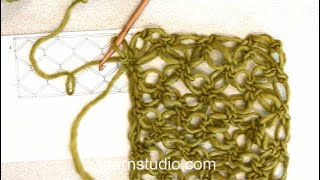
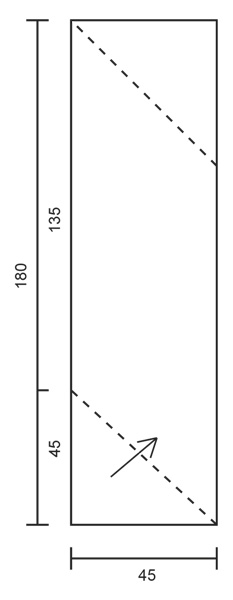
---------------------------------------------------------- EXPLANATION FOR THE PATTERN: ---------------------------------------------------------- PATTERN: See diagrams A.1 to A.4. CROCHET TIP: Hold the loop (= D) when working, this makes the love knot round and airy. ---------------------------------------------------------- START THE PIECE HERE: ---------------------------------------------------------- STOLE - SHORT OVERVIEW OF THE PIECE: Work back and forth from one corner and up to opposite corner - see chart. STOLE: See illustrations A.1 to A.4. See chart on how to crochet the piece. Begin in first corner as follows: FIRST CORNER: ROW 1: Work 1 chain stitch (= C on A.1) on hook size 4 mm / G/6 with Brushed Alpaca Silk. Work 1 love knot as follows: * Pull stitch on hook long - approx. 1½ cm, make 1 yarn over, pull yarn over through long stitch, insert hook through loop (see A.2 - loop = D on A.2) made from the long stitch - read CROCHET TIP, make 1 yarn over, pull yarn over through the loop (= 2 stitches on hook), make 1 yarn over, pull yarn over through the 2 stitches on hook *, work from *-* 3 more times (= 4 love knots) and form them into 1 square with 1 single crochet in 1st chain stitch worked (= C). ROW 2: Turn piece, work 3 love knots, 1 single crochet in the 3rd love knot from 1st row, work 3 love knots and 1 single crochet in the 2nd love knot from 1st row (= 2 squares on row). ROW 3: Turn piece, work 1 love knot and fasten with 1 single crochet in the 2nd love knot from previous row (i.e. In the last square worked) - you have now turned (= black squares in chart) and are ready to continue on this row: Work 3 love knots, 1 single crochet at the top of last square from previous row, 2 love knots, 1 single crochet in top of next square, 3 love knots, 1 single crochet in 1st love knot in first square from previous row (= 3 squares on row). REMEMBER THE CROCHET GAUGE! ROW 4: Turn piece, work 1 love knot and fasten with 1 single crochet in the 2nd love knot in last square from previous row - you have now turned and are ready to continue on this row: Work 3 love knots, 1 single crochet at the top of last square from previous row, 2 love knots, 1 single crochet at the top of next square, 2 love knots, 1 single crochet in top of next square, 3 love knots, 1 single crochet in 1st love knot in first square from previous row (= 4 squares on row). Continue like this upwards, turn on every row as explained in 3rd row and continue to work so that there is one more square on every row. Work 3 love knots in each side and 2 love knots on the rest of row (each square should have 4 love knots in total). Work like this until stole measures approx. 45 cm (see star in diagram on how to measure). - but without working the last love knot (the one you turn with), i.e. finish at E to continue diagonally. Desired number of square have been worked in width. MIDDLE: Then continue as shown in A.3, begin from E (with love knots and turn as shown in diagram), number of squares is the same but 1 and 1 square goes diagonally towards one side. Continue like this upwards until stole measures approx. 180 cm along the longest side. LAST CORNER: Then work as shown in A.4 (with love knots and turn as shown in diagram), there is now 1 square less on every row. Continue upwards until there is only 1 square on row, fasten off. Stole measures approx. 45 x 180 cm/17 3/4 x 70 3/4. |
|||||||
Diagram explanations |
|||||||
|
|||||||
 |
|||||||
 |
|||||||
 |
|||||||
Have you finished this pattern?Tag your pictures with #dropspattern #lerougescarf or submit them to the #dropsfan gallery. Do you need help with this pattern?You'll find 2 tutorial videos, a Comments/Questions area and more by visiting the pattern on garnstudio.com. © 1982-2026 DROPS Design A/S. We reserve all rights. This document, including all its sub-sections, has copyrights. Read more about what you can do with our patterns at the bottom of each pattern on our site. |
|||||||


With over 40 years in knitting and crochet design, DROPS Design offers one of the most extensive collections of free patterns on the internet - translated to 17 languages. As of today we count 324 catalogs and 12290 patterns - 12280 of which are translated into English (US/in).
We work hard to bring you the best knitting and crochet have to offer, inspiration and advice as well as great quality yarns at incredible prices! Would you like to use our patterns for other than personal use? You can read what you are allowed to do in the Copyright text at the bottom of all our patterns. Happy crafting!
Post a comment to pattern DROPS 192-49
We would love to hear what you have to say about this pattern!
If you want to leave a question, please make sure you select the correct category in the form below, to speed up the answering process. Required fields are marked *.