
Popular categories
Looking for a yarn?


Comments / Questions (102)
![]() Paige wrote:
Paige wrote:
Also do we just repeat the A.1B section for 20 times? Or is it A.1A and A.1B twenty times?
27.04.2015 - 19:49DROPS Design answered:
Dear Paige, you work 1 time the 4 sts in A.1A, then repeat a total of 20 times in first size the 6 sts in A.1B and finish pattern with the 3 sts in A.1C. Happy knititng!
28.04.2015 - 09:41
![]() Paige wrote:
Paige wrote:
With the body, when we are repeating the stockinette stitch with the a.1 sections, do we start with the bottom line of the diagram for the first row, and then the next row is the second line from the bottom?
27.04.2015 - 19:34DROPS Design answered:
Dear Paige, that's correct, start reading diagram from the bottom corner on the right side towards the left (from RS) and from the left towards the right from WS. Read more about diagrams here. Happy knitting!
28.04.2015 - 09:38
![]() Gunnel Tostar wrote:
Gunnel Tostar wrote:
Förlåt! Hade för bråttom, ser att det är ändrat på nätet. Skrev ut mönstret för några dagar sedan och satt och stickade nu.
24.04.2015 - 09:56
![]() Gunnel Tostar wrote:
Gunnel Tostar wrote:
Själv stickar jag som det ser ut på fotot. I mönstret står att de två kantmaskorna ska vara i slätstickning men fotot säger mig rätstickning. Har väl ingen stor betydelse. Kan väl rulla sig på olika sätt möjligen. Verkar påpekat tidigare men är inte ändrat i mönstret.
24.04.2015 - 08:11
![]() Päivi wrote:
Päivi wrote:
I have done this lace affair jacket - any button and buttonhole for holding on
17.04.2015 - 10:49DROPS Design answered:
Dear Päivi. No, this jacket has no buttonholes, You can close it with a pin or broche if needed - or make a buttonhole(s) if you prefer.
17.04.2015 - 11:31
![]() Murielle Pham wrote:
Murielle Pham wrote:
Modèle réalisé en bleu ; super résultat et pas difficile du tout à faire. merci pour ce joli modèle.
16.04.2015 - 15:05
![]() Bea wrote:
Bea wrote:
In der Anleitung steht, dass die ersten und letzen beiden Maschen jeder Reihe glatt rechts gestrickt werden sollen. Auf dem Foto sind diese aber eindeutig kraus rechts gestrickt. Was ist nun richtig?
28.03.2015 - 20:52DROPS Design answered:
An sich ist es richtig, 2 M glatt re und dann 1 M li zu stricken, wie beschrieben. Wenn es Ihnen aber besser gefällt, können Sie stattdessen 3 M kraus re stricken, oder 2 M kraus re und 1 M li. Am besten machen Sie ein kleines Probestück mit den Varianten. Sie müssen die Blenden in jedem Fall zuletzt dämpfen oder spannen, damit sie sich nicht nach innen umschlagen.
29.03.2015 - 11:08
![]() Bea wrote:
Bea wrote:
In der Anleitung steht, dass die ersten und letzen beiden Maschen jeder Reihe glatt rechts gestrickt werden sollen. Auf dem Foto sind diese aber eindeutig kraus rechts gestrickt. Was ist nun richtig?
28.03.2015 - 20:47DROPS Design answered:
Antwort siehe oben! :-)
29.03.2015 - 11:08
![]() Trish Hopkins wrote:
Trish Hopkins wrote:
I am on row 7 of the pattern repeat. The directions say to do the first 4 stitches (A) of A.1 then do the 6 stitches of B (28 times for M) then the last 3 stitches for C. On row 7 the slip-K2 tog-psso spans A-B then B-C. May I please have some clarification?
26.03.2015 - 01:23DROPS Design answered:
Dear Mrs Hopkins, on row 7, you will work the 2 last sts in A tog with the first st in B, then work the last 2 sts in B tog with the first st in new repeat in next B, and for the last repeat of B, work the last 2 sts in B tog with the first st in C. Happy knititng!
26.03.2015 - 08:56
![]() Trish Hopkins wrote:
Trish Hopkins wrote:
I can not tell by the picture or pattern... on right side you K2 then P1 and stockinette for the remainder of the side stitches (K right side/P wrong side). On the wrong side are the first/last 2 sts done in garter stitch or stockinette?
24.03.2015 - 13:14DROPS Design answered:
Dear Mrs Hopkins, the first 3 sts are worked as follows: 2 sts in st st (= K from RS, P from WS), and P1 (P from RS, K from WS), and the last 3 sts are worked: P1 (P from RS, K from WS) and 2 sts in st st (= K from RS, P from WS). Happy knitting!
24.03.2015 - 13:33
|
||||||||||||||||
Lace Affair#laceaffairjacket |
||||||||||||||||
 |
 |
|||||||||||||||
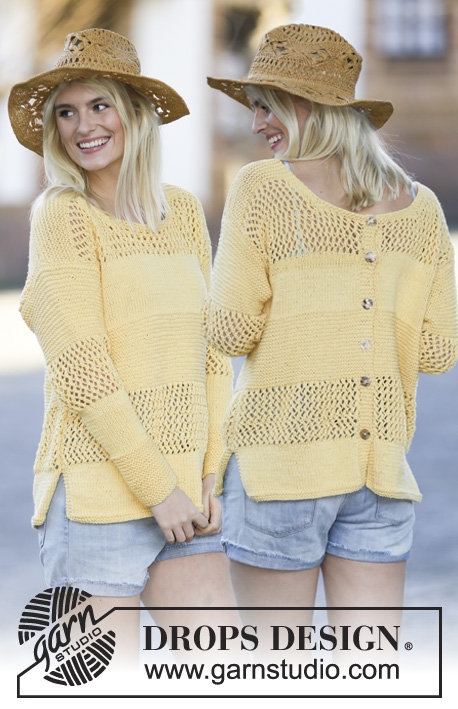
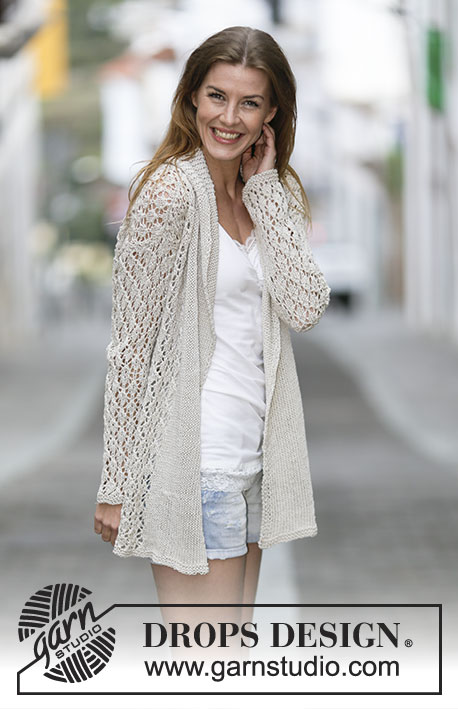
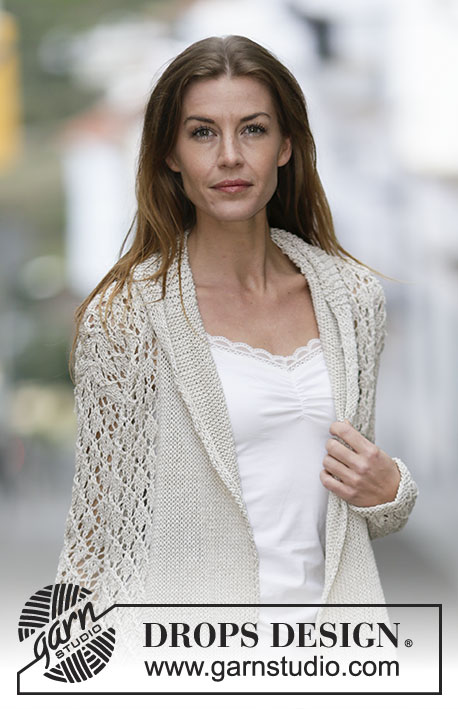
Knitted DROPS jacket with lace pattern and shawl collar in "Bomull-Lin" or "Paris". Size: S - XXXL.
DROPS 159-2 |
||||||||||||||||
|
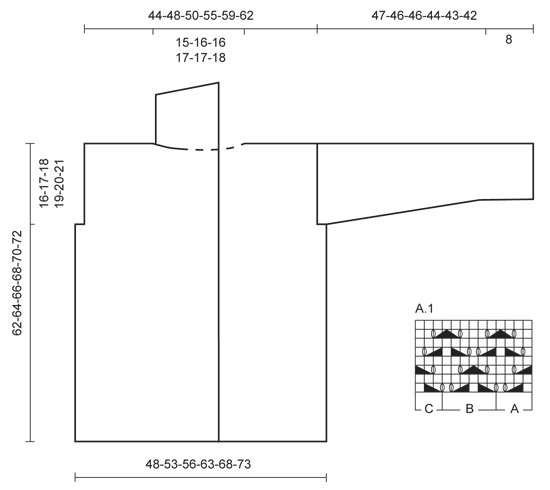
GARTER ST (back and forth): K all rows. 1 ridge = K2 rows. PATTERN: See diagram A.1. The diagram show all rows in pattern seen from RS. KNITTING TIP: Band sts will wrinkle inwards when working but lay flat after assembly. INCREASE TIP: Inc 1 st by making 1 YO, on next row work YO twisted (i.e. work in the back loop of st instead front) to avoid holes. ---------------------------------------------------------- BODY: Worked back and forth on circular needle from mid front. Loosely cast on 185-201-211-235-251-265 sts on circular needle size 4.5 mm / US 7 with Bomull-Lin or Paris. Work 2 ridges in GARTER ST - see explanation above. Switch to circular needle size 5.5 mm / US 9, work next row (= RS) as follows: 2 sts in stockinette st, P 1, and stockinette st over the next 26-28-27-27-26-24 sts (= band), work A.1A (= 4 sts), A.1B (= 6 sts) 20-22-24-28-31-34 times in total, A.1C (= 3 sts), work in stockinette st over the next 26-28-27-27-26-24 sts, P 1 and 2 sts in stockinette st (= band). Continue like this - READ KNITTING TIP AND REMEMBER THE KNITTING GAUGE. When piece measures approx. 46-47-48-49-50-51 cm / 18"-18½"-19"-19¼"-19¾"-20", insert 2 markers; 54-58-60-67-71-75 sts in from each side (= 77-85-91-101-109-115 sts between markers on back piece). On next row bind off 3-4-5-6-7-8 sts for armholes on each side of both markers (= 6-8-10-12-14-16 bind off sts in each side). Now divide the piece and finish each part separately. BACK PIECE: = 71-77-81-89-95-99 sts. Continue pattern as before with 1 edge st in garter st in each side until piece measures 60-62-64-66-68-70 cm / 23⅝"-24⅜"-25¼"-26"-26¾"-27½". Then bind off the middle 21-23-23-25-25-27 sts for neck and finish each shoulder separately. Continue to dec 1 st on next row from neck = 24-26-28-31-34-35 sts remain on the shoulder. Bind off when piece measures 62-64-66-68-70-72 cm / 24⅜"-25¼"-26"-26¾"-27½"-28⅜". LEFT FRONT PIECE: = 51-54-55-61-64-67 sts. Work 1 edge st in garter st towards the armhole and continue with pattern as before, and finish with 26-27-27-27-27-24 sts in stockinette st, P 1 and 2 sts in stockinette st (= band sts) towards mid front until piece measures 62-64-66-68-70-72 cm / 24⅜"-25¼"-26"-26¾"-27½"-28⅜". At beg of next row from RS bind off the first 24-26-28-31-34-36 sts for shoulder = 27-28-27-30-30-31 sts remain for collar. Work in garter st over these sts - AT THE SAME TIME work short rows, beg from WS as follows: * Work 1 ridge over all sts. On next row from WS K 21-22-21-24-24-25, turn and K back *, repeat from *-* until piece measures approx. 9-10-10-10½-10½-11 cm / 3½"-4"-4"-4¼"-4¼"-4½"' from bind off for shoulder (short side). Loosely bind off all sts. RIGHT FRONT PIECE: Work as left front piece but reversed. Beg short rows on collar from RS. SLEEVE: Worked back and forth on needle. Loosely cast on 35-37-39-39-41-43 sts (includes 1 edge st each side) on circular needle size 4.5 mm / US 7 with Bomull-Lin or Paris. Work 2 ridges. Switch to circular needle size 5.5 mm / US 9, work next row (= RS) as follows: 1 edge st in garter st, 1-2-0-0-1-2 sts in stockinette st, work A.1A (= 4 sts), A.1B over the next 24-24-30-30-30-30 sts (= 4-4-5-5-5-5 times), A.1C (= 3 sts), 1-2-0-0-1-2 sts in stockinette st, finish with 1 edge st in garter st. When piece measures 8 cm / 3⅛", inc 1 st inside 1 edge st in each side - READ INCREASE TIP above, work the inc sts in pattern. Repeat inc every 4½-4-3½-3-2½-2½ cm / 1¾"-1½"-1¼"-1⅛"-⅞"-⅞" 8-9-10-11-12-13 more times = 53-57-61-63-67-71 sts. When piece measures 45-44-43-40-39-37 cm / 17¾"-17 ¼"-17"-15¾"-15¼"-14½", insert 1 marker in each side of sleeve (for assembly). When piece measures 47-46-46-44-43-42 cm / 18½"-18"-18"-17¼"-17"-16½" (shorter measurements in the larger sizes because of wider shoulders), bind off all sts. ASSEMBLY: Sew shoulder seams and sew in sleeves in outer loops of edge sts. Sew the sleeve seams in one inside 1 edge st - NOTE: Section worked after marker at the top of sleeve should fit the bind off for armhole. Sew band tog mid back and sew band to the neck egde - NOTE! Seam should be at the back so that is is not visible when collar is folded down. Lightly steam the band with iron, it will then be flat. |
||||||||||||||||
Diagram explanations |
||||||||||||||||
|
||||||||||||||||
 |
||||||||||||||||
Have you finished this pattern?Tag your pictures with #dropspattern #laceaffairjacket or submit them to the #dropsfan gallery. Do you need help with this pattern?You'll find 20 tutorial videos, a Comments/Questions area and more by visiting the pattern on garnstudio.com. © 1982-2026 DROPS Design A/S. We reserve all rights. This document, including all its sub-sections, has copyrights. Read more about what you can do with our patterns at the bottom of each pattern on our site. |
||||||||||||||||


With over 40 years in knitting and crochet design, DROPS Design offers one of the most extensive collections of free patterns on the internet - translated to 17 languages. As of today we count 324 catalogs and 12278 patterns - 12268 of which are translated into English (US/in).
We work hard to bring you the best knitting and crochet have to offer, inspiration and advice as well as great quality yarns at incredible prices! Would you like to use our patterns for other than personal use? You can read what you are allowed to do in the Copyright text at the bottom of all our patterns. Happy crafting!
Post a comment to pattern DROPS 159-2
We would love to hear what you have to say about this pattern!
If you want to leave a question, please make sure you select the correct category in the form below, to speed up the answering process. Required fields are marked *.