
Popular categories
Looking for a yarn?


Comments / Questions (127)
![]() Sue wrote:
Sue wrote:
Are you aware there is an error in the number of trebles on the left and right fronts, thus in turn leads to errors in whole piece from there on in. For example the 5th size. On the back piece you increase at both ends of armhole edge 13 times = 26 trebles. You refer to this action when doing the fronts arm edge but instead of adding just 13 trebles to the total of trebles you add 26 for each piece. Because of this the entire pattern is 26 trebles out of sync on the 5th size.
14.04.2022 - 18:48DROPS Design answered:
Dear Sue, on back piece, you increase 13 sts x 2 (on each side), but also cast on 15 chains on each side for the armhole and crochet: 1 treble in the 4th chain from hook (= 2 trebles) + 1 treble in each of the next 11 chains (= 2+11= 13 trebles cast on in total + the 13 trebles increased). In the 5th size, you will then have a total of 118 trebles on back piece after all increases are done. Happy crocheting!
19.04.2022 - 14:16
![]() Naty wrote:
Naty wrote:
He buscado en las preguntas pero no veo mi duda,la cantidad de puntos de cada pieza delantera después de los aumentos está incorrecta? No se cuentan doble los puntos de la sisa porque solo se aumenta en un lado, es correcto?
19.05.2021 - 01:09DROPS Design answered:
Hola Naty, la cantidad de puntos no está incorrecta, se corrigió en su momento (en 2010) el fallo en este patrón. Para las sisas se aumenta solo en un lado.
30.05.2021 - 21:01
![]() Uta wrote:
Uta wrote:
Gibt es für die Anleitung / Muster auch in Form von Diagrammen? Wenn ja, können Sie mir diese bitte zusenden. Danke
21.03.2021 - 08:05DROPS Design answered:
Liebe Uta, wir haben für dieses Modell nur eine schriftliche Anleitung. Viel Spaß beim häkeln!
22.03.2021 - 08:03
![]() Jane Visser wrote:
Jane Visser wrote:
Can this pattern be shown in USA version?
21.04.2020 - 18:50DROPS Design answered:
Dear Jane, feel free to choose US version in language-menu by the main picture. Happy crocheting!
22.04.2020 - 07:13
![]() Castells wrote:
Castells wrote:
When doing the back part, shall I increase at the beggining and end of each row. Until i reach the number of rows. And then I do the chain increase??? or is this done at the same time? I find not clear this part. Thank you so much
15.02.2020 - 01:38DROPS Design answered:
Dear Mrs Castells, you first increase on each side = at the beg + at the end of every row. When all increases are done, crochet some extra chains at the end of row, crochet 1 st in each chain + in each stitch all the row then crochet new chain stitches at the end of the row, turn and crochet1 stitch in each chain stitch/each stitch. Happy crocheting!
17.02.2020 - 08:12
![]() Susanne Widmark wrote:
Susanne Widmark wrote:
Hej Undrar bara vilken storlek det är på västen. Xxl till ex. Är det som en dam48?
09.02.2020 - 17:11DROPS Design answered:
Hej Susanne, du hittar måtten på västen sist i mönstret. :)
10.02.2020 - 08:41
![]() Agnieszka Jachim wrote:
Agnieszka Jachim wrote:
Nie rozumiem objasnienia jak dodac oczka na podkroj rekawow z kazdej strony? Prosilabym o bardziej szczegolowe informacje lub film objasniajacy ta czesc schematu.
27.01.2020 - 12:17DROPS Design answered:
Witaj Agnieszko, należy dodawać 1 sł na początku i na końcu każdego rzędu (powtórzyć dodawanie oczek w sumie 5-7-8-10-13-17 razy z każdej strony, liczba powtórzeń zależy od wykonywanego rozmiaru) przerabiając 2 sł w pierwszy/ostatni sł > tzn. wykonujesz 2 słupki w 1 słupek. Brzeg nie będzie już prosty, a zacznie się rozszerzać na boki. Powodzenia!
28.01.2020 - 18:34
![]() Sylvana wrote:
Sylvana wrote:
Buongiorno, sarebbe possibile trovare le spiegazioni con uno schema a disegni, anziché scritto , grazie .
06.11.2019 - 16:26DROPS Design answered:
Buongiorno Sylvana. Purtroppo non ci è possibile modificare le spiegazioni. Provi a seguire le istruzioni passo passo, aiutandosi anche con i video suggeriti. Per un'assistenza più personalizzata, può rivolgersi al suo rivenditore Drops di fiducia. Buon lavoro!
06.11.2019 - 17:28
![]() Suzanne St John wrote:
Suzanne St John wrote:
I would love to see this pattern written in English. Thank you!
21.05.2019 - 13:39DROPS Design answered:
Dear Mrs St John, this pattern is available in both UK-English and US-English, click on the scroll menu under photo and select the desired language. Happy crocheting!
21.05.2019 - 15:44
![]() Katharine wrote:
Katharine wrote:
How do you assemble 118-26 edge to edge
25.05.2018 - 09:13DROPS Design answered:
Dear Katharine, you will sew shoulder 1 st from front piece together with 1 st from back piece and sew the sides together sewing in the outermost loop of sts on back piece and on front piece. Happy assembly!
25.05.2018 - 09:28
|
|
Vested lnterest#vestedlnterestvest |
|
 |
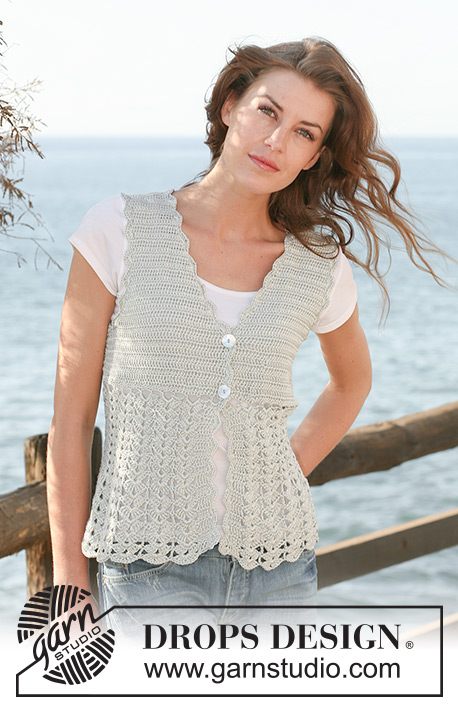 |
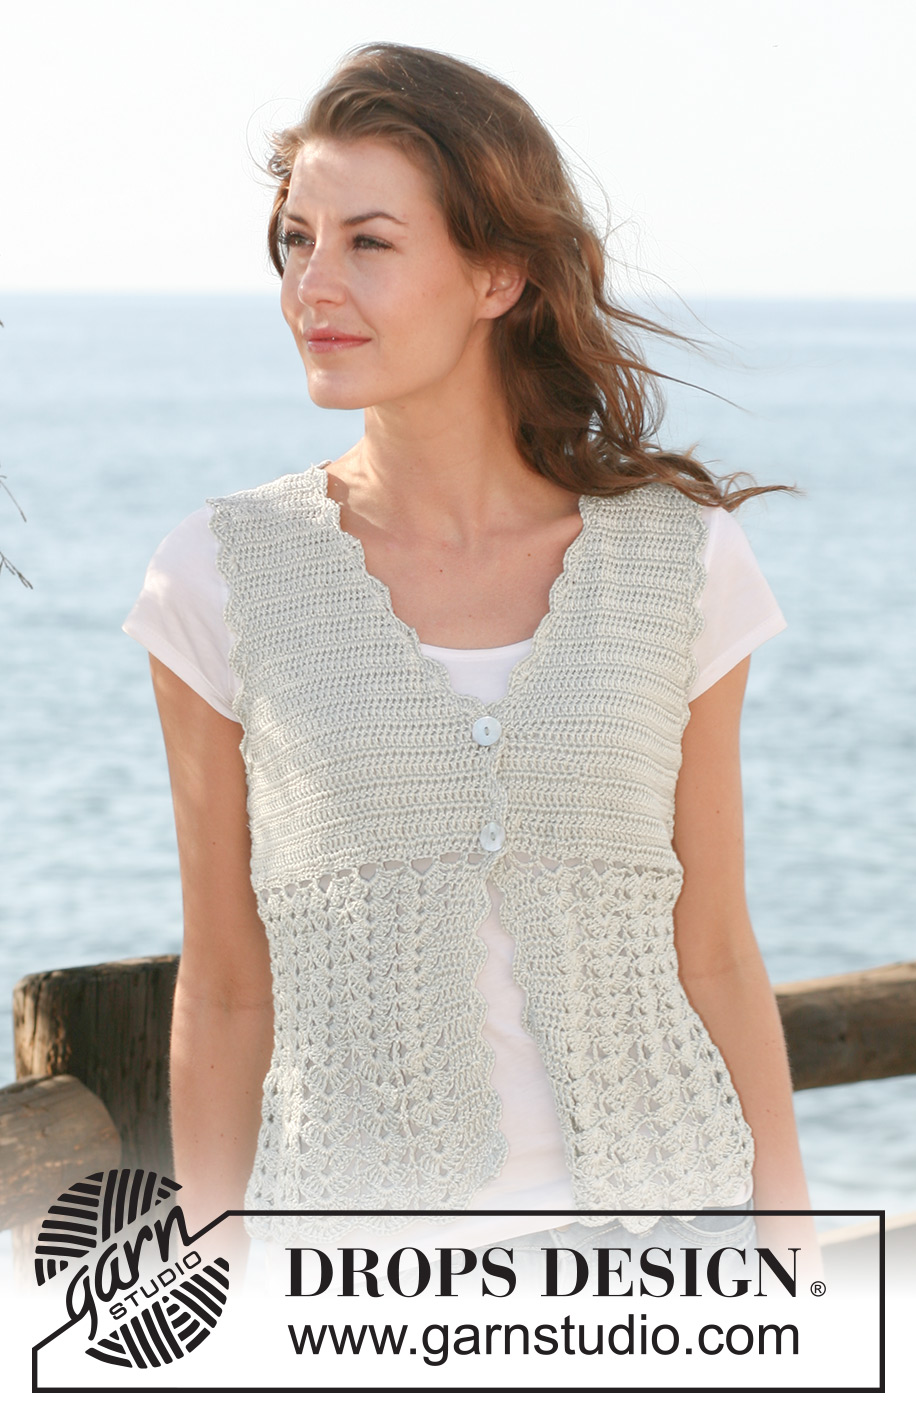
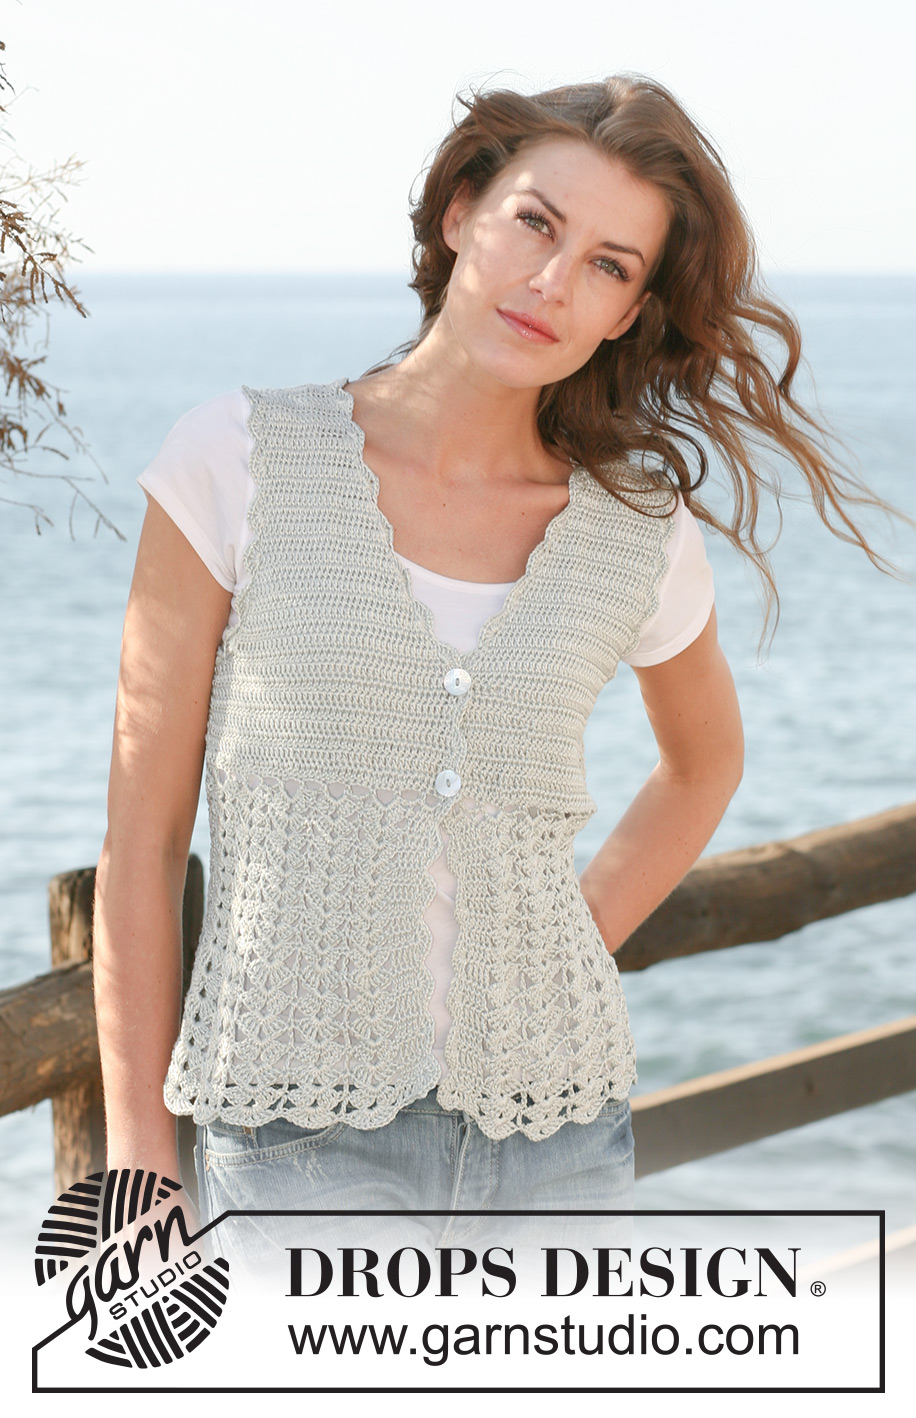
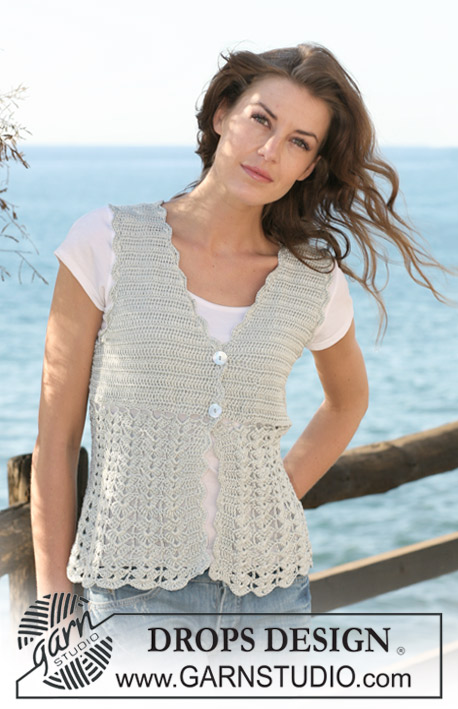
Crochet DROPS waistcoat with fan pattern in ”Cotton Viscose”. Size XS - XXL.
DROPS 118-26 |
|
|
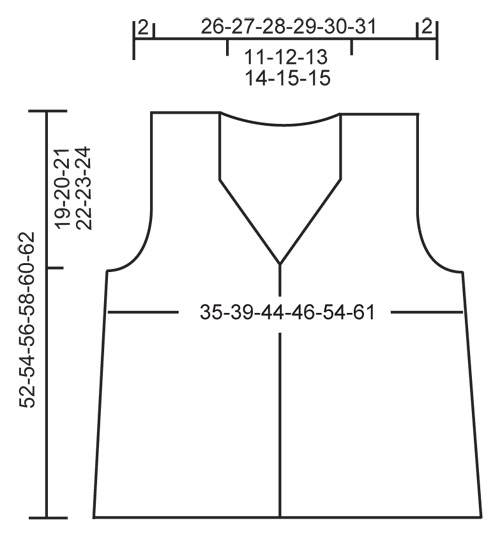
CROCHET TIP: Replace first dc on row with 3 ch, and finish row with 1 dc in 3rd ch from previous row. Replace first tr on row with 4 ch, and finish row with 1 tr in 4th ch from previous row. -------------------------------------------------------- -------------------------------------------------------- WAISTCOAT: Back piece and both front pieces crochet from shoulder and down. Then the pieces are sewn tog and the body piece of waistcoat is crochet in fan pattern from the yoke towards bottom edge. LEFT SHOULDER BACK PIECE (when placed flat): Crochet 23 LOOSE ch with hook size 3.5 mm/E/4 and Cotton Viscose. ROW 1: Crochet 1 dc in 4th ch from hook, *skip 1 ch, 1 dc in each of the next 4 ch *, repeat from *-* and finish with skip 1 ch and 1 dc in each of the last 3 ch = 17 dc. ROW 2: See CROCHET TIP! Crochet 1 dc in each dc. ROW 3: Crochet 1 dc in each dc. Put piece aside and crochet RIGHT SHOULDER on back piece in the same way, turn piece. ROW 4: 1 dc in each dc as before, at the end of row on right back piece crochet 30-33-35-38-40-43 ch (= neckline mid back), then 1 dc in each dc on left back piece, turn piece. ROW 5: 1 dc in each dc on left back piece, 1 dc in each of the first 2-1-2-1-2-1 ch, * skip 1 ch, 1 dc in each of the next 4 ch *, repeat from *-* a total of 5-6-6-7-7-8 times, skip 1 ch, 1 dc in each of the last 2-1-2-1-2-1 ch, crochet 1 dc in each dc from right back piece. There are now 58-60-62-64-66-68 dc on row. Continue with 1 dc in each dc. AT THE SAME TIME when piece measures 13-12-12-11-9-6 cm / 5⅛"-4¾"-4¾"-4⅜"-3½"-2⅜" inc for armhole each side. Inc 1 dc at the beg and at the end of every row, and repeat the inc a total of 5-7-8-10-13-17 times each side by working 2 dc in the outermost dc. On next row ch 7-8-10-11-15-18 at the end of row, turn and crochet 1 dc in 4th ch from hook and 1 dc in each of the next 3-4-6-7-11-14 ch. Repeat the other side = 78-86-94-102-118-134 dc. Continue with 1 dc in each dc until back measures 25-27-29-31-33-35 cm / 9¾"-10⅝"-11⅜"-12¼"-13"-13¾". Put piece aside. RIGHT FRONT PIECE: Crochet 23 LOOSE ch on hook size 3.5 mm/E/4 with Cotton Viscose. ROW 1: Crochet 1 dc in 4th ch from hook, *skip 1 ch, 1 dc in each of the next 4 ch *, repeat from *-* and finish with skip 1 ch and crochet 1 dc in each of the last 3 ch = 17 dc. ROW 2: See CROCHET TIP! Crochet 1 dc in each dc. Continue with 1 dc in each dc, AT THE SAME TIME when piece measures 5 cm / 2" inc for neckline towards mid front. Inc 1 dc at the end and the beg of every row towards mid front by working 2 dc in outermost dc a total of 16-17-18-19-20-21 times. AT THE SAME TIME when piece measures 13-12-12-11-9-6 cm / 5⅛"-4¾"-4¾"-4⅜"-3½"-2⅜" inc for armhole at the side as described for back piece. When all inc are complete there are 43-47-51-55-63-71 dc on row. Continue with 1 dc in each dc until piece measures 25-27-29-31-33-35 cm / 9¾"-10⅝"-11⅜"-12¼"-13"-13¾" – adjust to back piece. Put piece aside and crochet left front piece. LEFT FRONT PIECE: Like right front piece. ASSEMBLY: Sew shoulder seams edge to edge. Sew side seams edge to edge. There are now 164-180-196-212-244-276 dc along bottom edge. FAN PATTERN: Continue back and forth from mid front as follows – see CROCHET TIP! ROW 1: 1 dc in each dc = 164-180-196-212-244-276 dc, turn piece. ROW 2: 1 dc in each dc, AT THE SAME TIME inc 32 dc evenly = 196-212-228-244-276-308 dc. ROW 3: * ch 4, skip 3 sts, 1 sc in next dc *, repeat from *-* on all sts = 49-53-57-61-69-77 ch-loops, turn piece. ROW 4: 4 dc in first ch-loop, 1 dc in next ch-loop, * 4 dc + 2 ch + 4 dc in next ch-loop, 1 dc in next ch-loop *, repeat from *-* until 1 ch-loop remain, and finish with 4 dc in this ch-loop = 23-25-27-29-33-37 fans with 4 dc (= front band) each side towards mid front, turn piece. ROW 5: 1 dc in each of the first 4 dc (= front band), 1 dc in next dc, * 4 dc + 2 ch + 4 dc in the middle of next dc-group (i.e. in 2 ch in dc-group), 1 dc in next dc *, repeat from *-* until 4 dc remain, and finish with 1 dc in each dc (= front band). Repeat row 5 until piece measures approx 40-42-44-46-48-50 cm / 15¾"-16½"-17¼"-18"-19"-19¾" from shoulder. NEXT ROW: 1 tr in each of the first 4 dc, 1 tr in next dc, * 4 tr + 2 ch + 4 tr in the middle of next dc-group, 1 tr in next dc *, repeat from *-* until 4 dc remain, and finish with 1 tr in each dc. Repeat this row until piece measures approx 52-54-56-58-60-62 cm / 20½"-21¼"-22"-22¾"-23⅝"-24⅜" from shoulder. Cut and fasten thread. Sew buttons on left front band over fan pattern. Use gaps between dc on right front band as buttonholes. CROCHET BORDER: Crochet a border with hook size 3.5 mm/E/4 and Cotton Viscose round opening as follows, beg at bottom of right front piece: 1 sc in first st, * skip approx 2 cm / ¾", 3 dc + 2 ch + 3 dc in next st, skip approx 2 cm / ¾", 1 sc in next st *, repeat from *-* up along right front piece, along neckline and down along left front piece. Crochet a similar border round armholes. |
|
 |
|
Have you finished this pattern?Tag your pictures with #dropspattern #vestedlnterestvest or submit them to the #dropsfan gallery. Do you need help with this pattern?You'll find 7 tutorial videos, a Comments/Questions area and more by visiting the pattern on garnstudio.com. © 1982-2026 DROPS Design A/S. We reserve all rights. This document, including all its sub-sections, has copyrights. Read more about what you can do with our patterns at the bottom of each pattern on our site. |
|


With over 40 years in knitting and crochet design, DROPS Design offers one of the most extensive collections of free patterns on the internet - translated to 17 languages. As of today we count 325 catalogs and 12298 patterns - 12288 of which are translated into English (US/in).
We work hard to bring you the best knitting and crochet have to offer, inspiration and advice as well as great quality yarns at incredible prices! Would you like to use our patterns for other than personal use? You can read what you are allowed to do in the Copyright text at the bottom of all our patterns. Happy crafting!
Post a comment to pattern DROPS 118-26
We would love to hear what you have to say about this pattern!
If you want to leave a question, please make sure you select the correct category in the form below, to speed up the answering process. Required fields are marked *.