
Popular categories
Looking for a yarn?


Comments / Questions (125)
![]() Maria Selin wrote:
Maria Selin wrote:
Ser efter ytterligare detektivarbete att hela mönstret på höger framstycke är förvirrande skrivet. Ni skulle tjäna på att spalta upp varven mer. Jag är avancerad virkerska och mönsterskrivare men jag gick nästan bet på detta mönster.
25.05.2025 - 18:39
![]() Maria Selin wrote:
Maria Selin wrote:
Jag har nu repat upp höger framstycke ett antal gånger och förstår inte var jag gör fel? Där det står "Efter alla ökningar är det 51 (M) st på v" Jag får det till 44 st.... v1 stämmer. Vid v 2 där det står att man börjar utöka 1 st i slutet och början på varje varv mot mitt fram. Jag tolkar det som att man endast ökar mot mitt fram och inte mot sidan. Är det här jag gör fel? Mvh Maria
25.05.2025 - 17:17
![]() Susanna wrote:
Susanna wrote:
Thank you so much for your quick response....really appreciate. The pattern is beautiful...I'm going to try.
25.04.2025 - 07:51
![]() Susanna wrote:
Susanna wrote:
What does: "AT THE SAME TIME" means? Please explain. Thank you.
24.04.2025 - 19:50DROPS Design answered:
Dear Susanna, on the left shoulder back piece for example, it means you crochet 1 treble in each treble and then when piece measures 13-6 cm you start increasing for armhole (continuing to work with trebles as before). Happy crocheting!
25.04.2025 - 07:39
![]() Kathy L Mock wrote:
Kathy L Mock wrote:
These have to be some of the worst instructions. What on earth does it mean "AT THE SAME TIME"? I have had to pull apart my crochetting a number of times and CANNOT figure out your instructions. Perhaps I'll find another pattern somewhere else. Cute vest though.
18.01.2025 - 03:31
![]() Mariane wrote:
Mariane wrote:
Hej, jeg er i gang med højre forstykke. Jeg har 17 st. ved skulder, inden udtagninger, jeg skal tage 20 st ud ved hals, og 13 ved ærmegab, sådan som jeg læser det. Dette giver 50 st, I skriver, at der skal være 63 st når alle udtagninger er lavet, hvad gør jeg forkert. P.f.t.
15.09.2024 - 14:32DROPS Design answered:
Hei Mariane. Får også samme antall som deg, så oppskriften er oversendt til design avdelingen slik at de kan ta en dobbeltsjekk og evnt komme med en rettelse. mvh DROPS Design
23.09.2024 - 09:35
![]() Mariane wrote:
Mariane wrote:
Str. XL. Spørgsmål om antal st. masker efter udtagning og luftmasker til ærmegab. Efter 5. Række er der 66 st masker. Efter udtagning til ærmegab +26 st = 92s st. Derefter luftmasker i hver side = 2 x 12 st. Incl. luftmasker. Dette giver 116 st. Men I jeres opskrift står der, at der skal være 118 st. Hvad er det jeg gør forkert? NB! Tak for hjælpen til mit tidligere spørgsmål. M.v.h. Mariane
23.08.2024 - 20:45DROPS Design answered:
Hej Mariane, Det ser ud til at det skal være 116, så hækl 1 lm/st mindre i hver side, så laver vi en opdatering i opskriften :)
28.08.2024 - 08:00
![]() Mariane wrote:
Mariane wrote:
Ryggen, udtagning til ærmegab. Skal jeg måle de 9 cm (XL) fra skulder eller fra nakken? M.v.h. Mariane
21.08.2024 - 20:02DROPS Design answered:
Hej Mariane, du måler fra skulderen :)
22.08.2024 - 11:55
![]() Angela wrote:
Angela wrote:
Hi, I’m really struggling with the increase on the right front piece. I have started increasing at the neckline (medium size) and have reached 12cm. So now I have to start increasing for the arm hole same as the back piece - which is inc at the beginning AND end of each row. However as I’m doing the right front piece I assume I only have to increase at the arm hole edge??? So I started with 17 st then I inc 18st for the neckline & 8st for the arm hole I only get to 43st?
15.07.2024 - 22:11DROPS Design answered:
Dear Angela, yes, you only have to increase at the armhole edge (for the front), while, on the other side, you also increase, but for shaping the V neckline. Happy Stitching!
18.07.2024 - 04:18
![]() Moser wrote:
Moser wrote:
Das war die bisher schlechteste Anleitung die je hatte! Nicht zu empfehlen.
29.11.2023 - 14:39
|
|
Vested lnterest#vestedlnterestvest |
|
 |
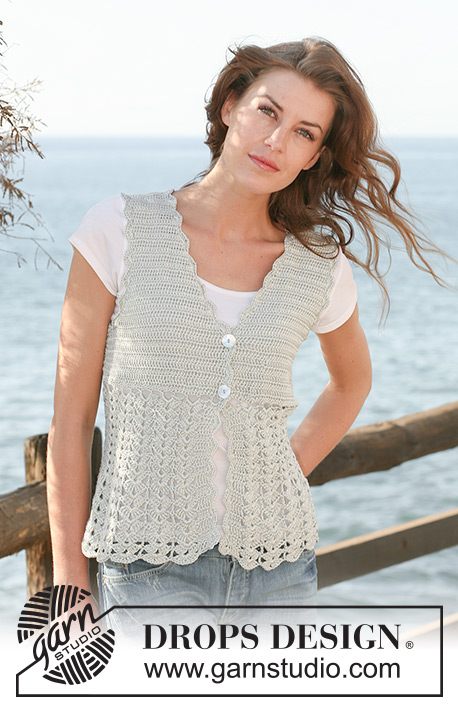 |
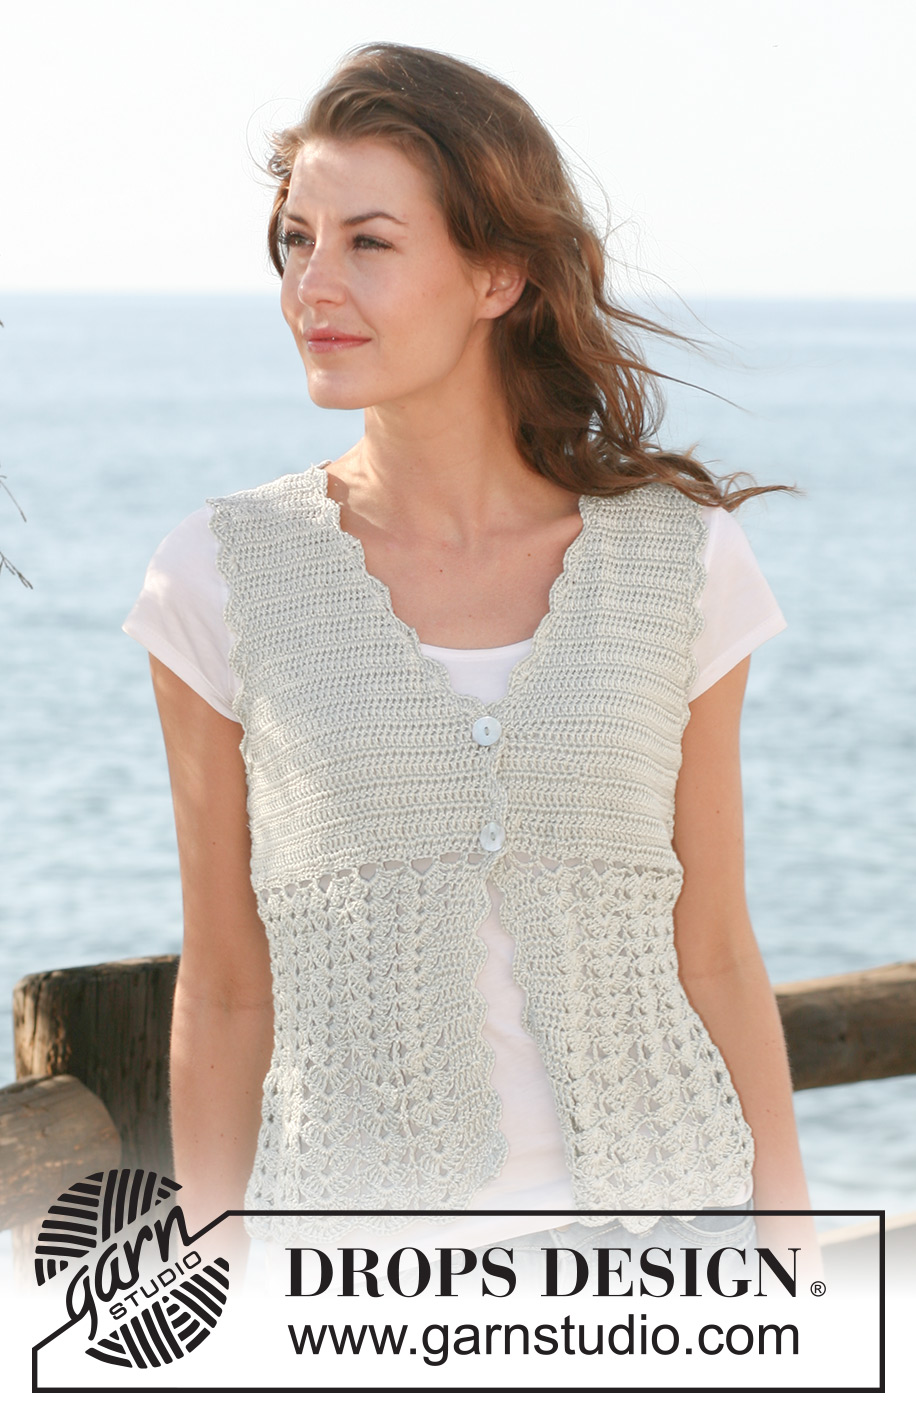
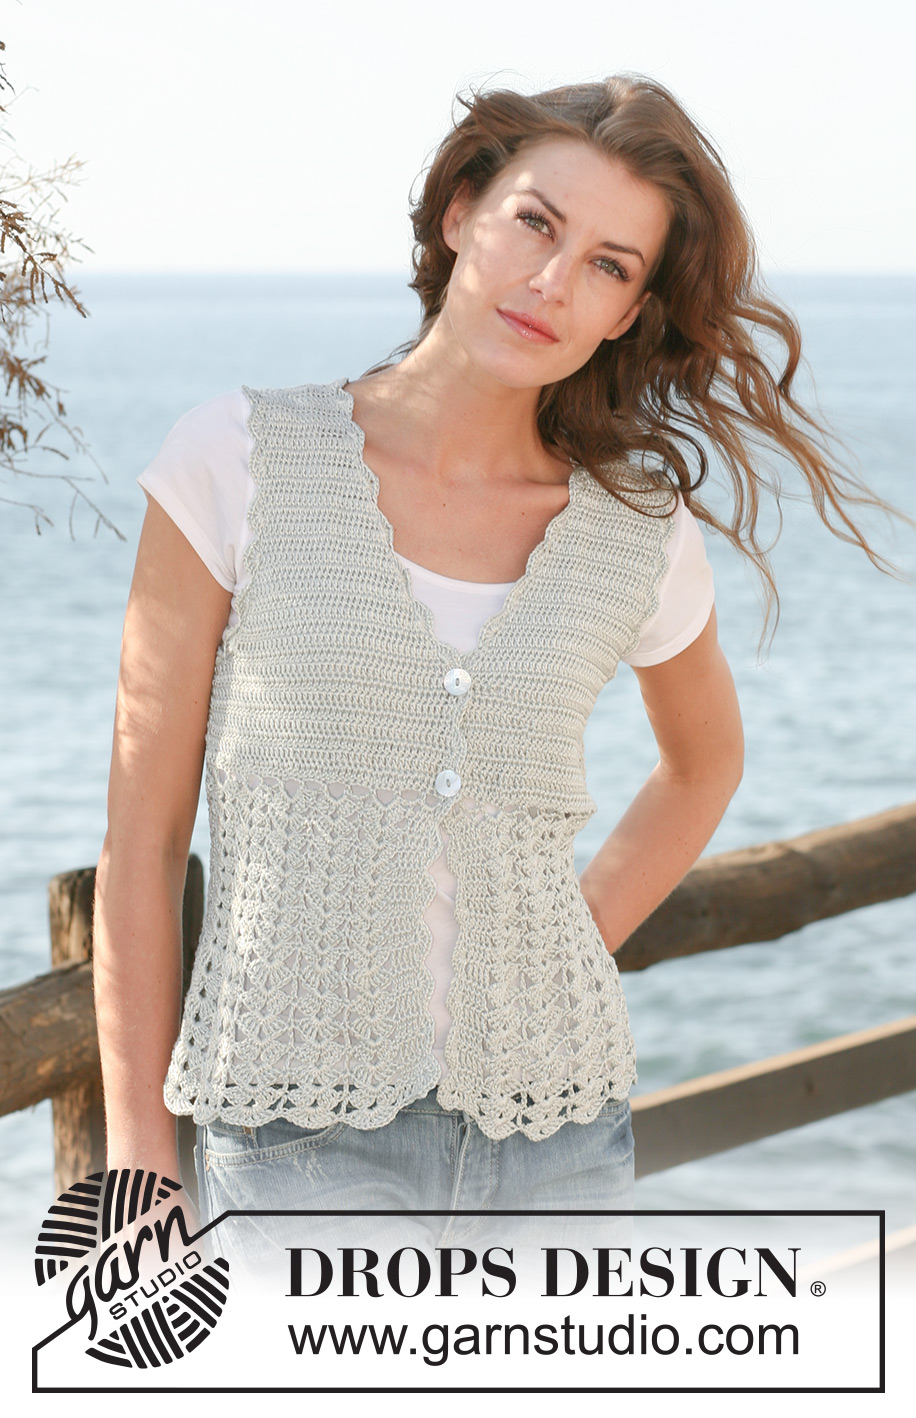
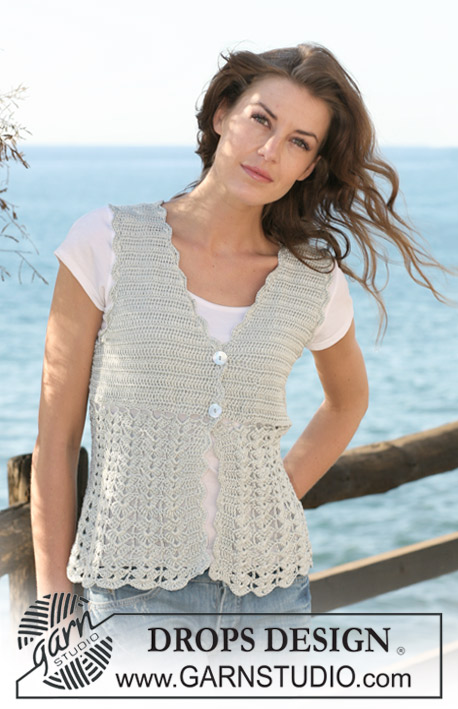
Crochet DROPS waistcoat with fan pattern in ”Cotton Viscose”. Size XS - XXL.
DROPS 118-26 |
|
|
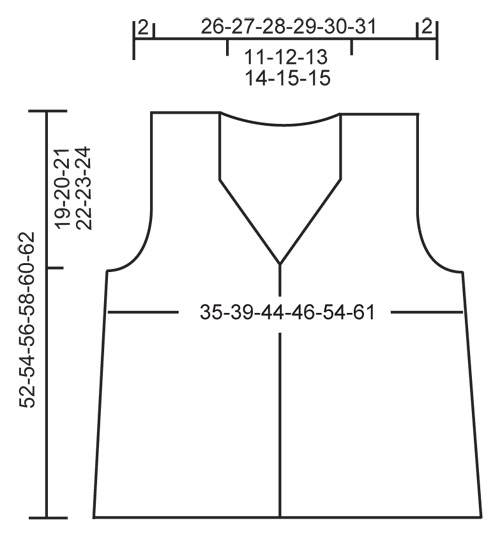
CROCHET TIP: Replace first tr on row with 3 ch, and finish row with 1 tr in 3rd ch from previous row. Replace first dtr on row with 4 ch, and finish row with 1 dtr in 4th ch from previous row. -------------------------------------------------------- -------------------------------------------------------- WAISTCOAT: Back piece and both front pieces crochet from shoulder and down. Then the pieces are sewn tog and the body piece of waistcoat is crochet in fan pattern from the yoke towards bottom edge. LEFT SHOULDER BACK PIECE (when placed flat): Crochet 23 LOOSE ch with crochet hook size 3.5 mm and Cotton Viscose. ROW 1: Crochet 1 tr in 4th ch from hook, * skip 1 ch, 1 tr in each of the next 4 ch *, repeat from *-* and finish with skip 1 ch and 1 tr in each of the last 3 ch = 17 tr. ROW 2: See CROCHET TIP! Crochet 1 tr in each tr. ROW 3: Crochet 1 tr in each tr. Put piece aside and crochet RIGHT SHOULDER on back piece in the same way, turn piece. ROW 4: 1 tr in each tr as before, at the end of row on right back piece crochet 30-33-35-38-40-43 ch (= neckline mid back), then 1 tr in each tr on left back piece, turn piece. ROW 5: 1 tr in each tr on left back piece, 1 tr in each of the first 2-1-2-1-2-1 ch, * skip 1 ch, 1 tr in each of the next 4 ch *, repeat from *-* a total of 5-6-6-7-7-8 times, skip 1 ch, 1 tr in each of the last 2-1-2-1-2-1 ch, crochet 1 tr in each tr from right back piece. There are now 58-60-62-64-66-68 tr on row. Continue with 1 tr in each tr. AT THE SAME TIME when piece measures 13-12-12-11-9-6 cm inc for armhole each side. Inc 1 tr at the beg and end of every row, and repeat the inc a total of 5-7-8-10-13-17 times each side by working 2 tr in the outermost tr. On next row crochet 7-8-10-11-15-18 ch at the end of row, turn and crochet 1 tr in 4th ch from hook and 1 tr in each of the next 3-4-6-7-11-14 ch. Repeat the other side = 78-86-94-102-118-134 tr. Continue with 1 tr in each tr until back measures 25-27-29-31-33-35 cm. Put piece aside. RIGHT FRONT PIECE: Crochet 23 LOOSE ch on crochet hook size 3.5 mm with Cotton Viscose. ROW 1: Crochet 1 tr in 4th ch from hook, * skip 1 ch, 1 tr in each of the next 4 ch *, repeat from *-* and finish with skip 1 ch and crochet 1 tr in each of the last 3 ch = 17 tr. ROW 2: See CROCHET TIP! Crochet 1 tr in each tr. Continue with 1 tr in each tr, AT THE SAME TIME when piece measures 5 cm inc for neckline towards mid front. Inc 1 tr at the end and the beg of every row towards mid front by working 2 tr in outermost tr a total of 16-17-18-19-20-21 times. AT THE SAME TIME when piece measures 13-12-12-11-9-6 cm inc for armhole at the side as described for back piece. When all inc are complete there are 43-47-51-55-63-71 tr on row. Continue with 1 tr in each tr until piece measures 25-27-29-31-33-35 cm – adjust to back piece. Put piece aside and crochet left front piece. LEFT FRONT PIECE: Like right front piece, but mirrored. ASSEMBLY: Sew shoulder seams edge to edge. Sew side seams edge to edge. There are now 164-180-196-212-244-276 tr along bottom edge. FAN PATTERN: Continue back and forth from mid front as follows – see CROCHET TIP! ROW 1: 1 tr in each tr = 164-180-196-212-244-276 tr, turn piece. ROW 2: 1 tr in each tr, AT THE SAME TIME inc 32 tr evenly = 196-212-228-244-276-308 tr. ROW 3: * 4 ch, skip 3 sts, 1 dc in next tr *, repeat from *-* on all sts = 49-53-57-61-69-77 ch-loops, turn piece. ROW 4: 4 tr in first ch-loop, 1 tr in next ch-loop, * 4 tr + 2 ch + 4 tr in next ch-loop, 1 tr in next ch-loop *, repeat from *-* until 1 ch-loop remain, and finish with 4 tr in this ch-loop = 23-25-27-29-33-37 fans with 4 tr (= front band) each side towards mid front, turn piece. ROW 5: 1 tr in each of the first 4 tr (= front band), 1 tr in next tr, * 4 tr + 2 ch + 4 tr in the middle of next tr-group (i.e. in 2 ch in tr-group), 1 tr in next tr *, repeat from *-* until 4 tr remain, and finish with 1 tr in each tr (= front band). Repeat row 5 until piece measures approx 40-42-44-46-48-50 cm from shoulder. NEXT ROW: 1 dtr in each of the first 4 tr, 1 dtr in next tr, * 4 dtr + 2 ch + 4 dtr in the middle of next tr-group, 1 dtr in next tr *, repeat from *-* until 4 tr remain, and finish with 1 dtr in each tr. Repeat this row until piece measures approx 52-54-56-58-60-62 cm from shoulder. Cut and fasten thread. Sew buttons on left front band over fan pattern. Use gaps between tr on right front band as buttonholes. CROCHET BORDER: Crochet a border with crochet hook size 3.5 mm and Cotton Viscose round opening as follows, beg at bottom of right front piece: 1 dc in first st, * skip approx 2 cm, 3 tr + 2 ch + 3 tr in next st, skip approx 2 cm, 1 dc in next st *, repeat from *-* up along right front piece, along neckline and down along left front piece. Crochet a similar border round armholes. |
|
|
|
Have you finished this pattern?Tag your pictures with #dropspattern #vestedlnterestvest or submit them to the #dropsfan gallery. Do you need help with this pattern?You'll find 7 tutorial videos, a Comments/Questions area and more by visiting the pattern on garnstudio.com. © 1982-2025 DROPS Design A/S. We reserve all rights. This document, including all its sub-sections, has copyrights. Read more about what you can do with our patterns at the bottom of each pattern on our site. |
|


With over 40 years in knitting and crochet design, DROPS Design offers one of the most extensive collections of free patterns on the internet - translated to 17 languages. As of today we count 314 catalogues and 11821 patterns translated into English (UK/cm).
We work hard to bring you the best knitting and crochet have to offer, inspiration and advice as well as great quality yarns at incredible prices! Would you like to use our patterns for other than personal use? You can read what you are allowed to do in the Copyright text at the bottom of all our patterns. Happy crafting!
Post a comment to pattern DROPS 118-26
We would love to hear what you have to say about this pattern!
If you want to leave a question, please make sure you select the correct category in the form below, to speed up the answering process. Required fields are marked *.