
Popular categories
Looking for a yarn?


Comments / Questions (66)
![]() Michelle wrote:
Michelle wrote:
Since the markers are placed in the stitches, do you have to move them up each row?
02.06.2009 - 11:12
![]() Kaia wrote:
Kaia wrote:
Underbar mössa, lätt att sticka och ser ljuvlig ut! Tack!
02.05.2009 - 09:03
![]() Ella wrote:
Ella wrote:
Endelig den "rigtige" model på en djævlehue, som sidder perfekt!
24.11.2008 - 11:06
![]() Sharlene wrote:
Sharlene wrote:
First visit and I'm thrilled
22.11.2008 - 21:32
![]() Mette wrote:
Mette wrote:
Sød og praktisk...hvad kan man ønske mere
21.11.2008 - 16:17
![]() JCM wrote:
JCM wrote:
Jeg vil ha oppskriften nåååå!!!!
18.11.2008 - 17:42
![]() Sandra wrote:
Sandra wrote:
Bitte bitte schnell die Anleitung - sehr schön dieses Käppi
17.11.2008 - 16:41
![]() Kirsti wrote:
Kirsti wrote:
...kjempesøt til små/nyfødt baby her i vinterNorge...
16.11.2008 - 16:00
![]() Inger wrote:
Inger wrote:
Den hue går aldrig af mode, uundværlig.
09.11.2008 - 22:01
![]() KARINE wrote:
KARINE wrote:
J' adore ce modèle et je recherche les explications depuis de années
09.11.2008 - 14:12
|
|||||||||||||
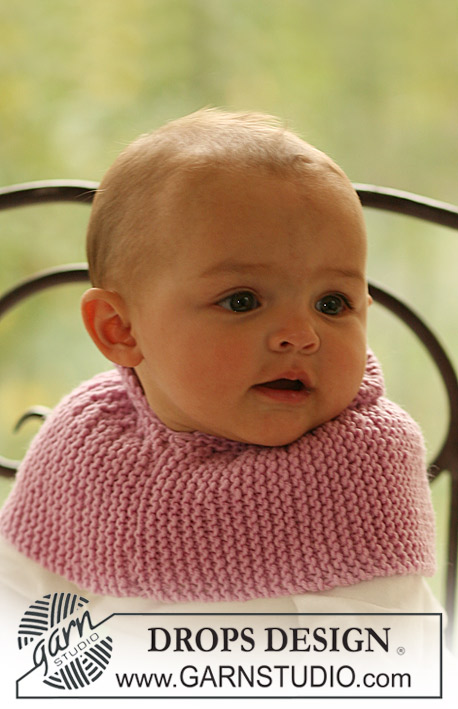
Fairy Rose#fairyrosebonnet |
|||||||||||||
|
|
|||||||||||||
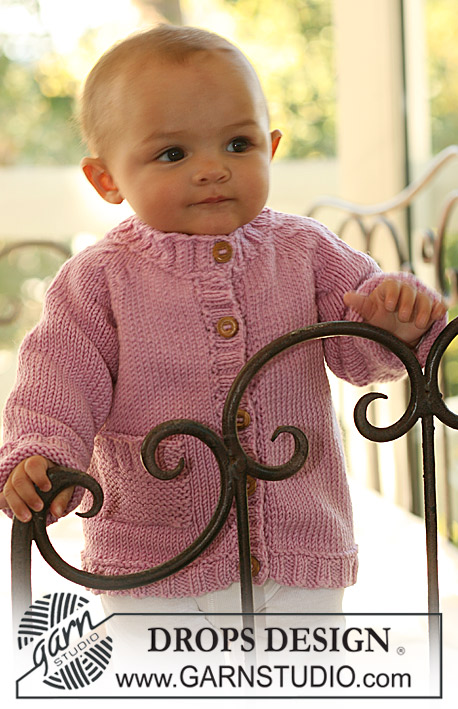
Knitted bonnet in stocking st for baby and children in DROPS Merino Extra Fine
DROPS Baby 16-5 |
|||||||||||||
|
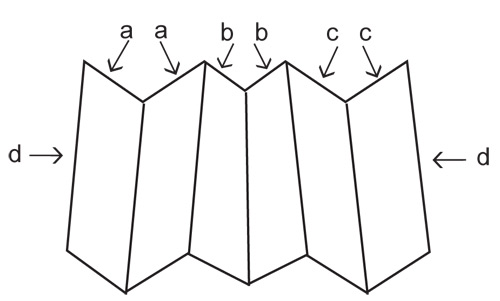
INCREASING TIP: Make all inc from RS. Inc 1 st by making 1 YO. Work YO into back of loop on return row to avoid a hole. DECREASING TIP: Make all dec from RS. Dec 1 st on each side of st with marker. Beg 1 st before st with marker, slip 1 st on cable needle behind piece, slip next st as if to K (st with marker), K tog next st and st from cable needle, psso. ---------------------------------------------------------- ---------------------------------------------------------- BONNET: Worked back and forth on needle. Cast on 97-105-109 (113-121) sts on needle size 4 mm [US 6] with Merino Extra Fine. K 4 rows (first row = RS). Now insert 7 markers in piece from RS as follows: M-1 in first st on row M-2 in st 18-20-21 (22-24) M-3 in st 35-39-41 (43-47) M-4 in st 49-53-55 (57-61) M-5 in st 63-67-69 (71-75) M-6 in st 80-86-89 (92-98) M-7 in last st on row Continue in stockinette st, AT THE SAME TIME on row 1 begin inc and dec as follows – SEE INCREASING AND DECREASING TIP: INC 1 st after M-1 on every other row DEC 1 st on each side of M-2 on every other row INC 1 st before M-3 on every other row INC 1 st after M-3 on every 4th row DEC 1 st on each side of M-4 on every 4th row 3-4-5 (5-6) times and then on every other row to finished measurements (i.e. when dec on every other row no of sts will dec) INC 1 st before M-5 on every 4th row INC 1 st after M-5 on every other row DEC 1 st on each side of M-6 on every other row INC 1 st before M-7 on every other row. Continue like this. When piece measures 13-15-16 (18-19) cm [5⅛"-6"-6¼" (7"-7½")] (measured from lowest point by M-2 or M-6) K 1 row from WS and then work next row as follows from RS: * K1, K2 tog *, repeat from *-*, AT THE SAME TIME as binding off. ASSEMBLY: Back of hat = bind off row, i.e. 2 whole points and 2 half points. The middle of the 3 whole points on the opposite side of piece = cast on row, sits at middle of forehead. Sew hat tog, edge to edge along bind off row as follows: Sew first half point to one side of the first whole point. Sew the other side of first whole point to one side of second whole point. Then the other side of second whole point to the last half point. Now sew hat tog mid back – make sure to sew edge to edge to avoid a chunky seam TIE STRINGS: Cast on 4 sts on needle size 4 mm [US 6] and continue as follows: * K1, place thread in front of piece (towards you), slip next st as if to P, place thread behind piece again *, repeat from *-* across the row = tube. Bind off when tube measures approx 20-22-24 (26-28) cm [8"-8¾"-9½" (10¼"-11")]. Make 1 more and sew strings to the point each side. |
|||||||||||||
Diagram explanations |
|||||||||||||
|
|||||||||||||
 |
|||||||||||||
Have you finished this pattern?Tag your pictures with #dropspattern #fairyrosebonnet or submit them to the #dropsfan gallery. Do you need help with this pattern?You'll find 12 tutorial videos, a Comments/Questions area and more by visiting the pattern on garnstudio.com. © 1982-2026 DROPS Design A/S. We reserve all rights. This document, including all its sub-sections, has copyrights. Read more about what you can do with our patterns at the bottom of each pattern on our site. |
|||||||||||||


With over 40 years in knitting and crochet design, DROPS Design offers one of the most extensive collections of free patterns on the internet - translated to 17 languages. As of today we count 324 catalogs and 12290 patterns - 12280 of which are translated into English (US/in).
We work hard to bring you the best knitting and crochet have to offer, inspiration and advice as well as great quality yarns at incredible prices! Would you like to use our patterns for other than personal use? You can read what you are allowed to do in the Copyright text at the bottom of all our patterns. Happy crafting!
Post a comment to pattern DROPS Baby 16-5
We would love to hear what you have to say about this pattern!
If you want to leave a question, please make sure you select the correct category in the form below, to speed up the answering process. Required fields are marked *.