
Popular categories
Looking for a yarn?


Comments / Questions (46)
![]() Nelli wrote:
Nelli wrote:
Een kleinigheidje: de stekenaantallen zoals genoemd in de werkbeschrijving voor de pas kloppen niet met de stekenaantallen na de boord (is opzet plus de meerdering direct na de boord). Dit geldt i.i.g. voor de maten L en XL, voor de andere maten heb ik het niet nagegaan. Vriendelijke groet!
02.05.2021 - 22:24
![]() Caroline wrote:
Caroline wrote:
Når man lukker kanten til sidst, anbefaler I at bruge større str pinde så man sørger for at den ikke bliver lukket for stramt. Hvor meget større anbefaler I?
11.04.2021 - 17:03
![]() Kristina Griksaite wrote:
Kristina Griksaite wrote:
Hei, tror du det er mulig å lage genseren med lange armer?
17.03.2021 - 11:43DROPS Design answered:
Hej Kristina, ja du fortsætter bare ærmet så langt du vil. Prøv blusen undervejs, så du får dine personlige mål :)
17.03.2021 - 14:40
![]() Marty Urbanovsky wrote:
Marty Urbanovsky wrote:
Should this beautiful garment, made with Melody, be blocked when I am finished? I do not want to harm the ethereal look.
13.03.2021 - 22:49DROPS Design answered:
Dear Marty, it never hurts to rinse and shape the sweater, even if it is not "hard blocked", meaning it is not pullet thaught like you would with a lace shawl, but soak, press the water out (do not spin!) and gently pull it to shape/size and let it dry. It will even out the possible inevennes the stitches, flatten the seams, etc. However, if you staisfied with the look of your finished sweater, you can skip blocking entirely. Happy Knitting!
14.03.2021 - 02:13
![]() Inga Schmidt wrote:
Inga Schmidt wrote:
Hej, jeg har 150 gr Melody. Jeg er en str L. Tror I så ikke, der er garn nok til, at jeg kan gøre den lidt længere.
13.03.2021 - 11:34DROPS Design answered:
Hei Inga. Om du strikker bolen til du skal begynne vrangbord, la maskene hvile på pinnen. Så starter du å strikker ermene. Når ermene er ferdig, vet du hvor mye garn du har igjen og kan bruke resten av garnet til bolen og vrangbord. mvh DROPS design
15.03.2021 - 14:45
![]() Benedicte wrote:
Benedicte wrote:
Hvornår skifter man til pind 8? :)
15.02.2021 - 09:20DROPS Design answered:
Hei Benedicte. Helt sist under halskanten står det: ....Skift til rundpind 8 og strik 1 omgang ret (omslagene i udtagningen strikkes drejet ret så der ikke bliver hul). Videre strikkes bærestykket som forklaret under. mvh DROPS design
15.02.2021 - 09:50
![]() Benedicte wrote:
Benedicte wrote:
Jeg forstår ikke hvad man skal efter man har lavet halsrib kanten.
12.02.2021 - 19:48DROPS Design answered:
Hej Benedicte, efter halskanten hopper du ned til bærestykket. Begynder med at sætte 4 mærker (som forklaret i opskriften) nu er du klar til at strikke rundt i glatstrik og tage ud til raglan. Første raglanudtagning er også forklaret. God fornøjelse! Nederst i opskriften finder du en video og en lektion om hvordan man gør :)
16.02.2021 - 13:48
![]() Linda wrote:
Linda wrote:
Hej. Tröjan är sned, vrider sig åt vänster när jag har den på mig. Hur gör jag nu?
09.02.2021 - 21:30DROPS Design answered:
Hei Linda. Det hørtes merkelig ut. Har du strikket den i DROPS Melody? Evnt hvilket annet garn? Du kan prøve å vaske den (etter vaskeanvisning) og la den tørke flatt i fasong, mulig den vil da rette seg "opp". mvh DROPS design
15.02.2021 - 13:53
![]() Ruth Kear wrote:
Ruth Kear wrote:
Please advise amount of yarn for size small...is it 150 yards or meters? Seem like a small amount compared to similar patterns. Thank you
16.12.2020 - 01:23DROPS Design answered:
Dear Mrs Kear, in size S you require 150 grams DROPS Melody/50 g a ball = 3 balls. Happy knitting!
16.12.2020 - 07:12
![]() Ewa wrote:
Ewa wrote:
Dzień dobry, nabrałam 58 oczek dla rozmiaru S na druty numer 7 (większe niż w opisie), przerobiłam kilka rzędów wg opisu na drutach nr 6, ale ta włóczka nie rozciąga się, wręcz zaciska na stałe przy pierwszym rzędzie i dekolt nie przechodzi przez głowę. Jaki jest sposób na zlikwidowanie tego problemu? Może należy jakimś specjalnym sposobem nabrać oczka na druty?
01.10.2020 - 16:14DROPS Design answered:
Witaj Ewo, może spróbuj TEGO SPOSOBU NABIERANIA OCZEK. Kilka innych sposobów na nabieranie oczek na elastyczny brzeg znajdziesz w naszych instrukcjach video, w kategoriach wybierz 'video druty', a następnie 'nabieranie'. Powodzenia!
02.10.2020 - 16:56
|
|
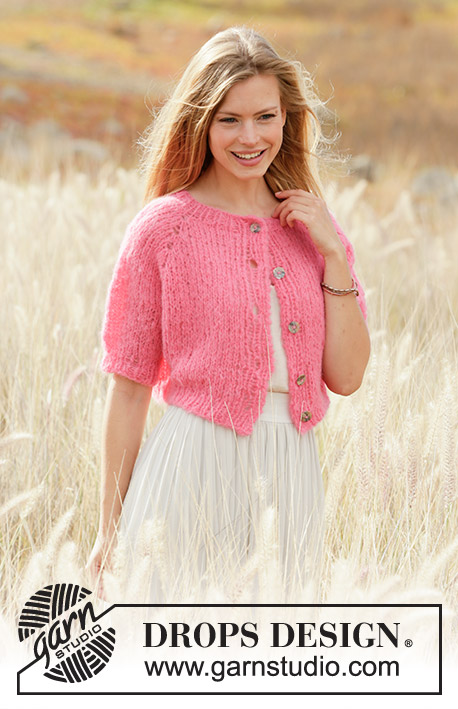
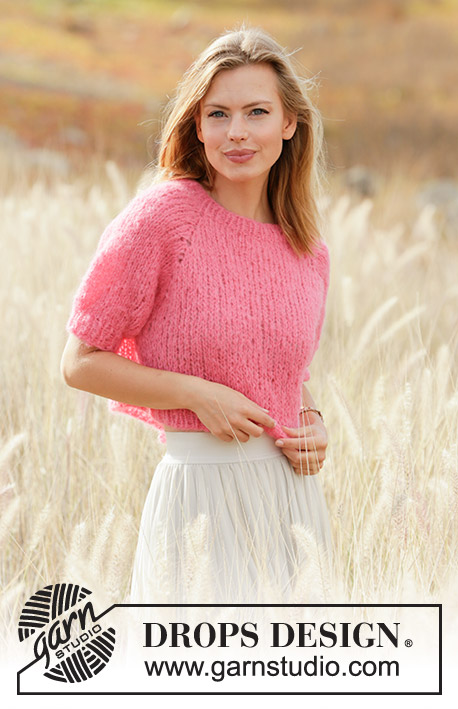
Sweet Melody#sweetmelodysweater |
|
 |
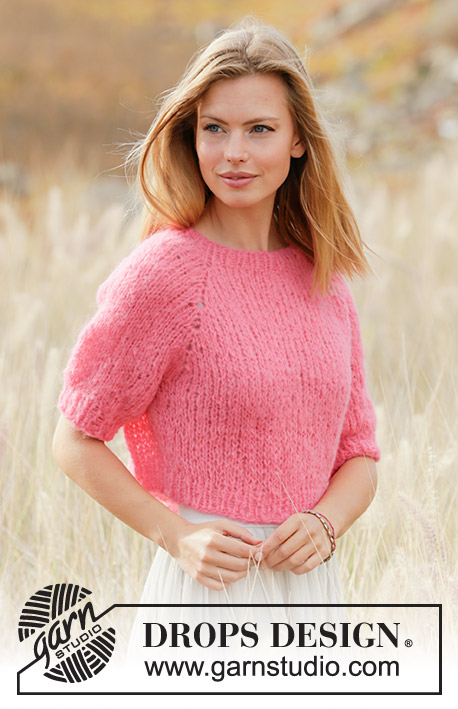 |
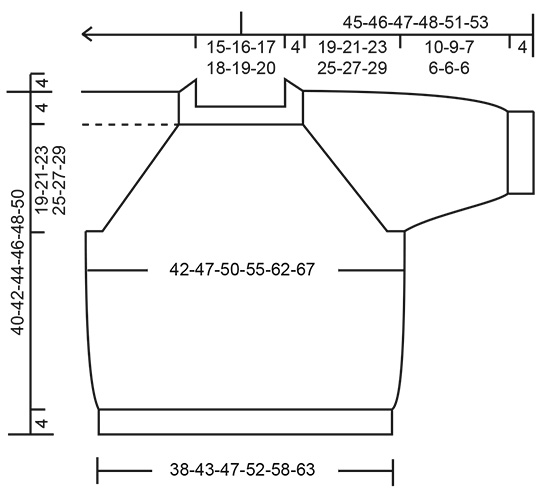
Knitted jumper with short sleeves in DROPS Melody. Piece is knitted top down with raglan. Size XS–XXL.
DROPS 212-23 |
|
|
---------------------------------------------------------- EXPLANATION FOR THE PATTERN: ---------------------------------------------------------- INCREASE/DECREASE TIP (evenly): To calculate how to increase/decrease evenly, use the total number of stitches on row (e.g. 56 stitches) and divide stitches by number of increases/decreases to be done (e.g. 4) = 14. In this example increase by making 1 yarn over after every 14th stitch. On next round, work yarn overs twisted to avoid holes. To decrease in this example knit every 13th and 14th stitch together. RAGLAN: Increase for raglan in every transition between front/back piece and sleeves as explained below, and increase every 4th round as explained in pattern. INCREASE 4 STITCHES AS FOLLOWS: Knit 1 in stitch below stitch with marker (raglan stitch), do not slip stitches off the needle, make 1 yarn over on right needle, knit 1 in same stitch, but wait to slip off the needle, make 1 yarn over on right needle and knit 1 in same stitch, then slip the stitch off the left needle (= 4 stitches increased). Insert 1 marker in the middle of these 5 stitches (for next increase). INCREASE 2 STITCHES AS FOLLOWS: Knit 1 in stitch below stitch with marker (raglan stitch), do not slip stitches off the needle, make 1 yarn over on right needle, knit 1 in same stitch, then slip the stitch off the left needle (= 2 stitches increased). Insert 1 marker in the middle of these 3 stitches (for next increase - only applies to size L). DECREASE TIP (applies to sides on body and mid under sleeves): Decrease 1 stitch on each side of marker thread as follows: Work until 3 stitches remain before marker thread, knit 2 together, knit 2 (marker thread is between these 2 stitches), slip 1 stitch knitwise, knit 1, pass slipped stitch over stitch worked (= 2 stitches decreased by marker). CAST-OFF TIP: To avoid a tight cast-off edge you may use a larger needle size. ---------------------------------------------------------- START THE PIECE HERE: ---------------------------------------------------------- JUMPER - SHORT OVERVIEW OF THE PIECE: Neck edge and yoke are worked in the round on circular needle, top down. Now divide yoke for body and sleeves. Body is worked in the round on circular needle, top down. Work sleeves in the round on double pointed needles/short circular needle, top down. NECK EDGE: Cast on 56-58-60-62-64-68 stitches on a short circular needle size 6 mm with Melody. Knit 1 round. Then work rib in the round (= knit 1/purl 1) for 4 cm. When rib is done, knit a round while at the same time increasing 4-6-8-6-8-4 stitches evenly - read DECREASE/INCREASE TIP = 60-64-68-68-72-72 stitches. Insert 1 marker in the middle of row (= mid front). Measure yoke from this marker! Switch to circular needle size 8 mm and knit 1 round (knit all yarn overs twisted to avoid holes). Then work yoke as explained below. YOKE: Insert 4 markers in the piece as explained below. Use markers when increasing for raglan. Count 9-10-11-11-12-12 stitches (= ½ back piece), insert 1 marker in next stitch, count 10 stitches (= sleeve), insert 1 marker in next stitch, count 18-20-22-22-24-24 stitches (= front piece), insert 1 marker in next stitch, count 10 stitches (= sleeve), insert 1 marker in next stitch. 9-10-11-11-12-12 stitches remain on back piece after last marker. Work in stocking stitch in the round. REMEMBER THE KNITTING TENSION! AT THE SAME TIME on first round, increase for RAGLAN – read explanation above. I.e. increase first 4 stitches in every stitch with marker (= 16 stitches in total increased on round). Work in stocking stitch and increase for raglan every 4th round 5-6-7-7-9-9 times in total vertically = 140-160-180-180-216-216 stitches. Continue with increase every 4th round, but now increase only 2 stitches in every stitch with marker, as explained above (= 8 stitches increased in total on round). Increase 2 stitches at every marker 1-1-1-2-0-1 times in total vertically. After last increase there are 148-168-188-196-216-224 stitches on needle. Work in stocking stitch without increases until piece measures 19-21-23-25-27-29 cm from marker by the neck. Now divide yoke for body and sleeves. I.e. work next round as follows from mid back: Work 22-25-27-29-33-35 stitches in stocking stitch (= ½ back piece), slip the next 30-34-40-40-42-42 stitches on 1 stitch holder for sleeve, cast on 6-6-6-8-8-10 new stitches on needle (= in the side under sleeve), work 44-50-54-58-66-70 stitches in stocking stitch (= front piece), slip the next 30-34-40-40-42-42 stitches on 1 stitch holder for sleeve, cast on 6-6-6-8-8-10 new stitches on needle (= in the side under sleeve) and work the remaining 22-25-27-29-33-35 stitches in stocking stitch (= ½ back piece). Finish body and sleeves separately. NOW MEASURE PIECE FROM HERE! BODY: = 100-112-120-132-148-160 stitches. Insert 1 marker thread at beginning of round and 1 marker thread after 50-56-60-66-74-80 stitches (= in the sides on body). Move the marker threads upwards when working; they should be used for decrease later. Begin round in the side at one of the marker threads, and work stocking stitch in the round. When piece measures 4 cm from division, decrease 1 stitch on each side of both marker threads - read DECREASE TIP (= 4 stitches decreased). Repeat decrease when piece measures 8 cm from division = 92-104-112-124-140-152 stitches. Work until piece measures 13 cm from division (approx. 4 cm remain until finished measurements, try the jumper on and work to desired length). Switch to circular needle size 6 mm. Knit 1 round while increasing 4-6-6-6-8-8 stitches evenly - remember INCREASE/DECREASE TIP = 96-110-118-130-148-160 stitches. Then work rib in the round (= knit 1/purl 1) for 4 cm. Cast off with knit over knit and purl over purl - read CAST-OFF TIP. Jumper measures approx. 40-42-44-46-48-50 cm from shoulder and down. SLEEVES: Slip the 30-34-40-40-42-42 stitches from stitch holder in one side of piece on double pointed needles or short circular needle size 8 mm, and pick in addition up 1 stitch in each of the 6-6-6-8-8-10 stitches under sleeve = 36-40-46-48-50-52 stitches. Insert 1 marker thread in the middle of the 6-6-6-8-8-10 stitches under sleeve and move the marker thread upwards when working. Use marker later when decreasing mid under sleeve. Begin round at the marker thread and work stocking stitch in the round. When sleeve measures 2 cm from division in all sizes, decrease 2 stitches mid under sleeve - read DECREASE TIP. Decrease like this every 5-3-½-½-½-½ cm 2-3-5-5-5-5 times in total = 32-34-36-38-40-42 stitches. Work until sleeve measures 10-9-7-6-6-6 cm from division (approx. 4 cm remain until finished measurements, try the jacket on and work to desired length). NOTE! Shorter measurements in the larger sizes because of wider neck and longer yoke. Knit 1 round while decreasing 2 stitches evenly = 30-32-34-36-38-40 stitches. Switch to double pointed needles size 6 mm. Work rib in the round = knit 1/purl 1 for 4 cm. Cast off with knit over knit and purl over purl - remember CAST-OFF TIP. Sleeve measures approx. 14-13-11-10-10-10 cm from division. Work the other sleeve the same way. |
|
 |
|
Have you finished this pattern?Tag your pictures with #dropspattern #sweetmelodysweater or submit them to the #dropsfan gallery. Do you need help with this pattern?You'll find 27 tutorial videos, a Comments/Questions area and more by visiting the pattern on garnstudio.com. © 1982-2026 DROPS Design A/S. We reserve all rights. This document, including all its sub-sections, has copyrights. Read more about what you can do with our patterns at the bottom of each pattern on our site. |
|


With over 40 years in knitting and crochet design, DROPS Design offers one of the most extensive collections of free patterns on the internet - translated to 17 languages. As of today we count 325 catalogues and 12298 patterns translated into English (UK/cm). 12298
We work hard to bring you the best knitting and crochet have to offer, inspiration and advice as well as great quality yarns at incredible prices! Would you like to use our patterns for other than personal use? You can read what you are allowed to do in the Copyright text at the bottom of all our patterns. Happy crafting!
Post a comment to pattern DROPS 212-23
We would love to hear what you have to say about this pattern!
If you want to leave a question, please make sure you select the correct category in the form below, to speed up the answering process. Required fields are marked *.