
Popular categories
Looking for a yarn?


Comments / Questions (218)
![]() Helga wrote:
Helga wrote:
Bei der Passe komme ich nicht auf die 244 Maschen, warum
21.04.2023 - 01:30DROPS Design answered:
Liebe Helga, vor der Raglanzunahmen haben Sie 156 Maschen in M; dann wird man 8 Maschen (4 M beim Vorder- + 4 M beim Rückenteil) insgesamt 9 Mal zunehmen (=156+72=228 Maschen), dann werden nur 4 Maschen (2 M beim Vorder- + 2 M beim Rückenteil) insgesamt 4 Mal zugenmommen (228+16=244 Maschen). Viel Spaß beim stricken!
21.04.2023 - 08:38
![]() Deborah wrote:
Deborah wrote:
Hi, ik was begonnen in maat L met dit patroon maar de uitleg snap ik niet bij de verdeling van de hals, waarom zijn er voor de rechtermouw 12 steken en voor de linker 8? En daar moet er opeens ook 1 av. en 2r. Heel graag even een reactie.
10.04.2023 - 12:01
![]() Christina wrote:
Christina wrote:
Det står i oppskrift at ved raglanfellingene, skal det felles to foran merketråd, to etter! Dette skal utgjøre totalt 8 økte masker. I mitt regnestykke, blir det 16 totalt( 4 merketråder). Men det står jo at det kun økes på forstykket og bakstykket.. vil det si, at jeg skal starte økingen etter første merketråd, og neste øking før neste merketråd?-3. øking:etter merketråd, 4. økning før 4. merketråd? Litt vanskelig dette her! Takk for hjelp!
06.04.2023 - 22:15DROPS Design answered:
Hei Christina, Det er totalt 2 masker økt ved hver raglanlinje (1 før og 1 etter). Du øker bare på for- og bakstykke (ikke på ermene) slik at det blir totalt 8 masker økt på omgangen. God fornøyelse!
11.04.2023 - 07:01
![]() Carrée Sylviane wrote:
Carrée Sylviane wrote:
Bonjour, Ce pull me plaît énormément. Pourriez-vous me fournir les explications pour le tricoter de BAS en HAUT avec des aiguilles droites ou, si cela est possible, me communiquer des modèles similaires pour le faire avec des aiguilles 5 Cela serait très gentil de votre part. Je vous remercie infiniment
27.03.2023 - 14:28DROPS Design answered:
Bonjour Mme Carrée, nous ne sommes malheureusement pas en mesure de pouvoir adapter chacun de nos modèles à chaque demande, vous pouvez toutefois vous inspirer d'un modèle similaire tricoté de bas en haut - cf ici - ajoutez des filtres si besoin. Bon tricot!
27.03.2023 - 15:37
![]() Mara Senn wrote:
Mara Senn wrote:
Guten Tag Laut Anleitung werden die Raglanzunahmen erst nur beim Vorder- und Rückenteil gemacht. Bloss welche der vier Markierungsfäden kennzeichnen Vorder- und Rückenteil? Besten Dank
04.03.2023 - 15:50DROPS Design answered:
Liebe Frau Senn, nehmen Sie so zu: vor dem 1. Markierer (am Ende Rückenteil), nach dem 2. Markierer (am Anfang Vorderteil), vor dem 3. Markierer (am Ende Vorderteil) und nach dem 4. Markierer (am Anfang Rückenteil). Viel Spaß beim stricken!
06.03.2023 - 09:21
![]() Annalena Åkerlind wrote:
Annalena Åkerlind wrote:
Hej, jag skulle vilja byta bomullsgarnet mot ullgarn, kanske merino? DROPS 212-15 DROPS Design: Modell w-806 Garngrupp C eller A + A
21.02.2023 - 13:38DROPS Design answered:
Hej Annalena Du kan byta ut garnet mot ett annat garn i garngrupp C (som tex Big merino) eller två trådar från ett garn i garngrupp A (som tex Baby merino). Tänk bara på att beräkna riktig garnåtgång och att hålla stickfastheten som uppges. Mvh DROPS Design
22.02.2023 - 11:43
![]() Lulu wrote:
Lulu wrote:
What does this mean?: "Then work in the outermost stitch in each side of front piece and back piece in on sleeves."
16.01.2023 - 21:45DROPS Design answered:
Dear Lulu, when dividing piece on next round, the first stitch on front and back piece as well as the last stitch on front and back pieces will now be worked on each sleeve. Happy knitting!
17.01.2023 - 10:15
![]() Kelly wrote:
Kelly wrote:
I'm knitting a large and started with the 126 stitches. However, after increasing in the neck section, I am no where near 162 stitches. The most I am getting is about 16 extra stitches. What am I missing?
12.08.2022 - 03:39DROPS Design answered:
Hi Kelly, On the first increase round you increase 3 + 13 (all the increased purled sections) + 5 + 13 (all the increased purled sections) +2 = 46 increased stitches and a total of 162 stitches. Happy knitting!
12.08.2022 - 06:54
![]() Linda wrote:
Linda wrote:
Bærestykket:øke 2 masker på hver 2 omgang totalt 8 masker, (str large) slik det står forklart side 3 blir det å øke 16 masker, det er iallefall slik jeg forstår det. Takknemlig for svar.
18.07.2022 - 12:30DROPS Design answered:
Hei Linda, Til å begynner med øker du ved hver raglanlinje kun på for- og bakstykkene (2 raglanlinjer på begge stykkene så øker 2 masker x 4 hver omgang). God fornøyelse!
19.07.2022 - 06:57
![]() Blanchka wrote:
Blanchka wrote:
Très joli modèle mais les explications ne sont pas aussi fluides et intutives qu\'habituellement ( vu le nombre de questions posées, je comprends mieux mes doutes) A l a fin de chaque période, un récapitulatif du nombre de mailles ( dos manches devant serait le bienvenu- avec mes remerciements
27.06.2022 - 16:37
|
|
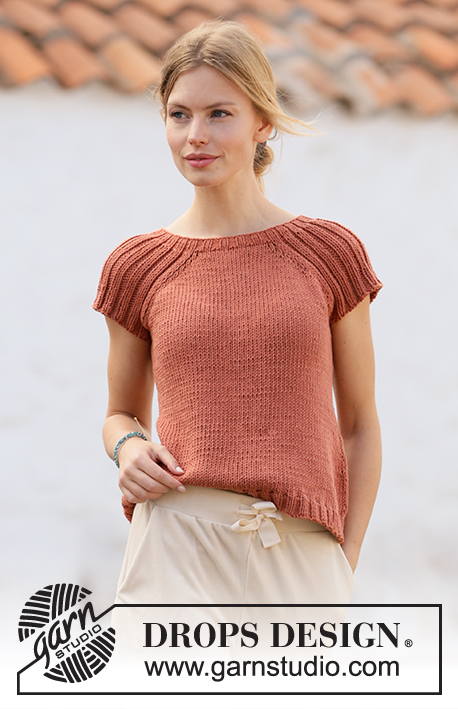
Canyon Clay#canyonclaytop |
|
 |
 |
Knitted top with raglan in DROPS Paris. Piece is knitted top down with rib. Size: S - XXXL
DROPS 212-15 |
|
|
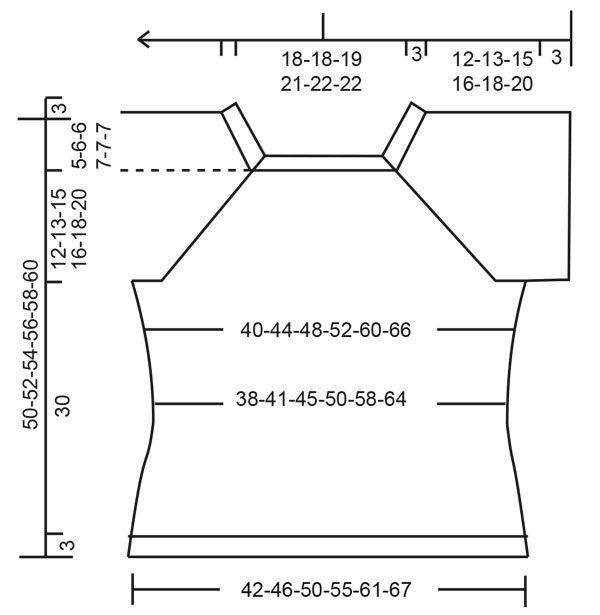
---------------------------------------------------------- EXPLANATION FOR THE PATTERN: ---------------------------------------------------------- INCREASE TIP-1 (evenly): To calculate how to increase evenly, count the stitches to be increased (e.g. 9 stitches) and divide by stitches of increases to be done (e.g. 2) = 4.5. In this example increase by making 1 yarn over after alternately every 4th and 5th stitch. On next row work yarn overs twisted to avoid holes. INCREASE TIP-2: Increase 1 stitch by making 1 yarn over. On next round purl yarn over twisted to avoid holes. Purl the new stitches. INCREASE TIP-3 (applies to sides of body): Work until 2 stitches remain before marker thread, 1 yarn over, knit 4 (marker thread is in the middle of these stitches), 1 yarn over. On next round knit yarn overs twisted to avoid holes. Then work the new stitches in stocking stitch. DECREASE TIP: Decrease 1 stitch on each side of marker thread as follows: Work until 3 stitches remain before marker thread and knit 2 together, knit 2 (marker thread is between these stitches), slip 1 stitch knitwise, knit 1, pass slipped stitch over stitch worked. RAGLAN: In the beginning increase 2 stitches towards each raglan on front and back piece (= 8 stitches increased on round), and thereafter increase 1 stitch towards each raglan on front and back piece (= 4 stitches increased on round). Increase 2 stitches before marker thread as follows: Work until 2 stitches remain before marker thread: 1 yarn over, knit 1, 1 yarn over, knit 1, marker thread is here. Increase 2 stitches after marker thread as follows: Knit 1, 1 yarn over, knit 1, 1 yarn over. Increase 1 stitch before marker thread as follows: Work until 1 stitch remains before marker thread: 1 yarn over, knit 1, marker thread is here. Increase 1 stitch after marker thread as follows: Knit 1, 1 yarn over. On next round knit yarn overs twisted to avoid holes. Then work the new stitches in stocking stitch. CAST-OFF TIP: To avoid a tight cast-off edge you may use a larger needle. If this also is too tight, make 1 yarn over after approx. every 4th stitch and cast off these as regular stitches. ---------------------------------------------------------- START THE PIECE HERE: ---------------------------------------------------------- TOP - SHORT OVERVIEW OF THE PIECE: Work neck edge and yoke in the round on circular needle from mid back, top down. Now divide yoke for body and sleeves. Work body in the round on circular needle. Work sleeves in the round on double pointed needles/short circular needle, top down. NECK EDGE: Cast on 112-118-126-138-144-144 stitches on circular needle size 3.5 mm with Paris. Knit 1 round. Work next round as follows: (Knit 2/purl 2) over the first 8-8-12-12-12-12 stitches, knit 1, insert a marker thread here (= in transition between back piece and right sleeve), knit 1, (purl 1/knit 2) over the next 33-36-36-42-45-45 stitches, purl 1, knit 1, insert a marker thread here (= in transition between right sleeve and front piece), knit 1, (purl 2/knit 2) over the next 16-16-20-20-20-20 stitches, purl 2, knit 1, insert a marker thread here (= in transition between front piece and left sleeve), knit 1, (purl 1/knit 2) over the next 33-36-36-42-45-45 stitches, purl 1, knit 1, insert a marker thread here (= in transition between left sleeve and back piece), knit 1, (purl 2/knit 2) over the next 8-8-8-8-8-8 stitches, purl 2. Continue in the round like this until rib measures 3 cm. When rib is done, work next round as follows: Knit until first marker thread and increase at the same time 2-3-3-3-3-4 stitches evenly – read INCREASE TIP-1, knit over knit and purl over purl until next marker thread and increase at the same time 1 stitch in every purl section – read INCREASE TIP-2, knit until next marker thread and increase at the same time 4-6-5-5-6-8 stitches evenly, knit over knit and purl over purl until next marker thread and increase at the same time 1 stitch in every purl section, knit the last 11-11-11-11-11-11 stitches and increase at the same time 2-3-2-2-3-4 stitches evenly = 144-156-162-178-188-192 stitches. Work 1 row with knit over knit and purl over purl (work the yarn overs twisted to avoid holes). Switch to circular needle size 5 mm. Insert 1 marker at the beginning of round (= approx. mid back), measure yoke from this marker! YOKE: Knit over knit and purl over purl. On first round start increase for RAGLAN – read explanation above. Only increase on front piece and back piece towards each raglan. Increase 2 stitches every other round 9-9-8-10-12-13 times in total, then increase 1 stitch every other round 2-4-6-6-8-8 times = 224-244-250-282-316-328 stitches. REMEMBER THE KNITTING TENSION! Continue with knit over knit and purl over purl until piece measures 12-13-15-16-18-20 cm from marker. The yoke is finished. Then work in the outermost stitch in each side of front piece and back piece in on sleeves. Work next round as follows: Work the first 30-33-37-41-47-50 stitches, slip the next 50-54-54-62-66-66 stitches on a stitch holder for sleeve and cast on 6-6-10-10-10-14 stitches on needle (= in the side under sleeve), work the next 62-68-71-79-92-98 stitches (= front piece), slip the next 50-54-54-62-66-66 stitches on a stitch holder for sleeve and cast on 6-6-10-10-10-14 stitches on needle (= in the side under sleeve), work the remaining 32-35-34-38-45-48 stitches on needle. Then finish body and sleeves separately. NOW MEASURE PIECE FROM HERE! BODY: = 136-148-162-178-204-224 stitches. Insert 1 marker thread in the in each side, in middle of the new stitches cast-on under the sleeves (= 3-3-5-5-5-7 new stitches on each side of marker thread). Move the marker threads upwards when working; they should be used for increase later in the sides. Work in stocking stitch in the round. When piece measures 4 cm from division, decrease 1 stitch on each side of marker threads - read DECREASE TIP. Decrease like this approx. every 8-7-6-5-4-3 cm 2 times in total = 128-140-154-170-196-216 stitches. When piece measures 20-18-16-14-12-10 cm from division, increase 1 stitch on each side of marker threads - read INCREASE TIP-3. Increase like this approx. every 3-4-4-5-6-6 cm 4-4-4-4-3-3 times in total = 144-156-170-186-208-228 stitches. When piece measures 30 cm from division (3 cm remain until finished measurements - work to desired length), knit 1 round while increasing 28-28-34-38-40-44 stitches = 172-184-204-224-248-272 stitches. Switch to circular needle size 3.5 mm. Work rib (knit 2/purl 2) in the round for 3 cm. Cast off with knit over knit and purl over purl - read CAST-OFF TIP. Top measures total 50-52-54-56-58-60 cm in total from shoulder and down. SLEEVE: Slip the 50-54-54-62-66-66 stitches from stitch holder in one side back on double pointed needles/circular needle size 5 mm, and pick up 1 stitch in each of the 6-6-10-10-10-14 stitches cast on under the sleeve = 56-60-64-72-76-80 stitches. Work rib (knit 2/purl 2) in the round. When sleeve measures 3 cm from division, cast off with knit over knit and purl over purl - remember CAST-OFF TIP. Work the other sleeve the same way. |
|
 |
|
Have you finished this pattern?Tag your pictures with #dropspattern #canyonclaytop or submit them to the #dropsfan gallery. Do you need help with this pattern?You'll find 25 tutorial videos, a Comments/Questions area and more by visiting the pattern on garnstudio.com. © 1982-2026 DROPS Design A/S. We reserve all rights. This document, including all its sub-sections, has copyrights. Read more about what you can do with our patterns at the bottom of each pattern on our site. |
|


With over 40 years in knitting and crochet design, DROPS Design offers one of the most extensive collections of free patterns on the internet - translated to 17 languages. As of today we count 325 catalogues and 12298 patterns translated into English (UK/cm). 12298
We work hard to bring you the best knitting and crochet have to offer, inspiration and advice as well as great quality yarns at incredible prices! Would you like to use our patterns for other than personal use? You can read what you are allowed to do in the Copyright text at the bottom of all our patterns. Happy crafting!
Post a comment to pattern DROPS 212-15
We would love to hear what you have to say about this pattern!
If you want to leave a question, please make sure you select the correct category in the form below, to speed up the answering process. Required fields are marked *.