
Looking for a yarn?


Comments / Questions (35)
![]() Susanne Borer wrote:
Susanne Borer wrote:
Danke, aber hier steht doch und zunehmen in jeder Runde 1 Mache mehr... damit man 60 Machen hat. Können Sie nochmals helfen. Danke 5.-10. RUNDE: Wie zuvor häkeln und zunehmen, d.h. in jeder Rund 1 Masche mehr zwischen den Zunahmen häkeln. Nach der 10. RUNDE sind 60 Maschen in der Runde und der Kreis hat einen Durchmesser von ca. 10 cm.
07.06.2019 - 16:48DROPS Design answered:
Liebe Frau Borer, oh Sie meinten ja beim Boden, ich war schon beim Netz, also bei der 5. Runde Boden häkeln Sie: *1 fM in die 3 ersten M., 2 fM in die nächste M*, und von *bis * wiederholen. Bei der 6. Runde häkeln Sie *1 fM in die 4 ersten M, 2 fM in die nächste M*, und so weiter, dh bei jeder Runde häkeln Sie 1 fM mehr zwischen den Zunahmen. Viel Spaß beim häkeln!
11.06.2019 - 09:34
![]() Susanne Borer wrote:
Susanne Borer wrote:
Grüezi Könnten Sie mir sagen wie ich in den Runden 5-10 Maschen aufnheme und wie ich diese in der Runde häkeln muss. Die Runden werden ja mit 2 feste Mache und in die 3. kommen ja dann 2 Maschen. Kein Tutorial gefunden. Danke für Feedback. Mit besten Grüssen Susanne
07.06.2019 - 15:54DROPS Design answered:
Liebe Frau Borer, es wird bei den Runden 5 bis 10 nicht zugenommen, dh die Anzahl vom Luftmaschenbogens bleibt gleich, es gibt nur 1 Luftmaschen mehr in jeder Runde (= 6 Lm/LmB bei der 5. Rd, 7 Lm/LmB bei der 6. Rd usw). Jede Runde beginnt und ende wie bei 4. Runde. Viel Spaß beim häkeln!
07.06.2019 - 16:09
![]() Madlenka wrote:
Madlenka wrote:
Vzpomínám si, že jsem v dětství měla podobnou síťovku, už se těším, až si ji uháčkuju i s vylepšením, které měla ta původní: dvojité dýnko sešité cca ze tří čtvrtin zapínací na patentku. Do této kapsičky se celá síťovka složila.
06.06.2019 - 16:57
![]() Regine Vande Mergel wrote:
Regine Vande Mergel wrote:
Ik begrijp niet wat er met toer 5-10( basis) bedoelt wordt :ga verder met haken enmeerderen opdeze manier : haak 1 steek meer voor iedere meerdering op iedere toer,
02.06.2019 - 10:41DROPS Design answered:
Dag Regine,
Op toer 4 haak je 2 steken dan 2 vasten in de volgende steek (= 1 meerdering), op de 5e toer haak je 3 steken dan 2 vasten in de volgende steek, op de 6e toer haak je 4 steken dan 2 vasten in de volgende steek, en zo dus op elke toer een steek meer voordat je meerdert.
24.07.2019 - 10:06
![]() Garatti wrote:
Garatti wrote:
Bonsoir je suis bien les explications mais le filet prend forme à plat. Il ne monte pas comme dans la vidéo. J'ai bien les 30 arceaux demandés. J'en suis au tour 6. Par avance merci
30.05.2019 - 23:03DROPS Design answered:
Bonjour Mme Garatti, si vous avez bien le bon nombre d'arceaux, le sac va "monter" progressivement, mais il vous faudra davantage de rangs que dans la vidéo pour le voir - on crochète au total 22 tours d'arceaux pour la partie "haute" du sac. Bon crochet!
31.05.2019 - 09:52
![]() Anna wrote:
Anna wrote:
Where the American English pattern says "half single crochet" - is this meant to be half double crochet? I think the video shows a half double crochet., and I can't seem to find the term "half single crochet" anywhere.
11.04.2019 - 11:10DROPS Design answered:
Dear Anna, yes, in fact that means half double crochet in US terms. May be it would be more comfortable to swich to some another language - Brittish English or even Czech :-) Languange you can choose right under the picture. Happy crochetting! Hana
11.04.2019 - 11:36
![]() Suzanne wrote:
Suzanne wrote:
I made this pattern. But the bag turned out so small! Like half the size of what it should be.
06.04.2019 - 12:16DROPS Design answered:
Dear Suzanne, did you checked your tension? And then kept the same tension as for your swatch? Remember the hook size is always a guideline, you might have to use a smaller or a larger hook size to get the correct tension. Happy crocheting!
08.04.2019 - 10:32
![]() Inge wrote:
Inge wrote:
Mijn tas is heel mooi afgewerkt, maar de handlussen zijn aan de binnenzijde wel niet zo stevig, dat rekt zo een beetje open en zou met de tijd loskomen. Kan ik dit oplossen met de handvatten aan de binnenzijde en de 25 steken tussen het handvat een extra rij vasten te geven? Of kan ik dit nog anders oplossen? De buitenzijde van de handvatten is wel steviger omdat die een extra rij kregen.
13.03.2019 - 11:35DROPS Design answered:
Dag Inge,
Ja, dat is een goed idee om het zo op te lossen. Je zou die extra toer van vasten ook wat strakker kunnen haken (bijvoorbeeld door een kleinere naald te gebruiken)
15.03.2019 - 18:35
![]() Ingrid wrote:
Ingrid wrote:
Mijn tas is een heel stuk korter dan beschreven in het patroon, nl 28 cm ipv 38cm. Waarschijnlijk omdat ik de lusjes nogal vast gehaakt heb Kan ik dit oplossen door sommige rijen te herhalen, dus 2x na elkaar dezelfde toer te haken? En welke toeren kan ik dan best herhalen om 10 cm meer te krijgen en toch een mooi resultaat over te houden ?Losser haken vind ik geen optie, want dan zijn de lusjes niet zo mooi.
13.03.2019 - 11:32DROPS Design answered:
Dag Ingrid,
Als je de tas hoger wilt maken zou je dit kunnen doen door meer toeren van toer 7 tot 16 te haken, dus de toer waarbij alle lossenlussen 8 lossen hebben herhaal je dan een aantal keren naar wens.
15.03.2019 - 18:39
![]() Lone Vedholm wrote:
Lone Vedholm wrote:
Meget nem og udførlig opskrift- men brugte kun 50 g garn + meget lidt af næste nøgle, så et garnforbrug på 150 g,, iflg opskriften, er lidt misvisende :)
07.03.2019 - 10:12
|
|
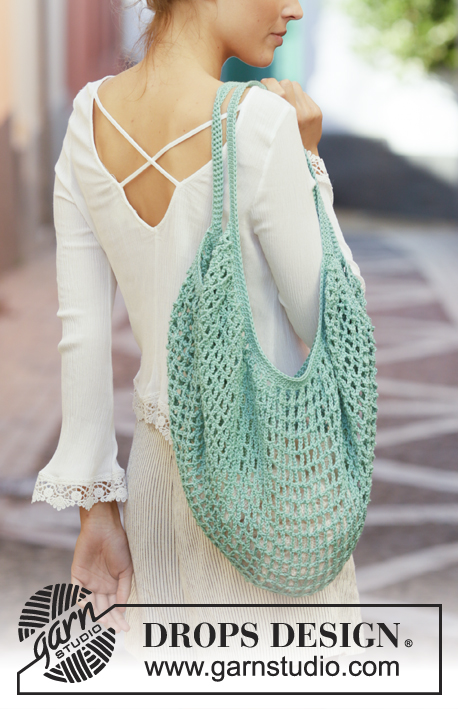
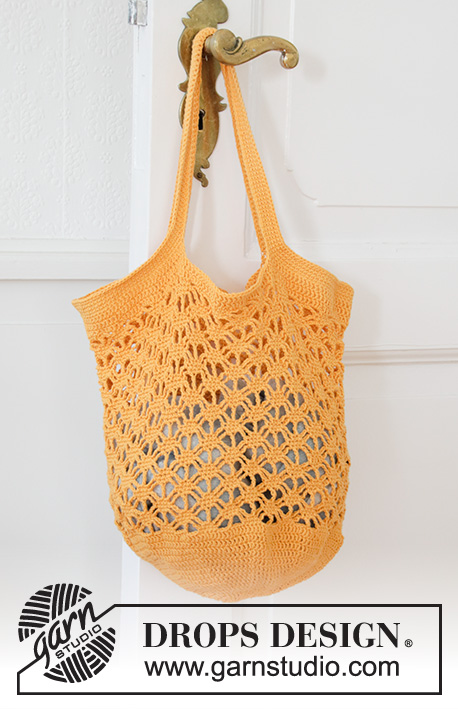
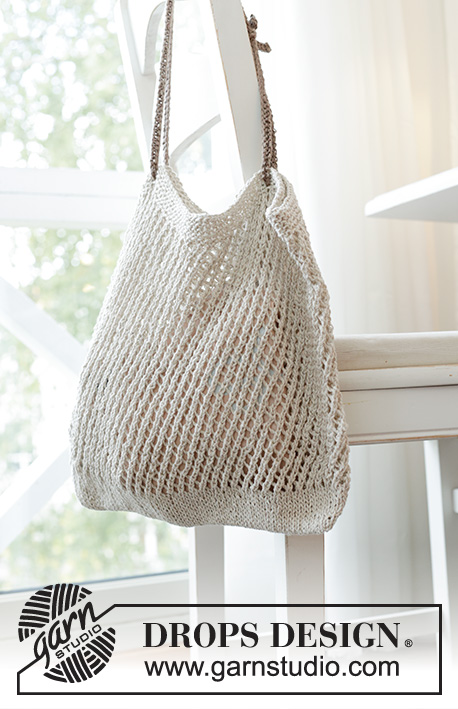
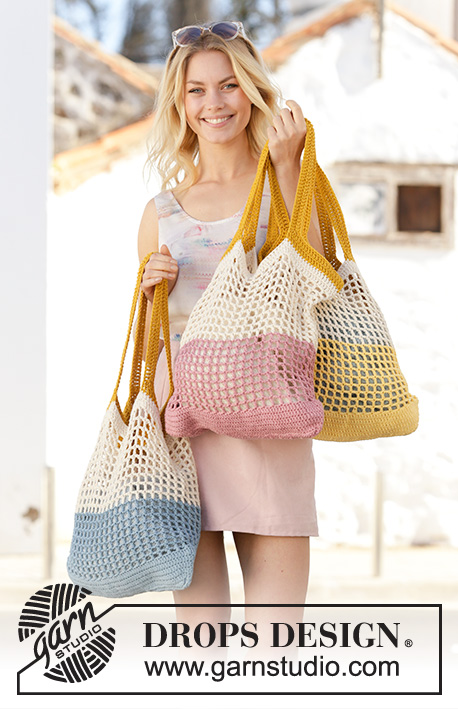
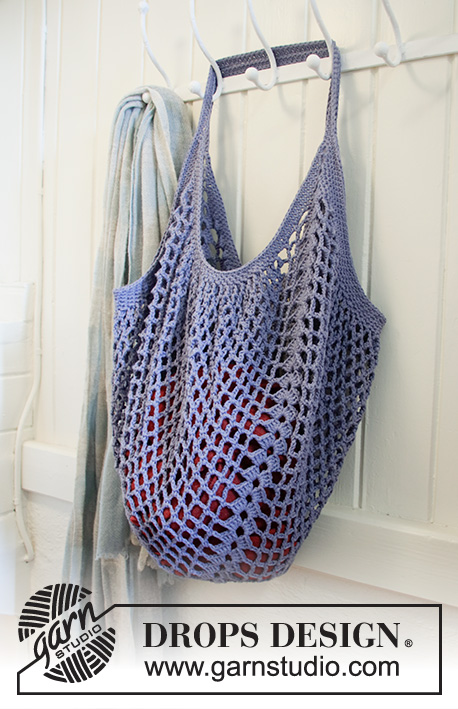
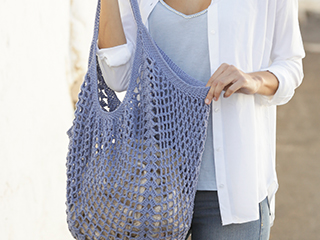
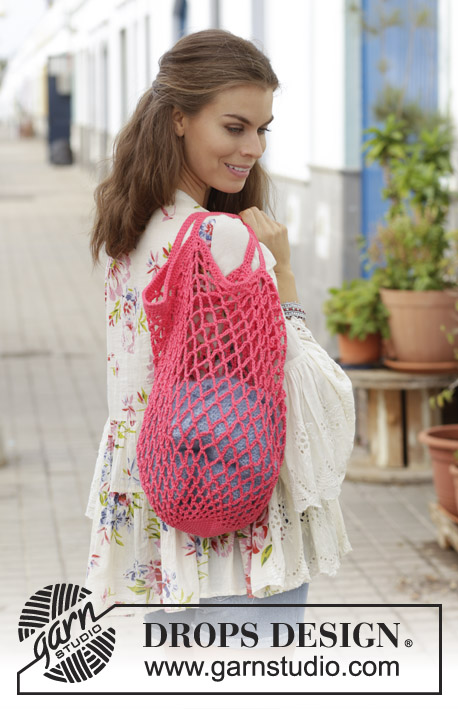
Sugar Mesh#sugarmeshbag |
|
 |
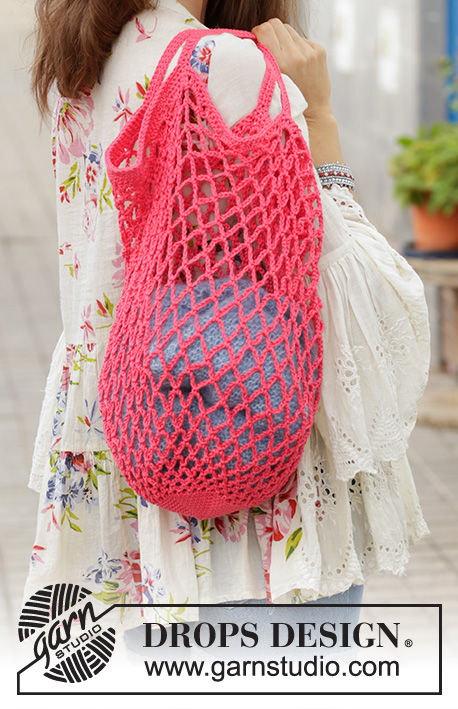 |
Crocheted shopping net/tote bag with chain-spaces. Piece is crocheted bottom up in DROPS Muskat.
DROPS 187-17 |
|
|
INFORMATION FOR PATTERN: CROCHET INFO (applies to bottom and edge): Replace first double crochet with 1 chain stitch and finish round with 1 slip stitch in 1st chain stitch. Replace first half treble crochet with 2 chain stitches and finish round with 1 slip stitch in 2nd chain stitch. ---------------------------------------------------------- SHOPPING NET: Begin shopping net with a circle with double crochets in the base, then work chain-spaces to form the net. Then work an edge with a handle in each side. BASE: Work 4 chain stitches with hook size 3.5 mm and Muskat, form a ring with 1 slip stitch in first chain stitch. READ CROCHET INFO. ROUND 1: Work 6 double crochets in ring. ROUND 2: Work 2 double crochets in every double crochet = 12 stitches. ROUND 3: Work * 1 double crochet in first stitch, 2 double crochets in next stitch *, repeat from *-* the entire round = 18 stitches. ROUND 4: Work * 1 double crochet in each of the first 2 stitches, 2 double crochets in next stitch *, repeat from *-* the entire round = 24 stitches. ROUNDS 5-10: Continue to work and increase this way, work 1 stitch more before every increase on every round. After ROUND 10 there are 60 stitches on round and circle measures approx. 10 cm in diameter. NET: Now work chain-spaces to form the net. Work as follows: ROUND 1: Work 2 chain stitches, * skip 1 double crochet, 1 double crochet in next stitch, 2 chain stitches *, repeat from *-* the entire round, finish with 1 slip stitch around the first 2 chain stitches on round = 30 chain-spaces. ROUND 2: Work 3 chain stitches, insert a marker in these 3 chain stitches (= 1st chain-space). This is done to make it easier to see where 1st chain-space is when continuing. Then work * 1 double crochet around next chain-space, 3 chain stitches *, repeat from *-* until 1st chain-space and finish with 1 slip stitch around this chain-space. ROUND 3: Work 4 chain stitches, move the marker to these chain stitches (= 1st chain-space). Then work * 1 double crochet around next chain-space, 4 chain stitches *, repeat from *-* until 1st chain-space and finish with 1 slip stitch around this chain-space. ROUND 4: Work 5 chain stitches, move the marker to these chain stitches (= 1st chain-space). Then work * 1 double crochet around next chain-space, 5 chain stitches *, repeat from *-* until 1st chain-space and finish with 1 slip stitch around this chain-space. ROUND 5: Work 6 chain stitches, move the marker to these chain stitches (= 1st chain-space). Then work * 1 double crochet around next chain-space, 6 chain stitches *, repeat from *-* until 1st chain-space and finish with 1 slip stitch around this chain-space. ROUND 6: Work 7 chain stitches, move the marker to these chain stitches (= 1st chain-space). Then work * 1 double crochet around next chain-space, 7 chain stitches *, repeat from *-* until 1st chain-space and finish with 1 slip stitch around this chain-space. ROUND 7: Work 8 chain stitches, move the marker to these chain stitches (= 1st chain-space). Then work * 1 double crochet around next chain-space, 8 chain stitches *, repeat from *-* until 1st chain-space and finish with 1 slip stitch around this chain-space. ROUNDS 8-16: Work as ROUND 7 (all chain-spaces have 8 chain stitches). ROUNDS 17-18: Work as ROUND 6 (all chain-spaces have 7 chain stitches). ROUNDS 19-20: Work as ROUND 5 (all chain-spaces have 6 chain stitches). ROUNDS 21-22: Work as ROUND 4 (all chain-spaces have 5 chain stitches) but finish ROUND 22 with 1 slip stitch in 1st chain stitch at beginning of round. EDGE WITH HANDLE: ROUND 1: Work 5 half treble crochets around every chain-space from previous round = 150 half treble crochets. ROUND 2: Work 1 double crochet in every half treble crochet = 150 double crochets. ROUND 3: Work 1 double crochet in each of the first 25 double crochets, work 75 chain stitches (= handle), skip 25 double crochets, work 1 double crochet in each of the next 50 double crochets, work 75 chain stitches (= handle) and skip 25 double crochets, work 1 double crochet in each of the next 25 double crochets. ROUND 4: Work 1 double crochet in each of the first 25 double crochets, work 1 double crochet in each of the next 75 chain stitches, 1 double crochet in each of the next 50 double crochets, 1 double crochet in each of the next 75 chain stitches, 1 double crochet in each of the last 25 double crochets. ROUND 5: Work 1 slip stitch in each of the first 25 double crochets, 1 double crochet in each of the next 75 double crochets (= handle), 1 slip stitch in each of the next 50 double crochets, 1 double crochet in each of the next 75 double crochets (= handle), 1 slip stitch in each of the last 25 double crochets. Fasten off. |
|
Have you finished this pattern?Tag your pictures with #dropspattern #sugarmeshbag or submit them to the #dropsfan gallery. Do you need help with this pattern?You'll find 8 tutorial videos, a Comments/Questions area and more by visiting the pattern on garnstudio.com. © 1982-2025 DROPS Design A/S. We reserve all rights. This document, including all its sub-sections, has copyrights. Read more about what you can do with our patterns at the bottom of each pattern on our site. |
|


With over 40 years in knitting and crochet design, DROPS Design offers one of the most extensive collections of free patterns on the internet - translated to 17 languages. As of today we count 320 catalogues and 12094 patterns translated into English (UK/cm). 12094
We work hard to bring you the best knitting and crochet have to offer, inspiration and advice as well as great quality yarns at incredible prices! Would you like to use our patterns for other than personal use? You can read what you are allowed to do in the Copyright text at the bottom of all our patterns. Happy crafting!
Post a comment to pattern DROPS 187-17
We would love to hear what you have to say about this pattern!
If you want to leave a question, please make sure you select the correct category in the form below, to speed up the answering process. Required fields are marked *.