Comments / Questions (48)
![]() Müller wrote:
Müller wrote:
Guten Tag, ich vertehe nicht beim Rückenteil, dass man A.2 über A.1 stricken soll, wie wird das gemeint? Dann steht da außerdem, dass man A2 stricken soll bis 1 Masche übrig ist. Soll man also die reihe so oft wiederholen bis 1 Masche übrig ist und dass dann mit allen einzelnen reihen von A2? Danke im voraus!
17.01.2021 - 23:25DROPS Design answered:
Liebe Frau Müller, Sie sollen die 2 Maschen von A.2 über die 2 Maschen von A.1 stricken/in der Breite wiederholen, so haben Sie 1 Masche kraus rechts (= die 1. Masche in A.2) über die linke Masche von A.1 und die rechte Masche in A.2 stricken Sie über die rechte Masche in A.1. Beim A.1 hatten Sie 1 linke Masche beidseitig innerhalb die rechte Masche vor/nach den 3 M krausrechts - hier wird das gleiche, Dann stricken Sie mit A.2 und 1 M krausrechts beidseitig + 1 Masche glatt rechts nach der 1. Randmasche. Viel Spaß beim stricken!
18.01.2021 - 11:16
![]() Melanie wrote:
Melanie wrote:
Hallo, ich verstehe den Anfang des Rückenteils nicht. Wieso steht da zweimal 1. Reihe. Erst steht da 1. Rück Reihe und dann 1. Vor Reihe. Warum steht das 2 mal da und müsste es nicht it vor Reihe beginnen? Ich würde noch gerne wissen, wie man stricken muss, falls man das Top länger als angegeben haben möchte. Danke im Voraus!
15.01.2021 - 08:30DROPS Design answered:
Liebe Melanie, nach Anschlag stricken Sie alle Maschen links = diese Reihe wird von der Rückseite gearbeitet. Dann stricken Sie die nächste Reihe von der Vorderseite = Hinreihe mit A.1 (= 1. Reihe = Hinreihe) und 3 M kraus rechts beidseitig. Leider können wir nicht jede Anleitung nach jedem Wunsch umrechnen. Gerne kann Ihnen Ihr DROPS Händler damit helfen. Viel Spaß beim stricken!
15.01.2021 - 15:16
![]() Alysha Magtuto wrote:
Alysha Magtuto wrote:
Hello! When we get to the row of A.2 where we cast on 1 stitch at the end of the row, do we start the following row by knitting the stitch that was just casted on?
01.08.2020 - 11:27DROPS Design answered:
Dear Mrs Magtuto, after you have cast on 1 st at the end of first of 2 rows, knit the new st (= edge stitch in garter stitch) then after you have cast on 1 st at the end of 2nd row, work: 1 edge st in garter st, K1, A.2 until 1 st remain, 1 edge st in garter st. Happy knitting!
03.08.2020 - 07:42
![]() Winki wrote:
Winki wrote:
Zeigt das Muster die Maschen wie sie auf der Vorderseite erscheinen? Bei A3 ist die Reihe mit dem Pfeil aber eine Hinreihe!
27.07.2020 - 17:06DROPS Design answered:
Liebe Winki, ja, es sind alle Reihen eingezeichnet und A.1 und A.2 beginnen mit einer Hin-Reihe. Bei A.3 soll allerdings tatsächlich mit einer Rück-Reihe begonnen werden (Reihe mit Pfeil), damit sich der V-Ausschnitt, den Sie mit A.3 einleiten, optisch absetzt. Gutes Gelingen!
28.07.2020 - 11:21
![]() Liesel Thompson wrote:
Liesel Thompson wrote:
Please clarify for me? For A2 pattern is the 2nd row Which will be worked from the wrong side be a row of purl stitch or knit stitch please?
17.07.2020 - 16:12DROPS Design answered:
Hi Liesel, Row 2 in A.2 is purled, as it is from the wrong side. Happy knitting!
20.07.2020 - 07:32
![]() Liesel Thompson wrote:
Liesel Thompson wrote:
Please explain how there are 48 stitches on the left and right back when the total stitches are 95? After 20cm working on 95 stitches are we meant to increase 1 somewhere?
15.07.2020 - 22:26DROPS Design answered:
Dear Mrs Thompson, you increase one stitch in A.3 (next to last row = 3rd symbol from diagram text) so that there are 96 sts on needle. Happy knitting!
16.07.2020 - 09:59
![]() Johanne Villars Jørgensen wrote:
Johanne Villars Jørgensen wrote:
Hej. Det er sådan et flot mønster. Jeg ønsker at strikke toppen så den bliver lidt længere, er der da et stykke af opskriften jeg kan gentage til den får den ønskede længde? De bedste hilsner fra Johanne.
07.07.2020 - 23:09DROPS Design answered:
Hei Johanne. Du kan strikke / fortsette med dette mønstret mellom første og siste økning: Strikk mønster slik: 1 kantmaske rille, 1 rett, A.2 til det gjenstår 1 maske, 1 kantmaske i rille, til du har strikket de ekstra cm du ønsker. Husk å nok garn. God Fornøyelse!
13.07.2020 - 08:50
![]() India Saleem wrote:
India Saleem wrote:
Please can you clarify - is the first row purl 2nd row - is knit 4 then A1 (1P,1K) Knit last 3 stiches pattern is confusing - thanks India
19.06.2020 - 15:42DROPS Design answered:
Dear Mrs Saleem, do you mean at the very beg? you first purl 1 row, then next row will be worked from RS with A.1 = Purl 1, K1. Continue then in rib like this as shown in A.1: K over K and P over P. but work 3 sts in garter stitch on each side and knit 1 before working A.1 (so that pattern starts and ends with K1 from RS). Happy knitting!
19.06.2020 - 16:15
![]() Jyoti Patel wrote:
Jyoti Patel wrote:
I would like to reduce to an XS, how many stitches should i start with? First line is pearl, could you explain the next line for the ribbed and how to follow the box diagram pattern as i am unable to do so. Thank you. Help would be much appreciated.
13.06.2020 - 19:24DROPS Design answered:
Dear Mrs Patel, we are unfortunately not able to adapt every pattern to every single request, please contact your yarn store for any further individual assistance. Read more here about diagrams and work A.1 in rib P1/K1 (seen from RS) - Happy knitting!
15.06.2020 - 08:53
![]() Teresa wrote:
Teresa wrote:
Ora mi è chiaro! Grazie!
05.04.2020 - 15:45
Mazo#mazotop |
|||||||||||||
 |
 |
||||||||||||
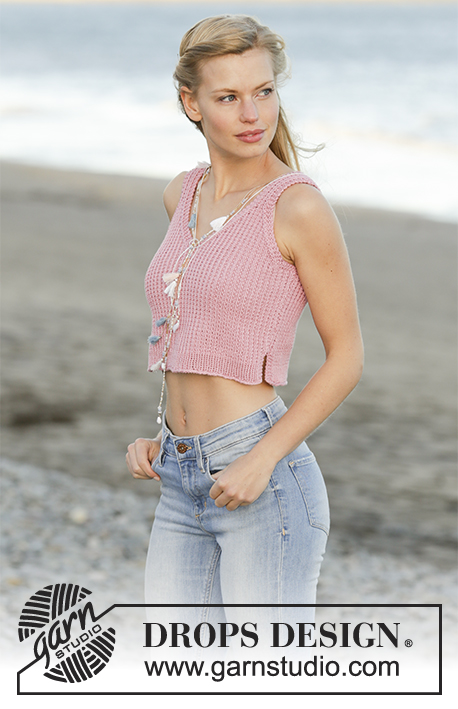
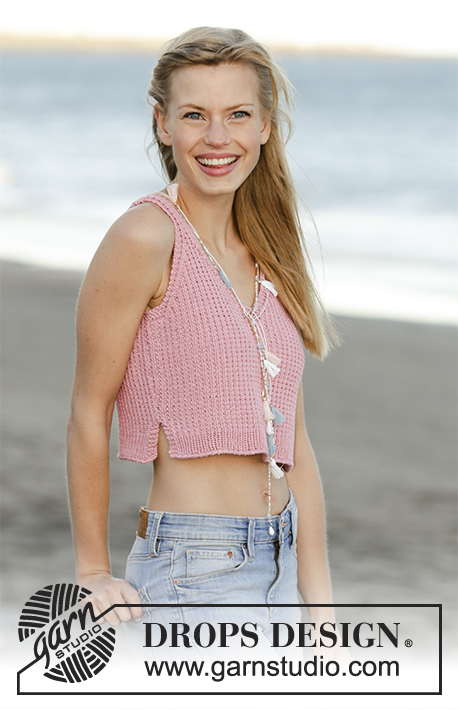
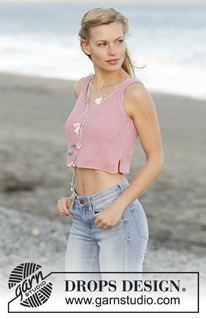
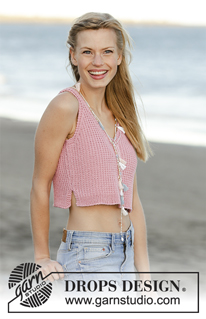
Top with V-neck, textured pattern and vents in the sides, worked bottom up in DROPS Muskat. Size: S - XXXL.
DROPS 178-66 |
|||||||||||||
|
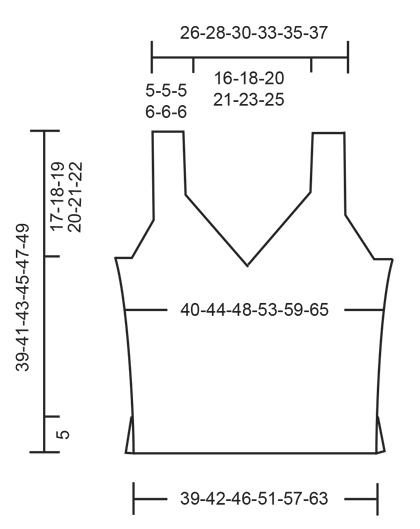
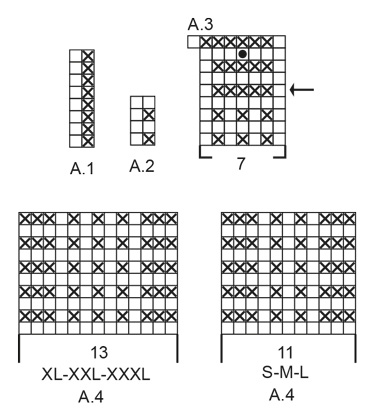
GARTER STITCH (back and forth): Knit all rows. 1 ridge = knit 2 rows. PATTERN: See diagrams A.1 to A.4. Diagrams show all rows in pattern seen from the right side. Choose diagram for your size. INCREASE TIP: Increase 1 stitch by making a yarn over. On next row knit yarn over twisted to avoid hole. NOTE: Work the new stitches gradually in the pattern A.2. DECREASE TIP: Decrease 1 stitch inside 3 edge stitches in garter stitch. All decreases are done from the right side. Decrease as follows after 3 edge stitches in garter stitch: Slip 1 stitch knitwise, knit 1, pass slipped stitch over stitch worked Decrease as follows before 3 edge stitches in garter stitch: Begin 2 stitches before the 3 edge stitches in garter stitch and knit 2 together. ---------------------------------------------------------- TOP: Worked back and forth in 2 parts and sewn together when finished. BACK PIECE: Cast on 81-89-97-107-119-133 stitches with Muskat on circular needle size 4 mm. Purl 1 row from wrong side. Work rib as follows (1st row = right side): Work 3 stitches in GARTER STITCH - see explanation above, knit 1 stitch, repeat A.1 (= 2 stitches) until 3 stitches remain on row, work 3 stitches in garter stitch. Continue pattern back and forth like this until A.1 has been worked vertically. Then work A.2 (= 2 stitches) over A.1. REMEMBER THE KNITTING TENSION! When piece measures 5 cm, cast on 1 new stitch at the end of the next 2 rows (marks where vents end) = 83-91-99-109-121-135 stitches. Work pattern as follows: 1 edge stitch in garter stitch, knit 1, A.2 until 1 stitch remains, 1 edge stitch in garter stitch. When piece measures 7 cm, increase 1 stitch inside 1 edge stitches in garter stitch in each side - READ INCREASE TIP! Repeat increase when piece measures 10 cm = 87-95-103-113-125-139 stitches. When piece measures 19-20-21-22-23-24 cm, work from arrow in A.3 over the middle 7 stitches on row - adjust so that this row marked with arrow is worked from wrong side. On first row from right side after A.3 work over the first 44-48-52-57-63-70 stitches on row and slip the remaining 44-48-52-57-63-70 stitches on 1 stitch holder. RIGHT SIDE AT THE BACK: = 44-48-52-57-63-70 stitches. READ ALL OF THE FOLLOWING SECTION - decrease for neck and armhole at the same time as follows: Work pattern A.2 as before with 3 edge stitches in garter stitch towards neck and 1 edge stitch in garter stitch towards the side. NECK: On first row from right side begin decrease for neck. Decrease 1 stitch inside the 3 edge stitches in garter stitch - READ DECREASE TIP. Decrease like this every other row (i.e. on every row from right side) 16-18-20-22-24-26 times in total. ARMHOLE: When piece measures 21-22-23-24-25-26 cm, work in garter stitch over the outermost 10-10-12-11-11-14 stitches towards the side (including 1 edge stitch in garter stitch). When 4 rows have been worked (= 2 ridges) over these stitches, cast off the first 7-7-9-8-8-11 stitches at beginning of row for armhole. Work the next 3 stitches in garter stitch (= edge towards armhole). Decrease 1 stitch inside the 3 edge stitches in garter stitch towards the armhole. Decrease like this every other row (i.e. on every row from right side) 10-12-12-14-18-20 times in total. After all cast offs and decreases for armhole and neck, 11-11-11-13-13-13 stitches remain on row for strap. Continue the pattern as before with 3 edge stitches in garter stitch in each side. Work strap as shown in A.4 - choose diagram for size. When piece measures 39-41-43-45-47-49 cm, cast off all stitches. LEFT SIDE AT THE BACK: Slip the 44-48-52-57-63-70 stitches from stitch holder in the other side back on circular needle size 4 mm and work the same way as right side at the back but reversed – NOTE: When casting off for armhole in the side, cast off at beginning of row from wrong side (instead of beginning of row from right side). The remaining decreases for armhole and neck are done from right side. FRONT PIECE: Cast on and work as back piece. ASSEMBLY: Sew the two straps together with grafting/kitchener stitches to avoid a chunky seam. Sew side seam inside 1 edge stitch in garter stitch in each side from armhole and down to vent. Repeat in the other side. Fasten off. |
|||||||||||||
Diagram explanations |
|||||||||||||
|
|||||||||||||
 |
|||||||||||||
 |
|||||||||||||
Have you finished this pattern?Tag your pictures with #dropspattern #mazotop or submit them to the #dropsfan gallery. Do you need help with this pattern?You'll find 23 tutorial videos, a Comments/Questions area and more by visiting the pattern on garnstudio.com. © 1982-2025 DROPS Design A/S. We reserve all rights. This document, including all its sub-sections, has copyrights. Read more about what you can do with our patterns at the bottom of each pattern on our site. |
|||||||||||||






Post a comment to pattern DROPS 178-66
We would love to hear what you have to say about this pattern!
If you want to leave a question, please make sure you select the correct category in the form below, to speed up the answering process. Required fields are marked *.