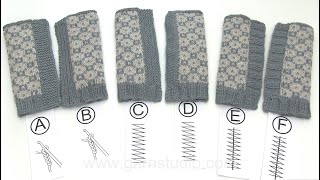
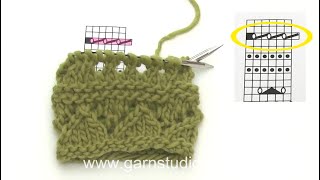
Many find it scary to cut in knitwear, while others have no problems and are more than happy cutting without sewing with a sewing machine or crocheting an edge before cutting. Highly recommend that you read the text below to get a better understanding of the video. In this DROPS video we use the yarn DROPS Nepal and show 3 different ways to sew / attach threads before cutting. We also show 6 different bands. We do not show how the bands are knitted in this video. The sample pieces in the video have 7 steek stitches (= cutting stitches) as we work with each other every color and the mid stitch is marked with a contrasting thread. You can also have more or less steek stitches (= cutting stitches). Often a jacket pattern will be explained how to knit back and forth, so these steek stitches are not explained in the pattern, but you have to add them yourself. On sample piece A and B a row with double crochets are worked, while on sample piece C, D, E and F, a sewing machine is used before cutting. On sample piece A half of the 3rd and half of the 4th stitches are worked together, while half of the 4th and half of the 5th stitches are worked together on sample piece B. A sewing machine with zigzag stitch is used on piece C and D and a zigzag stitch + 1 straight stitch on piece E and F. Overview of the different bands: A) The cutting edge is worked using double crochets with a thinner thread than the garment itself (use a thinner thread and with the same content if possible, in this video we use DROPS Flora, color no. 19 coral). The band is a long loose strip worked in garter stitches that is sewn to the garment, make sure the band is not being too long or too short in relation to the garment. The raw edge is sewn directly to the garment on the wrong side. B) The cutting edge is worked using double crochets with a thinner thread than the garment itself (use a thinner thread and with the same content if possible, in this video we use DROPS Flora, color no. 19 coral). The band is worked in one piece, half rib (knit 1, purl 1 with 1 edge stitch in garter stitch) and half stockinette stitch. The band is sewn to the garment and the stockinette stitch piece is laid over the raw edge and sewn from the wrong side. C) The cutting edge is sewn using zigzag from a sewing machine, approx. 0,5-1,0 cm = 1/8”-3/8" from where it is to be cut. For the band, stitches are picked up in the first stitch in the garment itself. Skip approx. every 4 stitches to avoid the band being too long in relation to the garment. The band is worked in garter stitch to the desired measurement and the raw edge is concealed with a decorative ribbon. D) The cutting edge is sewn using zigzag from a sewing machine, approx. 0,5-1,0 cm = 1/8”-3/8" from where it is to be cut. For the band, stitches are picked up in the first stitch in the garment itself. Skip approx. every 4 stitches to avoid the band being too long in relation to the garment. Work the band using stockinette stitch to the desired measurement, then purl 1 row (folding edge) and then stockinette stitch. The last part with stockinette stitches should be laid over the raw edge and sewn. E) The cutting edge is sewn using straight seam over a zigzag seam (= 2 seams) from a sewing machine, approx. 0,5 - 1,0 cm = 1/8”-3/8" from where it is to be cut. For the band, stitches are picked up in the first stitch in the garment itself. Skip approx. every 4 stitches to avoid the band being too long in relation to the garment. The band is worked in rib, knit 2, purl 2 to the desired measurement and the raw edge is concealed with a decorative ribbon. F) The cutting edge is sewn using straight seam over a zigzag seam (= 2 seams) from a sewing machine, approx. 0,5 -1,0 cm = 1/8”-3/8" from where it is to be cut. For the band, stitches are picked up in the first stitch in the garment itself. Skip approx. every 4 stitches to avoid the band being too long in relation to the garment. The band is worked in rib (knit 2, purl 2) to the desired measurement. At the wrong side, pick up the same amount of stitches in the same stitch as the band and work a piece (stockinette stitch) to be laid over the raw edge and sewn. We use the yarn DROPS Nepal in this video.
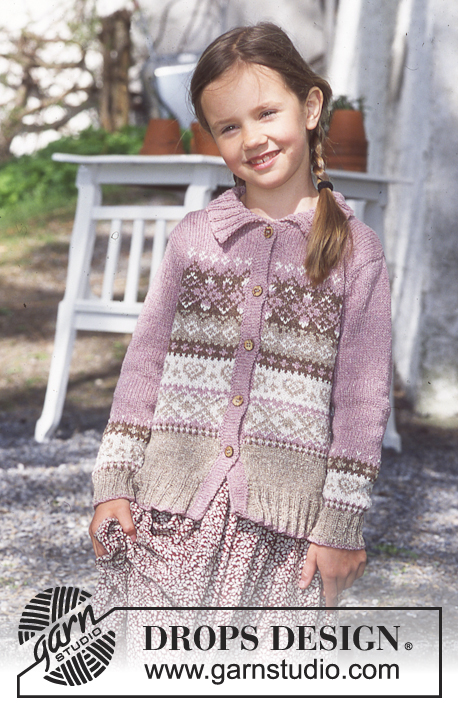
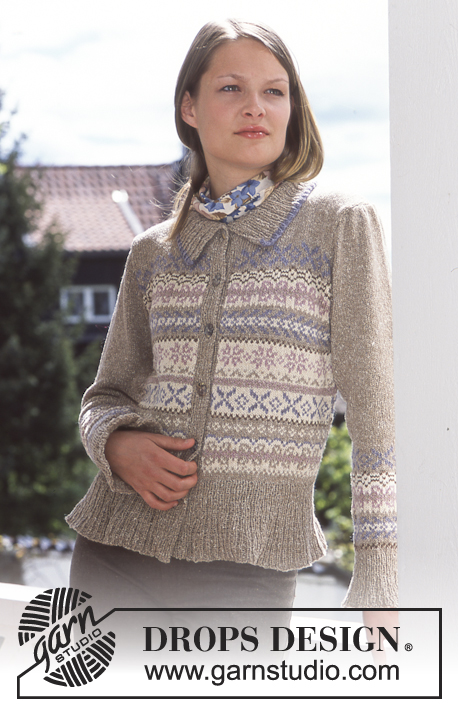
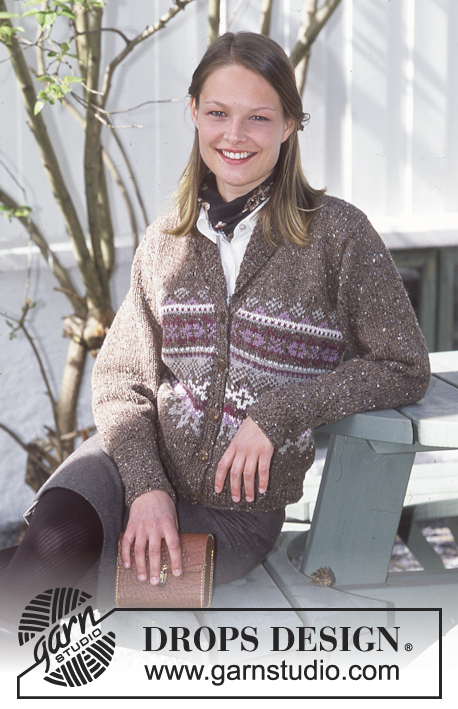
Patterns using this technique


Ich möchte gern einen Seitenschlitz mit dieser Methode arbeiten, aber keine Blende stricken. Ist es möglich, nur die Maschen der Wolle zu sichern und das andere Garn für die Steekmaschen komplett herauszuziehen? Oder bleibt immer eine Restmasche sichtbar?
24.07.2025 - 09:38DROPS Design :
Liebe Tanja, so, wie Sie es sich vorstellen, funktioniert es leider nicht - Sie kriegen die Steekmaschen nicht komplett "aufgelöst", Sie können aber die übrig geblieben Steek-Maschen nach hinten (zur Innenseite) umschlagen und festnähen, sodass sich am aufgeschnittenen Rand nichts weiter löst. Der Seitenschlitz ist dann etwas dicker als der Rest des Strickstücks. Vielleicht probieren Sie es einfach mit einem Probestück aus. Gutes Gelingen!
28.07.2025 - 20:57Hebben jullie patronen voor een kindervest die gebreid wordt met een knipbies? ik kan er geen enkele vinden met vriendelijke groeten Simonne Vandenbunder
10.09.2024 - 17:13Dette var flotte forklaringer på forskjellige måter å strikke stolper. Etter 40 år med strikking, lærte eg noko nytt i dag òg. Takk!
25.07.2024 - 08:48Hi Which of your yarns do you recommend for knitting a garment with steaks? Thanks
07.07.2024 - 19:00DROPS Design :
Dear Raminta, you can use almost any yarn. Wool yarns will hold better than cotton yarns, so you should use yarns like Alpaca or Karisma Superwash. Happy knitting!
07.07.2024 - 22:12You have demystified steeking for me. Such a clear and helpful video.
02.12.2023 - 08:28Welke manier zou het beste zijn voor een kabeltrui/-vest? Met vriendelijke groet, Catharina
28.11.2023 - 11:45DROPS Design :
Dag Catharina,
In de video worden 6 verschillende biezen uitgelegd. Wat precies bij jouw project past is natuurlijk heel erg afhankelijk van je persoonlijke voorkeur en smaak.
06.12.2023 - 20:13Hei, Er det mulig å bruke metode A på bomullsgarn?
02.01.2023 - 15:16DROPS Design :
Hej Anne-Marie, hvis du er usikker på om det fungerer på dit garn, så lav en lille prøve først :)
12.01.2023 - 15:38Tusen takk for en flott video-oppskrift som forklarer alt jeg har lurt på om knappestolper og sårkanter.
18.07.2021 - 15:00Het is gelukt!
27.05.2021 - 09:36Ik ga voor het eerst een voorpand doorknippen. Ik heb de instructies op deze site bekeken. Ze zijn heel duidelijk. Ik ben vergeten de boord in 2 delen te breien. Kan ik nu toch afwerken zoals in de instructie staat of moet ik er nu een rits in zetten ?
29.04.2021 - 09:42DROPS Design :
Dag Corneel,
Ik weet niet precies hoe je werkstuk eruit ziet, maar deze techniek zou je in principe door kunnen laten lopen in de boord, dus de 'kniprand' loopt dan door in de boord.
26.05.2021 - 14:48