
Popular categories
Looking for a yarn?


Comments / Questions (13)
![]() Trudy Barten wrote:
Trudy Barten wrote:
In de tekst beschrijving van het voorpand staat: brei 2 cm boord. Op de tekening zie ik 8 cm boord. Wat moet het zijn?
11.12.2021 - 23:21DROPS Design answered:
Dag Trudy,
Er lijkt inderdaad een foutje in te staan. Ik denk ook dat het 8 cm moet zijn in plaats van 2 cm. Ik zal het doorgeven aan de ontwerpafdeling ter controle.
14.12.2021 - 10:56
![]() Eva wrote:
Eva wrote:
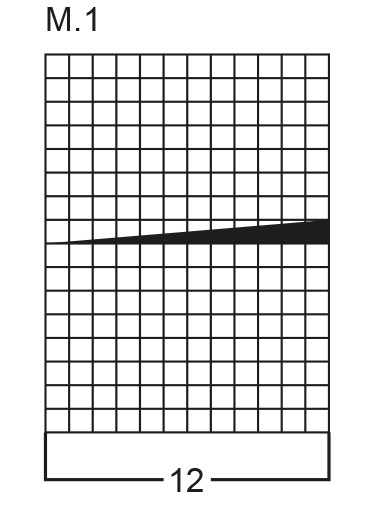
I am also knitting size 12, 97 sts across. My question is why do l have 4 cables (4x 12 ) when the model has only 2 cables each side of her front jumper. Question number 2, since only right side showing on chart, Do l knit the cable row every 15 or 30 rows? Please reply asap. Thank you. Regards Eva
02.11.2021 - 20:57DROPS Design answered:
Hi Eva, " cables on each side of the front piece is 4 cables in total. The chart M1 is worked 4 times over the front piece and then repeated in height so you cable every 16th row (repeated 4 times on this row). Hope this helps and happy knitting!
03.11.2021 - 07:11
![]() Régine DE LA BRIERE wrote:
Régine DE LA BRIERE wrote:
Bonjour, je n'ai pas trouvé d'explication pour les rang envers. Faut-il tricoter les maille comme elles se présentent, c'est-à-dire, end quand elles sont à l'end et env quand elles sont à l'env. Ou au point mousse ( donc à l'endroit pour les mailles à l'end) et à l'envers pour les torsades. Je vous remercie de vos réponses
07.10.2021 - 10:55DROPS Design answered:
Bonjour Mme De La Briere, Le diagramme montre le motif, vu sur l'endroit, autrement dit, M.1 se tricote en jersey (= tricotez à l'endroit sur l'endroit et à l'envers sur l'envers) - retrouvez plus d'infos sur les diagrammes dans cette leçon. Bon tricot!
07.10.2021 - 15:43
![]() Régine DE LA BRIERE wrote:
Régine DE LA BRIERE wrote:
Bonjour, pour le modèle 63-10, vous indiquez qu'il faut au total 91 ml pour une mesure de 52 cm, alors que l'échantillon et de 14ml pour 10cm, ce qui correspond à 73 ml et non 91. Ou est l'erreur ? Le nombre de maille ou les mesures du pull. Je vous remercie de votre réponse
06.10.2021 - 10:53DROPS Design answered:
Bonjour Mme De La Briere, les deux sont justes: il faut davantage de mailles pour tricoter des torsades qu'il n'en faut pour du jersey, autrement dit, pour obtenir les 52 cm de large en taille S, il vous faut 91 mailles sur la base d'une tension de 14 mailles jersey = 10 cm est juste. Pensez à bien vérifier votre tension, ajustez la taille des aiguilles si besoin. Bon tricot!
06.10.2021 - 16:19
![]() Anna Lundstedt wrote:
Anna Lundstedt wrote:
Jag förstår inte hur man ska kompensera? Ska man lägga upp? Vad gör man sen med de 4 m? Mönster: Se diagram ....Det kompenseras 4 m per fläta p.g.a flätans ihopdragning.
18.02.2021 - 20:09DROPS Design answered:
Hej Anna, det sker automatisk når du øker ifølge opskriften :)
23.02.2021 - 10:07
![]() Lene Juul Nielsen wrote:
Lene Juul Nielsen wrote:
Der er kun snoning den ene vej - mangler der ikke noget i mønstret så snoningerne kommer til at se rigtige ud?
04.05.2020 - 17:46
![]() Vibeke Funch wrote:
Vibeke Funch wrote:
Hvad betyder sætningen: Der kompenseres 4 m pr. snoning p.g.a. snoningens sammentrækning.
17.01.2020 - 22:31DROPS Design answered:
Hei Vibeke. Mulig det tidligere var en måte å skrive en forklaring på hvorfor strikkefastheten skal stemme over de maskene som strikkes med flette. Fletten trekker arbeidet sammen og det blir da kompensert med 4 masker pr flette. mvh DROPS design
27.01.2020 - 13:12
![]() Monica wrote:
Monica wrote:
Ho verificato ovviamente la corrispondenza del campione prima di iniziare, quindi è palesemente un errore nelle istruzioni. Riguardo ai rivenditori, ho mandato già mail a tutti e attendo risposta. Intendevo qualche idea creativa per inserire armoniosamente un altro colore,ripeto,considerando che disfare il Melody è un lavoraccio,quindi anche fare i bordi di un altro colore sarà sicuramente scomodo,tenendo conto che non è detto che la lana recuperata dai bordi sia sufficiente per il dietro
24.04.2019 - 10:08DROPS Design answered:
Buongiorno Monica, abbiamo inoltrato la sua segnalazione alla casa madre.
24.04.2019 - 11:57
![]() Monica wrote:
Monica wrote:
Ho verificato ovviamente la corrispondenza del campione prima di iniziare, quindi è palesemente un errore nelle istruzioni. Riguardo ai rivenditori, ho mandato già mail a tutti e attendo risposta. Intendevo qualche idea creativa per inserire armoniosamente un altro colore,ripeto,considerando che disfare il Melody è un lavoraccio,quindi anche fare i bordi di un altro colore sarà sicuramente scomodo,tenendo conto che non è detto che la lana recuperata dai bordi sia sufficiente per il dietro
24.04.2019 - 10:08
![]() Monica wrote:
Monica wrote:
Purtroppo la quantità indicata in questo modello è sbagliata, infatti non sono sufficienti 200gr di melody per la taglia S. Il filato è ora fuori produzione e io non riesco a trovare un gomitolo nel colore 12 ciliegia. Mi ritrovo quindi con il dietro a metà in un filato che, viste le sue caratteristiche, è molto difficile da disfare. Avete qualche idea?
23.04.2019 - 20:09DROPS Design answered:
Buongiorno Monica, la quantità di filato è corretta se il suo campione corrisponde a quello indicato: l'ha verificato prima di iniziare il lavoro? in ogni caso chiederemo una verifica alla casa madre. Per quanto riguarda il filato, provi a chiedere ad uno dei nostri rivenditori nell'elenco se ha ancora delle rimanenze del color ciliegia. Buon lavoro
24.04.2019 - 08:46
|
|||||||
DROPS 63-10 |
|||||||
 |
 |
||||||
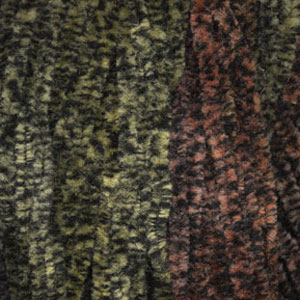
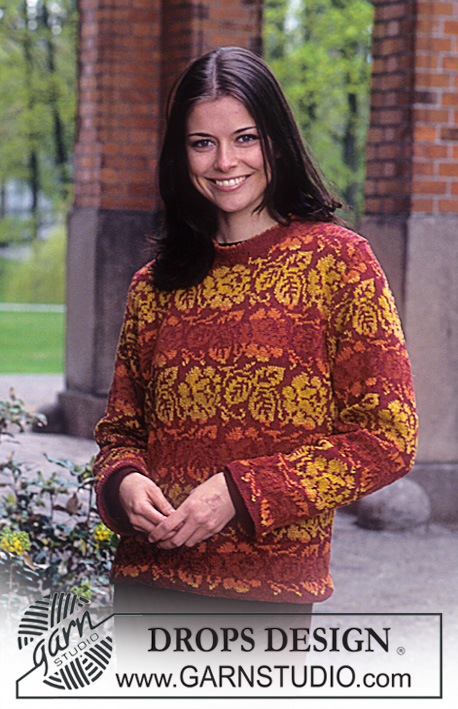
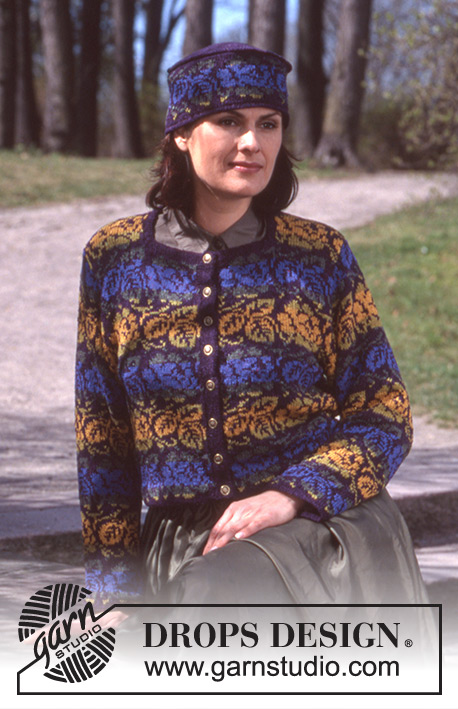
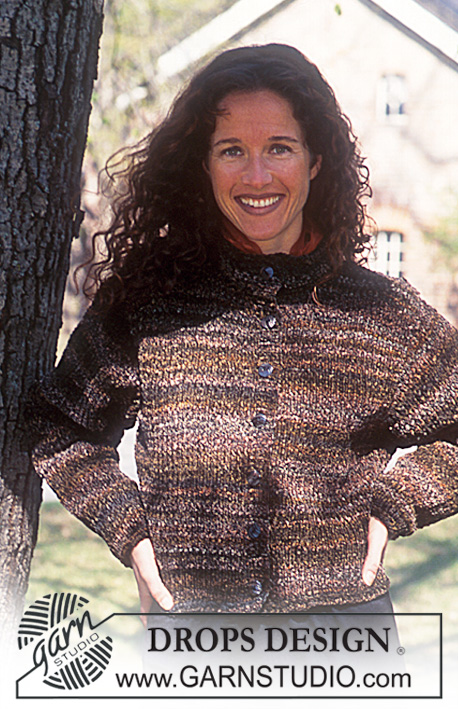
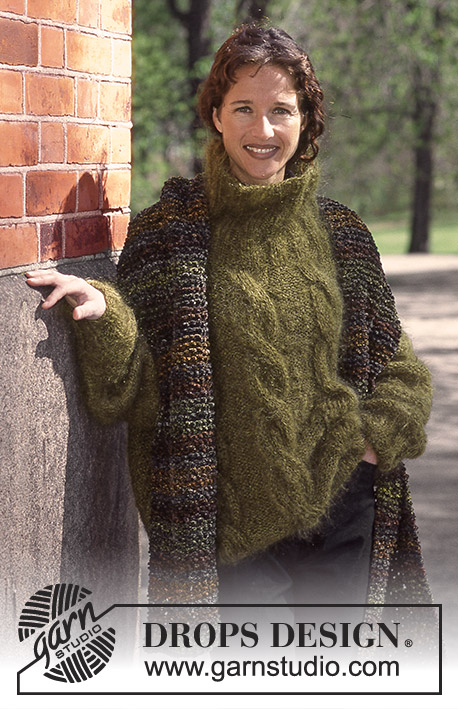
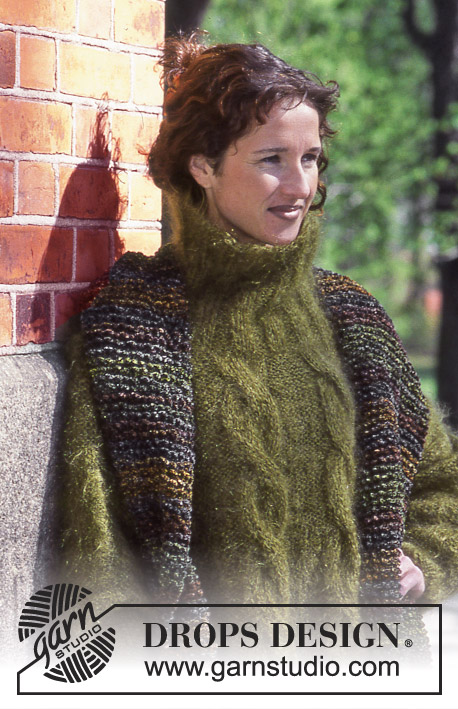
DROPS Sweater in Vienna or Melody, Scarf in Leopard or Snow.
DROPS 63-10 |
|||||||
|
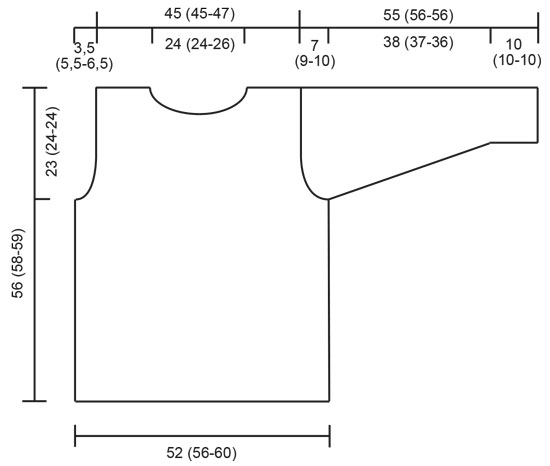
SWEATER: Gauge: 14 sts x 16 rows on larger needles in stockinette st = 10 x 10 cm. Rib: * K 3, P 3 *. Repeat from * - *. Garter Stitch, when knitting flat: Knit all sts, all rows. Pattern: See chart (1 chart = 1 repeat). The pattern is seen from the right side. Front: Cast on 86 (92-98) sts on smaller needles and knit rib for 2 cm, on the last row change to larger needles and inc 5 (5-4) sts evenly distributed = 91 (97-102) sts. On the next row establish the pattern as follows: 1 edge st (knit in garter st throughout), 7 (10-11) sts reverse stockinette st, Pattern 1, 9 (9-10) sts reverse stockinette st, Pattern 1, 9 (9-10) sts reverse stockinette st, Pattern 1, 9 (9-10) sts reverse stockinette st, Pattern 1, 7 (10-11) sts reverse stockinette st, 1 edge st (knit in garter st throughout). Continue in pattern as established until the piece measures 33 (34-35) cm, then bind off for armhole at each side every other row: 3 sts 1 time, 2 sts 1 (2-3) times, 1 st 1 (2-1) times = 79 (79-82) sts. When the work measures 50 (52-53) cm dec 8 sts evenly distributed over the center 41 (41-44) sts. On the next row bind off the center 21 (21-24) sts for the neck. Bind off at each neck edge every other row: 2 sts 2 times, 1 st 2 times. When the work measures 56 (58-59) cm dec 4 sts evenly distributed on each shoulder. Bind off on the next row. Back: Cast on and knit as for the front. When the work measures 53 (55-56) cm dec 8 sts evenly distributed over the center 41 (41-44) sts, on the next row bind off the center 29 (29-32) sts for the neck. Bind off 2 sts at each neck edge on the next row. When the work measures 56 (58-59) cm dec 4 sts evenly distributed on each shoulder = 15 sts. Bind off on the next row. Sleeve: Cast on 38 (38-38) sts on smaller needles and knit rib for 10 cm. Change to larger needles and knit reverse stockinette st, keeping 1 st at each edge in garter st throughout. After the rib, inc 1 st at each side (inside the edge st for a smoother seam) 14 (16-16) times: Size S: every 4th row Sizes M+L: alternately every 3rd and 4th row = 66 (70-70) sts. When the work measures 48 (47-46) cm bind off at each side for sleeve cap every other row: 2 sts 2 times, 1 st 2 (4-2) times, 2 sts 1 time, then bind off 3 sts at each side until the work measures 55 (56-56) cm, bind off. Assembly: Sew the shoulder seams. Pick up approx. 78-84 sts (divisible by 6) around the neck on smaller double pointed needles; join and knit rib for 20 cm , bind off loosely in rib. Sew in the sleeves. Sew sleeve- and side seam in one. SCARF IN LEOPARD OR SNOW. Finished measurements: 35.7 cm x 2 meters Materials: DROPS Leopard from Garnstudio 400 g col. 26 green/mixed Or use: DROPS Snow from Garnstudio 900 g col. 28 forest DROPS 10 mm needles, or size needed to obtain correct gauge. Gauge: 7 sts x 14 rows in garter st = 10 x 10 cm. Garter Stitch, when knitting flat: Knit all sts, all rows. Scarf: Cast on 25 sts with double yarn. Change to 1 strand and knit approx. 2 meters of garter st. Bind off with double yarn. |
|||||||
Diagram explanations |
|||||||
|
|||||||
|
|||||||
|
|||||||
Have you finished this pattern?Tag your pictures with #dropspattern or submit them to the #dropsfan gallery. Do you need help with this pattern?You'll find 20 tutorial videos, a Comments/Questions area and more by visiting the pattern on garnstudio.com. © 1982-2025 DROPS Design A/S. We reserve all rights. This document, including all its sub-sections, has copyrights. Read more about what you can do with our patterns at the bottom of each pattern on our site. |
|||||||


With over 40 years in knitting and crochet design, DROPS Design offers one of the most extensive collections of free patterns on the internet - translated to 17 languages. As of today we count 314 catalogues and 11822 patterns translated into English (UK/cm).
We work hard to bring you the best knitting and crochet have to offer, inspiration and advice as well as great quality yarns at incredible prices! Would you like to use our patterns for other than personal use? You can read what you are allowed to do in the Copyright text at the bottom of all our patterns. Happy crafting!
Post a comment to pattern DROPS 63-10
We would love to hear what you have to say about this pattern!
If you want to leave a question, please make sure you select the correct category in the form below, to speed up the answering process. Required fields are marked *.