
Looking for a yarn?


Comments / Questions (5)
![]() Bernadette Prunac wrote:
Bernadette Prunac wrote:
Bonjour, mon problème est le suivant : 10cm = 12 rangs pour l'échantillon. Que fais je? Je pensais faire un ouvrage facile et rapide, en fait c'est difficile (grosseur des aiguilles et finesse de la laine) Merci
26.10.2024 - 15:55DROPS Design answered:
Bonjour Mme Prunac, vous tricotez bien votre échantillon au point de riz? Vous pouvez sinon simplement tricoter avec votre propre échantillon en hauteur, si vous n'avez pas assez de rangs pour 10 cm, ce n'est pas forcément grave dans ce type de modèle, suivez simplement les indications de hauteur qui se trouvent en cm (surtout si votre largeur est bonne). Bon tricot!
28.10.2024 - 08:21
![]() Delhon Pascale wrote:
Delhon Pascale wrote:
Bonjour madame Je ne comprends comment faire le début du rang 4 Merci pour votre reponse Pascale
28.09.2024 - 13:24DROPS Design answered:
Bonjour mme Delhon, vous tricotez les rangs 4 à 7 de la même façon: 2 mailles de bordure, tricotez au point de riz (tricotez les mailles endroit à l'envers et les mailles envers à l'endroit) et terminez par 2 mailles de bordure. Bon tricot!
30.09.2024 - 07:56
![]() Chandelier wrote:
Chandelier wrote:
Je vous réécris car je n'arrive pas à comprendre comment tricoter les jetés ! Par exemple, j'ai 1 m end puis 1 m env et je dois tricoter 1 jeté entre ces 2 mailles mais comme je tricote le point de riz la m end va être tricotée à l'envers et la m env à l'endroit....... Dans ce cas, le jeté doit-il être tricoté à l'endroit où à l'envers ? Idem pour le jeté torse au rg suivant ? End ou env ? Pouvez-vous me donner des exemples précis ? Je vous remercie
23.05.2024 - 22:40DROPS Design answered:
Bonjour Mme Chandelier, quand l'augmentation est en début de rang, tricotez le jeté à l'endroit si la maille suivante doit être tricotée à l'envers et tricotez le à l'envers si la maille suivante doit être tricotée à l'endroit; en fin de rang, tricotez le jeté à l'endroit si la maille suivante doit être tricotée à l'envers, et tricotez le jeté à l'envers si la maille suivante doit être tricotée à l'endroit, autrement dit, vous allez toujours tricoter les mailles endroit à l'envers et les mailles envers à l'endroit et incorporer les augmentations au point de riz (torse = dans le brin arrière) pour qu'il continue sur les nouvelles mailles. Bon tricot!
24.05.2024 - 07:57
![]() Chandelier wrote:
Chandelier wrote:
Bonjour, J'aimerais savoir comment tricoter le jeté, torse endroit ou torse envers ? Par exemple, rang 3 1 jeté, rang 4 le tricoter torse mais dans quel sens endroit ou envers ? Je vous remercie pour votre réponse Agnes
21.05.2024 - 15:40DROPS Design answered:
Bonjour Mme Chandelier, les jetés se tricotent normalement = dans le brin avant, soit à l'endroit, soit à l'envers, en fonction de la maille précédente/suivante du point de riz. Bon tricot!
21.05.2024 - 16:10
![]() Sue wrote:
Sue wrote:
Lovely texture and yarn.
04.08.2023 - 06:59
|
|
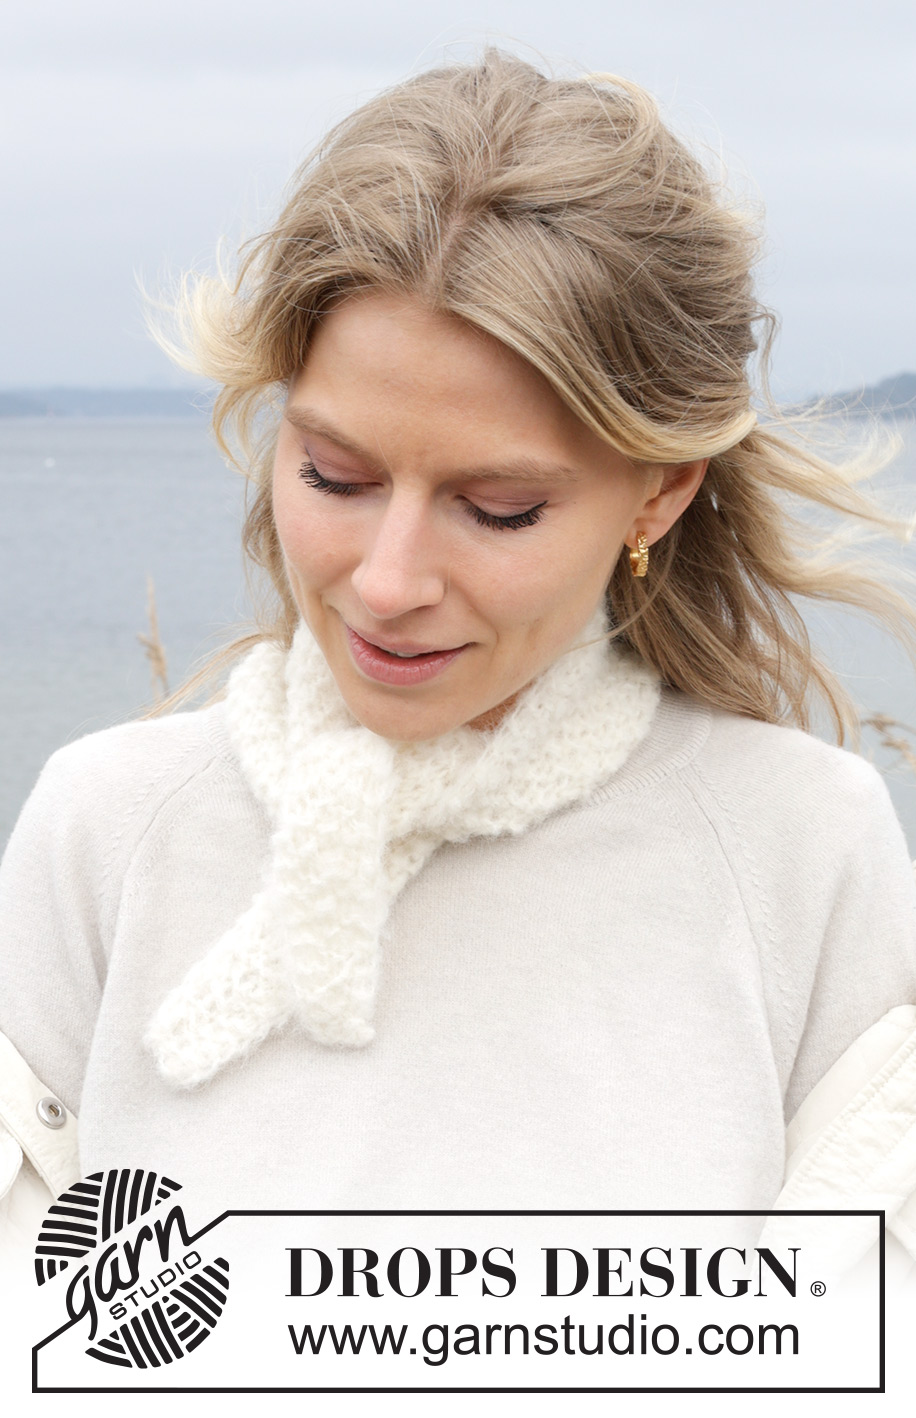
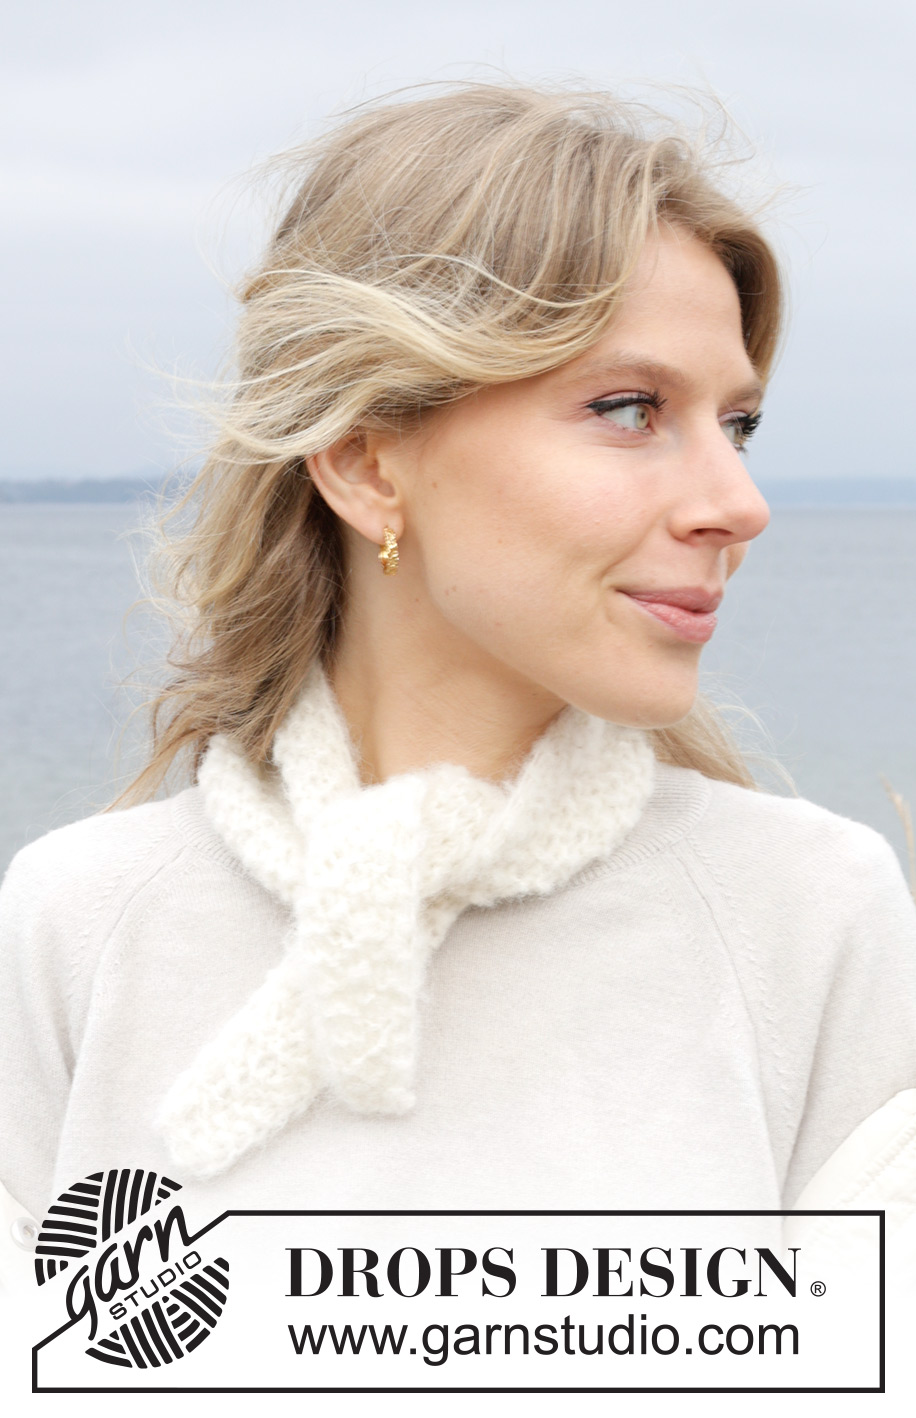
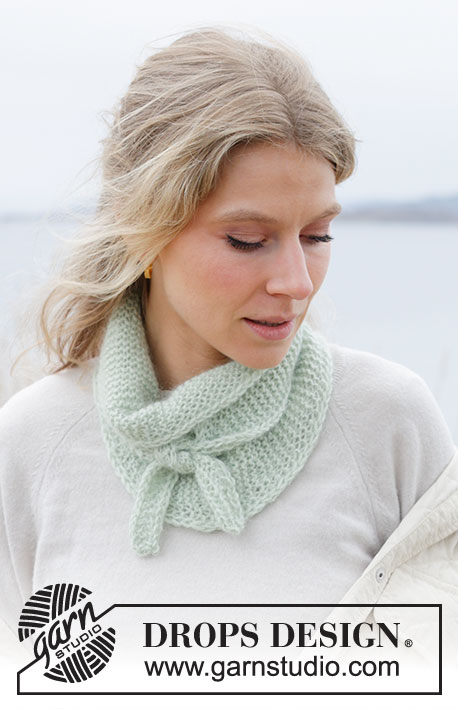
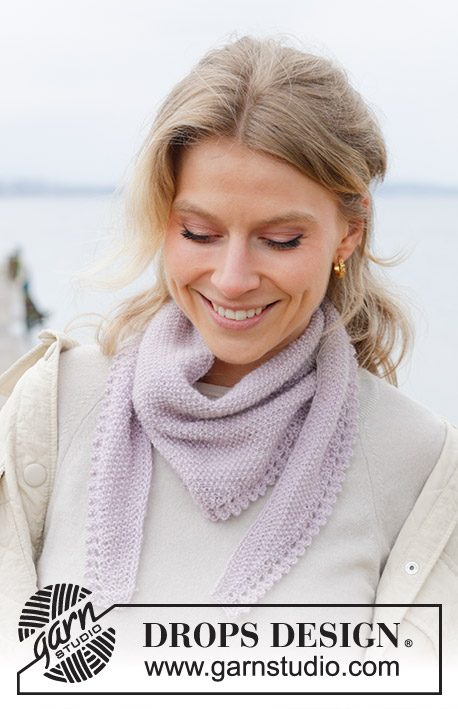
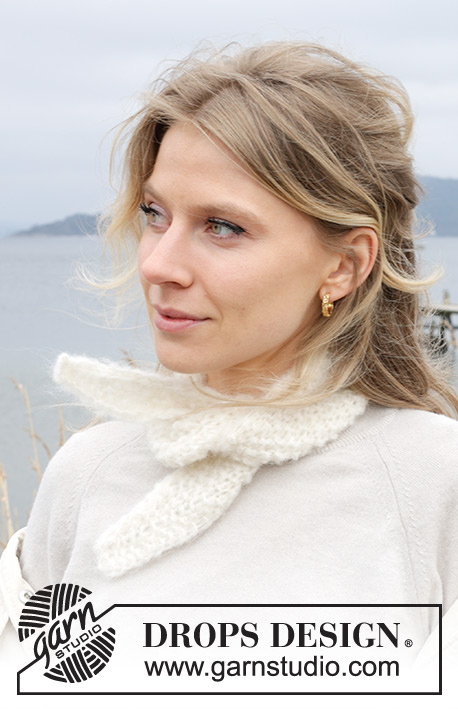
Mimie Shawl#mimieshawl |
|
 |
 |
Knitted shawl in DROPS Melody. The piece is worked sideways in moss stitch.
DROPS 242-56 |
|
|
------------------------------------------------------- EXPLANATIONS FOR THE PATTERN: ------------------------------------------------------- EDGE STITCHES: At the beginning of the row work 2 edge stitches as follows: Slip 1 stitch purl-wise with the strand in front of the piece, knit 1. At the end of the row work 2 edge stitches as follows: Work until there are 2 stitches left, slip 1 stitch purl-wise with the strand in front of the piece, knit 1. Work like this at the beginning and end of each row. MOSS STITCH (worked back and forth): ROW 1: * Knit 1 purl 1 *, work from *-*. ROW 2: Knit over purl and purl over knit. Repeat row 2 onwards ------------------------------------------------------- START THE PIECE HERE: ------------------------------------------------------- SHAWL – SHORT OVERVIEW OF THE PIECE: The piece is worked back and forth and from side to side. SHAWL: Cast on 5 stitches with circular needle size 8 MM = US 11 and DROPS Melody. Read EDGE STITCHES and MOSS STITCH in explanations above. ROW 1 (right side): Work 2 edge stitches, 1 moss stitch and 2 edge stitches. ROW 2 (wrong side): Work 2 edge stitches, 1 moss stitch and 2 edge stitches. ROW 3 (right side): Work 2 edge stitches, make 1 yarn over, work 1 moss stitch and 2 edge stitches. The yarn over is worked twisted on the next row – no hole. ROWS 4-7: Work 2 edge stitches, moss stitch until there are 2 stitches left and 2 edge stitches. ROW 8 (wrong side): Work 2 edge stitches, moss stitch until there are 2 stitches left, make 1 yarn over and work 2 edge stitches. The yarn over is worked twisted on the next row – no hole. ROWS 9-12: Work 2 edge stitches, moss stitch until there are 2 stitches left and 2 edge stitches. ROW 13 (right side): Work 2 edge stitches, make 1 yarn over, work moss stitch until there are 2 stitches left and 2 edge stitches. The yarn over is worked twisted on the next row – no hole. Repeat rows 4-13 onwards. The increases are on one side every 5th row, alternately from the right and wrong side. There are always 2 edge stitches on each side with increasing moss stitches in between. REMEMBER THE KNITTING GAUGE! When the piece measures approx. 36 cm = 14¼" from the cast-on edge, it measures approx. 15 cm = 6" down the middle and there are 18 stitches. Continue working moss stitch and 2 edge stitches on each side but without further increases for 4 cm = 1½". Now decrease on one side. Continue with moss stitch and edge stitches as before and decrease inside the edge stitches on the same side as you increased. Decrease inside 2 edge stitches on the same side as you previously increased. Decrease on every 5th row, alternately from the right and wrong side as follows: Decrease from the right side as follows: Work 2 edge stitches, slip 1 stitch knit-wise, knit 1, pass the slipped stitch over the knitted stitch, work moss stitch until there are 2 stitches left, work 2 edge stitches. Decrease from the wrong side as follows: Work 2 edge stitches, work moss stitch until there are 4 stitches left, knit 2 stitches together and work 2 edge stitches. Work as before and decrease like this until there are 5 stitches left. Work 2 rows, then bind off on the next row. The shawl measures approx. 76 cm = 29½". |
|
Have you finished this pattern?Tag your pictures with #dropspattern #mimieshawl or submit them to the #dropsfan gallery. Do you need help with this pattern?You'll find 15 tutorial videos, a Comments/Questions area and more by visiting the pattern on garnstudio.com. © 1982-2025 DROPS Design A/S. We reserve all rights. This document, including all its sub-sections, has copyrights. Read more about what you can do with our patterns at the bottom of each pattern on our site. |
|


With over 40 years in knitting and crochet design, DROPS Design offers one of the most extensive collections of free patterns on the internet - translated to 17 languages. As of today we count 314 catalogs and 11822 patterns - 11812 of which are translated into English (US/in).
We work hard to bring you the best knitting and crochet have to offer, inspiration and advice as well as great quality yarns at incredible prices! Would you like to use our patterns for other than personal use? You can read what you are allowed to do in the Copyright text at the bottom of all our patterns. Happy crafting!
Post a comment to pattern DROPS 242-56
We would love to hear what you have to say about this pattern!
If you want to leave a question, please make sure you select the correct category in the form below, to speed up the answering process. Required fields are marked *.