
Popular categories
Looking for a yarn?


Comments / Questions (113)
![]() Cathrine Persson wrote:
Cathrine Persson wrote:
Hei. Når man skal strikke rapport A1, står det at man skal øke 24 masker jevnt fordelt ved stjerne. Strikker str M. Tilsammen etter A1 skal man ha 140 masker inkl 4 masker økt gjennom mønsteret. Da mangler det 4 masker når man starter med 108 masker. Har prøvd å regne på de forskjellige str, kun str S stemmer slik jeg ser. Er det en feil et sted?
03.08.2019 - 21:18DROPS Design answered:
Hej. I storlek M stickar du A.1 27 gånger. Du har i början 108 m (4 x 27 =108 m). När du har ökat 4 maskor i A.1 består den av 8 m. 8 x 27 = 216 m. 24 m ska ökas på ökningsvarvet med svart stjärna. 216+24 = 240 m. Lycka till!
22.08.2019 - 10:20
![]() Claudine wrote:
Claudine wrote:
Bonjour , après les augmentations du 1er rang sur A1 ou dois je augmenter ensuite pour parvenir a 216 mailles.Je ne comprends pas votre schéma Merci pour votre réponse
10.07.2019 - 15:34DROPS Design answered:
Bonjour Claudine, on augmente 1 maille dans chaque A.1 au 1er tour, au 3ème tour, au 11ème tour et au 13ème tour (cf jetés dans le diagramme) = vous avez désormais 8 m dans chaque A.1 soit 8 m x 27 = 216 m. Au tour avec une étoile dans A.1, vous augmentez 24 m à intervalles réguliers = 240 m. Bon tricot!
10.07.2019 - 16:00
![]() Anne TUPIN wrote:
Anne TUPIN wrote:
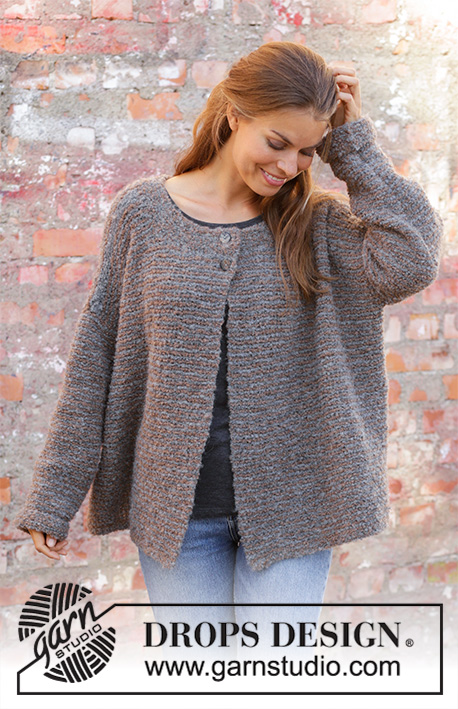
Pour ce modèle (DROP 197-10), je ne comprends pas à quel moment je dois augmenter les 82 mailles mentionnées au 6e rang du paragraphe "DOS & DEVANT". Par ailleurs, faut-il effectuer ces augmentations sur un même rang ? Sinon, doivent-elles se faire de manière progressive sur plusieurs rangs, jusqu'à l'arrivée aux côtes en bas du pull ?
15.05.2019 - 14:08DROPS Design answered:
Bonjour Mme Tupin, quand le dos et le devant (après la séparation des manches) mesure 27 cm, vous tricotez 1 tour endroit et sur ce tour, vous répartissez 82 augmentations (voir ici comment faire = vous avez maintenant 336 mailles sur l'aiguille et vous continuez au tour suivant en côtes 2 m end/2 m env avec l'aiguille 2,5. Bon tricot!
15.05.2019 - 15:06
![]() Olaug wrote:
Olaug wrote:
Rekker opp for 3 gong. Strikka på frå armhole på nytt utan å felle - fortsatt alt for stor. No 3. gong legg eg inn felling i midje.
25.03.2019 - 19:54
![]() Grete Simpson wrote:
Grete Simpson wrote:
Hva er overvidden i de forskjellige størrelsene?
12.03.2019 - 19:30
![]() Karin wrote:
Karin wrote:
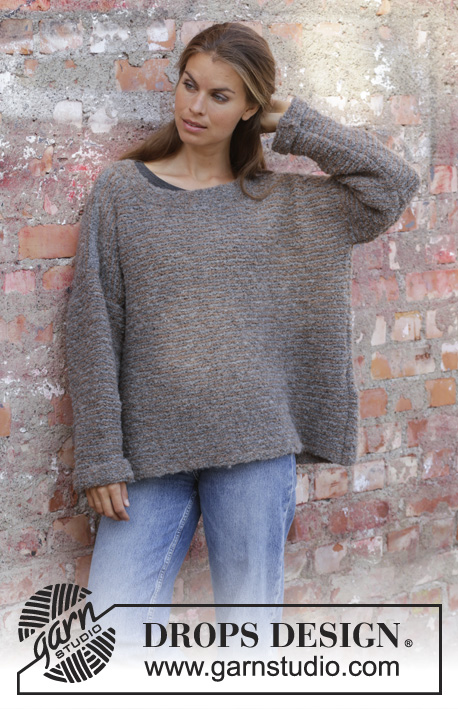
Ifølge oppskriften skal man strikke 27 cm fra begynnelsen på bolen og ned til vrangborden i alle størrelser. Jeg har strikket den lengre enn det, men genseren er mye kortere fra skulderen og ned enn det totale målet genseren skal være ifølge oppskriften. Det står også at man skal øke 86 masker før vrangborden i str M, men genseren blir jo kjempevid hvis man gjør det? Stemmer det at det skal være sånn, eller er det feil i oppskriften?
23.02.2019 - 13:55DROPS Design answered:
Hei Karin. Det kan høres ut som du ikke helt overholder strikkefastheten. Stemmer lengden på bærestykket med målskissen (24 cm i M)? det er fort gjort å strikke for stramt, særlig i mønsterstrikken. Om ikke strikkefastheten er overholdt vil lengden bli kortere. Det stemmer at bolen skal måle 27 cm i alle størrelser, før det strikkes vrangbord i 4 cm. Det økes masker før vrangborden for at det ikke skal bli en markant viddeforskjell på bol og vrangbord. Vrangbord er mer elastisk enn glattstrikk og trekker seg derfor mer sammen. På denne modellen skal vrangborden være like vid som resten av genseren, derfor økes 86 masker før vrangborden. God fornøyelse
25.02.2019 - 14:20
![]() Jacqueline wrote:
Jacqueline wrote:
Bij de beschrijving voor de armen staat: 'Minder zo iedere 10e-8e-6e-6e-6e-4e naald 7-3-9-5-1-18 keer en iedere 8e-6e-4e-4e-4e-2e naald 4-12-10-14-20-4 keer = 52-55-57-60-62-65 steken.' Moet ik eerst elke 10e naald 7x minderen en daarna elke 8e naald 4x of moet ik beiden gelijktijdig minderen?
19.02.2019 - 12:18DROPS Design answered:
Dag Jacqueline,
Je mindert inderdaad eerste elke 10e naald 7 keer en daarna elke 8e naald 4 keer, en niet tegelijkertijd.
21.02.2019 - 11:28
![]() Julie Lefebvre wrote:
Julie Lefebvre wrote:
Bonjour, j aimerais comprendre l explication de l empiecement A-1....je n arrive pas a comprendre tricoter maintenant 27- fois A-1(=4 mailles) au total en largeur ... le debut ca va et la suite aussi mais là j ai besoin de d'aide.....merci beaucoup
17.02.2019 - 23:17DROPS Design answered:
Bonjour Mme Lefebvre, dès le 1er rang de A.1 vous allez augmenter 1 maille dans chaque A.1, ainsi, vous avez 27 x 5 mailles = 135 m à la fin du 1er rang. Continuez en suivant le diagramme et augmentez comme indiqué, quand les augmentations de A.1 sont faites, vous avez 8 m dans chaque A.1 (soit 8 m x 27 = 216 m au total). Au tour avec l'étoile, vous augmentez 24 m soit 216+24= 240 m. Bon tricot!
18.02.2019 - 10:41
![]() Jacqueline wrote:
Jacqueline wrote:
Bij de beschrijving voor de armen staat: 'Minder zo iedere 10e-8e-6e-6e-6e-4e naald 7-3-9-5-1-18 keer en iedere 8e-6e-4e-4e-4e-2e naald 4-12-10-14-20-4 keer = 52-55-57-60-62-65 steken.' Moet ik eerst elke 10e naald 7x minderen en daarna elke 8e naald 4x of moet ik beiden gelijktijdig minderen?
14.02.2019 - 22:32DROPS Design answered:
Dag Jacqueline,
Het klopt zoals je het zecht: eerst elke 10e naald 7x minderen en daarna elke 8e naald 4x en niet tegelijkertijd.
07.03.2019 - 22:17
![]() Solveig Charlotte Sivertsen wrote:
Solveig Charlotte Sivertsen wrote:
Hvorfor er ikke garnet som er bestilt for to uker siden, ikke kommet??
05.02.2019 - 14:24DROPS Design answered:
Hei Solveig. Det kan vi dessverre ikke hjelpe deg med. Du nesten spørre den butikken du bestilte fra, det er den som er ansvarlig for å selge og sende ut garn. Hilsen DROPS
08.02.2019 - 11:11
|
||||||||||||||||||||||||||||
Talvik#talviksweater |
||||||||||||||||||||||||||||
 |
 |
|||||||||||||||||||||||||||
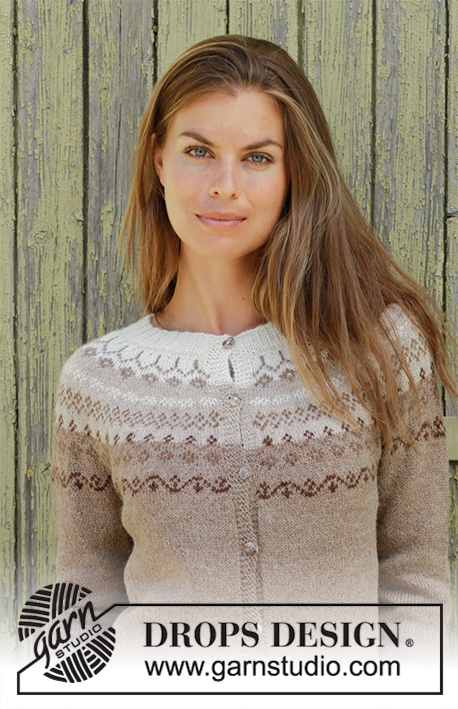
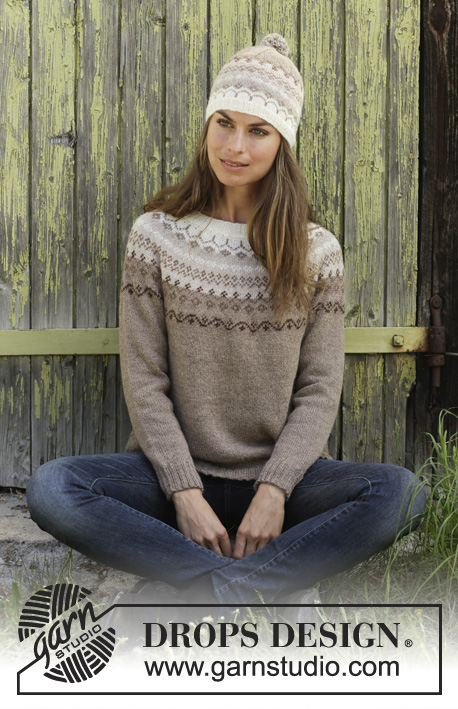
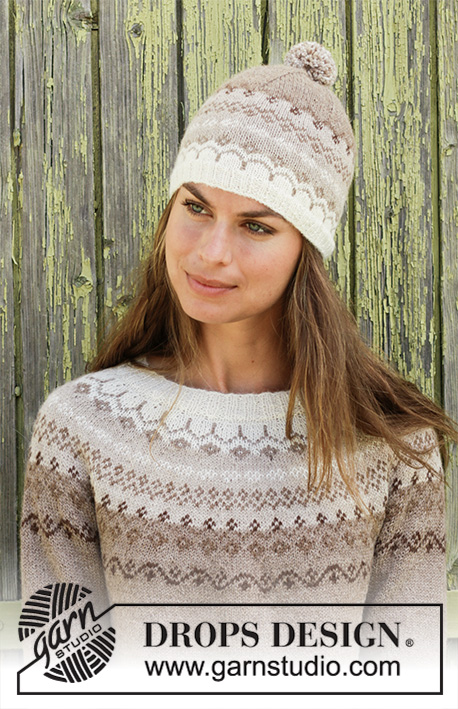
Knitted jumper with round yoke in DROPS Alpaca. Piece is knitted top down with Nordic pattern. Size: S - XXXL Knitted hat with Nordic pattern and pompom in DROPS Alpaca.
DROPS 197-10 |
||||||||||||||||||||||||||||
|
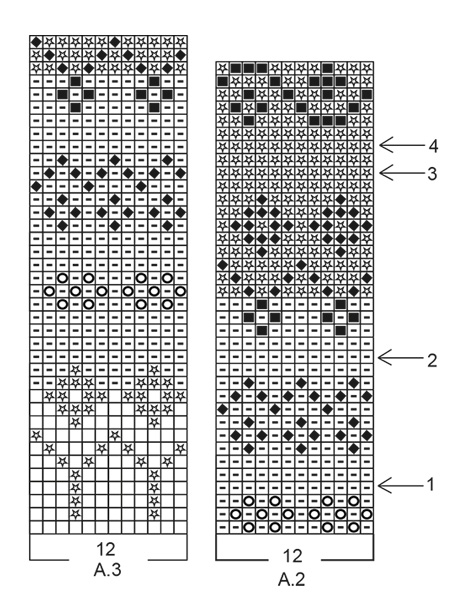
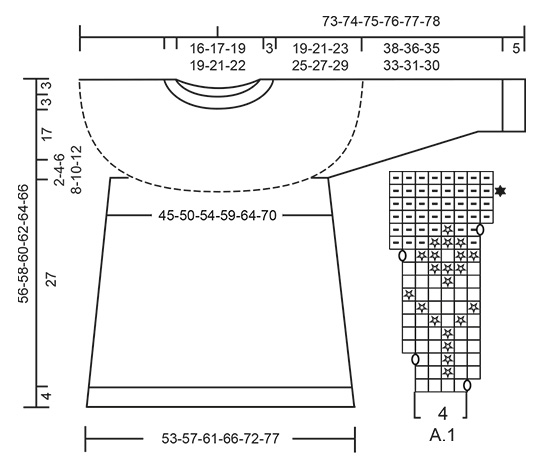
EXPLANATION FOR THE PATTERN: ---------------------------------------------------------- PATTERN: Jumper: See diagrams A.1 and A.2. Hat: See diagram A.3. Work all stitches in stocking stitch. DECREASE/INCREASE TIP (evenly): To calculate how to decrease/increase evenly, use the total number of stitches on round (e.g. 124 stitches) and divide stitches by number of decreased/increases to be done (e.g. 20) = 6.2. In this example decrease by knitting approx. every 5th and 6th stitch together. When increasing make a yarn over after approx. every 6th stitch. On next round work yarn over twisted to avoid hole. KNITTING TIP: To avoid the knitting tension to tighten when working pattern, it is important not to tighten the strands on back side of piece. Switch to a higher needle number when working pattern if the pattern is somewhat tight. INCREASE TIP (applies to sides of body): Work until 2 stitches remain before marker thread, make 1 yarn over, knit 4 (marker thread is in the middle of these stitches), make 1 yarn over (= 2 stitches increased). On next round knit yarn over twisted to avoid holes. Then work the new stitches in stocking stitch. DECREASE TIP-1 (applies to mid under sleeve): Decrease 1 stitch on each side of marker thread as follows: Work until 4 stitches remain before marker and knit 2 together, knit 4 (marker thread is between these 4 stitches), slip 1 stitch knitwise, knit 1, pass slipped stitch over stitch worked (= 2 stitches decreased). DECREASE TIP-2 (applies to hat): Work until 2 stitches remain before marker thread, knit the next 2 stitches together (= 1 stitch decreased). Repeat at each of the remaining marker threads. ---------------------------------------------------------- START THE PIECE HERE: ---------------------------------------------------------- JUMPER - SHORT OVERVIEW OF THE PIECE: Worked in the round on circular needle from mid back, work top down. Work sleeves in the round on double pointed needles/a short circular needle. NECK EDGE: Cast on 124-128-136-140-148-152 stitches on a short circular needle size 2.5 mm with off white. Knit 1 round. Now work rib (= knit 2/purl 2) for 3 cm. Knit 1 round while decreasing 20-20-20-20-20-20 stitches evenly - read DECREASE/INCREASE TIP = 104-108-116-120-128-132 stitches. Knit 1 round. YOKE: Switch to circular needle size 3 mm. Read KNITTING TIP and REMEMBER THE KNITTING TENSION! Now work pattern A.1 (= 4 stitches) 26-27-29-30-32-33 times in total on round. On round with black star in A.1 increase 20-24-20-24-32-36 stitches evenly – remember DECREASE/INCREASE TIP = 228-240-252-264-288-300 stitches (including the 4 stitches increased in every repetition of A.1. Now work pattern A.2 in the round, AT THE SAME TIME on round with arrow increase evenly as follows: ARROW-1: Increase 24-36-36-36-36-36 stitches = 252-276-288-300-324-336 stitches. ARROW-2: Increase 24-24-36-36-36-36 stitches = 276-300-324-336-360-372 stitches. ARROW-3: Increase 24-24-24-36-36-36 stitches = 300-324-348-372-396-408 stitches. ARROW-4: Increase 12-24-24-24-24-24 stitches = 312-348-372-396-420-432 stitches. When entire A.2 has been worked vertically, piece measures 20 cm from cast-on edge. Now work piece in light beige and stocking stitch, AT THE SAME TIME on first round increase 14-10-14-17-20-14 stitches evenly. Increase like this every 4th-4th-5th-6th-8th-8th round 1-2-2-2-2-4 times in total = 326-368-400-430-460-488 stitches. Then work until piece measures 22-24-26-28-30-32 cm from cast-on edge. Work next round as follows: Knit 49-54-58-64-70-75 (= half back piece), slip the next 64-75-83-86-90-93 stitches on a stitch holder for sleeve, cast on 10-10-12-12-14-16 new stitches on needle (= in the side under sleeve), knit 99-109-117-129-140-151 (= front piece), slip the next 64-75-83-86-90-93 stitches on a stitch holder for sleeve, cast on 10-10-12-12-14-16 new stitches on needle (= in the side under sleeve) and knit the remaining 50-55-59-65-70-76 stitches (= half back piece). Finish body and sleeves separately. NOW MEASURE PIECE FROM HERE! BODY: = 218-238-258-282-308-334 stitches. Insert 1 marker thread in the middle of the 10-10-12-12-14-16 new stitches that were cast on under sleeves. Move the marker threads upwards when working. Continue in the round with light beige and stocking stitch. When piece measures 4 cm from division, increase 1 stitch on each side of both marker threads - read INCREASE TIP (= 4 stitches increased). Increase like this every 8th round 9 times in total = 254-274-294-318-344-370 stitches. Continue like this until piece measures 27 cm. Knit 1 round while increasing 82-86-94-106-116-122 stitches evenly - remember DECREASE/INCREASE TIP = 336-360-388-424-460-492 stitches. Switch to circular needle size 2.5 mm and work rib = knit 2/purl 2 for 4 cm. Cast off with knit over knit and purl over purl but to avoid at tight cast-off edge make 1 yarn over after every 4th stitch (cast off yarn overs as stitches). Jumper measures approx. 56-58-60-62-64-66 cm from shoulder and down. SLEEVE: Slip the 64-75-83-86-90-93 stitches from stitch holder in one side of piece double pointed needles/a short circular needle size 3 mm and pick in addition up 1 stitch in each of the 10-10-12-12-14-16 new stitches cast on under sleeve = 74-85-95-98-104-109 stitches. Insert 1 marker thread in the middle of the 10-10-12-12-14-16 stitches under sleeve. Begin round here and work in stocking stitch in the round. When sleeve measures 4 cm from division, decrease 2 stitches mid under sleeve - read DECREASE TIP-1! Decrease like this every 10th-8th-6th-6th-6th-4th round 7-3-9-5-1-18 times and every 8th-6th-4th-4th-4th-2nd round 4-12-10-14-20-4 times = 52-55-57-60-62-65 stitches. When sleeve measures 38-36-35-33-31-30 cm from division (shorter measurements in the larger sizes because of longer yoke), knit 1 round while increasing 16-17-19-20-18-19 stitches evenly - remember DECREASE/INCREASE TIP = 68-72-76-80-80-84 stitches. Switch to double pointed needles size 2.5 mm and work rib in the round = knit 2/purl 2. When rib measures 5 cm, cast off with knit over knit and purl over purl but to avoid a tight cast-off edge make 1 yarn over after every 4th stitch (cast off yarn overs as regular stitches). Sleeve measures approx. 43-41-40-38-36-35 cm from division. Work the other sleeve the same way. ---------------------------------------------------------- HAT - SHORT OVERVIEW OF THE GARMENT: Work in the round on a short circular needle. Switch to double pointed needles when needed. HAT: Cast on 120-132 stitches on circular needle size 2.5 mm with off white. Knit 1 round. Then work rib (= knit 2/purl 2) for 2 cm. Switch to circular needle size 3 mm and work pattern A.3 (= 12 stitches) 10-11 times in total on round. REMEMBER THE KNITTING TENSION! When A.3 has been worked vertically, piece measures approx. 14-14 cm. Then work in stocking stitch in the round with light beige. When piece measures 15-15 cm, insert 6 marker threads in the piece, 20-22 stitches apart each marker thread. On next round, decrease 1 stitch before every marker thread – read DECREASE TIP-2. Decrease like this every other round 14-17 times in total = 36-30 stitches. Knit 2 and 2 stitches together until there are 9-8 stitches on needle. Cut the yarn and pull it through the remaining stitches, tighten tog and fasten. Hat measures approx. 24-26 cm. Make a pompom approx. 6 cm in diameter. Use 3 strand light camel, 1 strand off white and 1 strand light beige to make pompom and fasten at the top of hat. |
||||||||||||||||||||||||||||
Diagram explanations |
||||||||||||||||||||||||||||
|
||||||||||||||||||||||||||||
 |
||||||||||||||||||||||||||||
 |
||||||||||||||||||||||||||||
Have you finished this pattern?Tag your pictures with #dropspattern #talviksweater or submit them to the #dropsfan gallery. Do you need help with this pattern?You'll find 26 tutorial videos, a Comments/Questions area and more by visiting the pattern on garnstudio.com. © 1982-2026 DROPS Design A/S. We reserve all rights. This document, including all its sub-sections, has copyrights. Read more about what you can do with our patterns at the bottom of each pattern on our site. |
||||||||||||||||||||||||||||


With over 40 years in knitting and crochet design, DROPS Design offers one of the most extensive collections of free patterns on the internet - translated to 17 languages. As of today we count 324 catalogues and 12245 patterns translated into English (UK/cm). 12245
We work hard to bring you the best knitting and crochet have to offer, inspiration and advice as well as great quality yarns at incredible prices! Would you like to use our patterns for other than personal use? You can read what you are allowed to do in the Copyright text at the bottom of all our patterns. Happy crafting!
Post a comment to pattern DROPS 197-10
We would love to hear what you have to say about this pattern!
If you want to leave a question, please make sure you select the correct category in the form below, to speed up the answering process. Required fields are marked *.