
Popular categories
Looking for a yarn?


Comments / Questions (101)
![]() Ritva Mustonen wrote:
Ritva Mustonen wrote:
Onko tämä kuvio kotoisin Dalvikin kylästä? Kuinka vanha kuvio on? Voitko kertoa lisää sen historiasta?
06.11.2018 - 00:59
![]() Ria Vreenegoor wrote:
Ria Vreenegoor wrote:
Er staat dat ik na 35 -36 etc tot 40 cm moet minderen voor de armsgaten maar dat is volgens mij niet goed want ik moet 4 maal elke 24 naald meerderen dus dat klopt niet want elke 28 naalden is plm 10 cm dus wat is goed?
22.10.2018 - 21:50DROPS Design answered:
Dag Ria Vreenegoor,
Inderdaad, je komt dan niet uit in de hoogte. Ik zal het even doorgeven aan de ontwerpafdeling om na te kijken.
Daar ben ik al weer :). Bij nader inzien zie ik dat het toch klopt omdat je helemaal aan het begin, bij het invoegen van de markeerdraden ook meerdert, reken je niet 4 maal 24 naalden maar 3 maal 24 naalden en op die manier kom je wel uit.
23.10.2018 - 19:02
![]() Lia wrote:
Lia wrote:
Non ho capito bene: devo finire l'alzata e POI cominciare con il ferro a diritto con diminuzioni della scollatura?
22.10.2018 - 18:11DROPS Design answered:
Buonasera Lia. Sì è corretto: finisce l'alzata, poi lavora un giro a diritto e durante questo giro diminuisce il numero di maglie indicate per la sua taglia. Buon lavoro!
22.10.2018 - 21:03
![]() Montse M. wrote:
Montse M. wrote:
Ahora sí. Muchas gracias! Al pensar que se tejía de arriba a abajo, no cuadraba nada. Un saludo!
11.10.2018 - 09:50
![]() Montse M. wrote:
Montse M. wrote:
Otra duda sobre el diagrama A.1. El diagrama empieza junto al cuello por la parte más estrecha del dibujo (7p)y se va ensanchando hasta acabar con 16/18p. En las explicaciones dice que hay que acabar, según la talla, en la flecha marcada. Pero esta flecha está al principio del gráfico, en la parte estrecha.
10.10.2018 - 13:21DROPS Design answered:
Ver la respuesta abajo.
12.10.2018 - 14:10
![]() Montse M. wrote:
Montse M. wrote:
Hola! No entiendo las explicaciones, porque donde pone "cuerpo" explica la parte de aumentos del canesú, pero no indica cuándo empezar con el diagrama (en la foto se ve que empieza después del cuello). Sin embargo, donde dice "canesú" explica la parte del cuerpo, después de separar las mangas y sí introduce el diagrama. ¿Puede haber un error? Me gustaría hacer este patrón en dos tallas. Gracias!
10.10.2018 - 10:19DROPS Design answered:
Hola Montse. El patrón está correcto. Ha sido una errata en la descripción. El jersey se trabaja de abajo arriba.
11.10.2018 - 08:29
![]() Ria Vreenegoor wrote:
Ria Vreenegoor wrote:
Nee ik bedoel de boord onderaan de trui en aan de mouwen want ik vind het niet mooi als de boorden uitstaan dus aansluitend
02.10.2018 - 19:28DROPS Design answered:
Dag Ria, In dat geval kun je ervoor kiezen om het patroon aan te passen en minder steken op te zetten, zodat je niet hoeft te meerderen na de boord.
04.10.2018 - 11:53
![]() Ria Vreenegoor wrote:
Ria Vreenegoor wrote:
Bedankt voor uw snelle reactie Als ik het goed begrijp kan ik dus gewoon beginnen met de boord met het aantal steken na de mindering dan komt er een gewone strakke boord aan
02.10.2018 - 10:13DROPS Design answered:
Dag Ria, Aha, je bedoelt de halsboord (Ik meende dat je de boord onderaan bedoelde :) Voordat je met de halsboord begint minder je een aantal steken verdeeld. Daarna ga je over op een dunnere naald en meerder je weer een aantal steken (Dit minderen en meerderen wordt gedaan om de hals elastischer te maken) Daarna brei je gewoon de halsboord volgens patroon.
02.10.2018 - 10:18
![]() Ria Vreenegoor wrote:
Ria Vreenegoor wrote:
Bedankt voor uw snelle antwoord fantastisch Maar als ik het goed begrijp kan ik als ik die afstaande boorden niet wil kan ik gewoon beginnen met het aantal steken na de boord en hiermee de boord breien
01.10.2018 - 11:32
![]() Ria Vreenegoor wrote:
Ria Vreenegoor wrote:
Klopt het dat bj patroon Drops 185-1 dat ik na de boord van trui en mouw zoveel steken moet minderen??Waarom is dat?
29.09.2018 - 12:22DROPS Design answered:
Dag Ria, Ja hoor, dat klopt. Zo is dit model ontworpen, waarbij de boord dus iets naar buiten staat.
30.09.2018 - 21:12
|
|||||||||||||||||||
Dalvik#dalviksweater |
|||||||||||||||||||
 |
 |
||||||||||||||||||
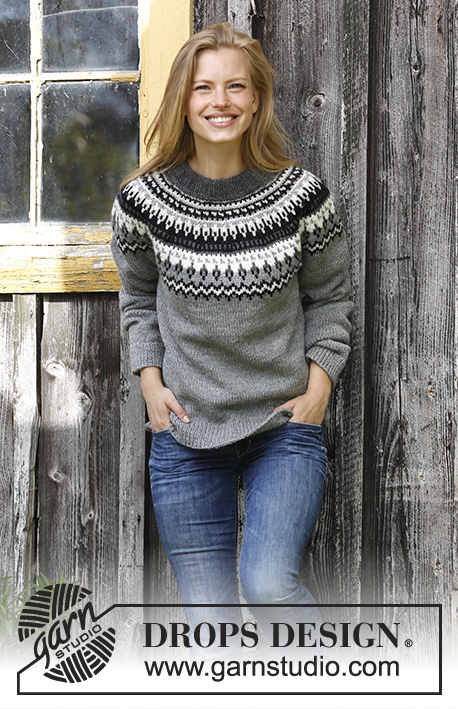
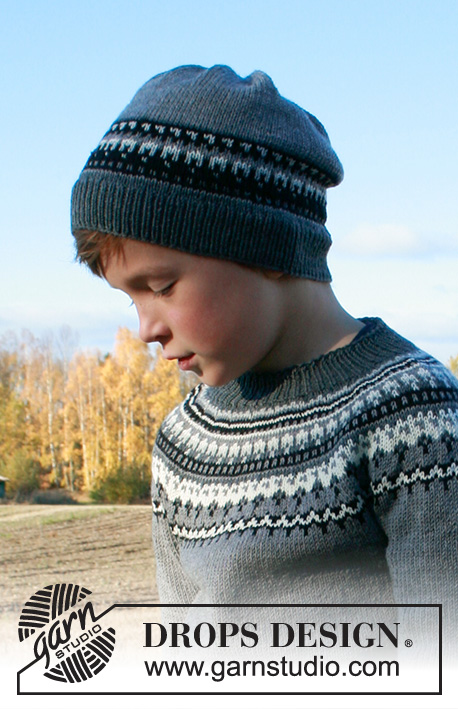
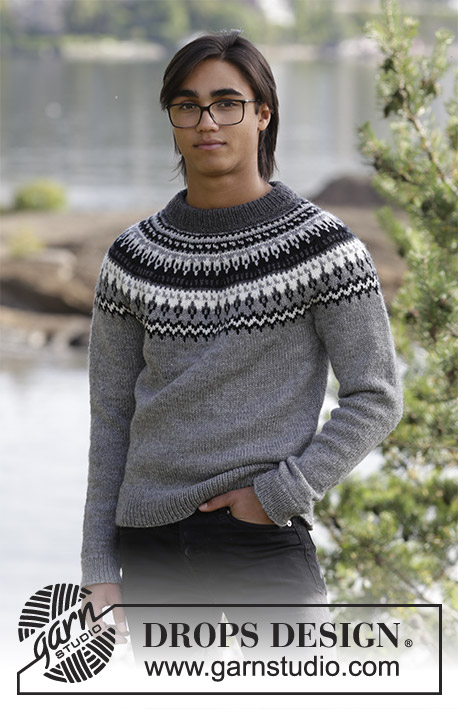
The set consists of: Men’s knitted jumper with raglan, round yoke and multi-coloured Nordic pattern and knitted hat with multi-coloured Nordic pattern. Sizes S - XXXL. The piece is worked in DROPS Karisma.
DROPS 185-1 |
|||||||||||||||||||
|
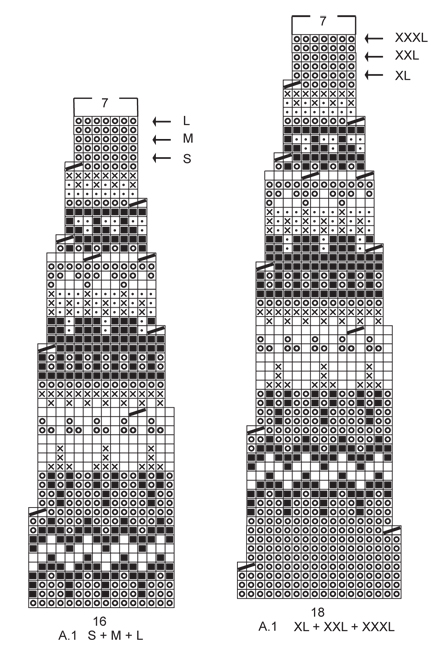
INFORMATION FOR THE PATTERN: RIDGE/GARTER STITCH (worked in the round): 1 ridge = 2 rounds. Knit 1 round and purl 1 round. INCREASE TIP (for sides of body and mid under sleeves): Start 1 stitch before the marker, make 1 yarn over, knit 2 (the marker sits in the middle of these 2 stitches), make 1 yarn over (= 2 stitches increased). On the next round knit the yarn overs twisted to avoid holes. DECREASE/INCREASE TIP: To work out how to decrease/increase evenly, count the total number of stitches on the needle (e.g. 230 stitches), and divide by the number of decreases/increase to be made (e.g. 46) = 5. In this example, when decreasing knit every 4th and 5th stitch together. If you are increasing, make 1 yarn over after every 5th stitch, on the next round knit the yarn overs twisted to avoid holes. RAGLAN: Decrease to raglan on each side of the marker in each transition between body and sleeves. Start 2 stitches before the marker, knit 2 together, marker sits here, slip 1 stitch as if to knit, knit 1, pass the slipped stitch over the knitted stitch (= 2 stitches decreased). PATTERN: Jumper: See diagram A.1. Choose diagram for your size. Hat: See diagram A.2. The diagrams show all the rows in the pattern seen from the right side. The whole pattern is worked in stocking stitch. KNITTING TIP: To avoid the knitting tension becoming tighter when working pattern with more than one colour, it is important that the strands at the back of the piece do not pull. You can increase a needle size when working pattern if this is a problem. ---------------------------------------------------------- JUMPER: The piece is worked in the round with circular needle, bottom up. The sleeves are worked in the round with double pointed needles. BODY: Cast on 230-252-270-300-332-362 stitches with circular needle size 3 mm and medium grey. Work rib (knit 1 / purl 1) for 7 cm. Knit 1 round where you decrease 46-50-50-60-70-72 stitches evenly on round – read DECREASE/INCREASE TIP = 184-202-220-240-262-290 stitches. Change to circular needle size 4 mm. Continue with stocking stitch. REMEMBER THE KNITTING TENSION! On the next round, insert 1 marker at the beginning of the round and 1 marker after 92-101-110-120-131-145 stitches (= in the sides). Now increase 1 stitch on each side of both markers – read INCREASE TIP (= 4 stitches increased on the round). Increase in each side every 22nd-23rd-24th-24th-28th-28th round a total of 4 times = 200-218-236-256-278-306 stitches. When the piece measures 35-36-37-37-39-40 cm, cast off 8-8-10-10-12-14 stitches in each side for the armholes (i.e. cast off 4-4-5-5-6-7 stitches on each side of both markers) = 92-101-108-118-127-139 stitches left on the front and back pieces. Lay the piece to one side and work sleeves. SLEEVE: Cast on 66-66-76-76-76-84 stitches with double pointed needles size 3 mm and medium grey. Work rib (knit 1 /purl 1) for 5 cm. Knit 1 round where you decrease 18-18-22-22-22-24 stitches evenly on round = 48-48-54-54-54-60 stitches. Insert 1 marker at the beginning of the round (= mid under sleeve). Change to double pointed needles size 4 mm and work stocking stitch in the round. When the piece measures 6-7-9-7-6-10 cm increase 2 stitches mid under the sleeve – read INCREASE TIP. Increase in this way every10th-8th-9th-8th-7th-6th round a total of 12-14-12-14-16-16 times = 72-76-78-82-86-92 stitches. When the piece measures 49-48-48-46-47-46 cm (NOTE: Shorter measurements in the larger sizes because of broader shoulder measurements), cast off the middle 8-8-10-10-12-14 stitches under the sleeve = 64-68-68-72-74-78 stitches left on the needle. Lay the piece to one side and work one more sleeve. YOKE: Place the sleeves on the same circular needle as the body where you cast off stitches for the armholes = 312-338-352-380-402-434 stitches on the needle. Insert 1 marker in each transition between body and sleeves (= 4 markers). Work stocking stitch with medium grey. AT THE SAME TIME on the first round decrease to RAGLAN – see description above (= 8 stitches decreased). Decrease in this way every 2nd round a total of 2-2-3-3-3-3 times = 296-322-328-356-378-410 stitches. After the last round of decreases, knit 1 round where you decrease 24-34-24-32-36-32 stitches evenly on round = 272-288-304-324-342-378 stitches left on needle. Continue by working pattern according to diagram A.1 (choose diagram for your size = 17-18-19-18-19-21 repeats on the round). Read KNITTING TIP! Continue pattern in this way and decrease as shown in the diagram. When A.1 has been completed (finish after a round marked with an arrow in the diagram for your size) there are 119-126-133-126-133-147 stitches left on the needle and the piece measures approx. 54-56-58-60-62-64 cm. Now you can work an elevation in the back of the neck or go straight to working neckline if you do not want an elevation. ELEVATION IN BACK OF NECK: For a better fit you can work an elevation in the back of the neck with dark grey. Insert 1 marker mid back of neck. Knit 14-15-16-15-16-18 stitches past the marker, turn, tighten strand and purl 28-30-32-30-32-36 stitches back. Turn and knit 42-45-48-45-48-54 stitches, turn, tighten strand and purl 56-60-64-60-64-72 stitches back. Turn and knit 70-75-80-75-80-90 stitches, turn, tighten strand and purl 84-90-96-90-96-108 stitches back. Turn, tighten strand and knit to mid back. NECKLINE: Knit 1 round with dark grey where you decrease 25-30-35-26-29-39 stitches evenly on round = 94-96-98-100-104-108 stitches around the neck. Change to short circular needle size 3 mm. Work 2 RIDGES – see description above, AT THE SAME TIME on the last round, increase 22-22-24-26-26-26 stitches evenly on round = 116-118-122-126-130-134 stitches. Continue working rib (knit 1 /purl 1). When the rib measures 8 cm work 1 ridge. Loosely cast off – Make sure the cast-off edge is not tight! Fold the collar double and fasten on the inside, ridge to ridge. ASSEMBLY: Sew the openings under the sleeves ---------------------------------------------------------- HAT: The hat is worked in the round with circular needle. Change to double pointed needles when necessary. Cast on 132-154 stitches with circular needle size 3 mm and dark grey. Work rib (knit 1 /purl 1) for 4 cm. Change to circular needle size 4 mm. Knit 1 round AT THE SAME TIME as you decrease 24-34 stitches evenly on round – read DECREASE/INCREASE TIP = 108-120 stitches. Work A.2 (= 9-10 repeats of 12 stitches) – read KNITTING TIP! REMEMBER THE KNITTING TENSION! When A.2 has been completed continue working with medium grey to finished length. When the piece measures 17-18 cm decrease 8-0 stitches evenly on round and at the same time insert 10 markers in the piece with 10-12 stitches between each marker = 100-120 stitches. On the next round decrease 1 stitch after each marker by knitting 2 stitches together (= 10 stitches decreased). Decrease in this way every 2nd round a total of 9-11 times = 10-10 stitches. On the next round knit all stitches together 2 and 2 = 5 stitches. Cut the strand, pull it through the remaining stitches and fasten well. The hat measures approx. 24-26 cm in height. |
|||||||||||||||||||
Diagram explanations |
|||||||||||||||||||
|
|||||||||||||||||||
 |
|||||||||||||||||||
 |
|||||||||||||||||||
Have you finished this pattern?Tag your pictures with #dropspattern #dalviksweater or submit them to the #dropsfan gallery. Do you need help with this pattern?You'll find 32 tutorial videos, a Comments/Questions area and more by visiting the pattern on garnstudio.com. © 1982-2026 DROPS Design A/S. We reserve all rights. This document, including all its sub-sections, has copyrights. Read more about what you can do with our patterns at the bottom of each pattern on our site. |
|||||||||||||||||||


With over 40 years in knitting and crochet design, DROPS Design offers one of the most extensive collections of free patterns on the internet - translated to 17 languages. As of today we count 324 catalogues and 12245 patterns translated into English (UK/cm). 12245
We work hard to bring you the best knitting and crochet have to offer, inspiration and advice as well as great quality yarns at incredible prices! Would you like to use our patterns for other than personal use? You can read what you are allowed to do in the Copyright text at the bottom of all our patterns. Happy crafting!
Post a comment to pattern DROPS 185-1
We would love to hear what you have to say about this pattern!
If you want to leave a question, please make sure you select the correct category in the form below, to speed up the answering process. Required fields are marked *.