
Popular categories
Looking for a yarn?


Comments / Questions (41)
![]() Amelia wrote:
Amelia wrote:
Hallo, ich hab noch ein Problem ich versteh leider nicht wie mit den Raglan zunahme gemeint ist und zwar ab da wo ich für Größe S nur alle 4 Runden 1 Masche zunehmen soll für die Ärmel. Die 16 Zunahmen mit 1 Masche alle 2 Runden hab ich jetzt muss ich für das Vorder-Rückenteil aber noch 4 Zunahmen machen, damit ich dafür auf meine 20 Zunahmen komme. Wie strick ich denn den Raglan für die Ärmel bis ich bis ich für diese wieder zunehmen kann?
15.07.2016 - 22:44DROPS Design answered:
Liebe Amelia, Sie haben in Grösse S sowohl am Ärmel als auch am Körper 44 Runden in der Höhe, die Ranglanaufnahmen enden also gleichzeitig. (Ärmel: 16 x in jeder 2. Rd = 32 Rd und 3 x in jeder 4. Rd = 12 Rg, zusammen 44 Rd. Vorder- und Rückteil: 20 x jede 2. Rd = 40 Rd und 1 x jede 4. Rd, zusammen 44 Rd).
19.07.2016 - 15:22
![]() Amelia wrote:
Amelia wrote:
Ja meine Maschenprobe passte
08.07.2016 - 14:32DROPS Design answered:
In dem Fall empfehle ich, mehr Maschen anzuschlagen. Wahrscheinlich ist Ihr Anschlag fester als von uns geplant.
09.07.2016 - 14:52
![]() Amelia wrote:
Amelia wrote:
Also wenn ich die Größe S stricken will mit 62 M aufnehmen ? hab ich gemacht aber da passt ja noch nicht mal der Kopf durch und meine Maschenprobe stimmte. Sollen das wirklich nur 62 M sein?
01.07.2016 - 19:36DROPS Design answered:
Liee Amelia, wenn Ihr Maschenanschlag fest ist, können Sie die 10 zusätzlichen Maschen, die in der 1. Rd zugenommen werden, auch gleich anschlagen, also mit 72 statt 62 Maschen beginnen. Achten Sie aber darauf, dass das Material sehr dehnbar ist und eine zu weite Ausschnittkante unschön aussieht. Haben Sie die Maschenprobe gestickt und hat diese gepasst?
06.07.2016 - 08:53
![]() Bea wrote:
Bea wrote:
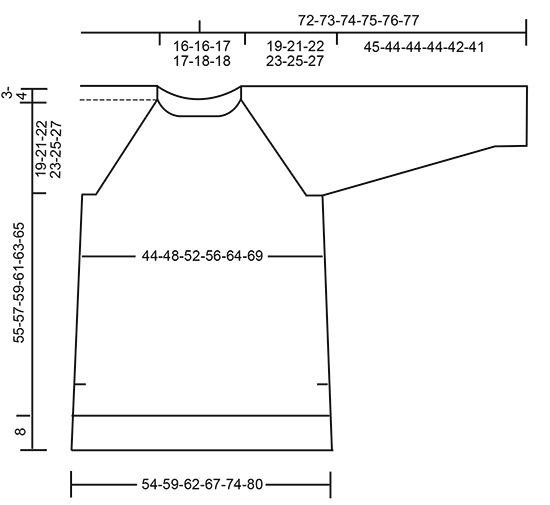
Mir fehlt das Diagramm, die Zentimeterangaben sind wichtig,um die richtige Grösse zu wählen. Danke! Das Modell ist wunderschön, ich freue mich aufs stricken!
29.06.2016 - 14:11DROPS Design answered:
Liebe Bea, vielen Dank für den Hinweis, das Diagramm ist nun sichtbar.
30.06.2016 - 13:52
![]() Ania wrote:
Ania wrote:
Enkelt vacker med rätt detaljer! Klart hållbar!
24.06.2016 - 16:15
![]() Truus wrote:
Truus wrote:
Nice raglan detail on a simple sweater, like it!
20.06.2016 - 12:28
![]() Gabi wrote:
Gabi wrote:
Toll, der muss dabei sein!
19.06.2016 - 14:08
![]() Lena Efverström wrote:
Lena Efverström wrote:
Såå fin!.....den blir det
12.06.2016 - 22:06
![]() Lisette Van Raadshooven wrote:
Lisette Van Raadshooven wrote:
Love, love, love!!
07.06.2016 - 21:41
![]() Andrea wrote:
Andrea wrote:
My absolute favorite
07.06.2016 - 13:28
|
|
Lilla Camilla#lillacamillasweater |
|
 |
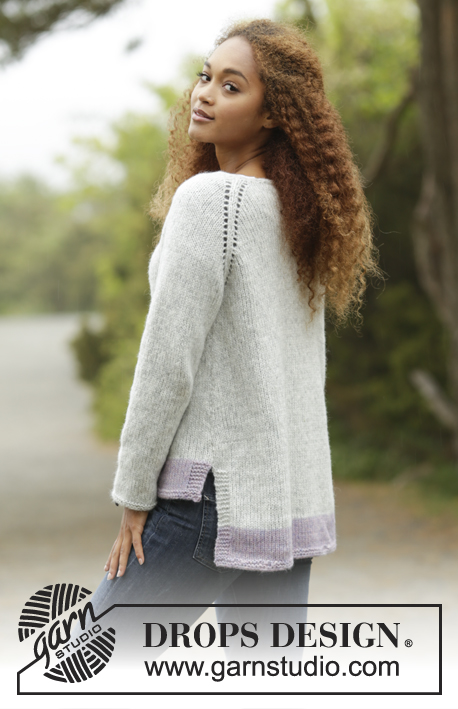 |
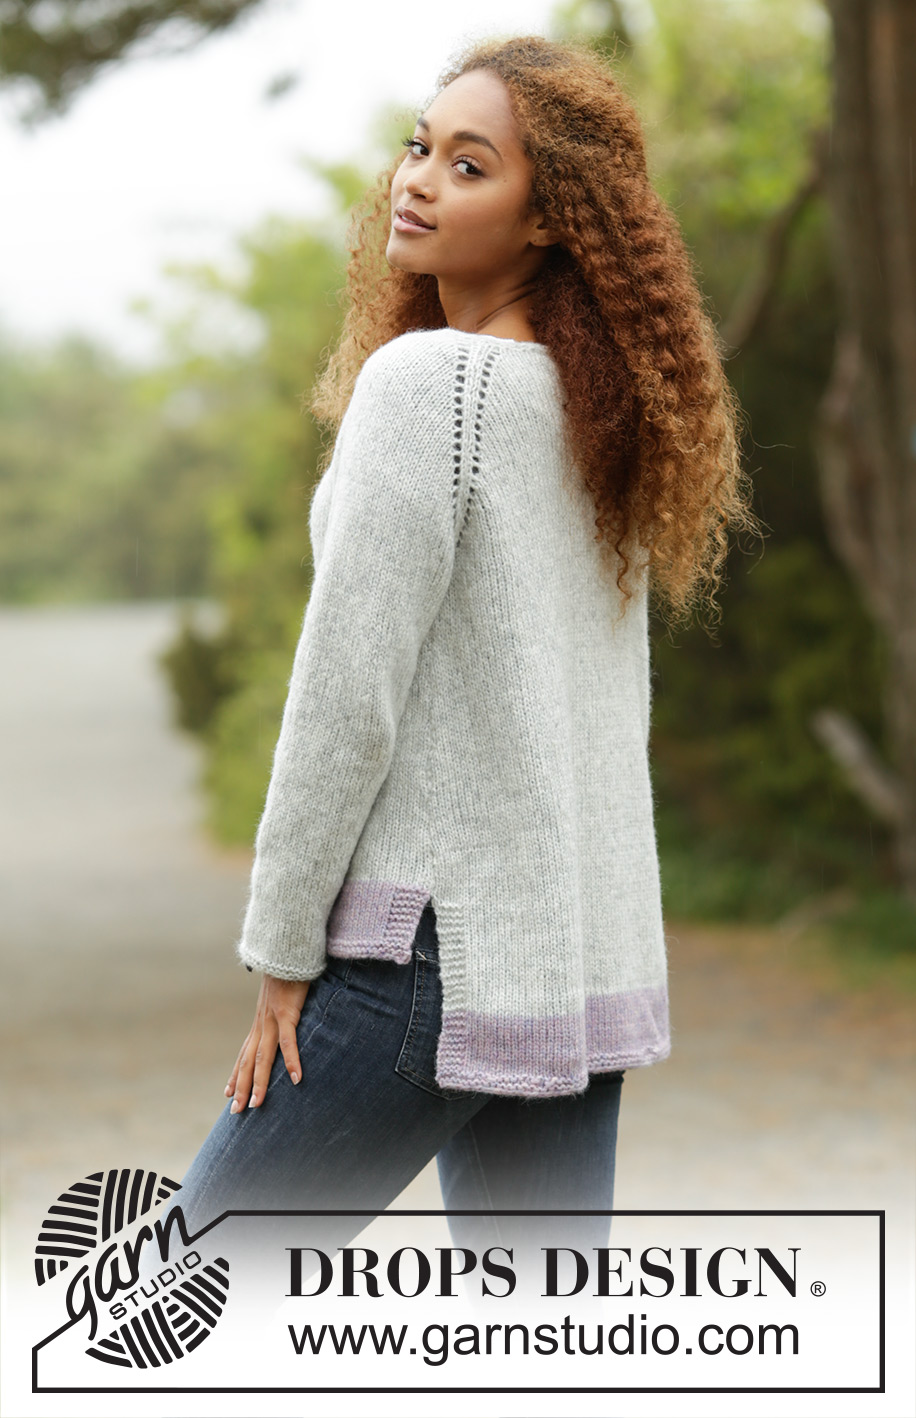
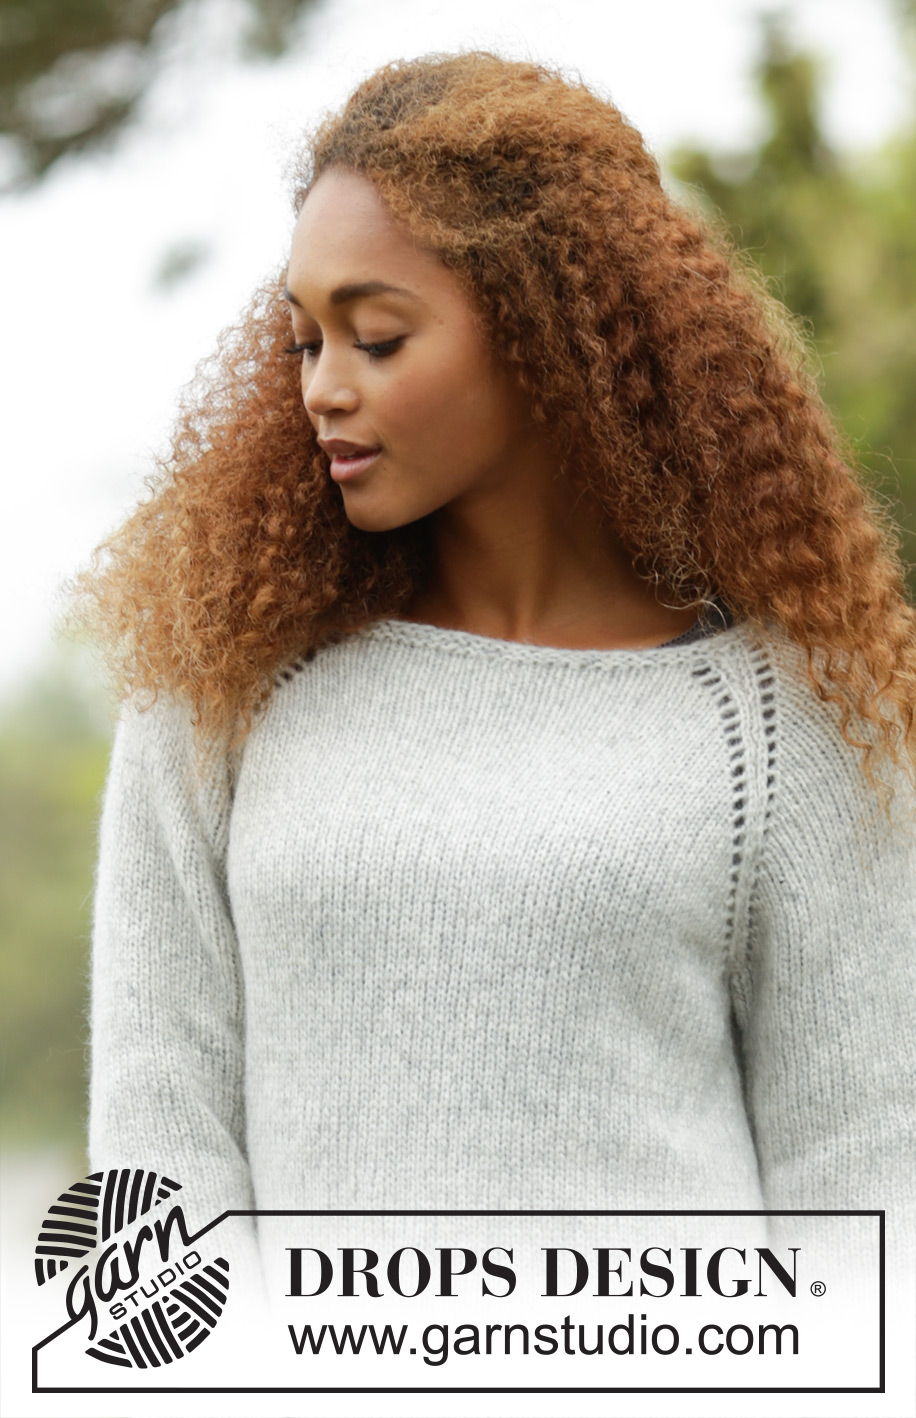
Knitted DROPS jumper with raglan, worked top down in ”Air”. Size: S - XXXL.
DROPS 172-33 |
|
|
GARTER ST (worked in the round): 1 ridge = 2 rounds. * K 1 round and P 1 round *, repeat from *-*. GARTER ST (back and forth): K all rows. 1 ridge = 2 rows K. INCREASE TIP RAGLAN: Inc for raglan on each side of the four markers - NOTE: The no of inc sts are different on front/back piece and sleeves. Inc 2 sts in each side on front and back piece every other round (= 8 sts inc): Inc as follows before marker: Beg 2 st before marker and work as follows: Work 2 sts in first st, 1 YO, K 1, marker. Inc as follows after marker: Marker, K 1, 1 YO and work 2 sts in next st. On next round K the YO to make hole. Inc 1 sts in each side on front and back piece or each sleeve every other round (= 4 sts inc in front/back or 4 sts in on sleeves): Inc as follows before marker: Beg 1 st before marker and work as follows: 1 YO, K 1, marker. Inc as follows after marker: Marker, K 1, 1 YO. On next round K the YO to make hole. Inc 1 sts in each side on front and back piece or each sleeve every 4th round (= 4 sts inc in front/back or 4 sts in on sleeves): Inc as follows before marker: Round 1: Beg 1 st before marker and work as follows: 1 YO, K 1, marker. Round 2: K YOs to make holes. Round 3: Beg 2 st before marker and work as follows: K 2 tog, 1 YO, K 1, marker (= no sts inc). Round 4: K YOs to make holes. Inc as follows after marker: Round 1: Marker, K 1, 1 YO. Round 2: K YOs to make holes. Round 3: Marker, K 1, 1 YO, K 2 tog (= no sts inc). Round 4: K YOs to make holes. INCREASE TIP (applies to inc in the sides of body): Beg 1 sts before marker, 1 YO, K 2 (marker is in the middle of these 2 sts), 1 YO (= 2 sts inc). On next round K YOs twisted to avoid holes. DECREASE TIP: Dec mid under sleeve as follows: Beg 3 sts before marker and K 2 tog, K 2 (marker is between these 2 sts), slip 1 st as if to K, K 1, psso (= 2 sts dec). ---------------------------------------------------------- JUMPER: Worked in the round on circular needle, top down. Work sleeves in the round on circular needle/double pointed needles. YOKE: Cast on 62-62-66-74-78-78 sts on circular needle size 4.5 mm with pearl grey and work 1 ridge in GARTER ST - see explanation above. K 1 round while inc 10 sts evenly = 72-72-76-84-88-88 sts. Switch to a short circular needle size 5 mm and work as follows (= beg of round = mid back): 13-13-14-14-15-15 sts in stocking st (= half back piece), insert a marker, 10-10-10-14-14-14 sts in stocking st (= sleeve), insert a marker, 26-26-28-28-30-30 sts in stocking st (= front piece), insert a marker, 10-10-10-14-14-14 sts in stocking st (= sleeve), insert a marker, stocking st over the last 13-13-14-14-15-15 sts on round (= half back piece). REMEMBER KNITTING TENSION AND READ ALL OF THE FOLLOWING SECTION BEFORE CONTINUING: On next round start inc for RAGLAN – READ INCREASE TIP. Inc on each side of the 4 markers but inc differently on front/back piece and sleeves as follows: FRONT AND BACK PIECE: Inc 2 sts in each side on front and back piece every other round 0-2-1-3-6-8 times, inc 1 st in each side on front and back piece every other round 20-21-24-24-22-22 times and inc 1 st on each side on front and back piece every 4th round 1-0-0-0-0-0 times. SLEEVES: Inc 1 st in each side on each sleeve every other round 16-23-25-24-22-22 times and inc 1 st in each side on each sleeve every 4th round 3-0-0-1-3-4 times. After all inc = 232-264-280-304-324-344 sts on needle. Piece measures 22-24-25-27-29-31 cm from shoulder (19-21-22-23-25-27 cm from cast-on edge). Now work as follows: Work the first 34-38-40-44-49-53 sts (= half back piece), slip the next 48-56-60-64-64-66 sts on a stitch holder (= sleeve), cast on 6-6-8-8-10-12 sts under sleeve (insert 1 marker in the middle of these new sts), work the next 68-76-80-88-98-106 sts (= front piece), slip the next 48-56-60-64-64-66 sts on a stitch holder (= sleeve), cast on 6-6-8-8-10-12 sts under sleeve (insert 1 marker in the middle of these new sts), work the remaining 34-38-40-44-49-53 sts (= half back piece). NOW MEASURE THE PIECE FROM HERE. BODY: = 148-164-176-192-216-236 sts. Work in stocking st in the round with pearl grey until piece measures 3 cm. Now inc 1 st on each side of both markers – READ INCREASE TIP (= 4 sts inc). Inc every 3 cm 9 times = 184-200-212-228-252-272 sts. Continue in stocking st until piece measures 28-28-29-30-30-30 cm. Slip sts between 2nd and 1st marker on a stitch holder (= back piece), then work back and forth over the remaining 92-100-106-114-126-136 sts (= front piece). Switch to purple haze and work in stocking st with 5 sts in GARTER ST in each side - see explanation above. Continue like this for 7 cm, then work 2 ridges over all sts, cast off. BACK PIECE: Slip 92-100-106-114-126-136 sts from stitch holder back on to circular needle size 5 mm. Work in stocking st with 5 sts in garter st in each side. When piece measures 8 cm change to purple haze, continue with stocking st and garter st for 7 cm. Then work 2 ridges over all sts, cast off. SLEEVE: Slip sts from stitch holder back on a short circular needle/ double pointed needles size 5 mm and cast in addition on 6-6-8-8-10-12 new sts under sleeve = 54-62-68-72-74-78 sts. Insert 1 marker in the middle of the new sts under sleeve – NOW MEASURE PIECE FROM HERE. Worked in stocking st in the round on circular needle/double pointed needles. When piece measures 3 cm, dec 1 st on each side of marker - READ DECREASE TIP. Repeat dec every 3½-2½-2-2-2-1½ cm a total of 10-13-15-16-17-18 times. After all dec are done, 34-36-38-40-40-42 sts remain on round. When sleeve measures 44-43-43-43-41-40 cm, switch to double pointed needles size 4.5 mm. Work 2 ridges and LOOSELY cast off. Sleeve measures approx. 45-44-44-44-42-41 cm (NOTE: Shorter measurements in the larger sizes because of wider neck and longer yoke). Work the other sleeve the same way. ASSEMBLY: Sew the openings under the sleeves. |
|
 |
|
Have you finished this pattern?Tag your pictures with #dropspattern #lillacamillasweater or submit them to the #dropsfan gallery. Do you need help with this pattern?You'll find 29 tutorial videos, a Comments/Questions area and more by visiting the pattern on garnstudio.com. © 1982-2026 DROPS Design A/S. We reserve all rights. This document, including all its sub-sections, has copyrights. Read more about what you can do with our patterns at the bottom of each pattern on our site. |
|


With over 40 years in knitting and crochet design, DROPS Design offers one of the most extensive collections of free patterns on the internet - translated to 17 languages. As of today we count 324 catalogues and 12267 patterns translated into English (UK/cm). 12267
We work hard to bring you the best knitting and crochet have to offer, inspiration and advice as well as great quality yarns at incredible prices! Would you like to use our patterns for other than personal use? You can read what you are allowed to do in the Copyright text at the bottom of all our patterns. Happy crafting!
Post a comment to pattern DROPS 172-33
We would love to hear what you have to say about this pattern!
If you want to leave a question, please make sure you select the correct category in the form below, to speed up the answering process. Required fields are marked *.