
Popular categories
Looking for a yarn?


Comments / Questions (57)
![]() Rosa Díaz Guzmán wrote:
Rosa Díaz Guzmán wrote:
Por favor. Al inicio del trabajo. Pieza izquierda de la espalda. Parece que falta algún dato. Porque dice que inicia con tres puntos. No me queda claro. La cantidad exacta de puntos para seguir.
19.04.2024 - 03:36DROPS Design answered:
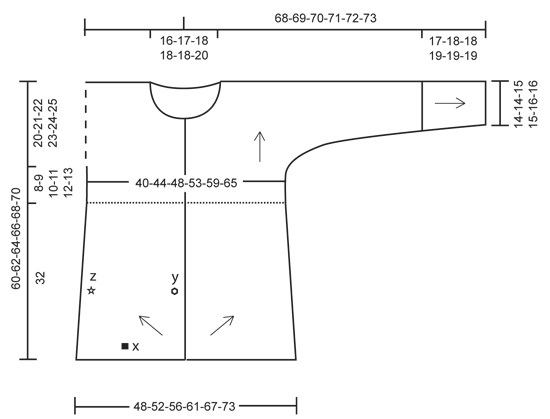
Hola Rosa, montas 3 pts y después comienzas las instrucciones como se indican. Trabajas algo similar a un triángulo desde la punta, que es la punta inferior central de la espalda y trabajas en diagonal hacia arriba. Vas aumentando trabajando 2 pts en el 1º pt en cada fila, tanto por el lado derecho como por el lado revés. Así, tienes 3 pts iniciales, en la siguiente fila trabajas 2 pts en el 1º pt, así que tendrás 4, e.t.c. Seguirás trabajando de esta manera y terminarás de aumentar en el lado revés cuando el borde inferior alcance las medidas indicadas como x, mientras que los aumentos para el lado derecho terminan cuando la línea central de la espalda mida 32cm.
22.04.2024 - 00:04
![]() Carla wrote:
Carla wrote:
Hallo, ik ben nu bezig aan de voorpanden maar ik denk dat ik verkeerd aan het breien ben. Ik heb 10 steken ( waaronder 7 voorbiessteken ) opgezet. Ik ben met het rechtervoorpand begonnen. Moeten er ook een vermeerderingen gemaakt worden telkens net na die 7 steken? of worden er alleen meerderingen gemaakt aan de verkeerde kant? Bedankt voor de hulp. vriendelijke groeten, Carla
01.05.2022 - 10:19DROPS Design answered:
Dag Carla,
Je meerdert inderdaad aan beide kanten. Eerst brei je de 7 voorbiessteken, dan meerder je. Brei de naald uit, keer het werk en meerder aan het begin van de naald aan de verkeerde kant. Op deze manier brei je diagonaal. Je meerdert dus steeds aan het begin van de naald, maar wel naast de 7 voorbiessteken. Bij een bepaalde hoogte (staat aangegeven in de beschrijving) stop je met meerderen aan de verkeerde kant, maar ga je in plaats daarvan minderen. Dat is het begin van de zijnaad.
09.05.2022 - 16:48
![]() Caromau wrote:
Caromau wrote:
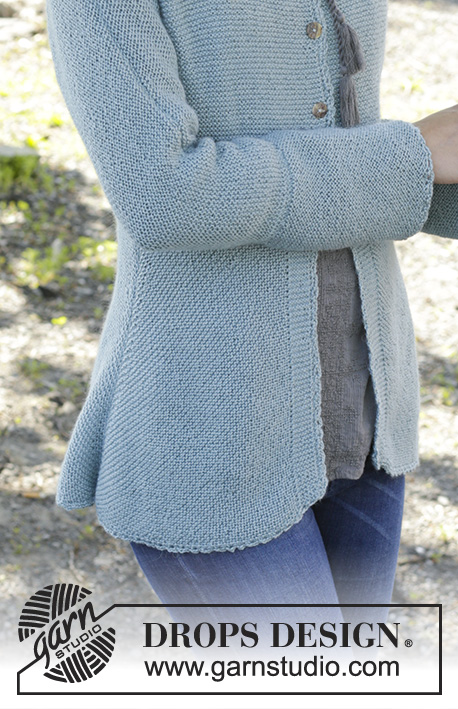
Ce gilet est très beau, mais comme il est de construction complexe, des photos supplémentaires (du dos, du bas des manches, etc) auraient été les bienvenues.
07.09.2018 - 14:18
![]() Maria Pessina wrote:
Maria Pessina wrote:
Posso lavorare coi ferri diritti il modello?
05.02.2018 - 13:14DROPS Design answered:
Buongiorno Maria. Il cardigan è lavorato avanti e indietro sui ferri. Può usare i ferri dritti e lavorare seguendo le spiegazioni. Buon lavoro!
05.02.2018 - 14:13
![]() Breibrij wrote:
Breibrij wrote:
Zou u wat meer foto’s bij het patroon kunnen zetten? Ik ben bezig met een vest (Drops 156-43), en ik zou het handig vinden als ik ook de achterkant van het vest kon zien. Ook detailfoto’s van de verschillende onderdelen lijken mij een goed idee, ter ondersteuning van de beschrijving bij het patroon.
29.10.2017 - 14:28DROPS Design answered:
Hallo Breibrij, Helaas zijn er van dit ontwerp niet meer foto's dan degene die afgebeeld is. Mocht je ergens niet uit komen dan kun je altijd vragen om hulp, ook bij je verkooppunt.
29.10.2017 - 18:50
![]() Lida Van Wersch wrote:
Lida Van Wersch wrote:
Dit staat bij de minderingen voor de zijkant van het rugpand: minder 1 st aan het begin van de volgende nld aan de verkeerde kant naast 4 st (na het minderen). Herhaal dit minderen elke 2½ cm in totaal 10 keer. Is dit een extra mindering na de mindering aan de zijkant? Is dit 1 keer, of moet je dat op deze manier na iedere 2,5 cm herhalen. Dat zou neerkomen op 2 minderingen in een naald en kom je op een totaal van 20 steken geminderd
23.10.2017 - 19:24DROPS Design answered:
Hallo Lida, Om in een punt te breien, minder je langs z, en daarnaast minder je ook nog 10 keer voor de taillering naast 4 steken.
25.10.2017 - 10:20Gyde wrote:
Hallo liebes Drops Team. Ich bin jetzt bei dem linken Vorderteil. Da soll eine Blende eingearbeitet werden. Lt. Beschreibung wie das rechte Rückenteil arbeiten. Das heißt, am Anfang jeder Hin-u. Rückreihe 1 M zunehmen. Also verdoppel ich genauso wie beim Rückenteil und danach dann noch die 7 Maschen für die Blende dranstricken? Kann mir das bitte jemand ganz genau erklären? Ich verstehe es nicht. Vielen Dank. Gyde
30.05.2017 - 15:37DROPS Design answered:
Liebe Gyde, die Zunahmen bei den beiden Vorderteile werden innerhalb die 7 Blendemaschen gestrickt. Viel Spaß beim stricken!
30.05.2017 - 15:51Gyde wrote:
Vielen Dank für die Hilfe. Jetzt hab ich es. Bei 32 cm mit den Abnahmen anfangen. So steht es aber nicht in der Anleitung, finde ich !!! Aber okay. Danke nochmal. LG und schönen Tag. Gyde
18.05.2017 - 14:48Gyde wrote:
Hallo. In der Beschreibung steh: die Zunahmen an der hinteren Mitte =y arbeiten, bis die Arbeit eine Gesamtlänge von 32 cm hat. Dann hab ich einfach ohne Zunahme weiter gestrickt. Dann steht unten: Wenn die Zunahmen an der hinteren Mitte fertig sind, dann abnehmen. Das ist für mich alles etwas unverständlich. So wie ich es gestrickt habe, sieht es merkwürdig aus. Kann mir jemand helfen? Danke und liebe Grüße. Gyde
18.05.2017 - 13:02DROPS Design answered:
Liebe Gyde, an der hinteren Mitte (y) bis 32 cm zunehmen, gleichzeitg an der unteren Kante (x) bis 36,5 zunehmen. Wenn die Zunahmen an y fertig sind, beginnen die Abnahmen an y. Wenn die Zunahmen an x fertig sind, beginnen die Abnahmen an z. (In den Größen XXL und XXXL sind die Zunahmen an der hinteren Mitte (= y) vor den Zunahmen am unteren Rand (= x) fertig.). Viel Spaß beim stricken!
18.05.2017 - 13:44Gyde wrote:
Hallo Drops Team. Wann sind die Zunahmen fertig? Nach 32 cm an der Achse y oder erst wenn die 10 Abnahmen an der Achse z fertig sind? LG Gyde
18.05.2017 - 10:06DROPS Design answered:
Liebe Gyde, die Zunahmen bei y sind fertig bey 32 cm, dann wird es bei y abgenommen. Viel Spaß beim stricken!
18.05.2017 - 13:36
|
||||||||||||||||
Clear Water#clearwatercardigan |
||||||||||||||||
 |
 |
|||||||||||||||
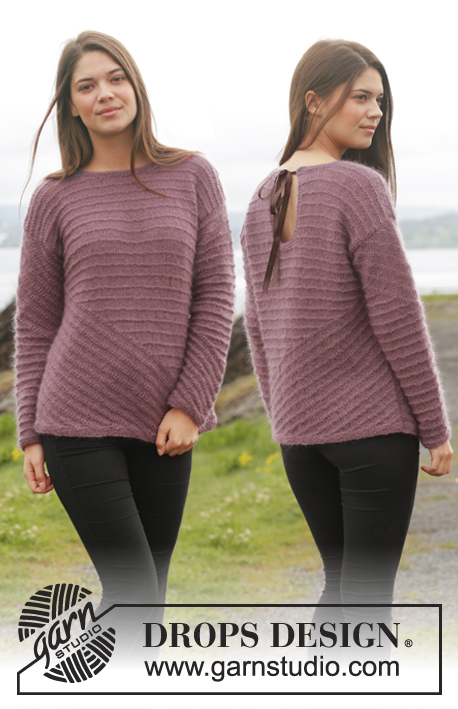
Knitted DROPS jacket in garter st in ”BabyAlpaca Silk”. Size: S - XXXL.
DROPS 156-43 |
||||||||||||||||
|
GARTER ST (back and forth on needle): K all rows. 1 ridge = 2 rows K. DECREASE TIP: Dec 1 st as follows: K 2 tog. BUTTONHOLES: Cast off for buttonholes on right band. 1 buttonhole = cast off fourth st from mid front and cast on 1 new st on next row over this st. Cast off for button holes when piece measures (measured from edge with picked up sts): SIZE S: 1, 6, 10 and 15 cm SIZE M: 1, 6, 11 and 17 cm SIZE L: 1, 6, 11 and 17 cm SIZE XL: 1, 5, 10, 14 and 20 cm SIZE XXL: 1, 5, 10, 14 and 19 cm SIZE XXXL: 1, 6, 11, 16 and 21 cm ---------------------------------------------------------- JACKET: The jacket is worked in parts in different directions. Arrows on chart show the knitting direction. Work entire jacket in GARTER ST - see explanation above, back and forth on circular needle to make room for all the sts. BACK PIECE: The back piece is worked in 2 parts that are sewn tog mid back. Then work yoke from here. LEFT BACK PIECE: Cast on 3 sts on circular needle size 3 mm with BabyAlpaca Silk. READ ALL OF THE FOLLOWING SECTION BEFORE CONTINUING! INC ON EVERY ROW IN EACH SIDE OF PIECE WHILE DEC. INCREASE: Inc 1 st at beg of every row from RS (= y – see chart) and at beg of every row from WS (= x) by working 2 sts in first st. Repeat inc mid back (= y) until piece measures 32 cm in all sizes (measured along y). Repeat inc in bottom edge (= x) until piece measures 24-26-28-30½-33½-36½ cm measured along x. NOTE! In size XXL and XXXL inc mid back (= y) are finished before all inc in bottom edge are done (= x). REMEMBER THE KNITTING TENSION! DECREASE IN THE SIDE: When inc in bottom edge (= x) is done, dec in the side (= z) as follows: Dec 1 st – READ DECREASE TIP - at beg of every row from WS. Repeat dec on every row from WS until finished measurements. AT THE SAME TIME when piece measures 3 cm along z - dec 1 st at beg of next row from WS inside 4 sts (after dec). Repeat dec every 2½ cm a total of 10 times. DECREASE MID BACK: When inc mid back (= y) is done, dec 1 st at beg of next row from RS. Repeat dec at beg of every row from RS until 3 sts remain. Cast off. RIGHT BACK PIECE: Work as left back piece but reversed. I.e. all dec/inc explained at beg of row from RS are now done at beg of row from WS and vice versa. ASSEMBLY BACK PIECE: Sew tog left and right back piece mid back in outer loops of edge sts. YOKE AT THE BACK: The piece is worked back and forth in garter st until finished measurements. Pick up (from RS) 1 st in every ridge on back piece - see dotted line on chart (same as on front piece). On next row adjust no of sts to 96-106-116-128-142-156. Cast on 1 st at the end of the next 2 rows (= edge st) = 98-108-118-130-144-158 sts. Continue to work until piece measures 8-9-10-11-12-13 cm from where sts were picked up. Cast on 10-10-10-7-7-7 new sts in each side for sleeve. Then cast on in each side on every other row: 4-3-3-3-2-2 sts 12-15-15-17-17-19 times and 15-15-11-3-14-5 sts 1 time = 244-248-250-252-254-258 sts. When piece measures 26-28-30-32-34-36 cm from where sts were picked up, cast off the middle 36-38-40-40-42-46 sts for neck. Finish each shoulder separately. On next row, cast off 1 st towards the neck = 103-104-104-105-105-105 sts on each shoulder/sleeve. Continue to work until piece measures 28-30-32-34-36-38 cm from where sts were picked up - sleeve opening measures approx. 14-14-15-15-16-16 cm - loosely cast off. LEFT FRONT PIECE: Work front piece diagonally (as right back piece + band), then work the yoke, i.e. work as follows: Cast on 10-10-10-10-11-11 sts (= 3 sts + 7-7-7-7-8-8 band sts) on circular needle size 3 with BabyAlpaca Silk. Work as RIGHT BACK PIECE, but work the last 7-7-7-7-8-8 sts from WS without inc (= band). NOTE! When dec from RS beg, cast off these 7-7-7-7-8-8 band sts. YOKE (LEFT FRONT PIECE): Worked back and forth in garter st. Pick up (from RS) 1 st in every ridge and 1 st in every band st in waist – see dotted line on chart. On next row adjust no of sts to 55-61-65-71-79-86. On next row cast on 1 new st in the side (= edge st) = 56-62-66-72-80-87 sts. Continue to work until piece measures 8-9-10-11-12-13 cm from where sts were picked up. Cast on 10-10-10-7-7-7 new sts for sleeve at the end of next row from WS for sleeve. Then cast on in the side on every other row: 4-3-3-3-2-2 sts 12-15-15-17-17-19 times and 15-15-11-3-14-5 sts 1 time = 129-132-132-133-135-137 sts. Continue to work until piece measures 16-18-18-20-20-22 cm. Now cast off 18-18-18-18-20-22 sts towards mid front for neck. Then cast off on every other row towards the neck 2 sts 4-5-5-5-5-5 times = 103-104-104-105-105-105 sts remain on row for shoulder/sleeve. Work until piece measures 28-30-32-34-36-38 cm from where sts were picked up, adjust according to back piece. Loosely cast off. RIGHT FRONT PIECE: Work front piece diagonally (same as left back piece + band), then work the yoke, i.e. work as follows: Cast on 10-10-10-10-11-11 sts (= 3 sts + 7-7-7-7-8-8 band sts) on circular needle size 3 mm with BabyAlpaca Silk. Work as LEFT BACK PIECE - AT THE SAME TIME work the first 7-7-7-7-8-8 sts from RS without inc (= band). YOKE (RIGHT FRONT PIECE): Work as LEFT YOKE but reversed - i.e. cast on sts for sleeve at the end of row from RS. Remember BUTTONHOLES - see explanation above. ASSEMBLY: Sew shoulder/overarm seams edge to edge to avoid a chunky seam. NECK EDGE: Pick up (from RS) approx. 100 to 140 sts on circular needle size 3 mm with BabyAlpaca Silk. Work 3 ridges in garter st back and forth. Loosely cast off. CUFFS: Pick up 1 st in every ridge at the bottom of sleeve. On next row adjust no of sts to 68-68-72-72-78-78. Then work back and forth over all sts. When cuff measures 17-18-18-19-19-19 cm (or desired length), loosely cast off. ASSEMBLY: Sew side seam, underarm seam and cuff seam in one inside 1 edge st. Sew on the buttons approx. 1 cm from edge on left front piece. CROCHET EDGE: Beg by working mid back of neck on crochet hook size 3.5 mm with BabyAlpaca Silk. Work 1 dc, * 3 ch, skip approx. 1 cm, 1 dc *, repeat from *-* around the neck, down along front piece, around the entire bottom edge and up and around to the back of neck again. Finish with 1 sl st in dc from beg of round. Work the same way around the cuffs at the bottom of both sleeves. |
||||||||||||||||
Diagram explanations |
||||||||||||||||
|
||||||||||||||||
 |
||||||||||||||||
Have you finished this pattern?Tag your pictures with #dropspattern #clearwatercardigan or submit them to the #dropsfan gallery. Do you need help with this pattern?You'll find 18 tutorial videos, a Comments/Questions area and more by visiting the pattern on garnstudio.com. © 1982-2026 DROPS Design A/S. We reserve all rights. This document, including all its sub-sections, has copyrights. Read more about what you can do with our patterns at the bottom of each pattern on our site. |
||||||||||||||||


With over 40 years in knitting and crochet design, DROPS Design offers one of the most extensive collections of free patterns on the internet - translated to 17 languages. As of today we count 324 catalogues and 12267 patterns translated into English (UK/cm). 12267
We work hard to bring you the best knitting and crochet have to offer, inspiration and advice as well as great quality yarns at incredible prices! Would you like to use our patterns for other than personal use? You can read what you are allowed to do in the Copyright text at the bottom of all our patterns. Happy crafting!
Post a comment to pattern DROPS 156-43
We would love to hear what you have to say about this pattern!
If you want to leave a question, please make sure you select the correct category in the form below, to speed up the answering process. Required fields are marked *.