
Popular categories
Looking for a yarn?


Comments / Questions (30)
![]() Anna wrote:
Anna wrote:
Hej! Jag håller på med det större underlägget, och befinner mig nu kring varv 12. Problemet är att mönstret verkar vara för stort, det blir vågigt och bucklor runt kanterna på det underlägg jag håller på med. Vad kan det här bero på? Maskornas antal följer de som angivits i mönstret. Kommer det här att ordnas av sig själv längre fram i mönstret, eller har jag gjort något fel?
17.11.2014 - 00:10DROPS Design answered:
Hej Anna, Det låter som om du kanske virkar lite för löst, du kan testa att gå 1 nr ner och se om det blir bättre. Lycka till!
25.11.2014 - 15:14
![]() Fatima wrote:
Fatima wrote:
Hallo,ich habe mir die Wolle bestellt um diese Tischsets zu häkeln,laut Beschreibung bekomme ich zwei kleine und ein großes Tischset raus,nun habe ich das Große nach Anleitung gehäkelt,da musste ich festestellen das ich noch nicht mal mit einem Knäul ausgekommen bin geschweige noch zwei kleine häkeln kann. Ich finde es jetzt ziemlich ärgerlich das das nach der Beschreibung nicht hingekommen ist.Ich muss jetzt noch weitere bestellen und das kostet mich 5€ Porto und das finde ich sehr schade.L.G.
26.02.2014 - 14:24DROPS Design answered:
Liebe Fatima, 1 Knäuel reicht bei der angegebenen Maschenprobe für ein grosses ODER 2 kleine Tischsets. Leider ist unserer damaligen Übersetzerin ein Fehler passiert. Wir entschuldigen uns dafür.
26.02.2014 - 16:40
![]() Hege wrote:
Hege wrote:
Hei! Skjønner ikke helt hvordan jeg skal få til 108 fastmasker i omg 6. Får bare til 96, siden jeg ikke ser helt hvor jeg kan hekle de 12 ekstra fm. Er det meningen at det skal være f.eks en luftmaske mellom hver dblst-gruppe?
14.12.2013 - 15:18DROPS Design answered:
Hei Hege. Du skal ogsaa hekle 1 fm mellom hver dblst-gruppe omg rundt. Du har 12 dblst grupper, saa her faar du de sidste 12 fm saa du ender med 108 fm.
16.12.2013 - 16:49
![]() Rina Werle wrote:
Rina Werle wrote:
Hallo, ich glaube einen Fehler in der Anleitung gefunden zu haben. Die 8. und 9. Runde sind bei Ihnen gleich, in der Norwegischen Anleitung steht jedoch meines Erachtens nach, dass die 9. Runde lediglich aus einer fM in jede fM der 8. Runde besteht. Viele Grüße, R. Werle
20.10.2013 - 11:33DROPS Design answered:
Liebe Rina, Sie haben völlig Recht, da ist unserer Übersetzerin ein Fehler passiert. Wir werden das sofort korrigieren. Wir enschuldigen uns für die Umstände.
21.10.2013 - 08:51
![]() Mariia wrote:
Mariia wrote:
Voisittteko valaista minua lauta-alusta ohjeen 4.krs kanssa, en ymmärrä miten se pitäisi tehdä. Miksi ohjeessa lukee 1 3p ja 4 3p?
09.05.2013 - 14:16DROPS Design answered:
Hei! Näissä kohdissa virkataan kolmoispylväitä (3p), eli virkkaat yhden kolmoispylvään/neljä kolmoispylvästä. Kolmoispylvään ohjeen löydät ohjevideo-osastoltamme.
13.05.2013 - 14:48
![]() Kirsi wrote:
Kirsi wrote:
Hei ! Olen tekemässä pientä lauta-alustaa mutta ohjeen 4 krs tuottaa hankaluuksia 4.KRS: 1 ps ensimmäiseen ks:aan, 1 ps ensimmäiseen kjs:aan, 5 kjs, 1 3p samaan kjs:aan, * 7 kjs, virkkaa sitten 4 3p yhtee Teenkö 5 kjs:n jälkeen 13 pylvästä samaan ketjusilmukkaan * 7 kjs:aa virkkaa sitten 43 p ? jne ....... onkohan nuo luvut ihan paikkaansa pitäviä vai virheellisiä .... Kiitos kun vastasit kysymykseeni , jään sitä odottelemaan . t: kikka
12.03.2013 - 23:20DROPS Design answered:
Hei! Lyhenne 3p tarkoittaa kolmoispylvästä. Kolmoispylväs virkataan seuraavasti: Tee 3 langankiertoa koukulle, vie koukku silmukan läpi, ota lanka koukulle ja vedä lanka läpi (= 5 s koukulla), *ota lanka koukulle, vedä lanka 2 silmukan läpi*, toista *-* yht. 4 kertaa (= 1 s koukulla).
15.03.2013 - 14:19
![]() Alexandra wrote:
Alexandra wrote:
Liebes Team von Drops, ich bin bei dieser Anleitung nicht durch Runde 4 gestiegen. 4er Päckchen 3erStäbchen mit 7LM dazwischen, aber die Anordnung ist mir schleierhaft. Beste Grüße, Alexandra
02.02.2013 - 20:38DROPS Design answered:
Hallo Alexandra, wir haben die Anleitung kontrolliert und sie ist korrekt (4 Dreifach-Stb werden zusammen abgemascht und ergeben einen „Büschel“) – wenn Sie noch zusätzliche Hilfe bei der Ausführung brauchen, wenden Sie sich bitte an den Laden, in dem Sie das Garn gekauft haben. Dort hilft man Ihnen gerne weiter. Viel Spaß beim Häkeln!
07.02.2013 - 08:58
![]() Griet wrote:
Griet wrote:
Goedemorgen Zou graag willen weten wat een triple is en hoe ik die maak. Kom er niet uit. groetjes Griet
15.07.2012 - 11:49DROPS Design answered:
Een triple stk is het hetzelfde als een driedubbel stk (stk = stokje). Voor de werkwijze kunt u kijken in ons instructievideo gedeelte onder D (driedubbel stk).
16.07.2012 - 10:42
![]() DROPS Deutsch wrote:
DROPS Deutsch wrote:
So, jetzt sollte alles in Ordnung sein.
28.03.2011 - 11:01
![]() Jennifer Böhm wrote:
Jennifer Böhm wrote:
Leider wurde diese Anleitung nicht vollständig ins deu´tsche übersetzt. Sowohl im kleinen als auch im großen Tischset finden sich noch original Anweisungen aus dem Norwegischen.
28.03.2011 - 09:57
|
|
My Love#dropsmylove |
|
 |
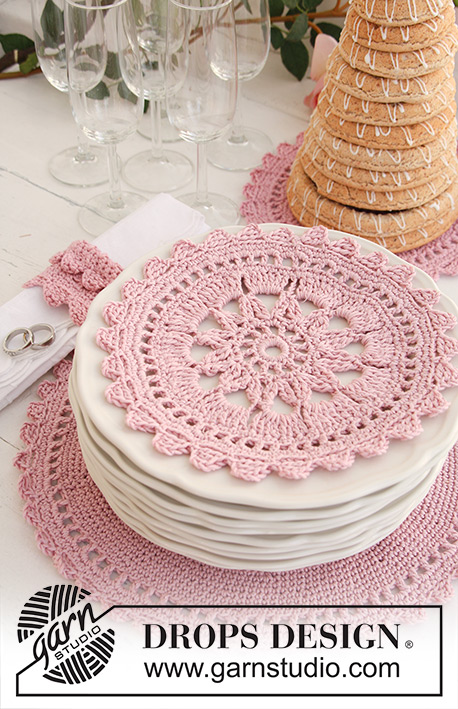 |
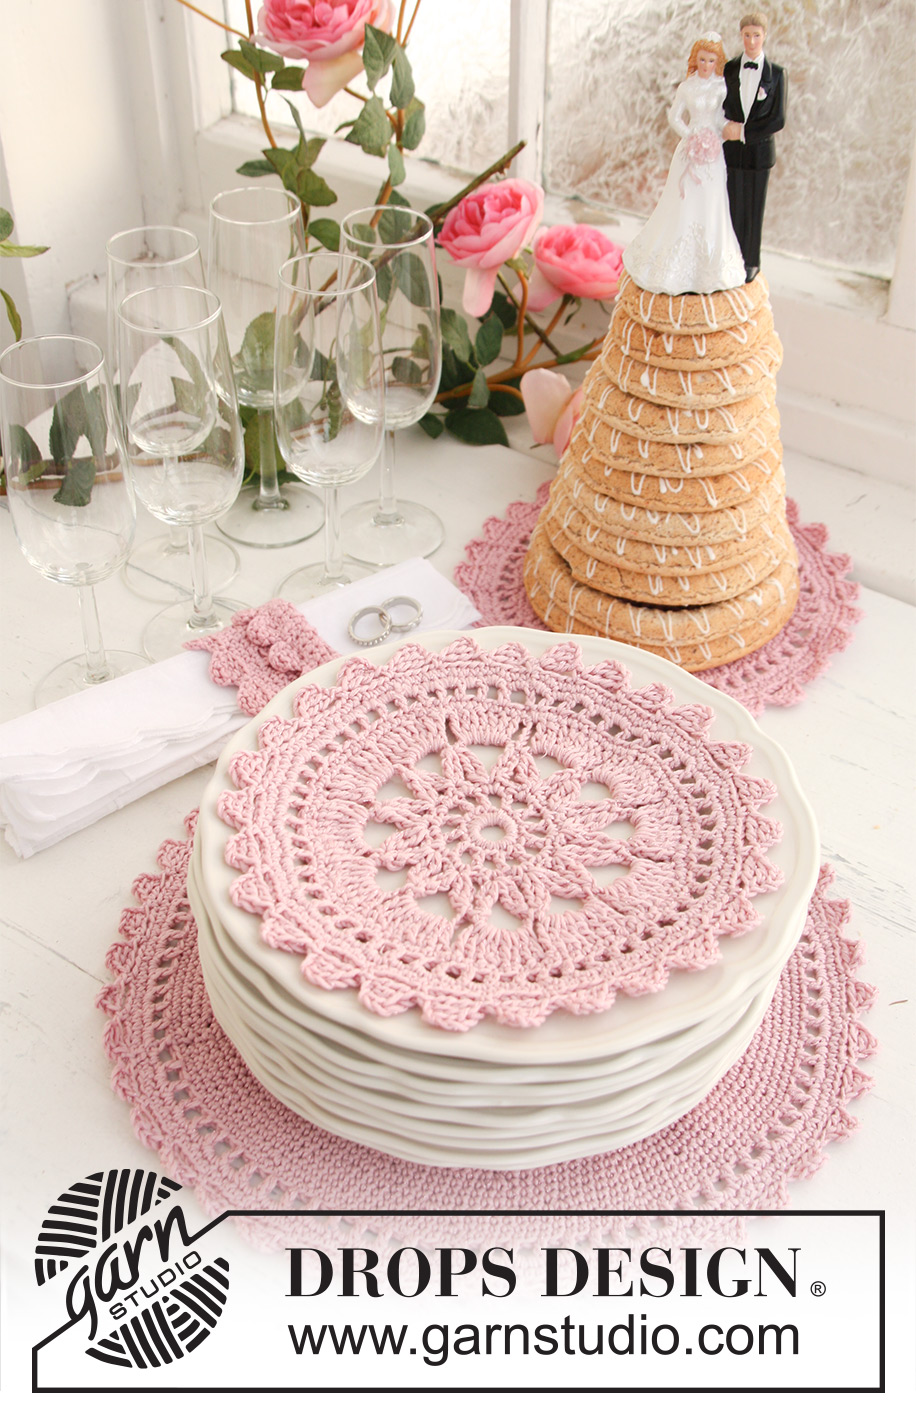
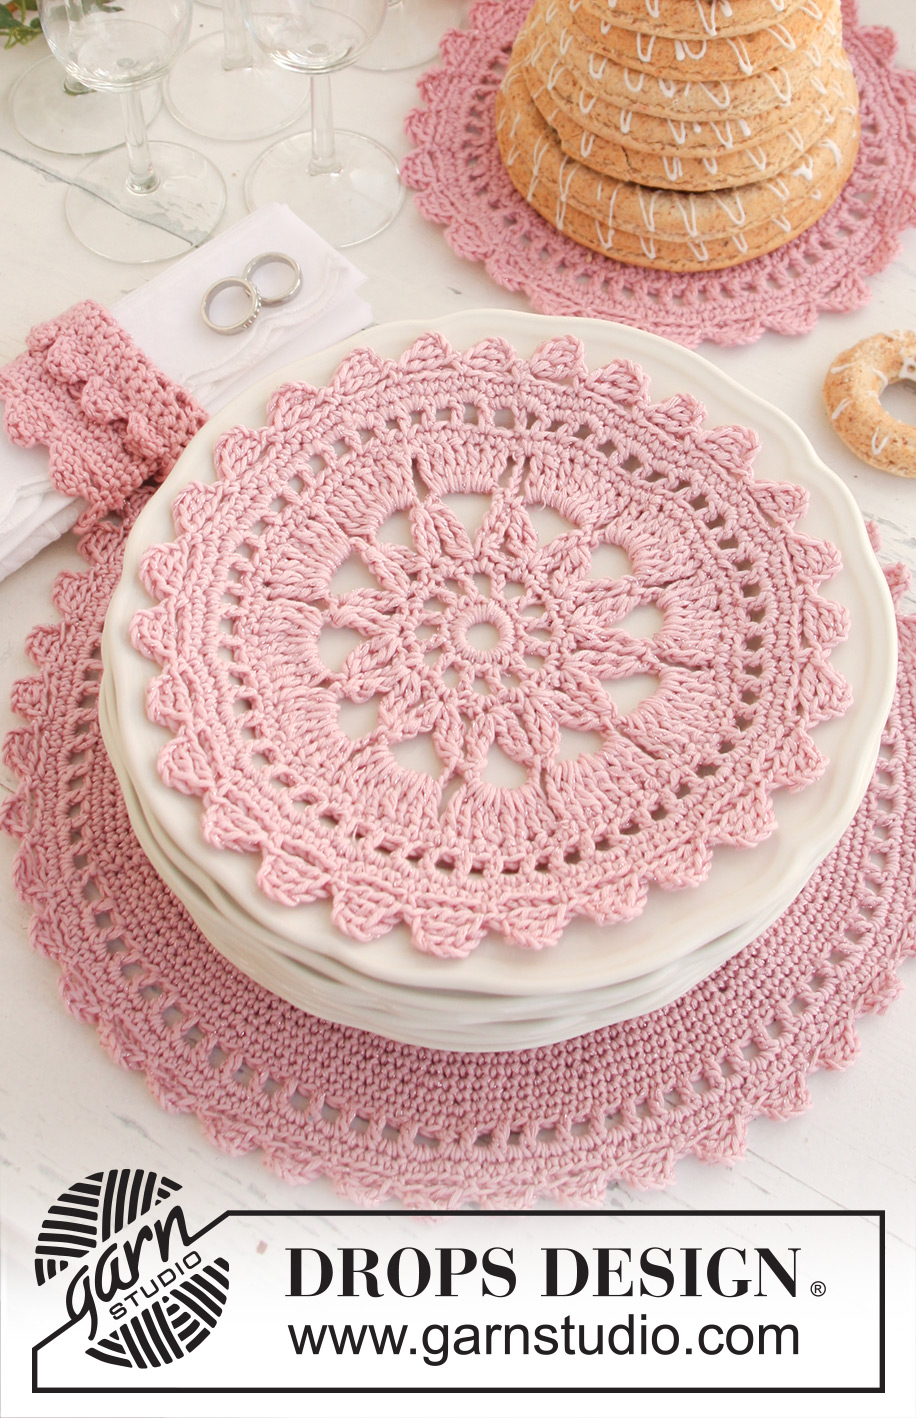
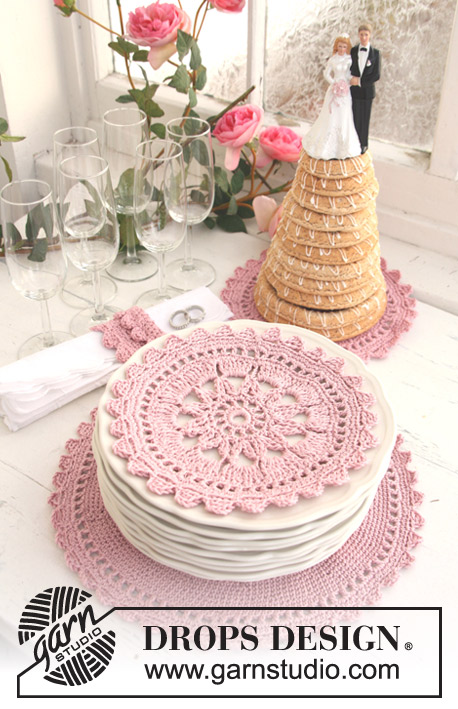
Set consists of: Crochet DROPS place mats and napkin rings in ”Safran” or "DROPS ♥ You #7" and ”Glitter”.
DROPS Extra 0-747 |
|
|
CROCHET INFO 1 (applies to place mats): Replace first dc on dc rounds with 1 ch. Finish every round with 1 sl st in ch from beg of round. CROCHET INFO 2 (applies to napkin ring): Replace first dc at beg of every round with 1 ch. Finish every round with 1 sl st in ch from beg of round. -------------------------------------------------------- -------------------------------------------------------- SMALL PLACE MAT: Crochet 8 ch on hook size 3 mm with 1 thread Safran or DROPS ♥ You #7 + 2 threads Glitter and form a ring with 1 sl st in first ch. READ CROCHET INFO 1. ROUND 1: Work 24 dc in ch-ring. ROUND 2: 5 ch (= 1 tr + 2 ch), * skip 1 dc, 1 tr in next dc, 2 ch *, repeat from *-* the entire round and finish with 1 sl st in 3rd ch from beg of round = 12 tr with 2 ch between each. ROUND 3: 1 ch, continue to crochet as follows in every ch-loop the entire round: 1 dc + 1 ch + 1 dc + 1 ch, finish round with 1 sl st in first ch = 24 dc with 1 ch between each. ROUND 4: 1 sl st in first dc, 1 sl st in first ch, 5 ch, 1 dtr in same ch, * 7 ch, now work 4 triple tr tog as follows: Work 2 triple tr in same ch but wait with last YO and pull through on both triple tr, skip 1 dc + 1 ch + 1 dc, work 1 triple tr in next ch but wait with last YO and pull through, then work last triple tr in same ch and pull last YO through all 5 sts on hook *, repeat from *-* a total of 11 times, 7 ch, work 2 triple tr in same ch (but wait with last YO and pull through on both), work 1 sl st in 5th ch from beg of round and pull thread through all 3 sts on hook. ROUND 5: 1 sl st in first ch-loop, 4 ch (= 1 dtr), 7 dtr in same ch-loop, then work 8 dtr in every ch-loop, finish with 1 sl st in 4th ch from beg of round = 12 dtr-groups with 8 dtr in each. ROUND 6: 1 ch, 1 dc in sl st, then work 1 dc in every dtr and 1 dc between each dtr-group the entire round, finish with 1 sl st in first dc from beg of round = 108 dc. ROUND 7: 4 ch (= 1 tr + 1 ch), skip 1 dc, * 1 tr in next dc, 1 ch (make sure to make ch the same length as 1 dc so that the round does not tighten), skip 1 dc *, repeat from *-* the entire round and finish with 1 sl st in 3rd ch from beg of round = 54 tr with 1 ch between each. ROUND 8: 1 ch, then work 2 and 3 dc alternately in every ch the entire round, finish with 1 sl st in ch from beg of round = 135 dc. ROUND 9: Work 1 dc in every dc = 135 dc. ROUND 10 (= lace edge): 1 ch, 1 dc in sl st, * 5 ch, 1 tr in 2nd ch worked, 1 dtr in first ch worked, skip 4 dc, 1 dc in next st *, repeat from *-* the entire round and finish with 1 sl st in dc from beg of round (instead of 1 dc in next st) = 27 loops. Cut and fasten the thread. -------------------------------------------------------- LARGE PLACE MAT: Work as small place mat up to and with 9th round. ROUND 10-12: Work as 9th round = 135 dc. ROUND 13: * Work 1 dc in each of the 8 first dc, 2 dc in next dc *, repeat from *-* the entire round = 150 dc. ROUND 14-15: Work 1 dc in every dc = 150 dc. ROUND 16: * Work 1 dc in each of the first 4 dc, 2 dc in next dc, work 1 dc in each of next 5 dc *, repeat from *-* the entire round = 165 dc. ROUND 17: Work 1 dc in every dc = 165 dc. ROUND 18: * Work 1 dc in each of the first 14 dc, 2 dc in next dc *, repeat from *-* the entire round = 176 dc. ROUND 19: Work 1 dc in every dc = 176 dc. NOTE: Work place mat bigger by repeating round 18 and 19 if desired. But for every repetition of 18th round work 1 dc more between each inc. Make sure that no sts can be divided by 2 before working round 20 (if mat is worked bigger the no of tr and dc given below will not be correct). ROUND 20: Crochet as round 7 = 88 tr with 1 ch between each. ROUND 21: Work as round 8 = 220 dc. ROUND 22: Work 1 dc in every dc = 220 dc. ROUND 23: Work lace edge as on 10th round on small place mat = 44 loops. Cut and fasten the thread. -------------------------------------------------------- NAPKIN RING: Crochet 38 ch on hook size 3 mm with 1 thread Safran or DROPS ♥ You #7 + 2 threads Glitter and form a ring with 1 sl st in first ch. ROUND 1: 1 ch, 1 dc in sl st, 1 dc in next ch, skip 1 ch, * 1 dc in each of the next 4 ch, skip 1 ch *, repeat from *-* the entire round and finish with 1 sl st in first dc from beg of round = 30 dc. ROUND 2: 1 dc in every dc. ROUND 3: 4 ch (= 1 tr + 1 ch), * skip 1 dc, 1 tr in next dc, 1 ch *, repeat from *-* the entire round and finish with 1 sl st in 3rd ch from beg of round = 15 tr with 1 ch between each. ROUND 4: 1 ch, 1 dc in sl st, then work 1 dc in every ch and 1 dc between each tr the entire round, finish with 1 sl st in first dc from beg of round = 30 dc. Then work dc in the round with 1 dc in every st until piece measures 5 cm. WORK NEXT ROUND AS FOLLOWS: 2 ch, * skip 1 dc, 1 dc in next dc, 1 ch *, repeat from *-* the entire round and finish with 1 sl st in first ch from beg of round (= folding edge). WORK NEXT ROUND AS FOLLOWS: 1 ch, 1 dc in sl st, then work 1 dc in every ch and 1 dc between every dc the entire round, finish with 1 sl st in first dc from beg of round = 30 dc. Work 2 more rounds with 1 dc in every dc. Fold the upper part of the napkin ring out towards RS in the folding edge and work next round from RS as follows (= lace edge): * 5 ch, 1 tr in 2nd ch worked, 1 dtr in first ch worked, skip approx. 1½ cm, 1 dc in next st *, repeat from *-* the entire round and finish with 1 sl st in first dc from beg of round (instead of 1 dc in next st). Cut and fasten the thread. Work another lace edge in the opposite end of the napkin ring. Cut and fasten the thread. |
|
Have you finished this pattern?Tag your pictures with #dropspattern #dropsmylove or submit them to the #dropsfan gallery. Do you need help with this pattern?You'll find 6 tutorial videos, a Comments/Questions area and more by visiting the pattern on garnstudio.com. © 1982-2026 DROPS Design A/S. We reserve all rights. This document, including all its sub-sections, has copyrights. Read more about what you can do with our patterns at the bottom of each pattern on our site. |
|


With over 40 years in knitting and crochet design, DROPS Design offers one of the most extensive collections of free patterns on the internet - translated to 17 languages. As of today we count 325 catalogues and 12298 patterns translated into English (UK/cm). 12298
We work hard to bring you the best knitting and crochet have to offer, inspiration and advice as well as great quality yarns at incredible prices! Would you like to use our patterns for other than personal use? You can read what you are allowed to do in the Copyright text at the bottom of all our patterns. Happy crafting!
Post a comment to pattern DROPS Extra 0-747
We would love to hear what you have to say about this pattern!
If you want to leave a question, please make sure you select the correct category in the form below, to speed up the answering process. Required fields are marked *.