
Popular categories
Looking for a yarn?


Comments / Questions (98)
![]() Petra wrote:
Petra wrote:
Hallo, stricke in XL, habe Probl. bei dem A2 Muster am Arm, nach der ersten Runde mit den Mark.: halb. Rückteil endet mit A1 (U 1re), Mark, dann 41 M re( A2), Mark, A3 (U 1re) , 18 re M incl Zunahmen, 1re U (A1), Mark, 41Mre (A2), Mark, 1U (A3), 8M re incl Zunahme- wo beginne ich zu zählen, wenn die mittlere Masche rechts sein soll? Ist das die 20. M nach dem Marker? D.h., 2 re M und dann erst li, re etc- Die Ragl zun. A1/ A3 sind stets nur nach den Armen? DANKE!
10.01.2023 - 14:13DROPS Design answered:
Liebe Petra, A.2 wird über 41 Maschen gestrickt: die ersten 20 Maschen stricken Sie: (1 M rechts, 1 M kraus rechts)x10, die nächste Masche ist die erste Masche von A.2 = 1 Masche rechts, dann stricken Sie A.2 weiter bis alle 41 Maschen gestrickt sind, das Muster A.2 auf jeden Ärmel beginnt und endet mit der 1. Masche A.2 (und die mittlere Masche ist auch eine rechte Masche). Viel Spaß beim stricken!
11.01.2023 - 09:12
![]() Lia wrote:
Lia wrote:
Ciao, posso terminare le maniche con un lavoro a coste come fatto per il collo? nel caso devo diminuire la dimensione dei ferri e/o il numero di maglie? Grazie
14.09.2022 - 12:02DROPS Design answered:
Buonasera Lia, può diminuire il numero di ferri e se vuole le maniche più aderenti, anche il numero di maglie: le consigliamo di provare il lavoro e adattare la lavorazione. Buon lavoro!
14.09.2022 - 19:27
![]() Lia wrote:
Lia wrote:
Ciao, posso terminare le maniche con un lavoro a coste come fatto per il collo? nel caso devo diminuire la dimensione dei ferri e/o il numero di maglie? Grazie!
14.09.2022 - 12:01DROPS Design answered:
Buonasera Lia, può diminuire il numero di ferri e se vuole le maniche più aderenti, anche il numero di maglie: le consigliamo di provare il lavoro e adattare la lavorazione. Buon lavoro!
14.09.2022 - 19:28
![]() Eva wrote:
Eva wrote:
The middle of my 40 stitches sleeve is a purl sticht. I do a2 for 40 stichters and then I knit another Stich. I started with knitting as the pattern describes and i place a marker after my yarn over for A1. What am I doing wrong ?
29.08.2022 - 16:51DROPS Design answered:
Dear Eva, there are 41 sts in A.2 for the sleeve (= 40 sts worked in A.2 + the first stitch in A.2), this means the middle of these will be a stitch worked K in the diagram (=as the first stitch in diagram). The increases for the raglan are worked at the end of A.1 (before the marker at the end of back piece), then at the beg of front piece you work A.3 (after the marker); at the end of front piece you work A.1 (before the marker) and at the beg of back piece you work A.3 (after the marker). Can this help?
30.08.2022 - 08:36
![]() Gerda Jersombeck wrote:
Gerda Jersombeck wrote:
Hallo,ich kapiere es nicht:nach derHalsblende bei "S" insgesamt 4x1 Masche zunehmen, dann habe ich 104 Maschen auf der Nadel. alles in rechts stricken? und wie geht es dann weiter? Oder nach je 4 Maschen 1 Zunahme, dann wäre ich bei 125 Maschen? LG Gerda
14.08.2022 - 15:59DROPS Design answered:
Liebe Frau Jersombeck, in A.1 und A.3 nehmen Sie gleichzeitig für den Raglan zu: 4 M rechts stricken + 4 M zunehmen, A.1 (= 4+4 +1+1= 10 M. Halbes Rückenteil), Mark, 41 Maschen A.2 (=Armel), Mark., A.3 ( 1 M), 7 M rechts stricken + 7 M zunehmen, A.1 (= 1 M) (= 1+1 + 7+7 + 1+1 M = 18 M = Vorderteil), Mark, 41 M A.2 = 2. Ärmel), Markierungsfaden, A.3 (= 1 M), die nächsten 3 M. rechts stricken + 3 M zunehmen (= 1+1 +3+3= 8 M - 2. halbes Rückenteil) = so haben Sie: 10+41+18+41+8= 118 M. Viel Spaß beim stricken!
15.08.2022 - 08:40
![]() Vicki wrote:
Vicki wrote:
I think the measurement listed for size small is inconsistent. . The diagram says 48 cm which would be 96cm (37.8 ")chest not 86 cm.
22.05.2022 - 16:32
![]() MAGNAUDEIX wrote:
MAGNAUDEIX wrote:
Bonjour, je ne comprends pas quand il est dit "faire A1 ou A2 ou A3. Pouvez-vous m'aider ,
17.04.2022 - 14:51DROPS Design answered:
Bonjour Mme MAGNAUDEIX, A.1, A.2 et A.3 sont les diagrammes correspondant aux augmentations du dos et du devant (A.1 et A.3) et au point fantaisie des manches (A.2). Cette leçon explique comment lire des diagrammes et pourra ainsi vous aider. Bon tricot!
19.04.2022 - 11:12
![]() Sara wrote:
Sara wrote:
Ciao! Lavoro questo maglione in taglia S . LaVoro lo sprone e sono al punto che ho 118 maglie ho capito che in A2 lavoro le maniche , il resto come si lavora ? A1/A3 sono composti da 6 giri? Non capisco come si lavora . Attendo ! Grazie !!
11.01.2022 - 11:13DROPS Design answered:
Buonasera Sara, quando arriva a 118 maglie ha inserito i segnapunti per delimitare le maniche e il corpo, per cui lavora A.2 sulle maniche e per il resto lavora A.1 e A.3 come nel giro precedente e le altre maglie a diritto. Buon lavoro!
11.01.2022 - 21:46
![]() Carina wrote:
Carina wrote:
Ich habe noch eine Frage bitte! Ich bin jetzt mit A1 und A3 einmal durch, wenn ich wieder von vorne beginne, beginne ich da wieder an der Stelle der Markierten Masche von A1 und A3 oder am Übergang zum Ärmel mit der Aufnahme? Danke!
05.12.2021 - 09:25DROPS Design answered:
Liebe Carina, also ja die Diagramme werden immer vor/nach der Ärmel gestrickt, damit die Raglanzunahmen immer vor/nach dem Übergang gestrickt wird: A.1 wird vor der Markierung am Ende Rückenteil gestrickt, am Anfang Vorderteil stricken Sie A.3 (nach der Markierung), am Ende Vorderteil stricken Sie A.1 (vor der Markierung), und am Anfang Rückenteil stricken Sie A.3 (nach der Markierung). Viel Spaß beim stricken!
06.12.2021 - 09:12
![]() Carina wrote:
Carina wrote:
Hallo, ich verstehe beim Diagramm für Drops 206-48 die Strickschrift nicht, bei A1 und A3, was sollen die ovalen Markierungen zwischen den Kästchen bedeuten? Und bei A2 was bedeuten die eckigen umgefüllten Kästchen? Danke sehr!
30.11.2021 - 13:07DROPS Design answered:
Liebe Carina, dies sind Umschläge - siehe letzes Symbol unter Diagram text. Das 2. Symbol = Quadrat im Kästchen ist für 1 Maschen links. A.2 = 1 Masche glatt rechts, 1 Masche kraus rechts. In A.1 und A.2 werden die Umschläge verschränkt gestrickt um Löcher zu vermeiden. Viel Spaß beim stricken!
30.11.2021 - 16:45
|
||||||||||
Winter Wheat#winterwheatsweater |
||||||||||
 |
 |
|||||||||
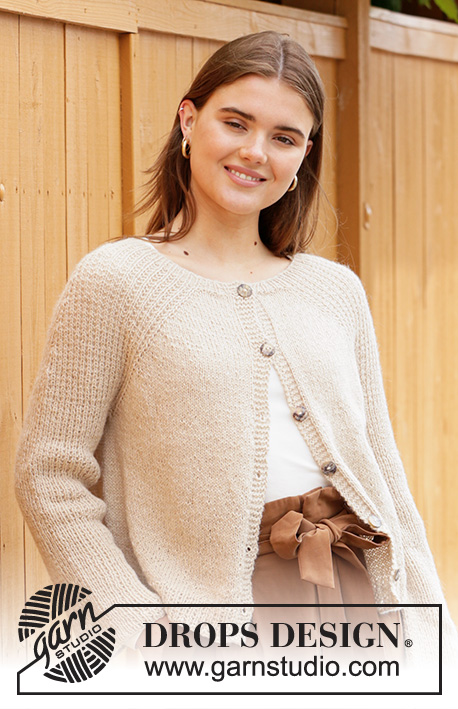
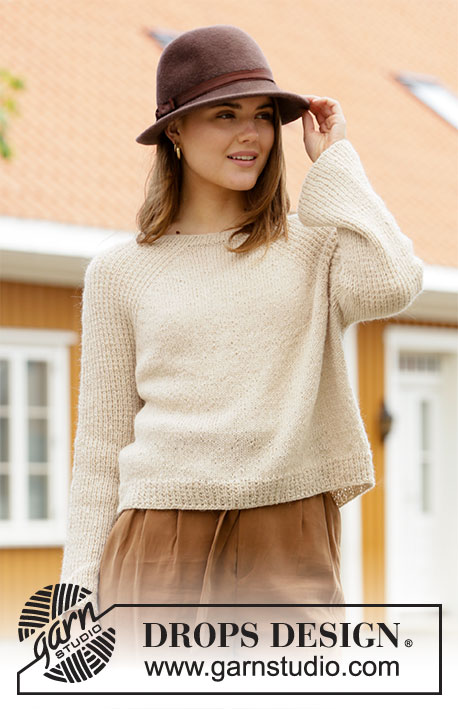
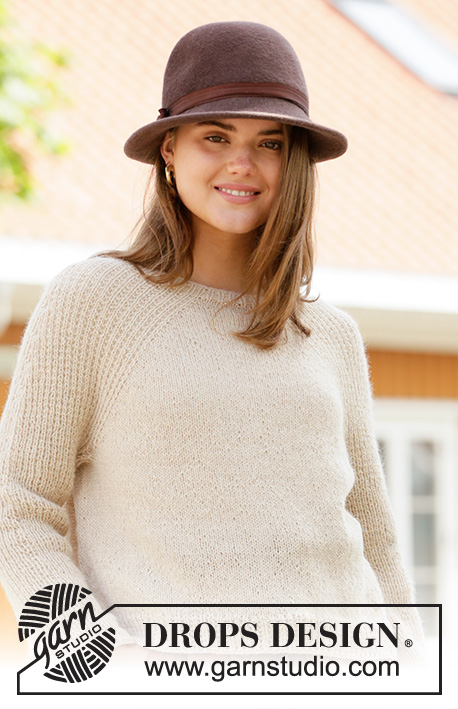
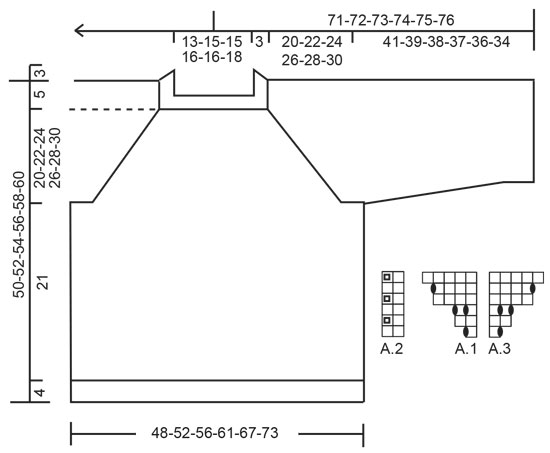
Knitted jumper with raglan in DROPS Puna or DROPS Soft Tweed. The piece is worked top down with textured pattern on the sleeves. Sizes S - XXXL.
DROPS 206-48 |
||||||||||
|
------------------------------------------------------- EXPLANATIONS FOR THE PATTERN: ------------------------------------------------------- PATTERN: See diagrams A.1 to A.3. INCREASE TIP (evenly spaced): To work out how to increase evenly, count the total number of stitches to be increased over (e.g. 4 stitches) and divide by the number of increases to be made (e.g. 4) = 1. In this example, increase by making 1 yarn over after each stitch. On the next round work the yarn overs twisted to avoid holes. INCREASE SLEEVES: Work as far as the mid-stitch on the sleeve (= stitch with marker), * knit 1, make 1 yarn over *, work from*-* a total of 2 times in the same stitch, knit 1 in the same stitch (= 4 stitches increased in the same stitch). Repeat on the other sleeve. The new stitches are worked into pattern A.2. DECREASE TIP (for sleeves): Decrease in the different sizes as follows: Sizes L and XXXL: Work until there are 2 stitches left before the stitch with the marker, knit 2 together, purl 1 (marker in this stitch), slip 1 stitch as if to knit, knit 1 and pass the slipped stitch over (= 2 stitches decreased). Sizes XL and XXL: Work until there are 3 stitches left before the stitch with the marker, knit 2 together, knit 3 (marker in the middle stitch of these 3), slip 1 stitch as if to knit, knit 1 and pass the slipped stitch over (= 2 stitches decreased). ------------------------------------------------------- START THE PIECE HERE: ------------------------------------------------------- JUMPER – SHORT OVERVIEW OF THE PIECE: The piece is worked in the round with circular needle, top down. The sleeves are worked in the round with double pointed needles/short circular needle. Stocking stitch is worked on the front and back pieces, textured pattern on the sleeves. NECK: Cast on 100-108-108-116-116-124 stitches with circular needle size 3 mm and Puna. Knit 1 round then work rib (= knit 1 / purl 1) in the round for 3 cm. Insert a marker here. THE PIECE IS NOW MEASURED FROM HERE! YOKE: Change to circular needle size 4.5 mm and work pattern as follows: Knit the first 4-6-6-8-8-10 stitches and increase at the same time 4-2-4-2-5-4 stitches evenly spaced – read INCREASE TIP, work A.1 over the next stitch, insert a marker thread here (= transition between half back piece and right sleeve), work A.2 over the next 40 stitches, work the first stitch in A.2, insert a marker thread here (= transition between right sleeve and front piece), work A.3 over the next stitch, knit 7-11-11-15-15-19 stitches and increase at the same time 7-4-7-3-9-7 stitches evenly spaced, A.1 over the next stitch, insert a marker thread here (= transition between front piece and left sleeve), work A.2 over the next 40 stitches, work the first stitch in A.2, insert a marker thread here (= transition between left sleeve and half back piece), work A.3 over the next stitch, knit 3-5-5-7-7-9 stitches and increase at the same time 3-2-3-1-4-3 stitches evenly spaced = 118-120-126-126-138-142 stitches on the needle. There is now 1 marker thread in each transition between body and sleeves (= 4 marker threads). Insert 1 marker in the mid-stitch on each sleeve (= knitted stitch). REMEMBER THE KNITTING TENSION! Continue in the round with pattern A.2 between the marker threads on the sleeves and A.1/A.3 + stocking stitch over the stitches on the front and back pieces – AT THE SAME TIME on round 3 in A.1/A.3 start INCREASE SLEEVES – read description above (= 4 stitches increased on each sleeve). Increase like this every 8th-8th-6th-6th-4th-4th round a total of 6-7-10-11-13-14 times. When A.1 and A.3 have been completed in height continue to repeat towards the raglan-lines 7-8-9-10-11-12 more times (a total of 8-9-10-11-12-13 times), then work the first 3-3-1-1-0-0 rounds in the diagrams. When all the increases to sleeves and front and back pieces are finished there are 302-328-366-390-430-458 stitches on the needle (24-28-40-44-52-56 stitches increased on each sleeve and 35-39-41-45-48-52 stitches increased on each side of the front and back pieces). The piece now measures 20-22-24-26-28-30 cm from the marker on the neck. If the piece is shorter than this continue working to the correct length. The next round is worked as follows: Work the first 44-48-52-56-62-67 stitches (= approx. half back piece), place the next 65-69-81-85-93-97 stitches on 1 thread for sleeve and cast on 9-9-9-11-11-13 new stitches on the needle (= in side under the sleeve), work the next 86-95-102-110-122-132 stitches (= front pieces), place the next 65-69-81-85-93-97 stitches on 1 thread for sleeve and cast on 9-9-9-11-11-13 new stitches on the needle (= in side under the sleeve) and work the remaining 42-47-50-54-60-65 stitches (= approx. half back piece). Body and sleeves are finished separately. THE PIECE IS NOW MEASURED FROM HERE! BODY: There are 190-208-222-242-266-290 stitches on the body. Continue in the round with stocking stitch until the piece measures 21 cm. Work an edge with pattern A.2 in the round. When the edge measures 4 cm, Cast off with knit over knit and purl over purl. The jumper measures approx. 50-52-54-56-58-60 cm from the shoulder down. SLEEVE: Place the 65-69-81-85-93-97 stitches from the thread on the one side of the piece on short circular needle size 4.5 mm and knit up 1 stitch in each of the 9-9-9-11-11-13 stitches cast on under the sleeve = 74-78-90-96-104-110 stitches. Work pattern A.2 in the round as before. The pattern should fit on the round. Work as follows in the different sizes: Sizes S, M: Work textured pattern until the sleeve measures 41-39 cm from the division. Cast off with knit over knit and purl over purl. Sizes L, XL, XXL and XXXL: Work textured pattern until the sleeve measures 4 cm from the division. Insert a marker in the middle stitch under the sleeve. On the next round begin to decrease under the sleeve – read DECREASE TIP. Decrease like this every 2nd round a total of 4-4-4-4 times = 82-88-96-102 stitches. Continue with textured pattern until the sleeve measures 38-37-36-34 cm. Cast off with knit over knit and purl over purl. Work the other sleeve in the same way. |
||||||||||
Diagram explanations |
||||||||||
|
||||||||||
 |
||||||||||
Have you finished this pattern?Tag your pictures with #dropspattern #winterwheatsweater or submit them to the #dropsfan gallery. Do you need help with this pattern?You'll find 26 tutorial videos, a Comments/Questions area and more by visiting the pattern on garnstudio.com. © 1982-2026 DROPS Design A/S. We reserve all rights. This document, including all its sub-sections, has copyrights. Read more about what you can do with our patterns at the bottom of each pattern on our site. |
||||||||||


With over 40 years in knitting and crochet design, DROPS Design offers one of the most extensive collections of free patterns on the internet - translated to 17 languages. As of today we count 324 catalogues and 12290 patterns translated into English (UK/cm). 12290
We work hard to bring you the best knitting and crochet have to offer, inspiration and advice as well as great quality yarns at incredible prices! Would you like to use our patterns for other than personal use? You can read what you are allowed to do in the Copyright text at the bottom of all our patterns. Happy crafting!
Post a comment to pattern DROPS 206-48
We would love to hear what you have to say about this pattern!
If you want to leave a question, please make sure you select the correct category in the form below, to speed up the answering process. Required fields are marked *.