
Popular categories
Looking for a yarn?


Comments / Questions (58)
![]() Sheila wrote:
Sheila wrote:
Would this pattern work using a yarn in Cat C (aran/worsted) ?
10.10.2018 - 21:35DROPS Design answered:
Dear Sheila, this jumper is worked with 1 yarn group B (Karisma) and 1 yarn group A (Kid-silk), the tension maybe different than with 1 yarn group C - you still can make a swatch to check your tension but the texture may look different. Happy knitting!
11.10.2018 - 09:03
![]() Lise-Lotte wrote:
Lise-Lotte wrote:
Är det rätt uppfattat att man räknar första varvet efter uppläggning som avigsida i denna beskrivning?
22.09.2018 - 12:03DROPS Design answered:
Hej Lise-Lotte, ja det är rätt uppfattat :)
24.09.2018 - 09:38
![]() Anne Lise wrote:
Anne Lise wrote:
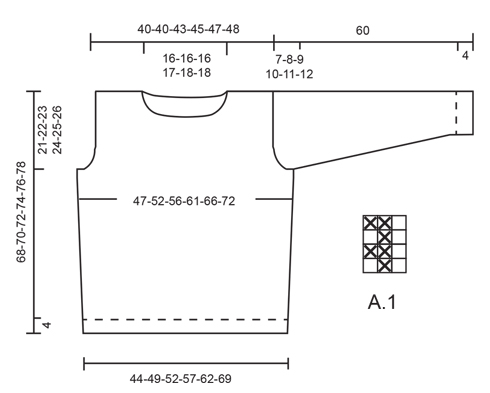
Bonjour, Je ne comprend pas comment tricoter le schéma A1 du model, quant je le fait cela ne me donne pas du tout la même chose que sur le model. Pouvez m'aider ?
17.09.2018 - 15:57DROPS Design answered:
Bonjour Anne-Lise, tricotez bien les mailles comme indiqué, soit ainsi: Rg 1 (= sur l'endroit): 1 m end, 1 m env, 1 m end (on lit de droite à gauche). Rg 2 (= sur l'envers): 2 m end, 1 m env (= on lit de gauche à droite). Répétez ces 2 rangs. Bon tricot!
17.09.2018 - 17:44Jan wrote:
How many stitches do I have left to cast off on the sleeve, size M? My sleeve looks a little strange at the top and i’m not sure that I understood the decreasing rows correctly.
28.05.2018 - 20:11DROPS Design answered:
Dear Jan, cast off at beg of every row in each side: 4 sts 1 time, 2 sts 3 times and 1 st 2 times. Then continue casting off 2 sts in each side (= both from RS and WS) until sleeve measures 59 cm (number of times will depend on your tension in height, just make sure you cast off the same number of sts on each sde) , then cast off 3 sts 1 time in each side and cast off the remaining sts. Happy knitting!
29.05.2018 - 08:48
![]() Stefania Ghelardi wrote:
Stefania Ghelardi wrote:
Vorrei sapere se il modello si puo eseguire anche von ferri tradizionali e non circolari? Grazie
30.01.2018 - 19:37DROPS Design answered:
Buonasera Stefania. Le istruzioni sono per una lavorazione in ferri di andata e ritorno. Può usare i ferri dritti e seguire le spiegazione senza apportare modifiche. Buon lavoro!
30.01.2018 - 19:50Michal Woods wrote:
I have knitted for over 40 years and this pattern is a mystery to me. I do not understand how the A1 sequence works and creates the rib pattern. I have tried and tried every way possible. Does the diagram supposed to illustrate the sequence on 4 rows? Maybe there is just too much lost in translation. Please help if you can. Thanks! Michal
19.11.2017 - 04:48DROPS Design answered:
Dear Mr Woods, A.1 is worked back and forth starting from RS at the bottom corner on the RS: Row 1 (RS, read from the right towards the left): K1, P1, K1. Row 2 (WS, read from the left towards the right): K2, P1. And repeat these 2 rows. Happy knitting!
20.11.2017 - 10:16
![]() Wil Taal wrote:
Wil Taal wrote:
Ik snap het niet, bij de omschrijving staat Zet 81-90-96-105-114-126 st op (incl. 1 kant st in ribbelst aan elke kant) met 1 draad Karisma en 1 draad Kid-Silk (= 2 draden), maar er staat nergens dat je alleen met Karisma verder moet gaan. Als het hele werk met 2 draden wordt gebreid, kom je toch Kid-Slik te kort ?
07.10.2017 - 21:22DROPS Design answered:
Hallo Wil, Kid silk is heel dun garen en wordt verkocht in bollen van 25 gram met een looplengte van 200 meter. Karisma wordt verkocht in bollen van 50 gram met een looplengte van 100 meter. Dus je hebt genoeg aan 150 gr kidsilk met 600 gram karisma. (maat S als voorbeeld genomen)
08.10.2017 - 19:49Jude Foster wrote:
I'm not understanding The main pattern in the body of the jumper and the vertical line of plain is not lining up ? Is there any video support ?
10.09.2017 - 10:49DROPS Design answered:
Dear Jude, you can find all the videos that can support the making of this sweater here. Happy Knitting!
10.09.2017 - 11:52
|
|||||||
Beaver Ridge#beaverridgesweater |
|||||||
 |
 |
||||||
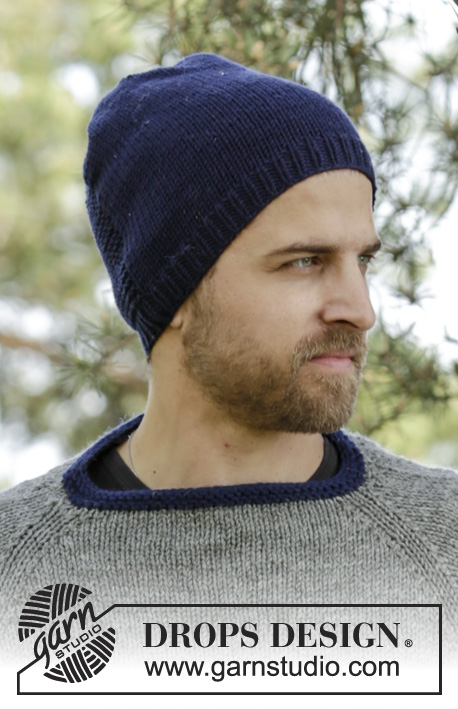
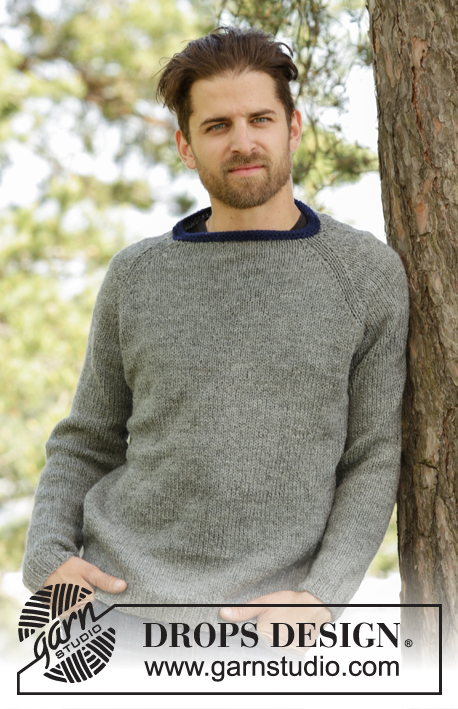
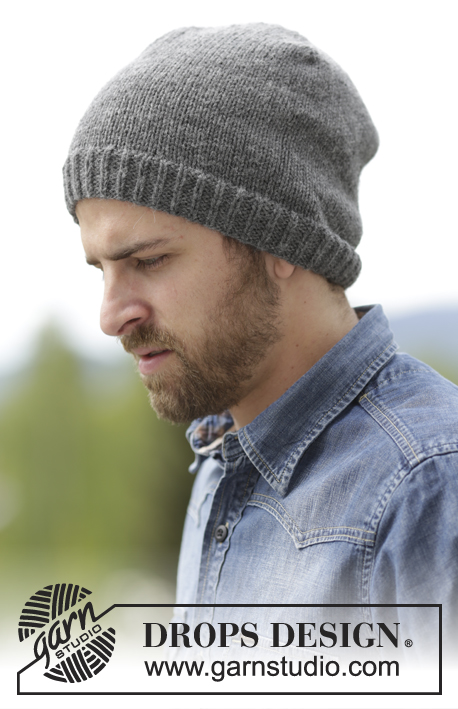
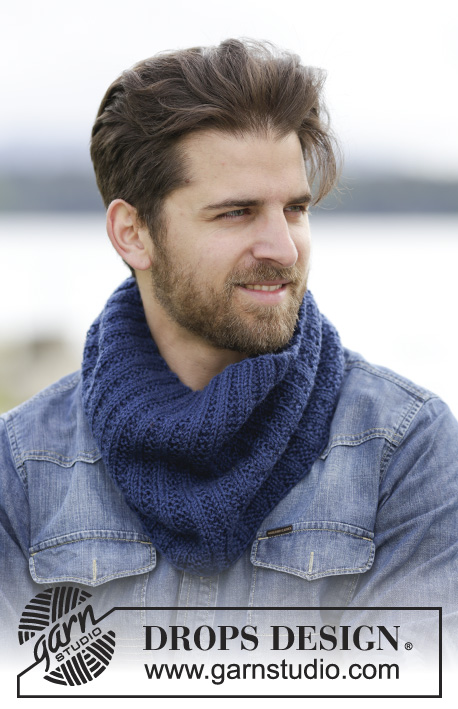
Knitted DROPS men’s jumper with textured pattern in Karisma and Kid-Silk. Size S- XXXL
DROPS 174-16 |
|||||||
|
GARTER ST (back and forth): K all rows. 1 ridge = 2 rows K. INCREASE TIP: All inc are done from RS. Inc 1 st by making a YO. On next row work YOs twisted. Then work the new sts in pattern A.1. PATTERN: See diagram A.1. The diagram shows all rows in pattern seen from RS. ---------------------------------------------------------- JUMPER: Worked back and forth on circular needle and sewn tog when finished. BACK PIECE: Cast on 81-90-96-105-114-126 sts (incl 1 edge st in garter st in each side) with 1 strand Karisma + 1 strand Kid-Silk (= 2 strands) on circular needle size 4.5 mm . P 1 row from WS. Then work rib from RS as follows: 1 edge st in GARTER ST - see explanation above - * K 1, P 2 *, repeat from *-* until 2 sts remain, K 1 and 1 edge st in garter st. When rib measures 4 cm (adjust so that last row is worked from WS), switch to circular needle size 5.5 mm. Work pattern from RS as follows: 1 edge st in garter st, A.1 (= 3 sts) 26-29-31-34-37-41 times in width, K 1 (= first st in A.1), 1 edge st in garter st. REMEMBER THE KNITTING TENSION When piece measures 15-16-15-16-15-16 cm, inc 1 st inside 1 edge st in garter st in each side - read INCREASE TIP. Inc like this every 14-14-15-15-16-16 cm 3 times in total = 87-96-102-111-120-132 sts. When piece measures 47-48-49-50-51-52 cm, cast off 3 sts at beg of the next 2 rows for armholes = 81-90-96-105-114-126 sts on needle. Continue pattern as before with 1 edge st in garter st in each side and cast off sts for armhole at beg of every row in each side as follows: 2 sts 1-3-3-3-5-7 times and 1 st 1-1-1-3-3-3 times = 75-76-82-87-88-92 sts. When piece measures 66-68-70-72-74-76 cm, slip the middle 27-28-28-29-30-30 sts on a stitch holder for neck and finish each shoulder separately. On next row from the neck, cast off 1 st = 23-23-26-28-28-30 sts remain on each shoulder. Cast off when piece measures 68-70-72-74-76-78 cm. FRONT PIECE: Cast on and work as back piece. When piece measures 61-63-64-66-67-69 cm, slip the middle 15-16-16-17-18-18 sts on a stitch holder for neck and finish each shoulder separately. Then cast off for neck on every row from neck as follows: Cast off 2 sts 3 times and 1 st 1 time = 23-23-26-28-28-30 sts remain on each shoulder. Cast off when piece measures 68-70-72-74-76-78 cm. SLEEVES: The sleeves are worked back and forth on circular needle. Cast on 51-54-54-57-57-60 sts (incl 1 edge st in each side) with 1 strand Karisma + 1 strand Kid-Silk (= 2 strands) on circular needle size 4.5 mm . P 1 row from WS. Then work as follows (seen from RS): 1 edge st in garter st, * K 1, P 2 *, repeat from *-* until 2 sts remain, K 1(= first st in A.1), 1 edge st in garter st. When piece measures 4 cm, switch to circular needle size 5.5 mm. Continue with pattern from RS as follows: 1 edge st in garter st, A.1 until 2 st remains, K 1, 1 edge st in garter st. When piece measures 9-9-9-8-10-10 cm, inc 1 st in each side. Repeat inc every 5-5-3½-3½-2½-2½ cm a total of 9-9-12-12-15-15 times = 69-72-78-81-87-90 sts – work the inc sts gradually in diagram A.1. When piece measures 53-52-51-50-49-48 cm (shorter measurements in the larger sizes because of longer sleeve cap and wider shoulders) cast off at beg of every row in each side: 4 sts 1 time, 2 sts 3 times and 1 st 1-2-4-5-7-8 times. Then cast off 2 sts in each side until piece measures 59 cm, then cast off 3 sts 1 time in each side. Cast off, the piece measures approx. 60 cm in all sizes. Knit another sleeve the same way. ASSEMBLY: Sew the shoulder seams. Sew sleeves in body. Then sew underarm seam and side seam inside 1 edge st in garter st. NECK EDGE: Now pick up sts around the neck with 1 strand Karisma + 1 strand Kid-Silk (= 2 strands) as follows: Pick up approx. 80-90 sts on circular needle size 4.5 mm around the neck - NOTE: Adjust to pick a no of sts between sts on stitch holders on front piece and back piece that fit rib (K 1/P 2) the entire round. I.e. total no of sts is divisible by 3 and over sts from stitch holders work K over K and P over P over sts in P and garter st. Work rib = K 1/P 2 until rib measures approx. 4 cm. Cast off sts with K over K and P over P. Fasten off. |
|||||||
Diagram explanations |
|||||||
|
|||||||
 |
|||||||
Have you finished this pattern?Tag your pictures with #dropspattern #beaverridgesweater or submit them to the #dropsfan gallery. Do you need help with this pattern?You'll find 22 tutorial videos, a Comments/Questions area and more by visiting the pattern on garnstudio.com. © 1982-2026 DROPS Design A/S. We reserve all rights. This document, including all its sub-sections, has copyrights. Read more about what you can do with our patterns at the bottom of each pattern on our site. |
|||||||


With over 40 years in knitting and crochet design, DROPS Design offers one of the most extensive collections of free patterns on the internet - translated to 17 languages. As of today we count 324 catalogues and 12290 patterns translated into English (UK/cm). 12290
We work hard to bring you the best knitting and crochet have to offer, inspiration and advice as well as great quality yarns at incredible prices! Would you like to use our patterns for other than personal use? You can read what you are allowed to do in the Copyright text at the bottom of all our patterns. Happy crafting!
Post a comment to pattern DROPS 174-16
We would love to hear what you have to say about this pattern!
If you want to leave a question, please make sure you select the correct category in the form below, to speed up the answering process. Required fields are marked *.