
Popular categories
Looking for a yarn?


Comments / Questions (486)
![]() Kim S wrote:
Kim S wrote:
I'm currently working on the s/m size pattern. I keep having issues - after the binding off for arm holes- I work round 14 with no problem but then get to round 15 & following directions, I end up with only 85 TR's--with a remainder of 4 TR spaces till I should slip stitch. I have pulled this out 4-5 times now & keep having the same issue every time. HELP!
06.11.2015 - 00:39DROPS Design answered:
Dear Kim S, on round 14 you have 256 tr. Work round 15 as follows: 1 tr over next tr, then repeat *3ch, skip 2 tr, 1 tr over next tr* repeat from *-* a total of 85 times around = 85 tr + first tr on round = 86 tr. Happy crocheting!
06.11.2015 - 13:05
![]() Nancy Klinesmith wrote:
Nancy Klinesmith wrote:
Love the little girls pattern in the picture of Moonlight Mist. But in looking you state it isn't available. If so, then why do you show it being modeled on little girls? Take those pictures off. It is so annoying looking and looking and then finding out it is not available!
01.11.2015 - 17:13
![]() Mary Williams wrote:
Mary Williams wrote:
I checked all the yarns and would like to use Drops Cotton for this pattern. Can I do that and how many skeins do you suggest? Thanks
01.11.2015 - 15:10DROPS Design answered:
Dear Mrs Williams, please find here all relevant information about alternatives and calculation of new amount of yarn. Happy crocheting!
02.11.2015 - 09:03Andrea wrote:
3rd round is only 12 dtr why does it go from 24 dtr in round 2 the 12 dtr in round 3 then 36 dtr in round 4? This doesn't make sense. Please explain. Thank you
29.10.2015 - 19:09DROPS Design answered:
Dear Andrea, at the end of round 3, you have 12 dtr with 3 ch between each dtr = 12 dtr + 12 3-ch-spaces. On round 4, you work 3 dtr in each dtr, with 3 ch between each dtr-group = 3 dtr x 12 dtr from round 3 = 36 dtr + 12 3-ch-spaces. Happy crocheting!
30.10.2015 - 09:49
![]() Sara Batt wrote:
Sara Batt wrote:
Corrections: (All rounds begin with ch 4, and add additional ch to it if required.) (Round 5, 8, 11, 14: only 1 tr in ch 2 space.) (Armholes for s/m are made by 1 tr, *26 ch, in 26th stitch from ch make tr, ch 3, tr for total of 14 tr, and 13 ch 3's*. End with 3 ch 26, and 38 tr.)
28.10.2015 - 19:04
![]() Donna Keller wrote:
Donna Keller wrote:
I am starting round 14 for the second time and the pattern says: Repeat rounds 14, 15 and 16 "WITH INC.". Does this mean that each time you finish a round you will automatically increase stitches, or do you have to increase your stitches? And if so, where on the pattern do you make the increases? Thanks.
28.10.2015 - 17:19DROPS Design answered:
Dear Mrs Keller, repeating these rounds, you will automatically increase number of sts and circle will be always larger. Work each of these rounds as stated (1 dtr in each dtr and 1 dtr in eeach ch-loop every time you work round 14, etc..). Happy crocheting!
28.10.2015 - 18:30Anne wrote:
I cannot wear wool so I want to use another yarn for this. Would you please advise what yarn weight the Alpaca Uni and Alpaca Mix is, as in fingering, DK, sport, or worsted? Thank you.
28.10.2015 - 07:01DROPS Design answered:
Dear Anne, please click here for all informations about thickness and yarns, you will find here some relevant informations about the alternatives - and remember your DROPS store will help you with individual assistance. Happy crocheting!
28.10.2015 - 11:40
![]() Brandi Lafleur wrote:
Brandi Lafleur wrote:
I am struggling with the starting of the arm holes I am making the larger size I know the arm holes begin at row 14 so do I complete row 12/ 13 before i make the arm holes
28.10.2015 - 05:12DROPS Design answered:
Dear Mrs Lafleur, in size XL, work circle until round 13 including, then work round 14 and 15 according to next paragraph "bind off for armholes as follows:/size XL". Then continue on round 16 as under "circle". Happy crocheting!
28.10.2015 - 11:30DEbbie O. wrote:
I have 192 tr but on the next round I'm not getting 48 only 41. Then where is round 14 for s/m ?
26.10.2015 - 02:49DROPS Design answered:
Dear Debbie O., you should have 192 tr at the end of round 11, and 48 tr at the end of round 12, 292 tr at the end of round 13 then read round 14,15 and 16 from "circle". Happy crocheting!
27.10.2015 - 15:21
![]() Diana wrote:
Diana wrote:
How do I measure to determine size?
25.10.2015 - 17:36DROPS Design answered:
Dear Diana, you will find at the bottom of the pattern all measurements for each size, -taken flat from side to side. Compare these to a similar garment you have and like the shape to find out the matching size - read more here. Happy crocheting!
26.10.2015 - 11:35
|
|
Moonlight Mist#moonlightmistjacket |
|
 |
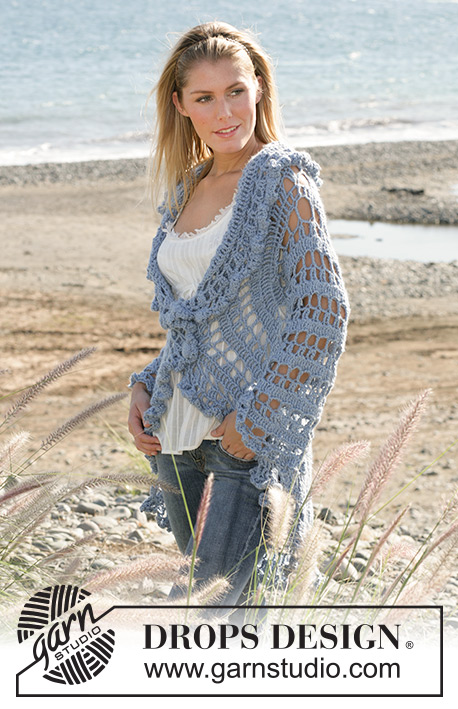 |
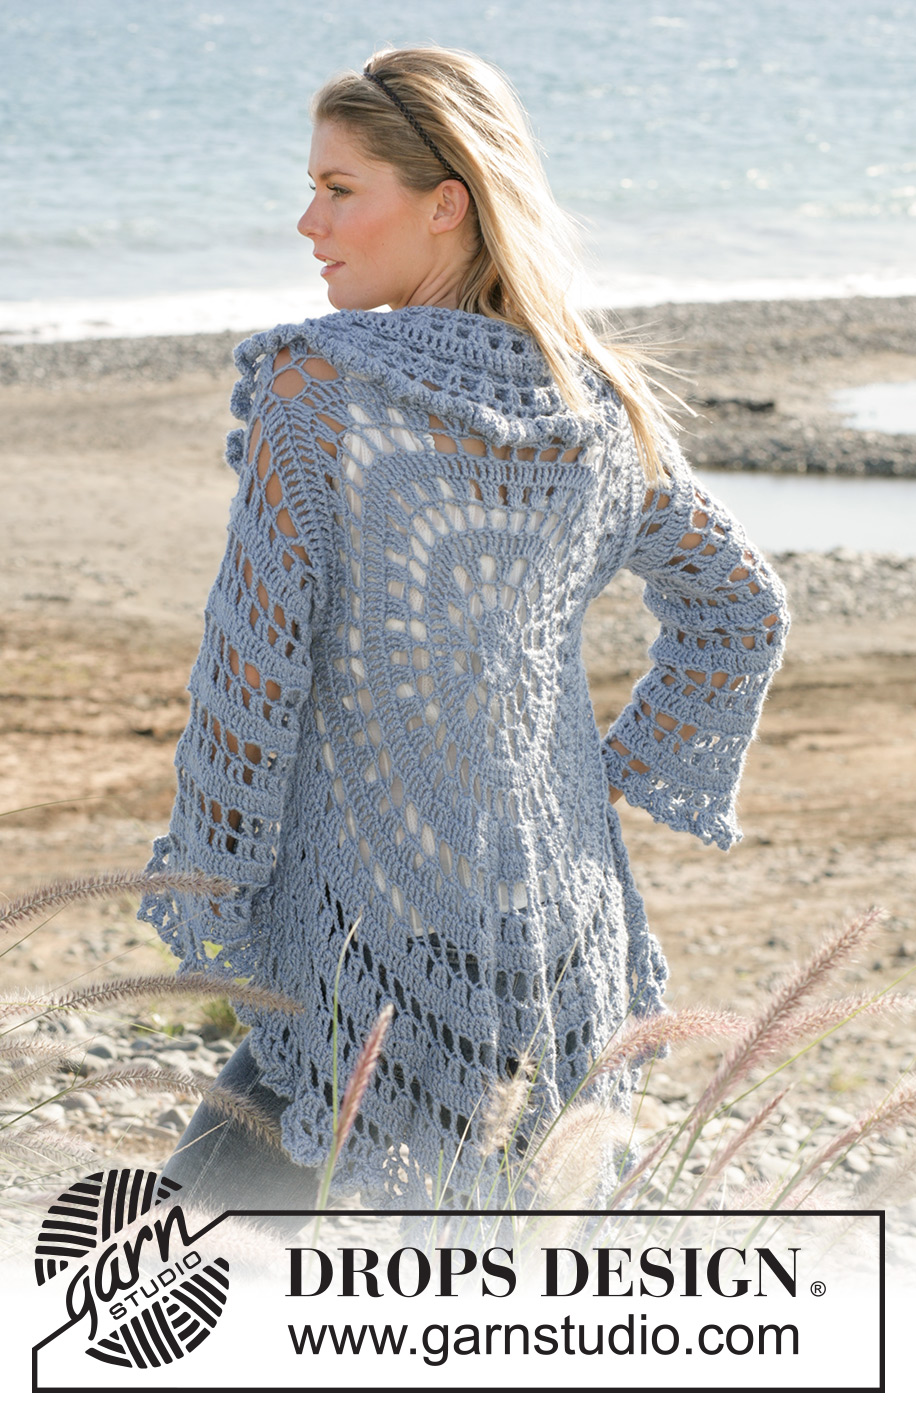
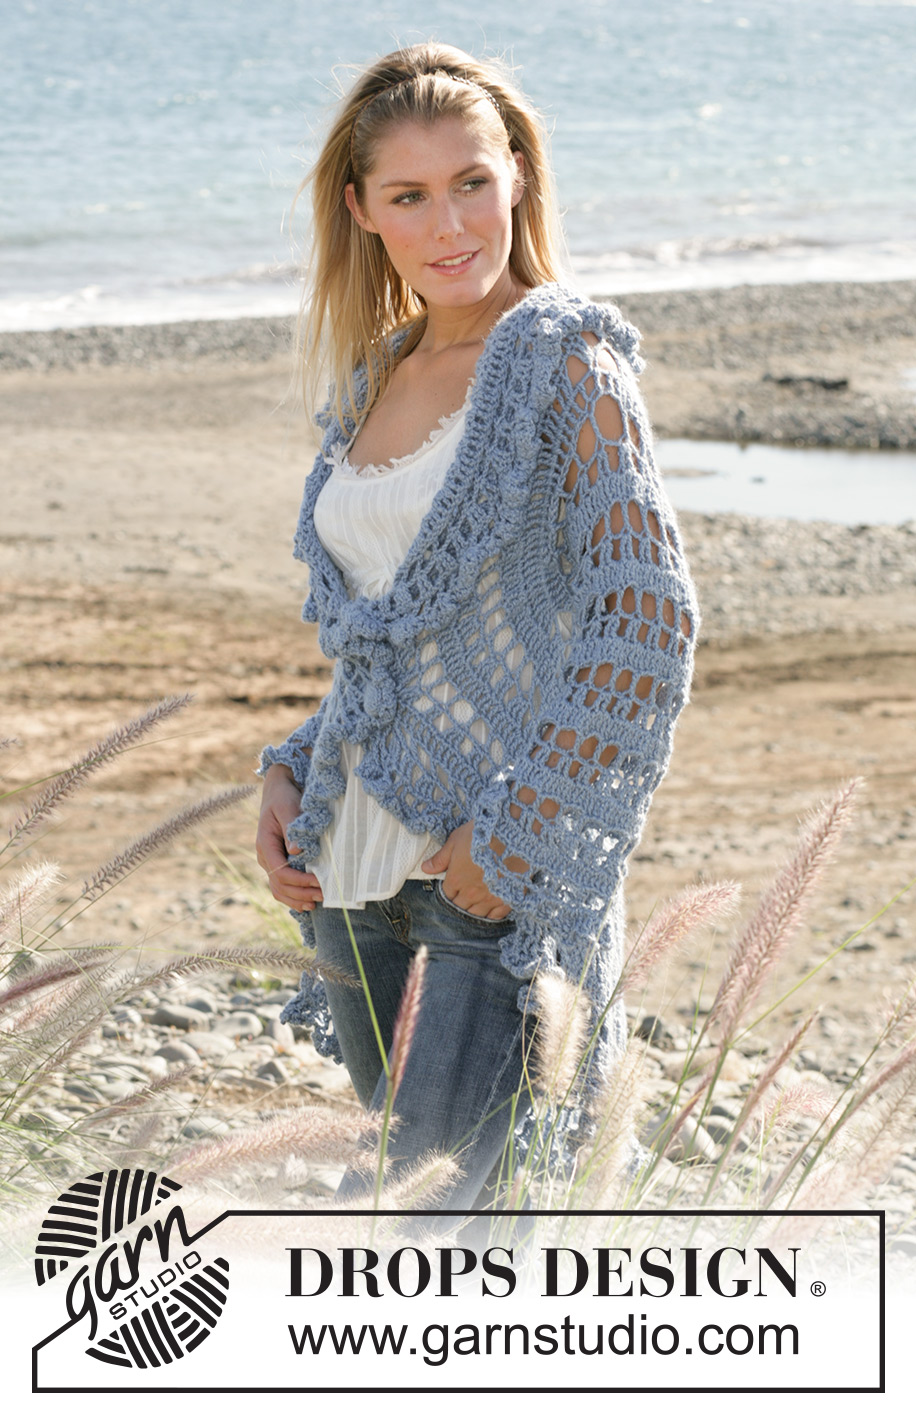
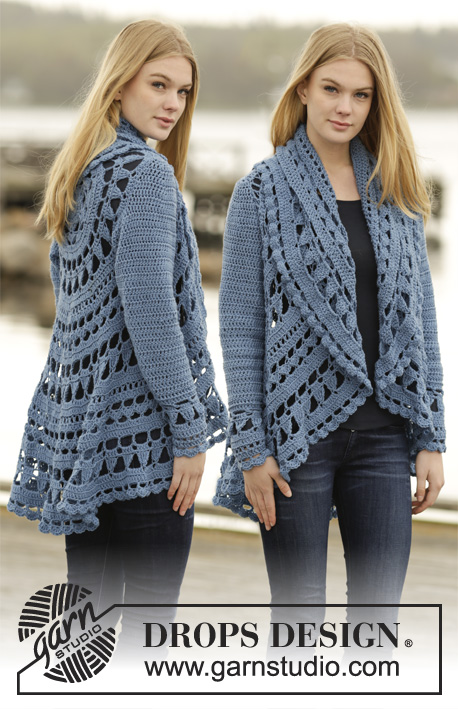
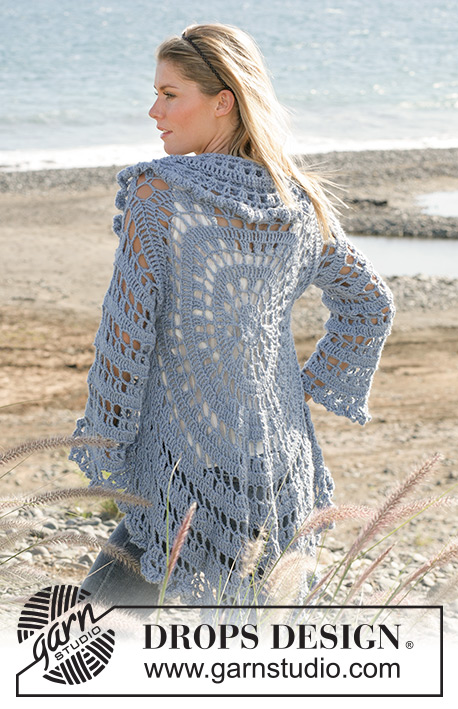
DROPS circle jacket crochet with 2 strands “Alpaca”. Sizes S-XL
DROPS 99-3 |
|
|
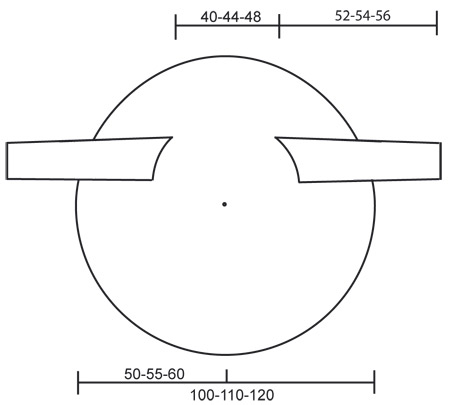
Crochet the jacket according to the explanations for the circle. Start to cast off for the armholes on the 12-13-14 round. Crochet 2 rounds according to the explanation for cast off for armholes, then continue to crochet according to explanation for the circle. Crochet tension: 3 rows in the circle using hook size 6 mm and 2 strands Alpaca measures 6.5 cm. After 5th round the circle measures 20 cm in diameter. Crochet info: Substitute the first dtr each round with 4 ch. Finish each round with a sl st at beg of round. Measurement tips: Because of the weight of the yarn, all measurements should be made whilst the garment is hanging, otherwise the sleeves will be too long when wearing the jacket. ------------------------------------------------------- CIRCLE: Crochet 4 ch with 2 strands Alpaca and make a ring with a sl st in the first ch. 1st round: Crochet 8 dc around the ring 2nd round: Read crochet info! Crochet 3 dtr in each dc. Finish with a sl st at beg. of round = 24 dtr 3rd round: Crochet 1 dtr, *3 ch, skip 1 dtr, 1 dtr in the next dtr*, repeat from *-* and finish with 3 ch and 1 sl st at the beg. of round = 12 dtr. 4th round: Crochet 3 dtr in the first dtr *3 ch, skip 3 ch, 3 dtr in the next dtr*, repeat from *-* and finish with 3 ch, skip 1 dtr and 1 sl st at beg. of round = 36 dtr. 5th round: Crochet 1 dtr in each dtr and 3 dtr in each ch-loop = 72 dtr. The circle now measures approx. 20 cm in diameter. 6th. round: Crochet 1 dtr in the first dtr, *3 ch, skip 1 dtr, 1 dtr in the next dtr*, repeat from *-* and finish with 3 ch, skip 1 dtr and a sl st at beg. of round = 36 dtr 7th. round: Crochet 3 dtr in the first dtr,* 2 ch, skip 3 ch, 3 dtr in the next dtr*, repeat from *-* and finish with 2 ch, skip 3 ch and a sl st at beg. of round = 108 dtr. 8th round: Crochet 1 dtr in each dtr and 1 dtr in each ch-loop = 144 dtr. 9th round: Crochet 1 dtr in the first dtr, *3 ch, skip 2 dtr, 1 dtr in the next dtr*, repeat from *-* and finish with 3 ch, skip 2 dtr and a sl st at beg. of round = 48 dtr 10th round: Crochet 3 dtr in the first dtr *1 ch, 3 dtr in the next dtr*, repeat from *-* and finish with 1 ch and a sl st at beg. of round = 144 dtr. 11th round: Crochet 1 dtr in each dtr and 1 dtr in each ch-loop = 192 dtr. Remember to cast off for armholes for size S/M – read cast off explanation for round 12 and 13 below! 12th round: *1 dtr, 3 ch, skip 2 dtr*, repeat from *-* until finish round = 64 dtr. Remember to cast off for armholes for size M/L – read cast off explanation for round 13 and 14 below! 13th round: 3 dtr in the first dtr, *2 ch, 3 dtr in the next dtr*, repeat from *-* = 192 dtr. Remember to cast off for armholes for size XL – read cast off explanation for round 14 and 15 below! 14th round: 1 dtr in each dtr, 1 dtr in each ch-loop = 256 dtr. 15th round: 1 dtr in the first dtr, *3 ch, skip 2 dtr, 1 dtr in the next dtr*, repeat from *-* until finish round = 86 dtr. 16th round: 3 dtr in the first dtr, *2 ch, 2 dtr in the next dtr, 2 ch, 3 dtr in the next dtr*, repeat from *-* until finish round = 215 dtr. Repeat round 14, 15 and 16 with inc. until the circle measures 100-110-120 cm in diameter. CAST OFF for armholes as follows: Size S/M: Crochet armholes according to round 12 below. 12th round: Crochet 1 dtr, 26 ch, skip over 26 dtr, *1 dtr, 3 ch, skip over 2 dtr*, repeat from *-* a total of 14 times, 1 dtr, 26 ch, skip 26 dtr, *1 dtr, 3 ch, skip 2 dtr*, repeat from *-* until finish round = 48 dtr. 13th round: Crochet as follows over the 26 ch’s: *3 dtr, 2 ch*, a total of 8 times. Over the dtr crochet as follows: *3 dtr in each dtr, 2 ch*, repeat from *-* = 192 dtr. Continue on round 14 as explained above. Size M/L: Crochet arm holes according to round 13 below. 13th round: 3 dtr in the first dtr, 30 ch, skip over (1 dtr and 3 ch) a total of 7 times, 3 dtr in the following dtr, *2 ch, 3 dtr in the next dtr*, repeat from *-* a total of 15 times, 30 ch, skip over (1 dtr and 3 ch) a total of 7 times, *2 ch, 3 dtr in the next dtr*, repeat from *-* until finish round = 150 dtr. 14th. round: Crochet as follows over the 30 ch’s: 28 dtr. Over the dtr and the ch-loops crochet as follows: 1 dtr in each dtr, 1 dtr in each ch-loop = 256 dtr. Continue on round 15 as explained above. Size XL: Crochet the armholes according to round 14 below: 14th round: 34 ch, skip over (3 dtr and 2 ch) a total of 8 times, *1 dtr in each of the next 3 dtr, 1 dtr in the next ch-loop*, repeat from *-* a total of 16 times, 34 ch, skip over (3 dtr and 2 ch) a total of 8 times *1 dtr in each of the next dtr, 1 dtr in the next ch-loop*, repeat from *-* until finish round = 192 dtr. 15th round: Crochet as follows over the 34 ch: *1 dtr, 3 ch*, repeat from *-* a total of 11 times. Over dtr crochet as follows: 1 dtr, *3 ch, skip over 2 dtr, 1 dtr in the next dtr*, finish with a dtr in the last dtr = 86 dtr. Continue on round 16 as explained above. SLEEVES: Crochet the sleeves from the armholes and down with 2 strands Alpaca. Crochet around. Remember the crochet info! 1st round: Crochet 52-60-68 dtr around the armhole from the circle and finish with a sl st in the first dtr from beg. of round. 2nd round: Crochet 1 dtr in the first dtr, *3 ch, skip over 3 dtr, 1 dtr in the next dtr*, repeat from *-* and finish with: Skip over 3 ch and 1 sl st in the first dtr = 13-15-17 dtr. 3rd round: Crochet 2 dtr in the first dtr, *1 ch, skip over 3 ch, 2 dtr in the next dtr*, repeat from *-* and finish with: 1 ch and 1 sl st in beg. of round = 26-30-34 dtr. 4th round: Crochet 1 dtr in each dtr and 2 dtr around each ch = 52-60-68 dtr. Repeat 2nd, 3rd and 4th round until the sleeve measures 52-54-56 cm from the armhole – read measurement tips. Cut and sew the thread. Crochet edge: Crochet an edge around the circle and at the bottom of the sleeves with 2 strands Alpaca as follows: 1st. round: 1 dtr in the first dtr, *2 ch, skip 1.5 - 2 cm, 1 dtr in the next stitch*, repeat from *-* and finish with 2 ch and a sl st in the first dtr. 2nd. round: 2 dtr in the first dtr, *4 ch, 2 dtr in the same dtr, 1 ch, 2 dtr in the next dtr* and finish with 4 ch, 2 dtr in the same dtr, 1 ch and 1 sl st in the first dtr. Cut and sew the thread. Button cover: Crochet 2 ch with 2 strands Alpaca and then crochet 6 dc in the first of the 2 ch and finish round with a sl st in the first dc (= 1st round). 2nd round: 1 ch, crochet 2 dc in each dc and finish with a sl st at beg. of round (= 12 dc) 3rd + 4th round: 1 ch, 1 dc in each dc and finish with a sl st at beg. of round (= 12 dc). 5th. round: 1 ch, crochet 1 dc in every other dc and finish with a sl st at beg. of round (= 6 dc). Put the button inside the cover, sew around and pull tight. Try on the jacket and place the buttons in the waist on the left side of the jacket in the penultimate round. |
|
 |
|
Have you finished this pattern?Tag your pictures with #dropspattern #moonlightmistjacket or submit them to the #dropsfan gallery. Do you need help with this pattern?You'll find 7 tutorial videos, a Comments/Questions area and more by visiting the pattern on garnstudio.com. © 1982-2026 DROPS Design A/S. We reserve all rights. This document, including all its sub-sections, has copyrights. Read more about what you can do with our patterns at the bottom of each pattern on our site. |
|


With over 40 years in knitting and crochet design, DROPS Design offers one of the most extensive collections of free patterns on the internet - translated to 17 languages. As of today we count 324 catalogues and 12290 patterns translated into English (UK/cm). 12290
We work hard to bring you the best knitting and crochet have to offer, inspiration and advice as well as great quality yarns at incredible prices! Would you like to use our patterns for other than personal use? You can read what you are allowed to do in the Copyright text at the bottom of all our patterns. Happy crafting!
Post a comment to pattern DROPS 99-3
We would love to hear what you have to say about this pattern!
If you want to leave a question, please make sure you select the correct category in the form below, to speed up the answering process. Required fields are marked *.