
Popular categories
Looking for a yarn?


Comments / Questions (76)
![]() Nicole wrote:
Nicole wrote:
When doing increases for the left and right, how do the new stitches fit into the pattern? It says for the left to knit one in gold then increase, but when you purl the next row how do you work that stitch, then you purl 1 with gold. I'm just confused because you are adding 5 new stitches, but how do you work them into the pattern.
01.04.2025 - 14:58DROPS Design answered:
Dear Nicole, you incorporate the new stitches into the pattern to enlarge it on the sides; so that you will work the new stitches as the previous stitches in diagram on the right side of A.3A and at the end of the row work the new stitches as the next stitches continuing the pattern. Happy knitting!
02.04.2025 - 07:32
![]() Eva wrote:
Eva wrote:
Det verkar som delar av diagrammet fallit bort efter senaste uppdateringen. A2, A3 och A4 visas bara som en ruta med frågetecken.
26.03.2025 - 08:46
![]() Michelle wrote:
Michelle wrote:
Bei Vorderteil steht: „Stricken, bis die Arbeit eine Länge von 28-29-30-31-33-34 cm ab dem Auffassen der Maschen hat“. Ist da das Auffassen oben an der Schulter gemeint oder wo das linke und rechte Vorderteil zusammengesetzt werden?
20.03.2025 - 00:55DROPS Design answered:
Liebe Michelle, man soll hier oben an der Schulter messen, wo man die Maschen für die Schulter aufgefassen hat. Viel Spaß beim Stricken!
20.03.2025 - 10:20
![]() Phenasia Soares wrote:
Phenasia Soares wrote:
Hi, I was wondering for the gauge (tension) when it says to use the pattern which part of the pattern which part do you use?
09.02.2025 - 17:54DROPS Design answered:
Dear Phenasia, you can work any of the charts or combined charts, since they all have the same Nordic pattern; we just need to test the gauge while making colour changes, since this may sometimes affect the overall gauge. Happy knitting!
10.02.2025 - 01:06
![]() Erika wrote:
Erika wrote:
Hej, undrar om det är en felskrivning i mönstret vid bakstycket står under storlek S och XXL ”sticka varv 1 och 2 gång till, sedan stickas varv 3, men utan ökning ” menar ni sticka varv 2 en gång till? Annars stämmer inte antal varv.
07.02.2025 - 20:55DROPS Design answered:
Hej Erika. Tack för info, du har helt rätt. Texten är nu rättad. Mvh DROPS Design
10.02.2025 - 11:17
![]() Gosia wrote:
Gosia wrote:
Czy oczko na środku na górze rękawa na schemacie A2.A (7 oczko) powinno zgadzać się z oczkiem z markerem na górze rękawa, czy powinno to być 5 oczko z 10 na schemacie? I czy trzy oczka w kolorze ochra powinny być idealnie po środku na dole rękawa - jedno oczko przed i za oczkiem z markerem?
31.01.2025 - 21:10DROPS Design answered:
Witaj Gosiu, na górze rękawa powinnaś mieć 5-te lub 6-te oczko schematu A.2A. Trzy oczka kolorem ochra pod rękawem powinny być idealnie po środku na dole rękawa - jedno oczko przed i za oczkiem z markerem. Pozdrawiamy!
03.02.2025 - 10:55
![]() Hannelore wrote:
Hannelore wrote:
Hoi! Ik heb een vraag over het voorpand. Ik moet de twee schouders samenvoegen, en daarna doorgaan met het patroon. Welk patroon is dit? A4A? Of A3A? Alvast bedankt!
10.01.2025 - 14:40DROPS Design answered:
Dag Hannelore,
Dit is patroon A.3A of A.4 (in wezen zijn dit dezelfde patroon. Het gaat erom dat je het gecreëerde patroon voortzet zodat het mooi doorloopt wanneer beide panden samengevoegd zijn.
11.01.2025 - 11:43
![]() Le Anh wrote:
Le Anh wrote:
Hi! I am knitting this sweater in size S, and I am struggling with this explanation: ¨Work the next row as follows from the right side: 3 stockinette stitches in color goldenrod, work A.2A a total of 8-9-9-10-11-12 times (8 stitches left on row), work A.2B, 3 stockinette stitches in color goldenrod.¨ It means that I will knit the first row 8 times repeatly from the right and continue the same with the next rows until I get the length? Thanks
22.12.2024 - 21:08DROPS Design answered:
Dear Le Anh, yes, you work 3 stitches in stocking stitch in goldenrod, then work the first row of A.2A and repeat it as many times as necessary for your size, now work the first row of chart A.2B once and finish the row with 3 stitches in goldenrod. On the next rows work in the same way, but with row 2 of the charts over the first row of the charts, then row 3, e.t.c. Happy knitting!
22.12.2024 - 22:52
![]() Claudia wrote:
Claudia wrote:
Eine Frage zum RECHTEN VORDERTEIL: Für Größe XXXL werden 45 Maschen aufgenommen. Als das Muster beginnt, sollen erst 3 rechte Maschen gestrickt werden, dann 3x A4 + 2 Maschen von A4. Macht zusammen 35 Maschen. Müsste ich daher statt 3x A4 nicht 4x A4 stricken? So käme ich auf 45 Maschen.
20.11.2024 - 23:41DROPS Design answered:
Liebe Claudia, ja es stimmt wahrscheinlich so, danke für den Hinweis, unser Designteam wird das noch mal schauen. Viel Spaß beim Stricken!
21.11.2024 - 08:44
![]() Anette wrote:
Anette wrote:
Wenn ich die Abbildung von dem Dandelion Field Pullover anschaue ist der 1. Rechts, RR links gestrickt. Außerdem hat er gerade Schultern.. ich verzweifelte hier. Habe die Wolle und Anleitung seit Wochen, bin aber nicht über die ersten Reihen hinausgekommen...
17.11.2024 - 15:44DROPS Design answered:
Liebe Anette, bei diesem Modell strickt man die 1. Reihe als Rückreihe, deshalb wird man links stricken. Siehe oben unter Tab Videos und Lektion wie man so einen Pullover strickt. Dort finden Sie Videos und Lektionen mit Fotos die Ihnen helfen werden. Viel Spaß beim Stricken!
18.11.2024 - 08:26
|
|||||||||||||
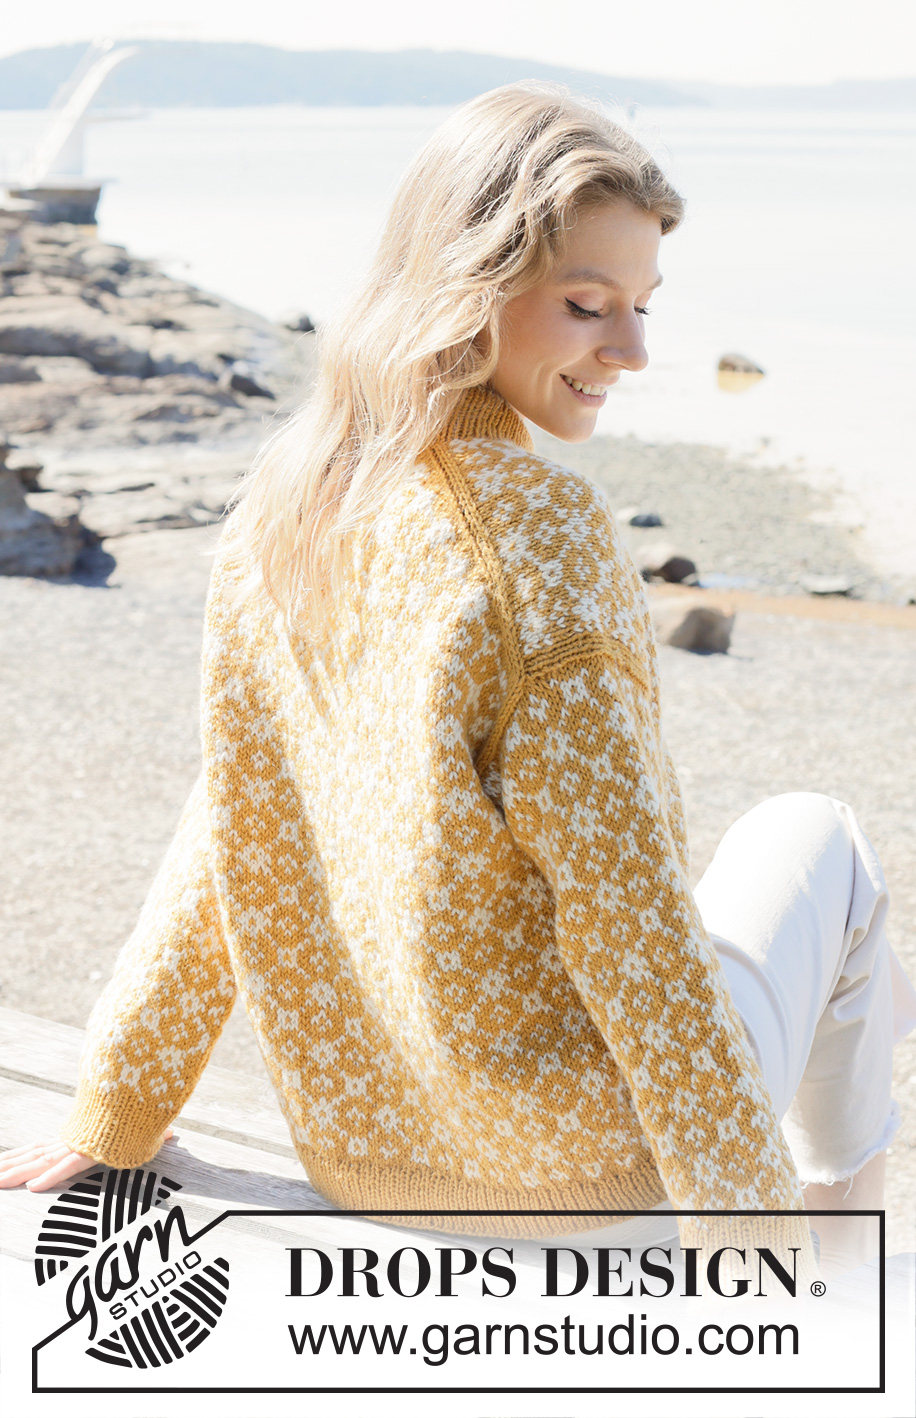
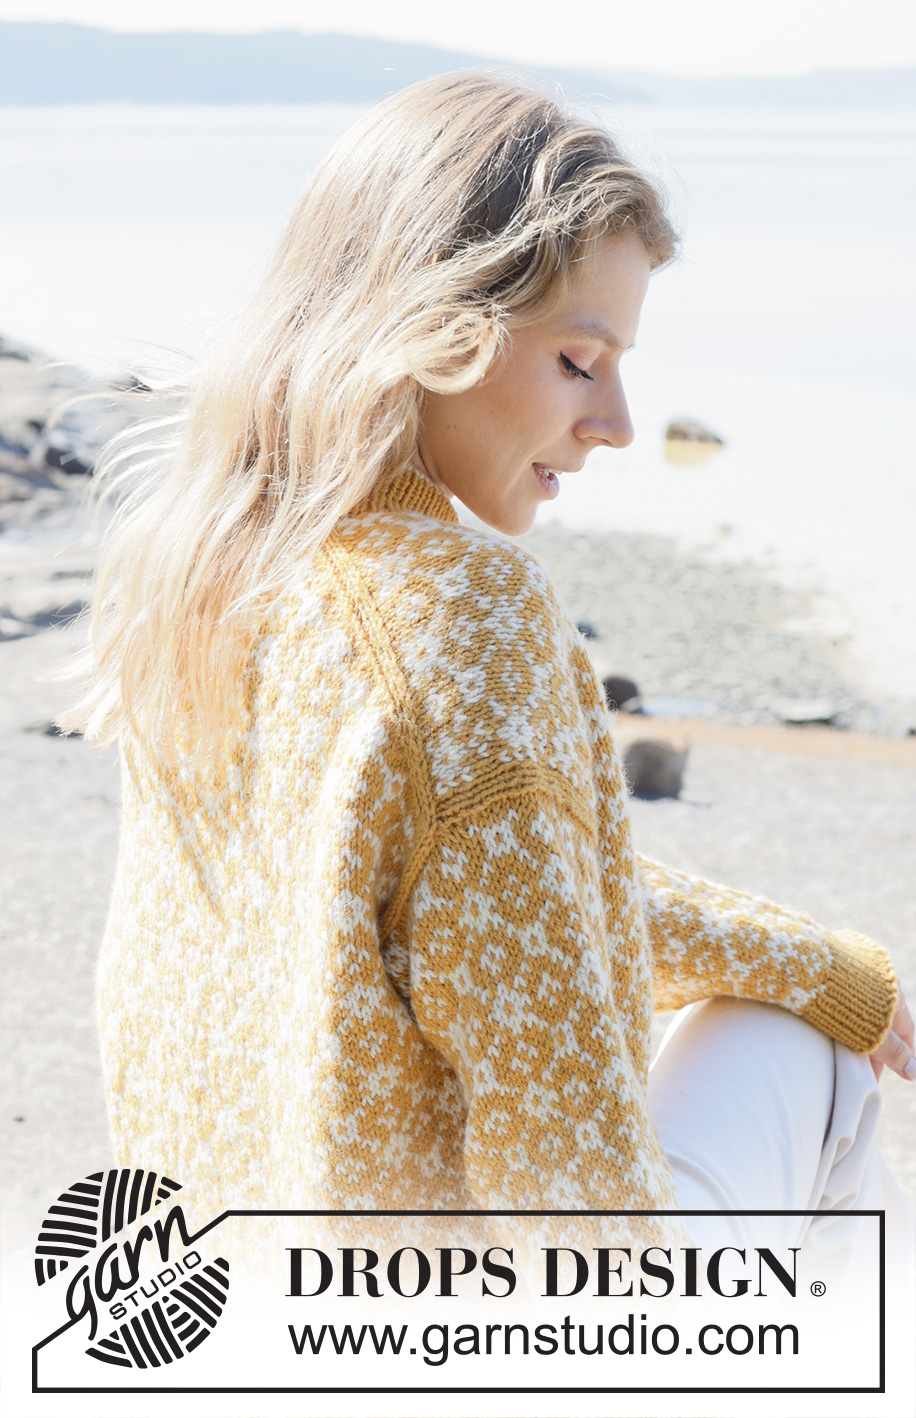
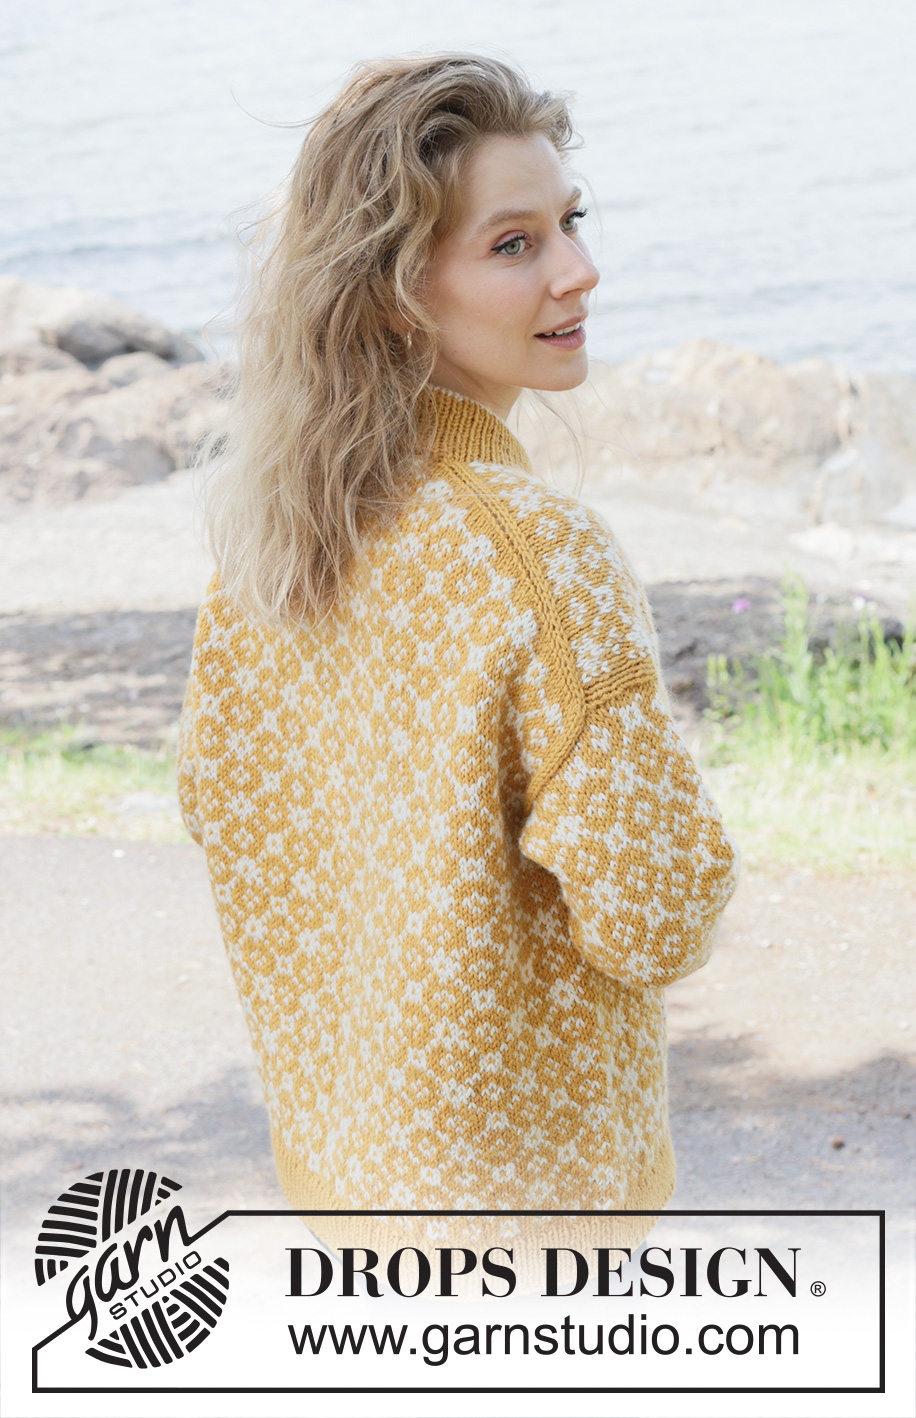
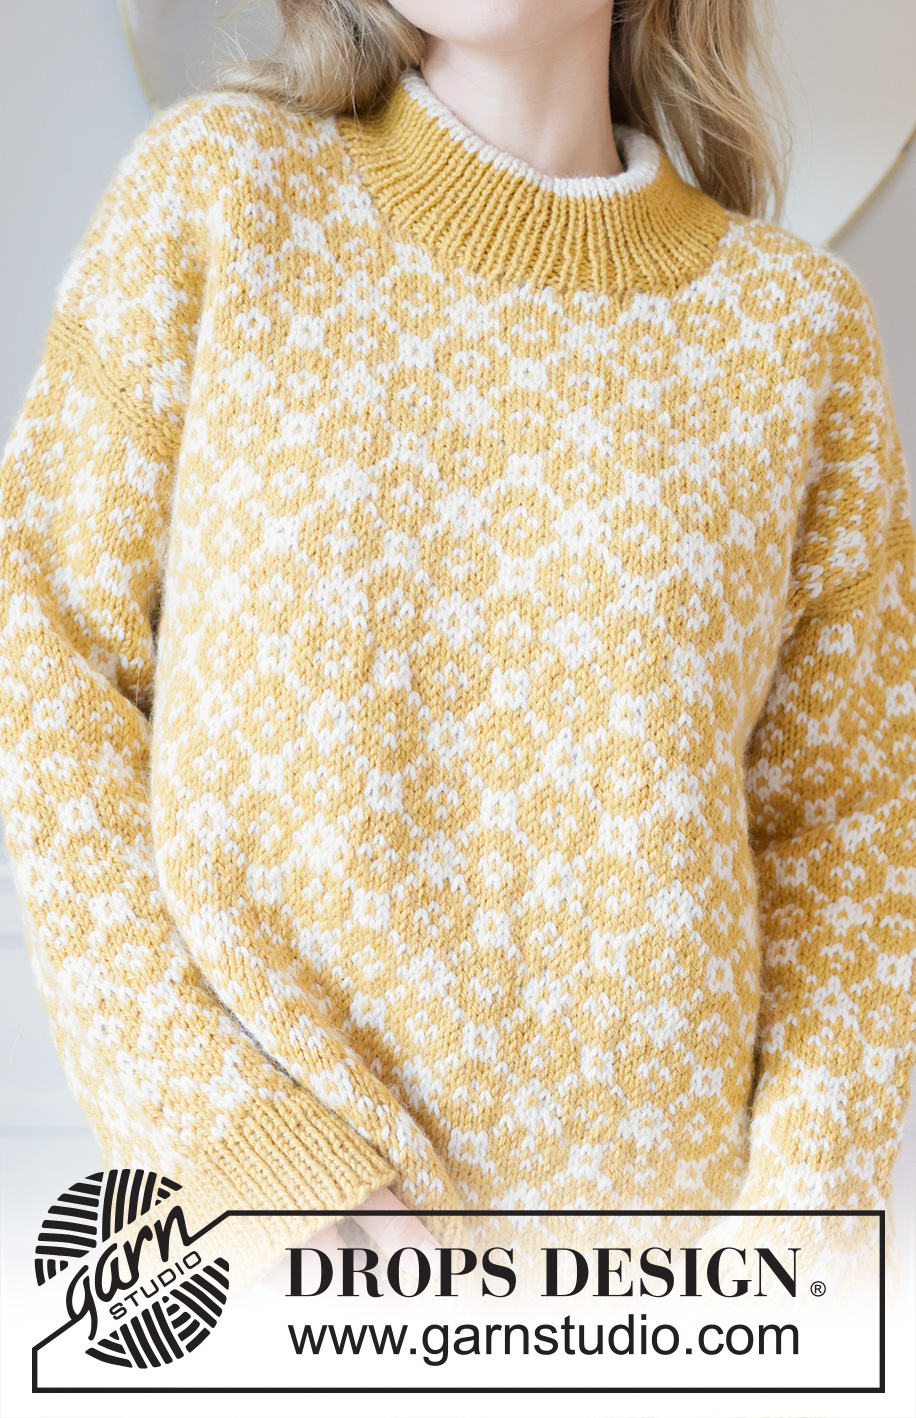
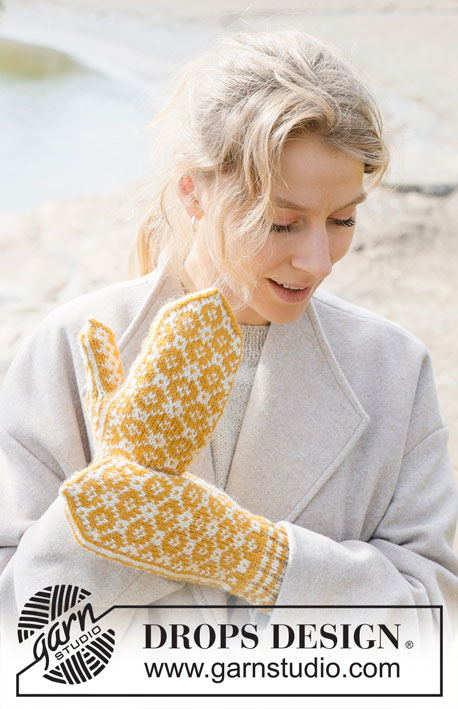
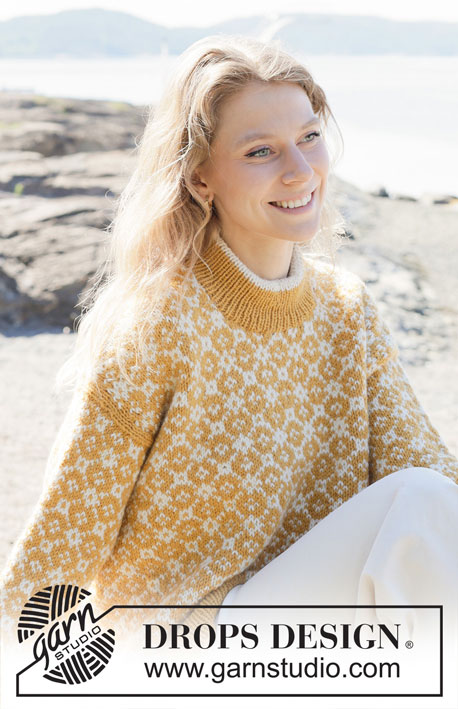
Dandelion Field#dandelionfieldsweater |
|||||||||||||
 |
 |
||||||||||||
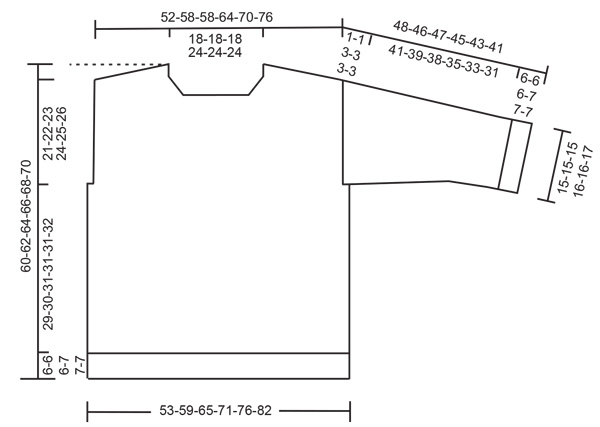
Knitted jumper in DROPS Nepal. The piece is worked top down with European/diagonal shoulders, Nordic pattern and double neck. Sizes S - XXXL.
DROPS 255-2 |
|||||||||||||
|
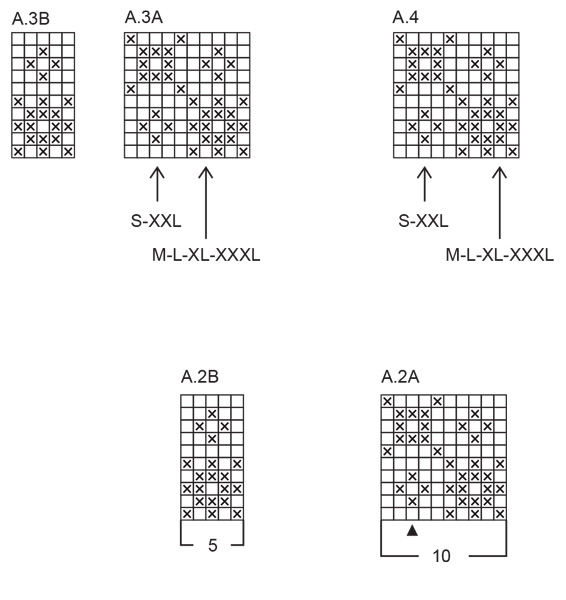
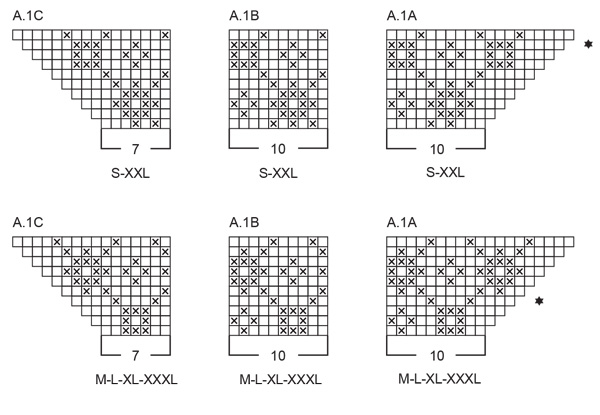
------------------------------------------------------- EXPLANATIONS FOR THE PATTERN: ------------------------------------------------------- GARTER STITCH (worked back and forth): Knit all rows, from both the right and wrong side. 1 ridge in height = knit 2 rows. PATTERN: See diagrams A.1 to A.4. The diagrams show the pattern from the right side. The pattern is worked in stocking stitch. Choose diagram for your size(applies to A.1). Start/finish at arrow for your size (applies to A.3 and A.4). INCREASE TIP-1: INCREASE 1 STITCH TOWARDS THE LEFT - from RIGHT SIDE: Use left needle to pick up yarn between 2 stitches from row below, pick up yarn from the front and knit in the stitch loop that is on the back of the needle. INCREASE 1 STITCH TOWARDS THE RIGHT - from RIGHT SIDE: Use left needle to pick up yarn between 2 stitches from row below, pick up yarn from the back and knit in the stitch loop that is on the front side of the needle. INCREASE TIP-2: INCREASE 1 STITCH TOWARDS THE RIGHT - from WRONG SIDE: Use left needle to pick up yarn between 2 stitches from row below, pick up yarn from the back and purl in the stitch loop that is on the front side of the needle. INCREASE 1 STITCH TOWARDS THE LEFT - from WRONG SIDE: Use left needle to pick up yarn between 2 stitches from row below, pick up yarn from the front and purl in the stitch loop that is on the back side of the needle. INCREASE TIP-3 (evenly spaced): To work out how to increase evenly, count the total number of stitches on the needle (e.g., 180 stitches) and divide by the number of increases to be made (e.g., 32) = 5.6. In this example, increase by making 1 yarn over after alternately each 5th and 6th stitch (approx.). On the next round work the yarn overs twisted to avoid holes. KNITTING TIP: Mark in the diagram the row the back piece finishes on. This makes it easier to match the front piece when working the armholes. DECREASE TIP: Decrease 1 stitch on each side of the marker as follows: Work until there are 2 stitches left before the marker-stitch under the sleeve, knit 2 together with colour goldenrod, knit 1 with colour goldenrod (marker-stitch), knit 2 twisted together with colour goldenrod (2 stitches decreased). ------------------------------------------------------- START THE PIECE HERE: ------------------------------------------------------- JUMPER – SHORT OVERVIEW OF THE PIECE: The pattern uses both long and short needles; start with the length which fits the number of stitches and change when necessary. The piece is started back and forth, casting on stitches at the back of the neck and working the back piece top down with pattern, while increasing stitches on each side for the shoulders, which become slightly diagonal. The back piece is worked as far as the armholes. The front piece is then worked in 2 sections, knitting up stitches along 1 back shoulder, working pattern and increasing for the neckline. This is repeated on the other shoulder. The 2 front sections are joined when the neckline is finished and then work until the armholes are finished. The front and back pieces are then joined and the body worked in the round. Stitches are knitted up around the armholes for the sleeves, which are worked in the round, top down. Stitches are knitted up around the neckline and the neck is worked in the round, then folded double to the inside. BACK PIECE: Cast on 33-33-33-43-43-43 stitches with circular needle size 5 mm and colour goldenrod DROPS Nepal. Work PATTERN – read description above, as follows: NOTE: The 3 outermost stitches in each side + increases are worked with colour goldenrod until the armholes are finished. ROW 1 (wrong side): Purl. ROW 2 (right side): Read INCREASE TIP-1. Knit 3, increase 1 stitch towards the left, work A.1A, then A.1B a total of 1-1-1-2-2-2 times, work A.1C, increase 1 stitch towards the right, knit 3. ROW 3 (wrong side): Read INCREASE TIP-2. Purl 3, increase 1 stitch towards the right, work A.1C, then A.1B as before, A.1A, increase 1 stitch towards the left, purl 3. Work ROWS 2 and 3 a total of 14-17-17-17-19-22 times (28-34-34-34-38-44 worked rows). NOTE: Each time A.1 is finished in height, there is room for 2 more repeats of A.1B in width. The increases for the diagonal shoulders are finished in sizes M, L, XL and XXXL. Continue as follows for sizes S and XXL. SIZES S and XXL: Work ROW 2 one more time, then ROW 3 one more time but without increasing (a total of 30-40 worked rows). ALL SIZES: After the last increase there are 91-101-101-111-121-131 stitches and the piece measures approx. 14-16-16-16-19-20 cm from the cast-on edge mid-back. Insert 1 marker outermost on one side. The piece is now measured from here! Work the next row as follows from the right side: 3 stocking stitches in colour goldenrod, work A.2A a total of 8-9-9-10-11-12 times (8 stitches left on row), work A.2B, 3 stocking stitches in colour goldenrod. Continue this pattern back and forth. Remember to maintain the knitting tension. Work until the piece measures 14-15-16-17-17-18 cm from the marker, measured along the armhole, and finishing with a row from the wrong side where you cast off 1 stitch on each side of the back piece = 89-99-99-109-119-129 stitches – read KNITTING TIP. Cut the strand, place the stitches on a stitch holder and work the left front piece along the left back shoulder. LEFT FRONT PIECE: Find the left back shoulder as follows: Lay the back piece flat, right side up, with the stitch holder towards you; left side of piece = left shoulder. Start from the right side on the left back shoulder by the neck. Use colour goldenrod and knit up 1 stitch in each worked row, inside 1 stitch, along the shoulder to the armhole then knit up 1 stitch in the next row at the outermost towards the armhole (pick up inside the outermost stitch)= 31-35-35-35-41-45 stitches. All lengths on the front piece are measured from this knitted-up row. Purl 1 row from the wrong side, then work as follows from the right side: Start at the arrow for your size in A.3A and work the last 3-7-7-7-3-7 stitches in A.3A, then repeat all of A.3A 2-2-2-2-3-3 times, work A.3B, finish with 3 stocking stitches in colour goldenrod. Continue this pattern back and forth until the piece measures 7-8-9-9-10-10 cm. Now increase for the neckline as follows (the increased stitches are worked into the pattern): ROW 1 (right side): Remember INCREASE TIP-1, knit 1 with colour goldenrod, increase 1 stitch towards the left (with colour goldenrod), continue A.3 as before, 3 stocking stitches with colour goldenrod. ROW 2 (wrong side): Purl 3 with colour goldenrod, work A.3 until there is 1 stitch left, purl 1 with colour goldenrod. Work ROWS 1 and 2 a total of 5 times (10 rows worked) = 36-40-40-40-46-50 stitches. Cut the strand, place the stitches on a stitch holder and work the right front piece along the right back shoulder. RIGHT FRONT PIECE: Start from the right side, 1 row before the last increase on the right back shoulder. Use colour goldenrod and knit up 1 stitch in each worked row, inside 1 stitch, from the armhole to the neckline = 31-35-35-35-41-45 stitches. All lengths on the front piece are measured from this knitted-up row. Purl 1 row from the wrong side, then work as follows from the right side: 3 stocking stitches with colour goldenrod, work A.4 a total of 2-3-3-3-3-4 times, then the first 8-2-2-2-8-2 stitches in A.4, finishing at the arrow for your size. Continue this pattern back and forth until the piece measures 7-8-9-9-10-10 cm. Now increase for the neckline as follows: ROW 1 (right side): Knit 3 with colour goldenrod, work A.4 until there is 1 stitch left, increase 1 stitch towards the right (with colour goldenrod), knit 1 with colour goldenrod – remember INCREASE TIP-1. ROW 2 (wrong side): Purl 1 with colour goldenrod, work A.4 until there are 3 stitches left, purl 3 with colour goldenrod. Work ROWS 1 and 2 a total of 5 times (10 rows worked) = 36-40-40-40-46-50 stitches. Now join the 2 front piece together. FRONT PIECE: Work as follows from the right side: Work the 36-40-40-40-46-50 stitches on the right front piece as before, cast on 19-21-21-31-29-31 stitches for the neckline, then work the 36-40-40-40-46-50 stitches on the left front piece as before = 91-101-101-111-121-131 stitches. Continue with stocking stitch and pattern as before, back and forth across all stitches (i.e., 3 stocking stitches in goldenrod at the beginning and end of the row and pattern otherwise). Work until the front piece measures 28-29-30-31-33-34 cm from the knitted-up row, finishing after the same row from the wrong side as on the back piece and casting off 1 stitch on each side on this last row = 89-99-99-109-119-129 stitches (to avoid cutting thread at the end of the row, the last 2 stitches can be purled together). The front and back pieces are joined for the body. The piece is now measured from here! BODY: Work pattern as before across the 89-99-99-109-119-129 stitches on the front piece, cast on 1-1-11-11-11-11 stitches (in side mid-under sleeve), work pattern as before across the 89-99-99-109-119-129 stitches from the back piece, cast on 1-1-11-11-11-11 stitches (in side mid-under sleeve) = 180-200-220-240-260-280 stitches. Continue the established pattern in the round, working across all stitches. The round starts in the middle of the cast-on stitches under one sleeve. Work until the body measures 28-29-30-30-30-31 cm from the join, finishing after row 5 or 9 in A.2 (the front piece measures approx. 56-58-60-61-63-65 cm from the knitted-up row). Work 2 rounds of stocking stitch with colour goldenrod. Change to circular needle size 3.5 mm. Work rib with colour goldenrod (knit 1, purl 1), AT THE SAME TIME increase 32-36-40-44-44-48 stitches evenly on round 1 – read INCREASE TIP-3 = 212-236-260-284-304-328 stitches. When the rib measures 6-6-6-7-7-7 cm, cast off a little loosely with rib. The front piece measures approx. 63-65-67-69-71-73 cm from the knitted-up row and is approx. 3 cm longer than the finished length, as the knitted-up row is not on top of shoulder but positioned slightly down the back piece. The jumper measures approx. 60-62-64-66-68-70 cm. SLEEVES: The sleeve is worked top down. Lay the piece flat and insert 1 marker mid-top of shoulder (NOTE! Mid-top of shoulder is not the knitted-up row on the front piece but approx. 7 to 8 cm down the front piece). Use circular needle size 3.5 mm and colour goldenrod. Start in the middle stitch of the cast-on stitches under the sleeve (insert 1 marker in this stitch) and knit up 72-76-90-92-96-100 stitches (inside 1 stitch) around the armhole, making sure you knit up 1 stitch in the marker-stitch under the sleeve and 1 stitch in the marker on top of the sleeve, and with equal numbers of stitches on each side of both marker-stitches. Count out from the marker-stitch on top of the shoulder to determine where to start the pattern – the marker-stitch should match the mid-stitch in A.2A. Change to circular needle size 5 mm. Work stocking stitch and A.2A in the round, but the middle 3 stitches under the sleeve are worked with colour goldenrod. When the sleeve measures 1 cm, decrease 1 stitch on each side of the marker-stitch under the sleeve - read DECREASE TIP. Decrease like this every 2nd round a total of 4-6-8-10-12-13 times, then every 5-4½-2½-2½-2-2 cm 7-7-11-9-8-8 times = 50-50-52-54-56-58 stitches. Continue the pattern with 3 stocking stitches in colour goldenrod under the sleeve, until the sleeve measures 42-40-41-38-36-34 cm from the shoulder-marker. Change to double pointed needles size 3.5 mm and work rib with colour goldenrod (knit 1, purl 1). AT THE SAME TIME increase 8-10-10-10-10-10 stitches evenly on round 1 = 58-60-62-64-66-68 stitches. When the rib measures 6-6-6-7-7-7 cm, cast off a little loosely with rib. The sleeve measures approx. 48-46-47-45-43-41 cm from top of shoulder. DOUBLE NECK: Use circular needle size 3.5 mm and colour goldenrod. Start from the right side on one shoulder-line and knit up 100-104-108-132-136-136 stitches, inside 1 stitch, around the neckline (if you knit up fewer stitches, this can be adjusted on the first round). The stitch count must be divisible by 2. Work rib in the round (knit 1, purl 1) for 4½-4½-5½-5½-6½-6½ cm (= approx. 12-12-15-15-18-18 rounds), change to colour off white and continue working until the rib measures 10-10-12-12-14-14 cm (= approx. 15-15-18-18-20-20 rounds with colour off white). Change to circular needle size 5 mm and cast off a little loosely with knit. Fold the neck double to the inside and sew down. There should be a visible stripe of colour off white at the top. To avoid the neck being tight and rolling outwards, it is important that the seam is elastic. |
|||||||||||||
Diagram explanations |
|||||||||||||
|
|||||||||||||
 |
|||||||||||||
 |
|||||||||||||
 |
|||||||||||||
Have you finished this pattern?Tag your pictures with #dropspattern #dandelionfieldsweater or submit them to the #dropsfan gallery. Do you need help with this pattern?You'll find 39 tutorial videos, a Comments/Questions area and more by visiting the pattern on garnstudio.com. © 1982-2026 DROPS Design A/S. We reserve all rights. This document, including all its sub-sections, has copyrights. Read more about what you can do with our patterns at the bottom of each pattern on our site. |
|||||||||||||


With over 40 years in knitting and crochet design, DROPS Design offers one of the most extensive collections of free patterns on the internet - translated to 17 languages. As of today we count 324 catalogues and 12290 patterns translated into English (UK/cm). 12290
We work hard to bring you the best knitting and crochet have to offer, inspiration and advice as well as great quality yarns at incredible prices! Would you like to use our patterns for other than personal use? You can read what you are allowed to do in the Copyright text at the bottom of all our patterns. Happy crafting!
Post a comment to pattern DROPS 255-2
We would love to hear what you have to say about this pattern!
If you want to leave a question, please make sure you select the correct category in the form below, to speed up the answering process. Required fields are marked *.