Comments / Questions (151)
![]() Gb Christine wrote:
Gb Christine wrote:
Bonjour Lorsque j arrive 23cm avec le bon nombre d3 mailles pour le dos et le devant mais seulement 53 m pour les manches au lieu de 61 ....et comment faire pour ne plus augmenter au niveau du point fantaisie alors que les augmentations sont à l intérieur de ce point Merci de votre réponse
03.12.2024 - 20:38DROPS Design answered:
Bonjour Christine, en taille M les augmentations du raglan se terminent en même temps: 24 fois tous les 2 tours pour le dos et le devant = 48 tours; 20 fois pour les manches (= 3 x les 15 rangs du diagramme (3x6 augmentations=18) + les 4 premiers rangs du diagrammes (2 augmentations) = 48 rangs et 20 augmentations); vous avez ainsi 19 m + 2x20 augmentations= 59 mailles + 1 m raglan de chaque côté = 61 mailles. Bon tricot!
04.12.2024 - 07:26
![]() Ana Oliveira wrote:
Ana Oliveira wrote:
Bom dia, comecei a fazer o ponto fazia e estou a fazer o tamanho XL com quantas malhas fico no final da primeira carreira? Eu fiquei com 114 malhas, está correto? Obrigada.
03.12.2024 - 11:25DROPS Design answered:
Bom dia, Tendo em conta de que o número inicial de malhas para o encaixe é de 106 malhas e que se fazem 8 aumentos na primeira carreira, sim, o número de malhas está correcto. Nota: O número de malhas vai aumentar porque vai continuar a fazer aumentos de ambos os lados dos 4 marcadores dos raglans. Bons tricôs!
04.12.2024 - 10:11
![]() Oufella wrote:
Oufella wrote:
Bonjour Svp, j'aimerais bien savoir si vous livrez au Canada Merci beaucoup
01.12.2024 - 00:51DROPS Design answered:
Bonjour Mme Oufella, tout à fait, retrouvez la liste des magasins au Canada ou livrant au Canada ici - consultez le site de Nordic Yarn pour trouver la liste des magasins au Canada. Bon tricot!
02.12.2024 - 09:25
![]() Anne wrote:
Anne wrote:
Hei! Har nettopp begynt på mønsteret. 1. Er det slik at annankvar pinne/ omgang er berre rettstrikk, utan mønster eller raglanfelling? 2. Etter 6 pinnar /omgangar i str. M: Kor mange maskar skal eg då ha på pinnen? Takk!
27.10.2024 - 12:07DROPS Design answered:
Hej Anne, du starter nederst i diagrammet, strikker mønster på første pind ifølge diagrammet. Næste pind strikkes ret ifølge diagrammet. Du tager ud ifølge diagrammet på 1. 3. 5. 9. 11. 13. pind :)
29.10.2024 - 08:12
![]() Adéla Honcikova wrote:
Adéla Honcikova wrote:
I thought - Dropping stitches every 3 cm according to the instructions isn't enough. Sorry :-)
12.10.2024 - 12:01
![]() Adéla Honcikova wrote:
Adéla Honcikova wrote:
Hello. Although I am knitting the sleeve from the underarm according to A2, the number of stitches is increased and the sleeve is getting wider. Knitting every 3 cm is not enough. This part of the pattern is not clearly described and seems to me to be incorrect. Or am I wrong? I have mended the sleeve twice and still can't get a successful finish. Please advise. Thank you
12.10.2024 - 11:56DROPS Design answered:
Dear Adéla , if you are working A.2 then the number of stitches shouldn't change. As you can see in the chart itself, there is always the same number of stitches, since the decreases and increases even themselves out. A.1 and A.3 are also worked, but without increases (just as before, at the end of the yoke), so they look exactly like A.2 in that case, and you can simply substitute them for A.2. After the first 3 or 4cm (depending on your size) you start decreasing every few cm, so the sleeve will slowly get narrower, not wider. Happy knitting!
13.10.2024 - 23:04
![]() Redureau Monique wrote:
Redureau Monique wrote:
Est-ce que je pourrais avoir la traduction en français de ce modèle ?
12.10.2024 - 09:55DROPS Design answered:
Bonjour Mme Redureau, volontiers, cliquez à chaque instant sur le menu déroulant à gauche de l'icone "imprimante" pour changer de langue, ou bien ici pour celui-ci. Bon tricot!
14.10.2024 - 10:01
![]() Cristina wrote:
Cristina wrote:
Boa tarde. Estou a fazer o tamanho L. No encaixe diminui 12 malhas e fiquei com 102 malhas. ao dividir as malhas pelas costas, frentes e mangas sobram 4 malhas: - 15 malhas ( meias costas) -19 malhas ( mangas) -30 malhas (frente) -19 malhas ( mangas) - 15 malhas ( metade das costas). Esta divisão dá 98 malhas e as 102 que deve ter. Está correto? Obrigada Cristina Cardoso
03.10.2024 - 19:55DROPS Design answered:
Bom dia, Dever contar também as malhas em que colocou os marcadores, o que dá 102 malhas. Exemplo: 15 malhas + 1 malha com o marcador + 19 malhas + 1 malha com o marcador, etc. Bons tricôs!
07.10.2024 - 10:31
![]() Donna Bertrand wrote:
Donna Bertrand wrote:
OMG, what brilliant insight!! Thank you so much!
30.09.2024 - 01:36
![]() Donna Bertrand wrote:
Donna Bertrand wrote:
Hi there, I'm knitting Remembering Spring in XL. The 2nd paragraph in the Yoke section says to "work A1 & A2 over next 12 stitches", but the diagram only covers 11 stitches. Do I repeat the 1st and 2nd stitch in A1 (y/o, no hole + K1) to involve the 12th stitch? That would give me 10 stitches to work with to get to the 2nd marker. To get there, do I work A3 3x, followed by the one K1 stated in the written instructions? If I can get this sorted, I'll be on my way - thank you for helping!
29.09.2024 - 22:17DROPS Design answered:
Dear Donna, the instructions are separated by commas. Work A.1 (1 time), work A.2 over the next 12 stitches (so 2 times, since A.2 = 6 stitches). Happy knitting!
29.09.2024 - 23:51
Remembering Spring#rememberingspringsweater |
|||||||||||||||||||
 |
 |
||||||||||||||||||
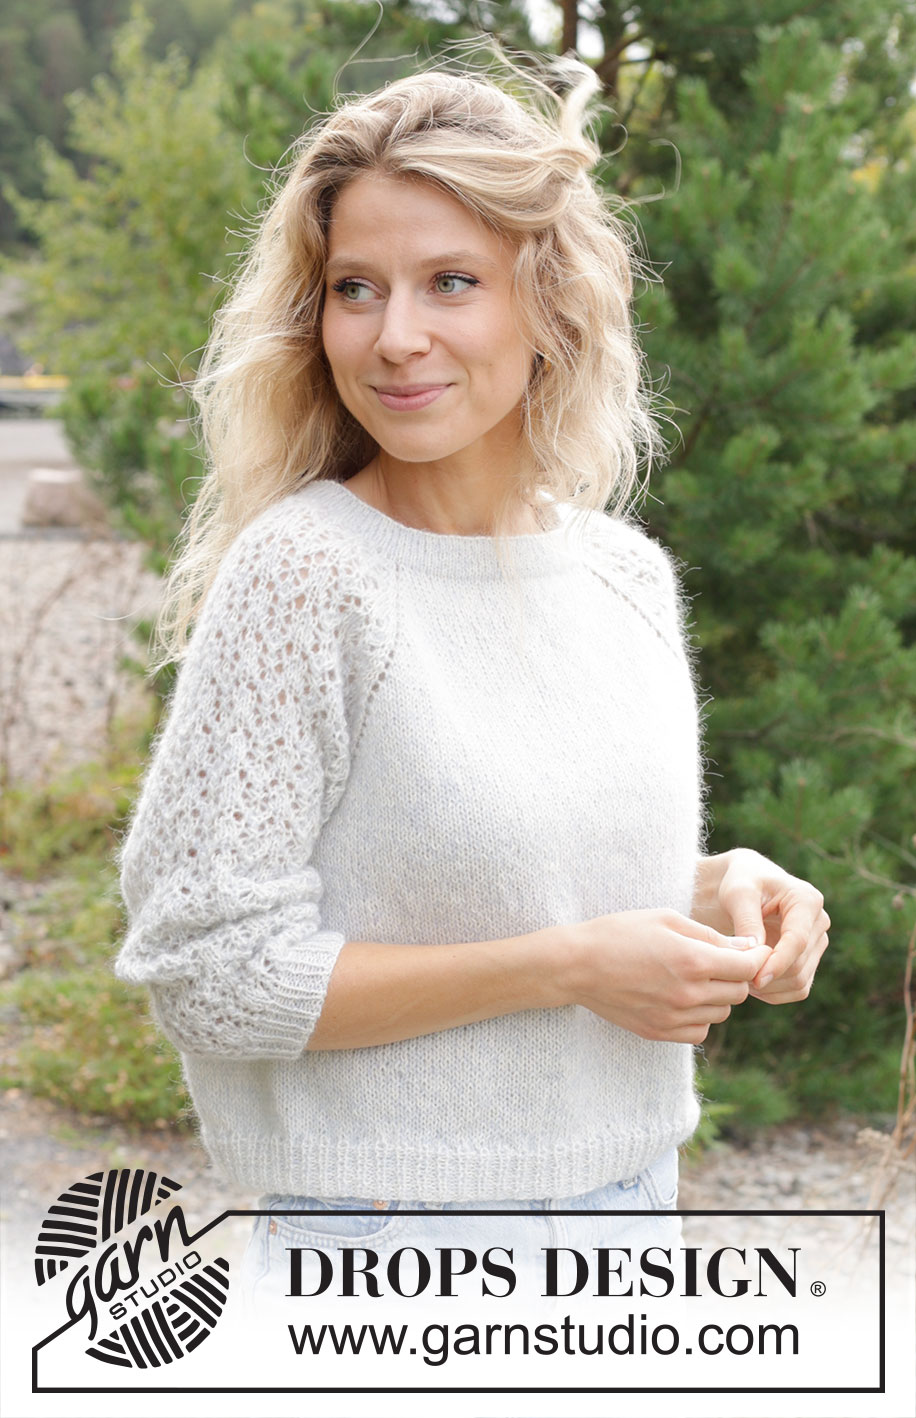
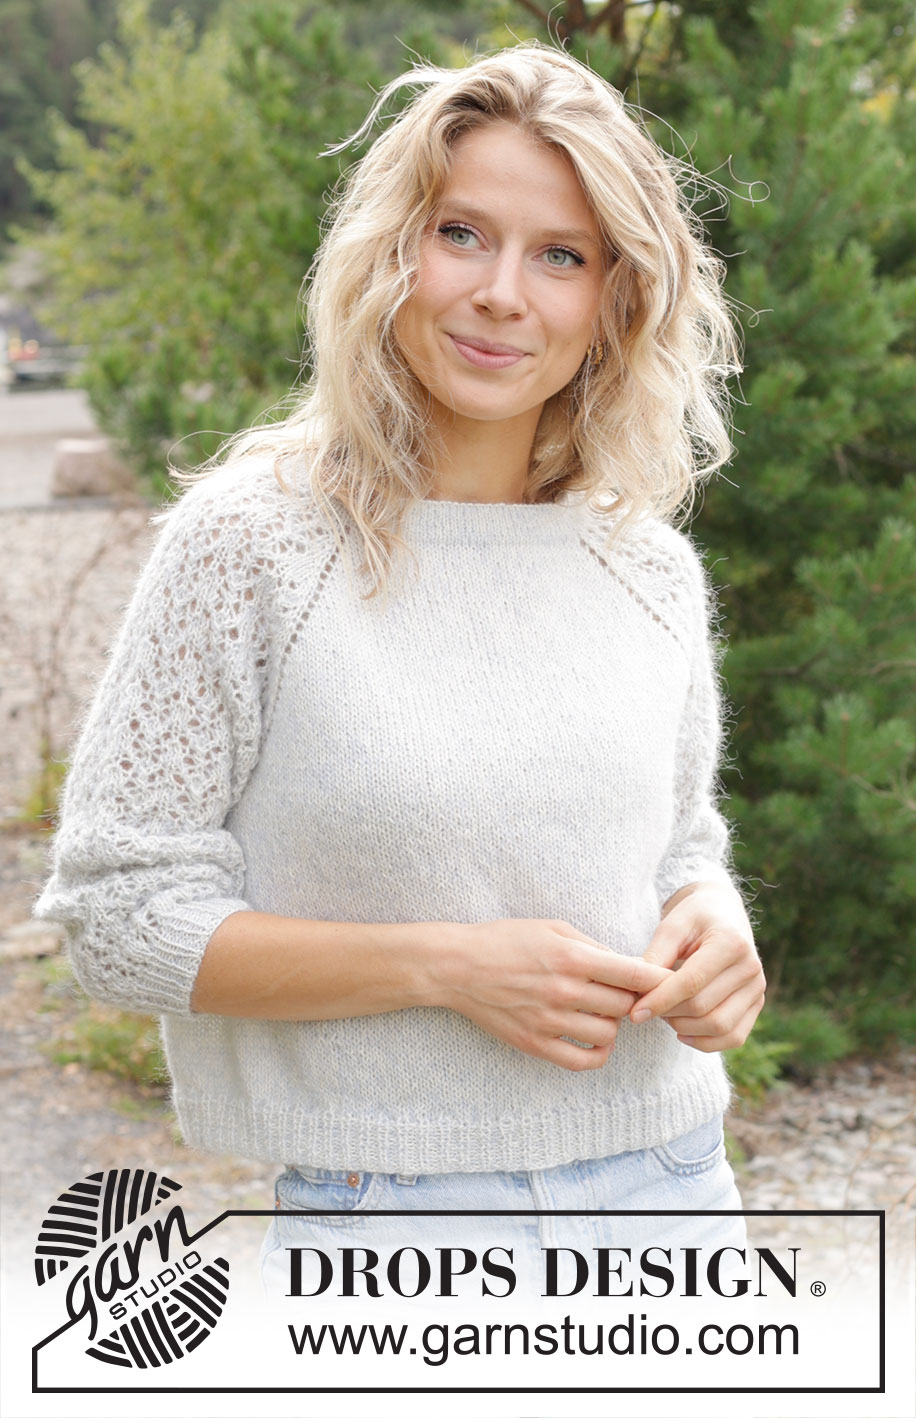
Knitted jumper in DROPS Alpaca and DROPS Kid-Silk. The piece is worked top down with double neck, raglan, lace pattern and ¾-length sleeves. Sizes S - XXXL.
DROPS 250-1 |
|||||||||||||||||||
|
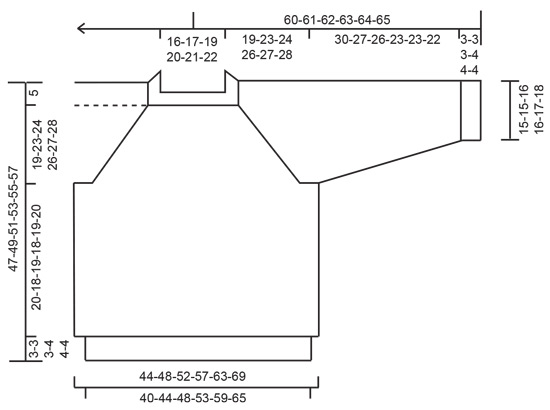
------------------------------------------------------- EXPLANATIONS FOR THE PATTERN: ------------------------------------------------------- PATTERN: See diagrams A.1 to A.3. RAGLAN: Increase 1 stitch by making 1 yarn over before/after each marker-stitch. On the next round knit the yarn overs on the front and back pieces – leaving holes. The yarn overs on the sleeves are knitted twisted – no holes. Work the new stitches in stocking stitch on the front and back pieces and into the pattern on the sleeves. DECREASE TIP (for sleeves): Decrease 1 stitch on each side of the marker-thread as follows: Work until there are 3 stitches left before the marker-thread, knit 2 together, knit 2 (marker-thread sits between these 2 stitches), slip 1 stitch knit-wise, knit 1 and pass the slipped stitch over the knitted stitch (2 stitches decreased). ------------------------------------------------------- START THE PIECE HERE: ------------------------------------------------------- JUMPER – SHORT OVERVIEW OF THE PIECE: The pattern uses both long and short needles; start with the length which fits the number of stitches and change when necessary. The double neck and yoke are worked in the round with circular needle, top down. When the yoke is finished, it is divided for body and sleeves and the body is continued in the round, while the sleeves wait. The sleeves are worked in the round, top down. The neck is folded to the inside and sewn down. If there is a «0» in your chosen size, skip the information and go straight to the next instruction. DOUBLE NECK: Cast on 104-108-114-118-122-126 stitches with circular needle size 4.5 mm, 1 strand DROPS Alpaca and 1 strand DROPS Kid-Silk (= 2 strands). Change to circular needle size 3.5 mm (casting on with a larger needle size gives and elastic cast-on edge). Work stocking stitch in the round for 2½ to 3 cm. Purl 1 round, the neck is later folded along this round. Continue with stocking stitch until the neck measures 6 cm. It will be approx. 3 cm when folded double. Insert 1 marker at the beginning of the round (= mid-back), the yoke is measured from here. YOKE: Change to circular needle size 4.5 mm. Knit 1 round and decrease 10-10-12-12-12-12 stitches evenly spaced = 94-98-102-106-110-114 stitches. Insert 4 markers without working the stitches (these are used when increasing for raglan) as follows: Count 13-14-15-16-17-18 stitches (= half back piece), insert 1 marker in the next stitch, count 19 stitches (= sleeve), insert 1 marker in the next stitch, count 26-28-30-32-34-36 stitches (= front piece), insert 1 marker in the next stitch, count 19 stitches (= sleeve), insert 1 marker in the next stitch, there are 13-14-15-16-17-18 stitches left after the last marker (= half back piece). On the next round, work PATTERN and increase for RAGLAN – read description above, as follows: Knit 13-14-15-16-17-18 (= half back piece), increase 1 stitch for raglan, knit 1 (first marker sits in this stitch), work A.1, A.2 over the next 12 stitches, work A.3, knit 1 (second marker sits in this stitch) (= sleeve), increase 1 stitch for raglan, knit 26-28-30-32-34-36, increase 1 stitch for raglan (= front piece), knit 1 (third marker sits in this stitch), work A.1, A.2 over the next 12 stitches, work A.3, knit 1 (fourth marker sits in this stitch) (= sleeve),increase 1 stitch for raglan, knit 13-14-15-16-17-18 (= half back piece). REMEMBER THE KNITTING TENSION! Continue this pattern but note that the increases are different on the front/back pieces and the sleeves – read INCREASES FOR SLEEVES and INCREASES FOR FRONT/BACK PIECES before continuing! INCREASES FOR SLEEVES: On the sleeves you increase 17-20-21-23-24-25 times on each side (including the first increase described above). The sleeve increases are drawn into diagrams A.1 and A.3. Each time A.1, A.2 and A.3 are finished in height, there is room for 2 more repeats of A.2 between A.1 and A.3. The stitches which do not fit into the pattern on each side of the sleeve are worked in stocking stitch. INCREASES FOR FRONT/BACK PIECES: On the front and back pieces, you increase 22-24-26-29-33-36 times (including the first increase described above), as follows: Increase on each round 0-0-0-0-4-6 times, then every 2nd round 22-24-26-29-29-30 times. AFTER THE LAST INCREASE: When all the increases are finished there are 250-274-290-314-338-358 stitches (70-76-82-90-100-108 stitches on the front/back pieces and 55-61-63-67-69-71 stitches on each sleeve (including the marker-stitches on each side of the sleeves). Continue with pattern and stocking stitch but without further increases. The stitches which do not fit into the pattern on each side of the sleeve are worked in stocking stitch. Work until the yoke measures 19-23-24-26-27-28 cm from the marker. DIVIDE FOR BODY AND SLEEVES: Now divide for the body and sleeves as follows: Knit 35-38-41-45-50-54 (= half back piece), place the next 55-61-63-67-69-71 stitches on a thread for the sleeve, cast on 10-10-12-12-14-16 stitches (in side under sleeve), knit 70-76-82-90-100-108 (= front piece), place the next 55-61-63-67-69-71 stitches on a thread for the sleeve, cast on 10-10-12-12-14-16 stitches (in side under sleeve), knit the last 35-38-41-45-50-54 stitches (= half back piece). The body and sleeves are finished separately. The piece is now measured from here! BODY: = 160-172-188-204-228-248 stitches. Continue with stocking stitch in the round until the body measures 20-18-19-18-19-20 cm from the division. On the next round begin working rib, AT THE SAME TIME on the first round increase 0-4-4-8-8-12 stitches evenly spaced = 160-176-192-212-236-260 stitches, as follows: Change to circular needle size 3.5 mm, work rib (knit 1, purl 1 – remember the increases). When the rib measures 3-3-3-4-4-4 cm, cast off a little loosely with rib. The jumper measures approx. 47-49-51-53-55-57 cm from the shoulder. SLEEVES: Place the 55-61-63-67-69-71 stitches from the thread on the one side of the piece on circular needle size 4.5 mm and knit up 1 stitch in each of the 10-10-12-12-14-16 stitches cast on under the sleeve = 65-71-75-79-83-87 stitches. Insert a marker-thread in the middle of the 10-10-12-12-14-16 stitches under the sleeve. Start at the marker-thread and continue the pattern in the round. The stitches which do not fit into the pattern under the sleeve are worked in stocking stitch. AT THE SAME TIME when the sleeve measures 3-3-3-4-4-4 cm from the division, decrease 2 stitches under the sleeve – read DECREASE TIP. Decrease like this every 4-2½-2-1½-1½-1 cm a total of 6-8-9-10-11-12 times = 53-55-57-59-61-63 stitches. Continue working until the sleeve measures 30-27-26-23-23-22 cm from the division. Change to double pointed needles size 3.5 mm and work rib (knit 1, purl 1). AT THE SAME TIME on the first round increase 1-1-3-3-5-7 stitches evenly spaced = 54-56-60-62-66-70 stitches. When the rib measures 3-3-3-4-4-4 cm, cast off a little loosely with rib. The sleeve measures approx. 33-30-29-27-27-26 cm from the division. ASSEMBLY: Fold the neck double to the inside and sew down. To avoid the neck being tight and rolling outwards, it is important that the seam is elastic. |
|||||||||||||||||||
Diagram explanations |
|||||||||||||||||||
|
|||||||||||||||||||
 |
|||||||||||||||||||
 |
|||||||||||||||||||
Have you finished this pattern?Tag your pictures with #dropspattern #rememberingspringsweater or submit them to the #dropsfan gallery. Do you need help with this pattern?You'll find 29 tutorial videos, a Comments/Questions area and more by visiting the pattern on garnstudio.com. © 1982-2026 DROPS Design A/S. We reserve all rights. This document, including all its sub-sections, has copyrights. Read more about what you can do with our patterns at the bottom of each pattern on our site. |
|||||||||||||||||||


Post a comment to pattern DROPS 250-1
We would love to hear what you have to say about this pattern!
If you want to leave a question, please make sure you select the correct category in the form below, to speed up the answering process. Required fields are marked *.