
Popular categories
Looking for a yarn?


Comments / Questions (43)
![]() Anne wrote:
Anne wrote:
Jeg har desværre fået lavet en for stram halskant og min mand synes den går lidt for langt op på halsen. I denne model er der ikke forskel på foran og bagpå ved halsen, det synes jeg er et problem. Kan jeg klippe halskanten af eller trævle op og strikke hilsen om ? Er kommet rigtig langt med kroppen. Hvordan gør man rent teknisk, og kan man i det hele taget strikke modsat vej ? Findes der video om emnet ?
25.05.2025 - 09:54
![]() Anne B wrote:
Anne B wrote:
Synes halskanten ser lidt løs / for stor ud. Andre, der har erfaret det ? Er selv gået i gang med modellen, men har slået lidt færre masker op til kanten. Synes dog det er svært at vide, og vil ikke til at trævle alt op når trøjen er færdig. Den strikkes jo oppefra og ned. mvh Anne
08.05.2025 - 15:06DROPS Design answered:
Hej Anne, det er en smags sag :) Du kan eventuelt vælge at strikke halskanten til sidst og tage ind på første halspind, da er det i så fald kun halsen du skal trevle op :)
08.05.2025 - 15:16
![]() Marja Sippola wrote:
Marja Sippola wrote:
NÄTTI MALLI
21.04.2025 - 21:23
![]() Fränzi wrote:
Fränzi wrote:
Ist der Pullover eher einfach zu stricken? Ich bin noch am Anfang meines Strickwissens;-)
04.03.2025 - 08:23DROPS Design answered:
Lieber Fränzi, lesen Sie die Anleitung aufmerksam, sollten Sie dann Fragen haben, stellen Sie sie gerne hier. Oben finden Sie Tabs "Videos" und "Lektion", dort finden Sie auch Hilfe. Viel Spaß beim Stricken!
04.03.2025 - 09:29
![]() Ulrike wrote:
Ulrike wrote:
Ich habe diesen Pulli für meinen Sohn gemacht und wie nach Anleitung am Rumpf nach 31 cm ab Ärmel das Bündchen gestrickt. Das ist extrem kurz, selbst für 170 cm Körpergröße!! Mein Sohn ist 192 cm groß und konnte ihn bauchfrei tragen :)) Wir haben einmal herzlich gelacht, dann hab ich weitere 12 cm für die Länge angestrickt und der Pulli wird nun gern getragen.
23.02.2025 - 17:02
![]() Sabine wrote:
Sabine wrote:
Hallo, ich möchte den tollen Pulli gern oben mit verschieden farbigen Streifen stricken. Geht das dann gleichmäßig mit den Ärmeln? Oder muss ich da gesondert zählen?
23.02.2025 - 12:30DROPS Design answered:
Liebe Sabine, hier finden Sie Pullover für Herren mit Streifen, das kann Ihnen sicher damit helfen. Viel Spaß beim Stricken!
24.02.2025 - 09:11
![]() Nadine Escalona wrote:
Nadine Escalona wrote:
Bei einer Länge von 8 cm ab der Teilung je 2 Maschen an beiden Seiten des Rumpfteils abnehmen – ABNAHMETIPP lesen. In dieser Weise alle 8 cm insgesamt 3 x in der Höhe zunehmen = 188-208-224-244-264-292 Maschen. Müsste es da dann nicht abnehmen heißen? Liebe Grüße
19.02.2025 - 19:22DROPS Design answered:
Liebe Frau Escalona, oh ja sicher stimmt, danke für den Hinweis, eine Korrekur erfolgt. Viel Spaß beim Stricken!
20.02.2025 - 11:26
![]() Ulla Nieminen wrote:
Ulla Nieminen wrote:
Vartalon pituus kainalosta L- koossa 31 cm + resori! Sehän jää napapaidaksi.
06.02.2025 - 16:01
![]() Zoe wrote:
Zoe wrote:
When it says to only increase on the front and back pieces how do I do that? And how does it work out to an increase of 26 stitches (size L) on the sleeves if I’m only increasing every 4th round for 12 rounds
06.02.2025 - 00:35DROPS Design answered:
Hi Zoe, To increase only on the front and back pieces, increase after marker-2 and before marker-3 (front piece), then after marker-4 and before marker-1 (back piece). You increase every 2nd row on the front and back pieces and every 4th row on the sleeves (alternately 4 and 8 stitches increased on the sleeves) and you increase like this 12 times on the body (6 times on the sleeves). When you add all the increases together (the first increases on both sides of all markers and then the alternate increases) you have a total of 32 increases on the body and 26 increases on the sleeves = 368 stitches. Hope this helps! happy knitting!
06.02.2025 - 09:55
![]() Zow wrote:
Zow wrote:
What size needles should i knit the gauge swatch on?
25.01.2025 - 20:53DROPS Design answered:
Dear Zow, the 3mm needles are only used for the rib edges so you need to work the gauge with the 4mm needles, the ones used for the stocking stitch sections. Happy knitting!
25.01.2025 - 21:59
|
|
Misty Day#mistyday |
|
 |
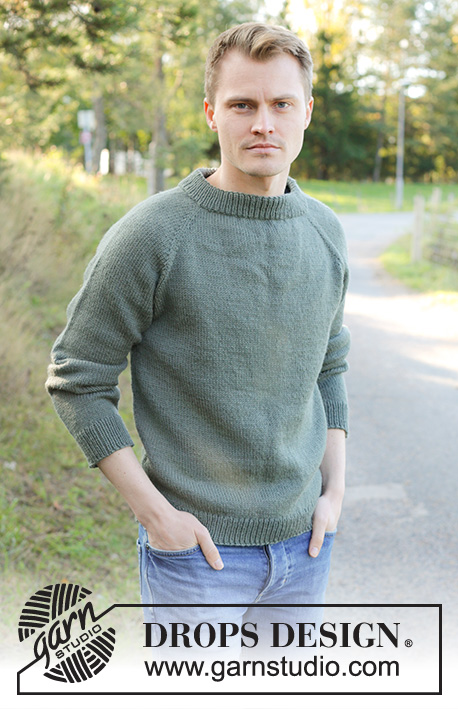 |
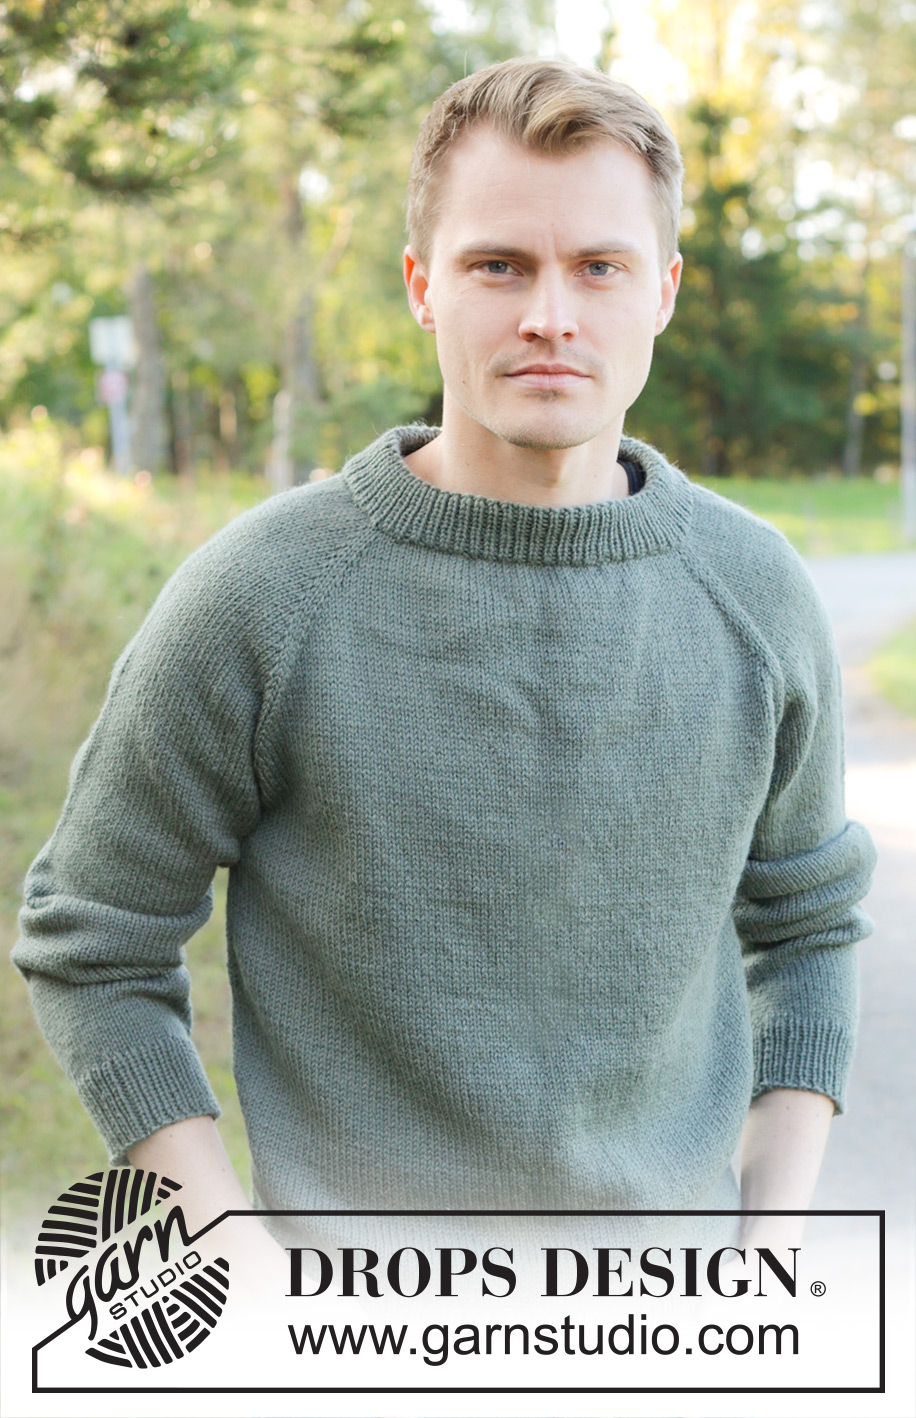
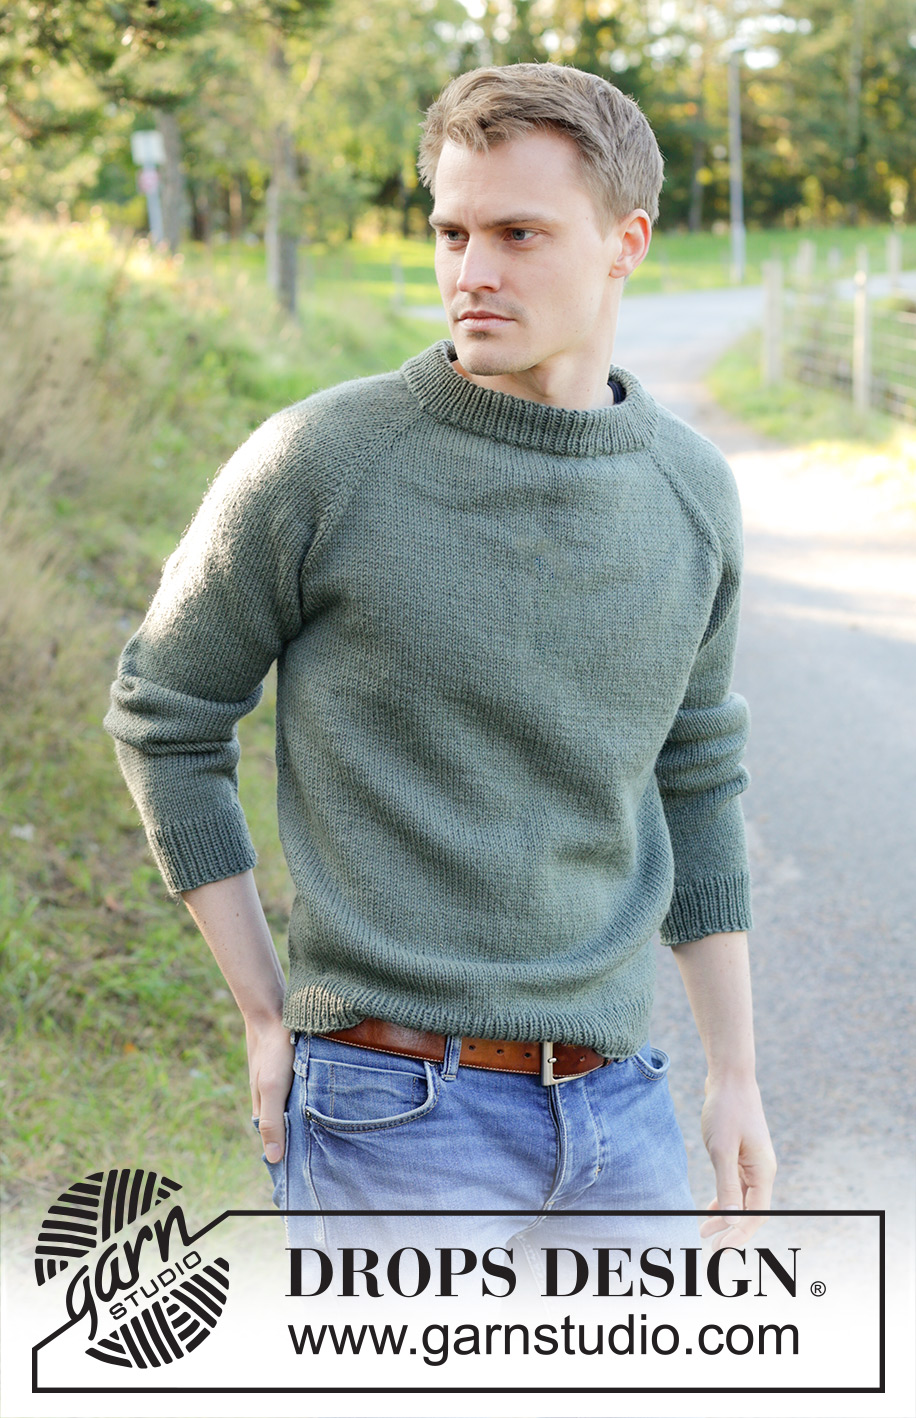
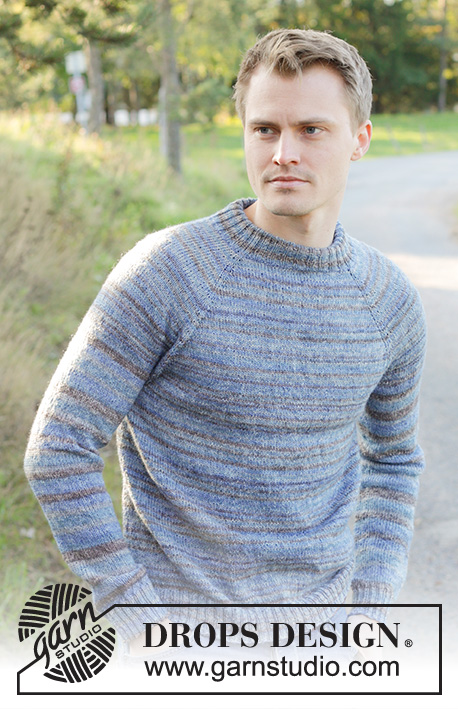
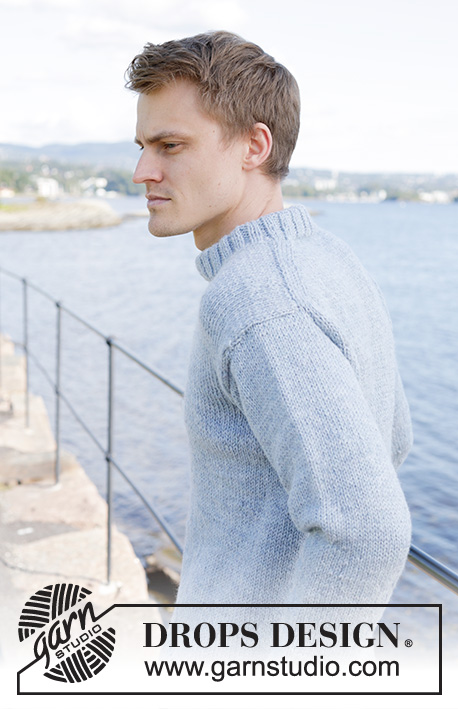
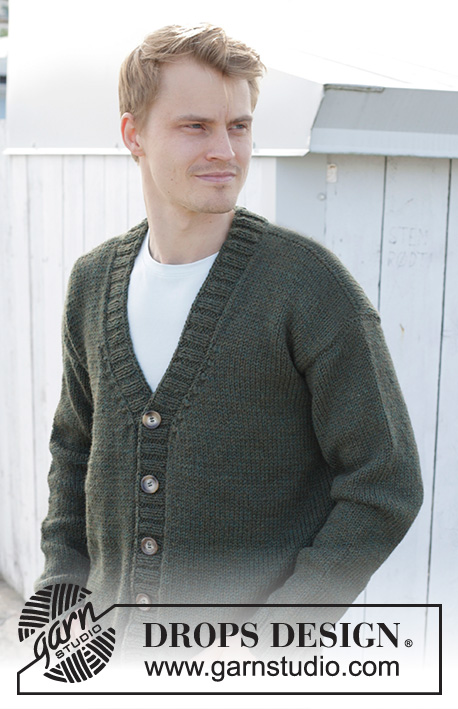
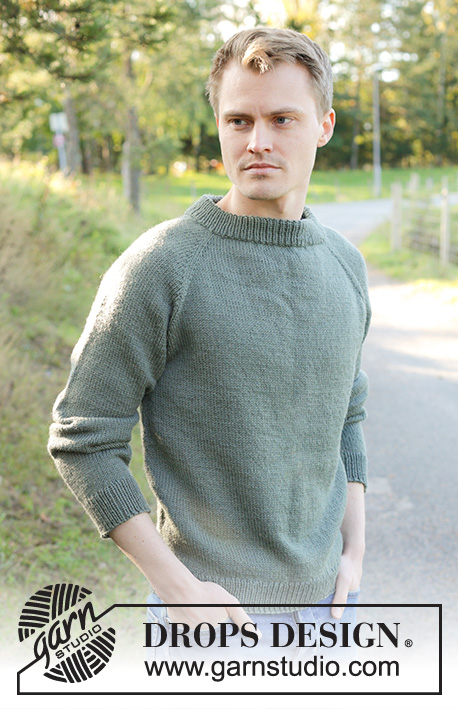
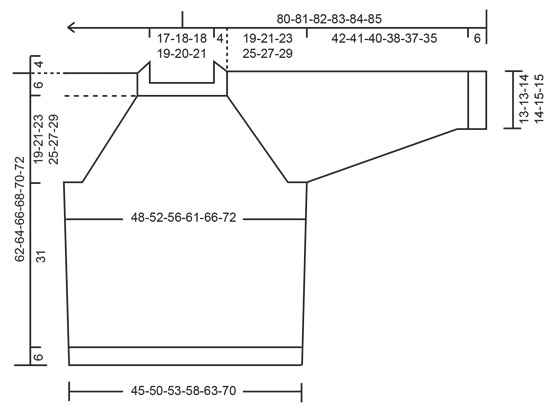
Knitted jumper for men in DROPS Lima. The piece is worked top down with stocking stitch, raglan and double neck. Sizes S - XXXL.
DROPS 246-8 |
|
|
------------------------------------------------------- EXPLANATIONS FOR THE PATTERN: ------------------------------------------------------- RAGLAN: Increase 1 stitch after/before 2 knitted stitches, in each transition between body and sleeves (the markers sit between these 2 stitches which are called raglan-stitches in the text). Increase by making 1 yarn over which is worked on the next round as described below. The new stitches are then worked in stocking stitch Yarn overs worked as follows: BEFORE 2 raglan-stitches: Slip the yarn over from left needle and replace it the other way around (insert the left needle from behind when replacing it). Knit the front loop (stitch twists to the right). No hole. AFTER 2 raglan-stitches: Knit the back loop (stitch twists to the left). No hole. INCREASE TIP: Increase by making 1 yarn over which is worked twisted on the next round to avoid a hole. DECREASE TIP (for sleeves and sides on body): Decrease 1 stitch on each side of the marker-thread as follows: Work until there are 3 stitches left before the marker-thread, knit 2 together, knit 3 (marker-thread sits in the middle stitch), slip 1 stitch knit-wise, knit 1 and pass the slipped stitch over the knitted stitch (2 stitches decreased). ------------------------------------------------------- START THE PIECE HERE: ------------------------------------------------------- JUMPER – SHORT OVERVIEW OF THE PIECE: The neck and yoke are worked in the round with circular needle from the right back shoulder, top down. The yoke is divided for the body and sleeves and the body is continued in the round with circular needle. The sleeves are worked in the round with short circular needle/double pointed needles. DOUBLE NECK: Cast on 120-124-128-132-136-140 stitches with DROPS Lima, using short circular needles size 3 and 4 mm held together. Remove the needle size 4 mm keeping stitches on needle size 3 mm (this gives you an elastic cast-on edge). Work rib in the round (knit 1, purl 1) for 4½ cm. Purl 1 round (folding edge), then continue the rib as before until the neck measures 9 cm from the cast-on edge. Fold the neck double to the inside and work 1 more round of rib, working every 2nd stitch together with its corresponding stitch on the cast-on edge. You now have a double neck. YOKE: Change to circular needle size 4 mm. Insert 4 markers without working the stitches. These are used when increasing for raglan: Insert marker-1 in the first stitch (a knitted stitch), count 25 stitches (sleeve), insert marker-2 in the next stitch, count 33-35-37-39-41-43 stitches (front piece), insert marker-3 in the next stitch, count 25 stitches (sleeve), insert marker-4 in the next stitch. There are 33-35-37-39-41-43 stitches left after the last marker (back piece). Knit 1 round, AT THE SAME TIME, increase 1 stitch in each of the 4 marker-stitches by knitting 1 in both the front and back loop. In addition, increase 2 stitches evenly over each of the front and back pieces – read INCREASE TIP (do not increase over the sleeves) = 128-132-136-140-144-148 stitches. Move the 4 markers so they sit between the marker-stitch and the increased stitch in each transition between the body and sleeves. Work the next round as follows: Start after the marker at the beginning of the round, knit 1, increase 1 stitch for RAGLAN – read description above, knit to 1 stitch before marker-2, increase 1 stitch on each side of the raglan-stitches, knit to 1 stitch before marker-3, increase 1 stitch on each side of the raglan-stitches, knit to 1 stitch before marker-4, increase 1 stitch on each side of the raglan-stitches, knit to 1 stitch before marker-1, increase 1 stitch for raglan, knit 1 (8 increased stitches). Continue with stocking stitch and increase for raglan on each side of the raglan-stitches every 2nd round a total of 10-16-20-19-18-13 times (including the increase described here) = 208-260-296-292-288-252 stitches. REMEMBER THE KNITTING TENSION! Continue with stocking stitch and increase for raglan but now every 2nd increase is only on the front and back pieces (4 increased stitches on the round). I.e., increase on the front and back pieces every 2nd round and on the sleeves every 4th round, alternately 4 and 8 increased stitches. Increase like this 16-14-12-16-20-28 times on the body (8-7-6-8-10-14 times on the sleeves). You have increased a total of 26-30-32-35-38-41 times on the body and 18-23-26-27-28-27 times on the sleeves. After the last increase there are 304-344-368-388-408-420 stitches. Continue with stocking stitch, without further increases, until the yoke measures 19-21-23-25-27-29 cm from the neck, mid-front. Divide for the body and sleeves: Knit 1, place the next 61-71-77-79-81-79 stitches on 1 thread for the sleeve, cast on 9-9-11-13-15-21 stitches (in side under sleeve), knit 91-101-107-115-123-131 (front piece), place the next 61-71-77-79-81-79 stitches on 1 thread for the sleeve, cast on 9-9-11-13-15-21 stitches (in side under sleeve), knit the last 90-100-106-114-122-130 stitches (back piece). The body and sleeves are finished separately. The piece is now measured from here! BODY: = 200-220-236-256-276-304 stitches. Insert 1 marker in each side – in the middle stitch cast on under each sleeve. Work stocking stitch to the first marker; the round now starts here. Continue with stocking stitch in the round for a further 8 cm. Now decrease 2 stitches each side of the body – read DECREASE TIP. Decrease like this every 8 cm, 2 more times = 188-208-224-244-264-292 stitches. Continue working until the body measures 31 cm from the division. Knit 1 round and increase 20-22-22-22-26-30 stitches evenly spaced = 208-230-246-266-290-322 stitches. Change to circular needle size 3 mm. Work rib (knit 1, purl 1) for 6 cm. Cast off a little loosely. The jumper measures approx. 62-64-66-68-70-72 cm from the shoulder. SLEEVES: Place the 61-71-77-79-81-79 stitches from the thread on the one side of the piece on short circular needle/double pointed needles size 4 mm and knit up 1 stitch in each of the new stitches cast on under the sleeve = 70-80-88-92-96-100 stitches. Insert a marker in the middle of the new stitches under the sleeve. Start at the marker and work stocking stitch in the round. When the sleeve measures 4-4-3-3-3-3 cm, decrease 2 stitches under the sleeve – read DECREASE TIP. Decrease like this every 5-3-2½-2-2-1½ cm a total of 8-12-15-16-17-18 times = 54-56-58-60-62-64 stitches. Continue working until the sleeve measures 42-41-40-38-37-35 cm from the division (or to desired length. There is approx. 6 cm left). Knit 1 round and increase 6 stitches evenly spaced = 60-62-64-66-68-70 stitches. Change to double pointed needles size 3 mm and work rib (knit 1, purl 1) for 6 cm. Cast off a little loosely. The sleeve measures approx. 48-47-46-44-43-41 cm from the division. Work the other sleeve in the same way. |
|
 |
|
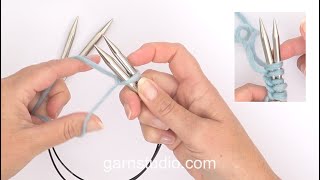
Have you finished this pattern?Tag your pictures with #dropspattern #mistyday or submit them to the #dropsfan gallery. Do you need help with this pattern?You'll find 29 tutorial videos, a Comments/Questions area and more by visiting the pattern on garnstudio.com. © 1982-2026 DROPS Design A/S. We reserve all rights. This document, including all its sub-sections, has copyrights. Read more about what you can do with our patterns at the bottom of each pattern on our site. |
|


With over 40 years in knitting and crochet design, DROPS Design offers one of the most extensive collections of free patterns on the internet - translated to 17 languages. As of today we count 324 catalogues and 12290 patterns translated into English (UK/cm). 12290
We work hard to bring you the best knitting and crochet have to offer, inspiration and advice as well as great quality yarns at incredible prices! Would you like to use our patterns for other than personal use? You can read what you are allowed to do in the Copyright text at the bottom of all our patterns. Happy crafting!
Post a comment to pattern DROPS 246-8
We would love to hear what you have to say about this pattern!
If you want to leave a question, please make sure you select the correct category in the form below, to speed up the answering process. Required fields are marked *.