
Popular categories
Looking for a yarn?


Comments / Questions (43)
![]() Neera wrote:
Neera wrote:
How many balls of yarn needed for a medium size sweater?
04.04.2026 - 23:38DROPS Design answered:
Hi Neera, for a medium size sweater you will need approximately 12 balls of yarn. Happy knitting!
05.04.2026 - 18:36
![]() Meloni wrote:
Meloni wrote:
I am still not understanding your answer to Ms. Sweeney's question. Have you added a stitch to hold the marker? Is there a video I can watch that explains your answer?
06.02.2026 - 23:23
![]() Helena wrote:
Helena wrote:
När jag läser mönstret ser jag att jag skall ÖKA på sista varvet före resåren nedtill på bak-/framstycke. Är detta verkligen rätt?
06.01.2026 - 00:41DROPS Design answered:
Hej Helena. Resår är mer elastiskt än slätstickning och drar därför ihop sig mer. Genom att öka maskor före resåren undviker man att det blir en markant skillnad på bredden på resåren jämfört med resten av fram- och bakstycket. Mvh DROPS Design
07.01.2026 - 13:30
![]() Deborah wrote:
Deborah wrote:
Can you give me a break down of sizes for men so that I can decide what size to make? Looking for a chest of 40 inches for a male. Thank you
11.11.2025 - 20:45DROPS Design answered:
Hi Deborah, There is a size chart at the bottom of the pattern, with all the measurements for each size. Regards, Drops Team.
12.11.2025 - 06:47
![]() Ranalda wrote:
Ranalda wrote:
OK, I have just found the "Winter Sprinkles" with Snow - which I can probably convert more easily, right? (as Snow and Andes are both group E), will just have to alter the floppy cuffs and hem [and adapt the collar] ;o)
27.10.2025 - 20:22DROPS Design answered:
Hi, Ranalda, it's easier to switch between yarns in the same yarn group, just make sure you have the right amount of yarn when you make the change. Happy knitting!
28.10.2025 - 09:06
![]() Ranalda wrote:
Ranalda wrote:
Is it "possible" to knit this in Andes (after converting the amount of wool/needles required) or is Andes simply too chunky? (I'm a bit disappointed with the lack of patterns for Men's jumpers using Andes - but have been asked to knit a "chunky sweater" ;o) Thanks for any advice!
27.10.2025 - 20:13
![]() Kerttu Lepola wrote:
Kerttu Lepola wrote:
Onko kerroksen vaihtumiskohta raglanlisäysten jälkeen se kohta, jossa on tehty aikaisemmin 1. raglanlisäys?
06.10.2025 - 19:05DROPS Design answered:
Kerroksen vaihtumiskohta on ensimmäisen merkityn silmukan ja sitä seuraavan silmukan välissä (ennen ensimmäistä raglanlisäystä).
13.10.2025 - 17:26
![]() Federica wrote:
Federica wrote:
Dove trovo la guida alle taglie?
03.08.2025 - 15:21DROPS Design answered:
Buonasera Federica, può trovare lo schema delle taglie in fondo alla pagina. Buon lavoro!
03.08.2025 - 21:34
![]() Jen wrote:
Jen wrote:
Hello! I am making an XL version of this sweater…did my raglan increases, ended up with 296 stitches total on my needles instead of 292…the TC is confusing as instead of increasing with size…it decreases..208,260,296,292,288,252. Is this an error? Also does the TC include the 8 raglan stitches? Thanks!
02.07.2025 - 13:09DROPS Design answered:
Dear Jen, you start yoke with 140 stitches in XL, and you will increase for the raglan 8 stitches a total of 19 times = 8x19= 152 sts increased for raglan + 140 = 292 stitches in total. Can this help? Happy knitting!
04.07.2025 - 11:38
![]() Marita wrote:
Marita wrote:
Hej. En fråga bara. Jag stickar den i M och ska då ha 124 m på halsen. Sedan ska det delas 25/35/25/35 men det blir bara 120. Ska det inte vara 25/37/25/37? Men då är det enligt mönstret str L. Bara en fundering
17.06.2025 - 06:33DROPS Design answered:
Hej Marita. Du har glömt att räkna de maskor du sätter markörer i, om du räknar med de 4 maskorna så stämmer det . Mvh DROPS Design
17.06.2025 - 14:48
|
|
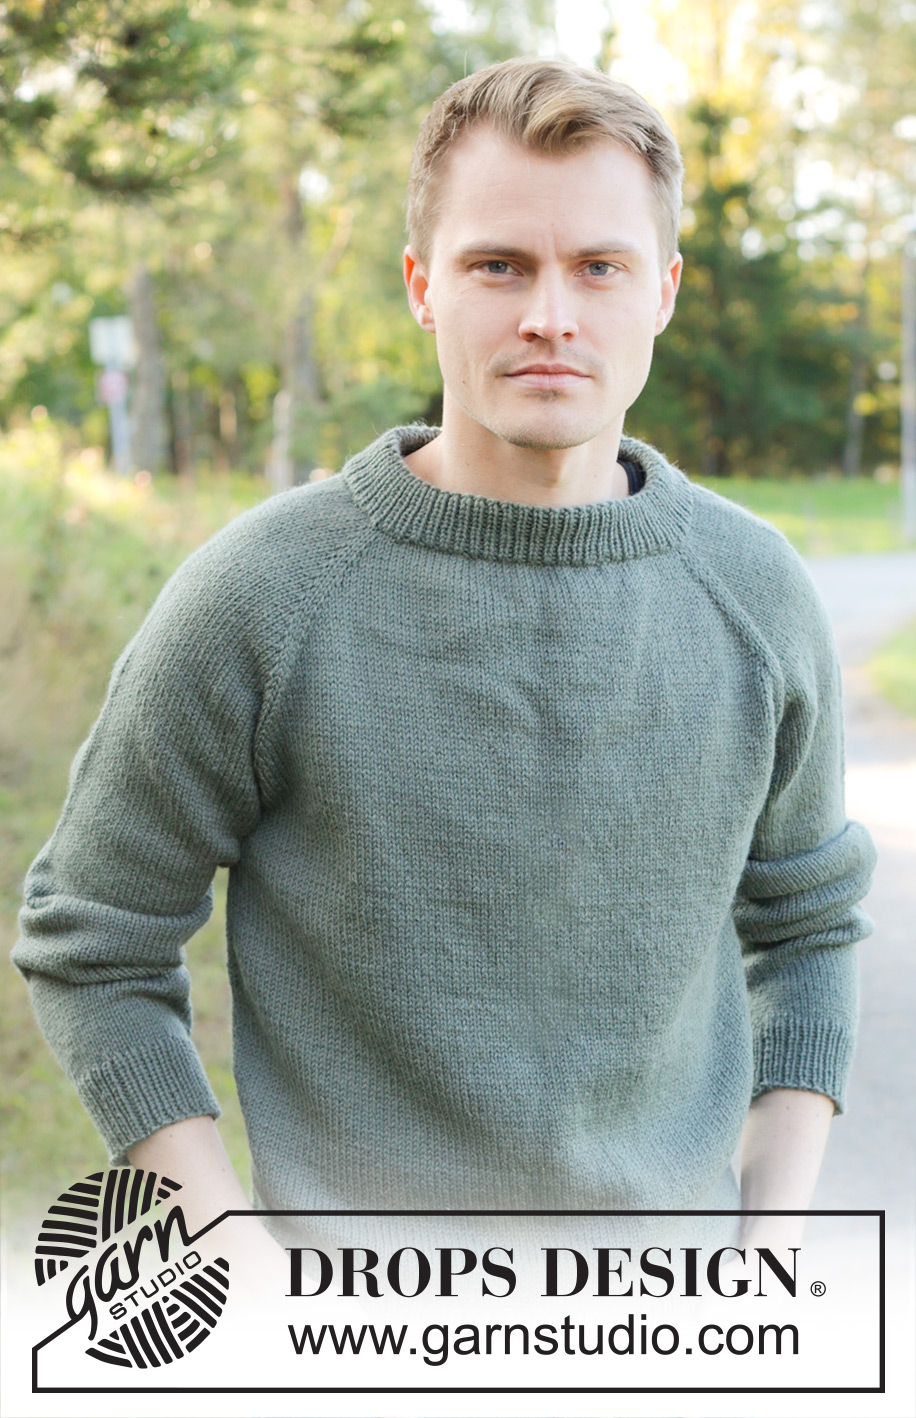
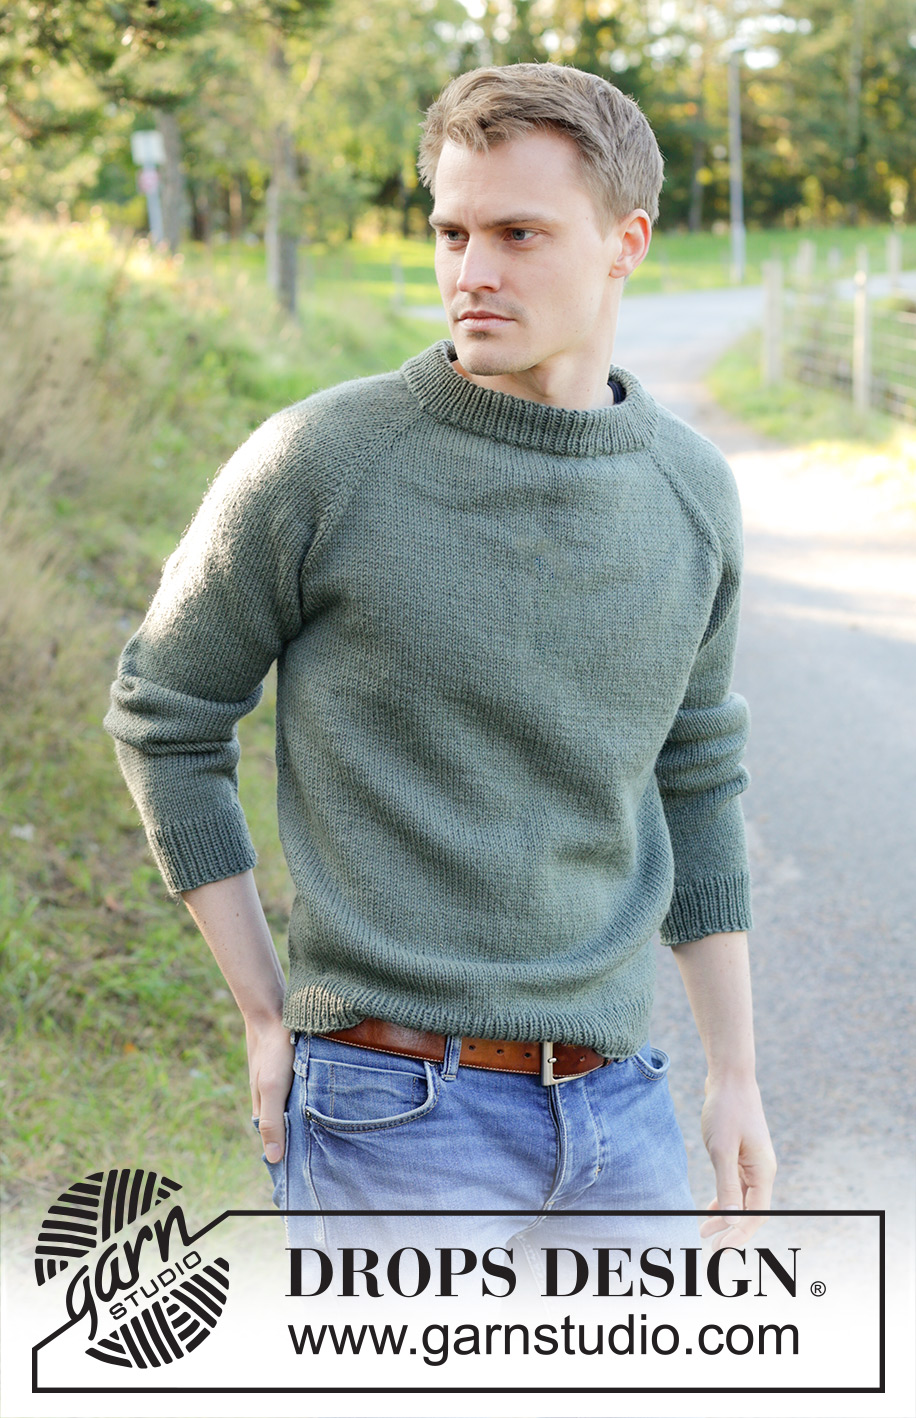
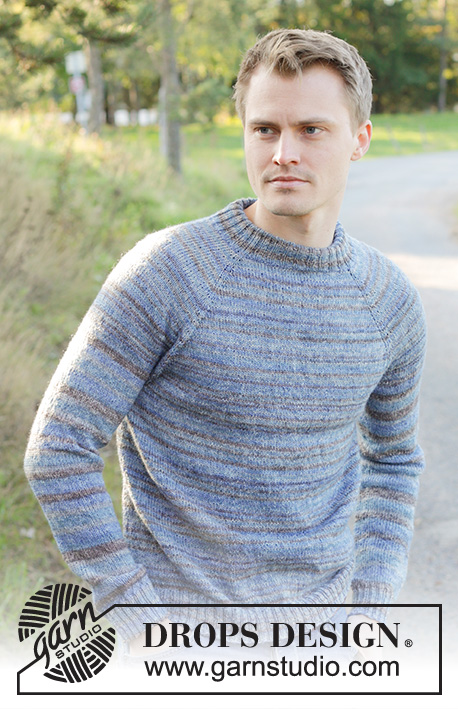
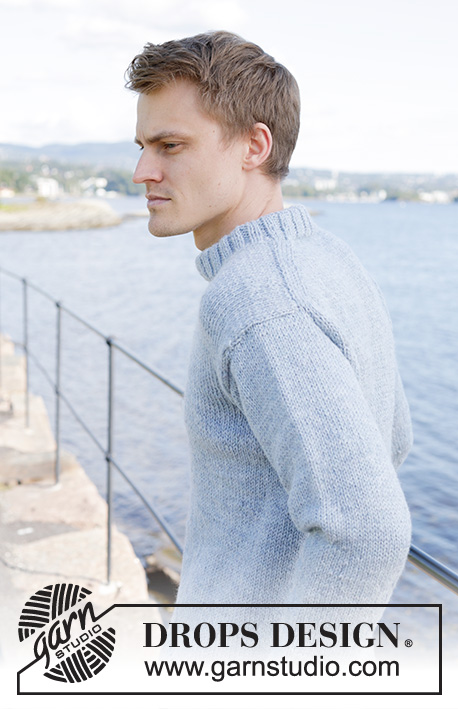
Misty Day#mistyday |
|
 |
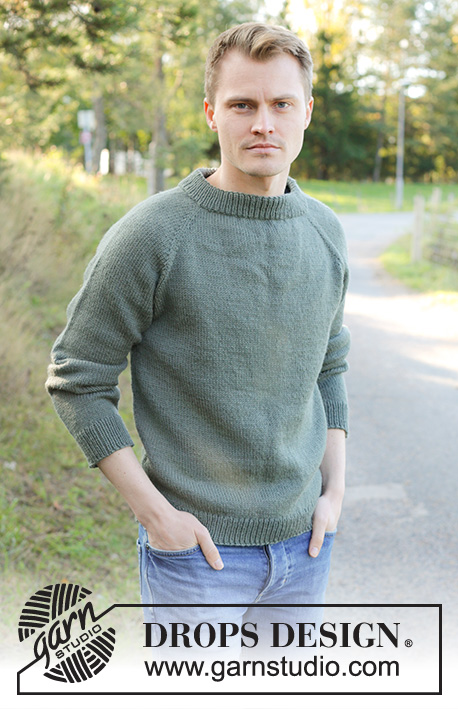 |
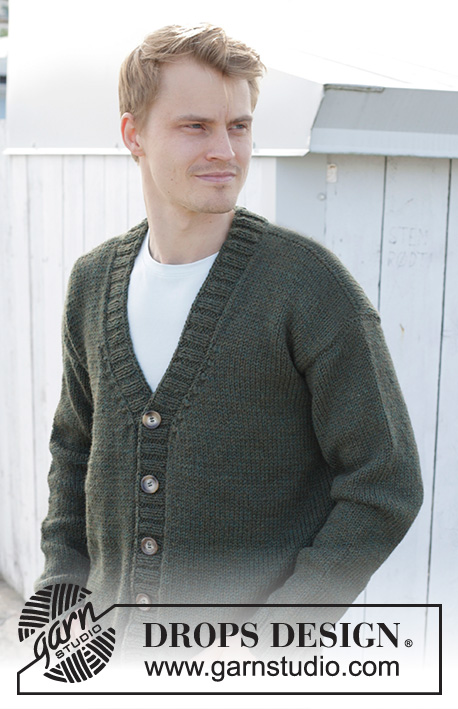
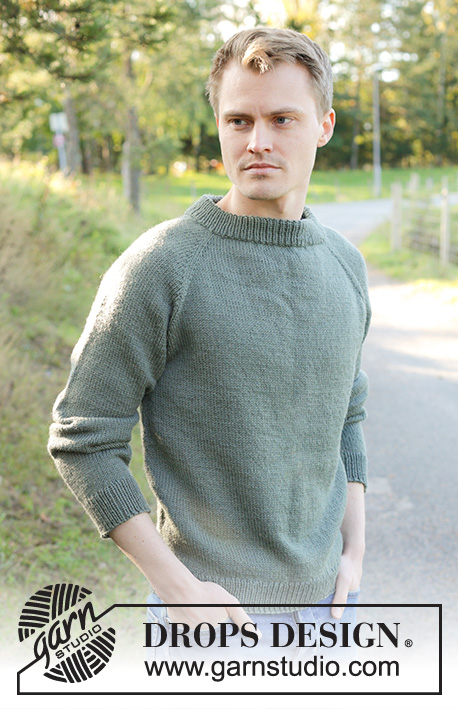
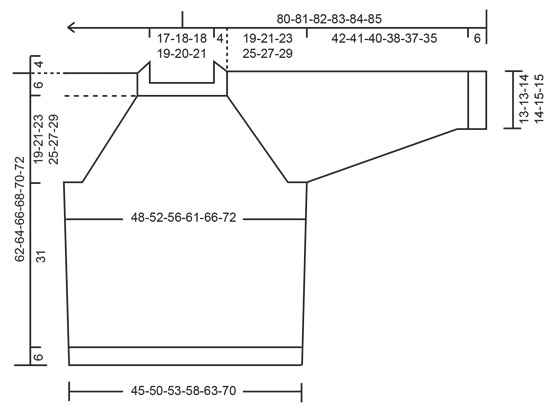
Knitted jumper for men in DROPS Lima. The piece is worked top down with stocking stitch, raglan and double neck. Sizes S - XXXL.
DROPS 246-8 |
|
|
------------------------------------------------------- EXPLANATIONS FOR THE PATTERN: ------------------------------------------------------- RAGLAN: Increase 1 stitch after/before 2 knitted stitches, in each transition between body and sleeves (the markers sit between these 2 stitches which are called raglan-stitches in the text). Increase by making 1 yarn over which is worked on the next round as described below. The new stitches are then worked in stocking stitch Yarn overs worked as follows: BEFORE 2 raglan-stitches: Slip the yarn over from left needle and replace it the other way around (insert the left needle from behind when replacing it). Knit the front loop (stitch twists to the right). No hole. AFTER 2 raglan-stitches: Knit the back loop (stitch twists to the left). No hole. INCREASE TIP: Increase by making 1 yarn over which is worked twisted on the next round to avoid a hole. DECREASE TIP (for sleeves and sides on body): Decrease 1 stitch on each side of the marker-thread as follows: Work until there are 3 stitches left before the marker-thread, knit 2 together, knit 3 (marker-thread sits in the middle stitch), slip 1 stitch knit-wise, knit 1 and pass the slipped stitch over the knitted stitch (2 stitches decreased). ------------------------------------------------------- START THE PIECE HERE: ------------------------------------------------------- JUMPER – SHORT OVERVIEW OF THE PIECE: The neck and yoke are worked in the round with circular needle from the right back shoulder, top down. The yoke is divided for the body and sleeves and the body is continued in the round with circular needle. The sleeves are worked in the round with short circular needle/double pointed needles. DOUBLE NECK: Cast on 120-124-128-132-136-140 stitches with DROPS Lima, using short circular needles size 3 and 4 mm held together. Remove the needle size 4 mm keeping stitches on needle size 3 mm (this gives you an elastic cast-on edge). Work rib in the round (knit 1, purl 1) for 4½ cm. Purl 1 round (folding edge), then continue the rib as before until the neck measures 9 cm from the cast-on edge. Fold the neck double to the inside and work 1 more round of rib, working every 2nd stitch together with its corresponding stitch on the cast-on edge. You now have a double neck. YOKE: Change to circular needle size 4 mm. Insert 4 markers without working the stitches. These are used when increasing for raglan: Insert marker-1 in the first stitch (a knitted stitch), count 25 stitches (sleeve), insert marker-2 in the next stitch, count 33-35-37-39-41-43 stitches (front piece), insert marker-3 in the next stitch, count 25 stitches (sleeve), insert marker-4 in the next stitch. There are 33-35-37-39-41-43 stitches left after the last marker (back piece). Knit 1 round, AT THE SAME TIME, increase 1 stitch in each of the 4 marker-stitches by knitting 1 in both the front and back loop. In addition, increase 2 stitches evenly over each of the front and back pieces – read INCREASE TIP (do not increase over the sleeves) = 128-132-136-140-144-148 stitches. Move the 4 markers so they sit between the marker-stitch and the increased stitch in each transition between the body and sleeves. Work the next round as follows: Start after the marker at the beginning of the round, knit 1, increase 1 stitch for RAGLAN – read description above, knit to 1 stitch before marker-2, increase 1 stitch on each side of the raglan-stitches, knit to 1 stitch before marker-3, increase 1 stitch on each side of the raglan-stitches, knit to 1 stitch before marker-4, increase 1 stitch on each side of the raglan-stitches, knit to 1 stitch before marker-1, increase 1 stitch for raglan, knit 1 (8 increased stitches). Continue with stocking stitch and increase for raglan on each side of the raglan-stitches every 2nd round a total of 10-16-20-19-18-13 times (including the increase described here) = 208-260-296-292-288-252 stitches. REMEMBER THE KNITTING TENSION! Continue with stocking stitch and increase for raglan but now every 2nd increase is only on the front and back pieces (4 increased stitches on the round). I.e., increase on the front and back pieces every 2nd round and on the sleeves every 4th round, alternately 4 and 8 increased stitches. Increase like this 16-14-12-16-20-28 times on the body (8-7-6-8-10-14 times on the sleeves). You have increased a total of 26-30-32-35-38-41 times on the body and 18-23-26-27-28-27 times on the sleeves. After the last increase there are 304-344-368-388-408-420 stitches. Continue with stocking stitch, without further increases, until the yoke measures 19-21-23-25-27-29 cm from the neck, mid-front. Divide for the body and sleeves: Knit 1, place the next 61-71-77-79-81-79 stitches on 1 thread for the sleeve, cast on 9-9-11-13-15-21 stitches (in side under sleeve), knit 91-101-107-115-123-131 (front piece), place the next 61-71-77-79-81-79 stitches on 1 thread for the sleeve, cast on 9-9-11-13-15-21 stitches (in side under sleeve), knit the last 90-100-106-114-122-130 stitches (back piece). The body and sleeves are finished separately. The piece is now measured from here! BODY: = 200-220-236-256-276-304 stitches. Insert 1 marker in each side – in the middle stitch cast on under each sleeve. Work stocking stitch to the first marker; the round now starts here. Continue with stocking stitch in the round for a further 8 cm. Now decrease 2 stitches each side of the body – read DECREASE TIP. Decrease like this every 8 cm, 2 more times = 188-208-224-244-264-292 stitches. Continue working until the body measures 31 cm from the division. Knit 1 round and increase 20-22-22-22-26-30 stitches evenly spaced = 208-230-246-266-290-322 stitches. Change to circular needle size 3 mm. Work rib (knit 1, purl 1) for 6 cm. Cast off a little loosely. The jumper measures approx. 62-64-66-68-70-72 cm from the shoulder. SLEEVES: Place the 61-71-77-79-81-79 stitches from the thread on the one side of the piece on short circular needle/double pointed needles size 4 mm and knit up 1 stitch in each of the new stitches cast on under the sleeve = 70-80-88-92-96-100 stitches. Insert a marker in the middle of the new stitches under the sleeve. Start at the marker and work stocking stitch in the round. When the sleeve measures 4-4-3-3-3-3 cm, decrease 2 stitches under the sleeve – read DECREASE TIP. Decrease like this every 5-3-2½-2-2-1½ cm a total of 8-12-15-16-17-18 times = 54-56-58-60-62-64 stitches. Continue working until the sleeve measures 42-41-40-38-37-35 cm from the division (or to desired length. There is approx. 6 cm left). Knit 1 round and increase 6 stitches evenly spaced = 60-62-64-66-68-70 stitches. Change to double pointed needles size 3 mm and work rib (knit 1, purl 1) for 6 cm. Cast off a little loosely. The sleeve measures approx. 48-47-46-44-43-41 cm from the division. Work the other sleeve in the same way. |
|
 |
|
Have you finished this pattern?Tag your pictures with #dropspattern #mistyday or submit them to the #dropsfan gallery. Do you need help with this pattern?You'll find 29 tutorial videos, a Comments/Questions area and more by visiting the pattern on garnstudio.com. © 1982-2026 DROPS Design A/S. We reserve all rights. This document, including all its sub-sections, has copyrights. Read more about what you can do with our patterns at the bottom of each pattern on our site. |
|


With over 40 years in knitting and crochet design, DROPS Design offers one of the most extensive collections of free patterns on the internet - translated to 17 languages. As of today we count 325 catalogues and 12298 patterns translated into English (UK/cm). 12298
We work hard to bring you the best knitting and crochet have to offer, inspiration and advice as well as great quality yarns at incredible prices! Would you like to use our patterns for other than personal use? You can read what you are allowed to do in the Copyright text at the bottom of all our patterns. Happy crafting!
Post a comment to pattern DROPS 246-8
We would love to hear what you have to say about this pattern!
If you want to leave a question, please make sure you select the correct category in the form below, to speed up the answering process. Required fields are marked *.