
Popular categories
Looking for a yarn?


Comments / Questions (57)
![]() Suzanne wrote:
Suzanne wrote:
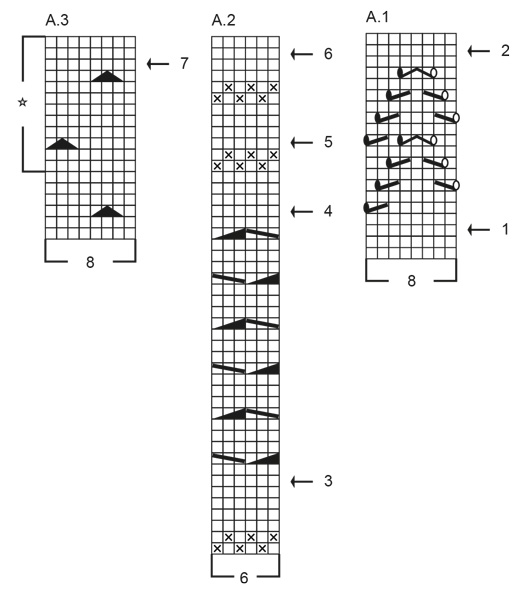
Quand on dit pour taille S/M A.3 est terminé (3rgs de noeuds au total ) est-ce qu’on fait tout le diagramme A.3 , c’est là que je ne comprend pas . merci
22.04.2026 - 20:36DROPS Design answered:
Bonjour Suzanne, dans ces deux tailles, on ne tricote que 3 rangs de noeuds en hauteur au total, autrement dit, vous tricotez une seule fois tous les rangs du diagramme A.3 (18 rangs). Bon tricot!
23.04.2026 - 10:43
![]() Villard wrote:
Villard wrote:
Bonjour pour ce modèle je ne comprends pas le diagramme A3. Puis-je avoir la marche à suivre. 3 m ensemble env. sans lâcher les mailles aig gauche. Tricoter à l’end. Puis les tricoter à l’env. ens et lâcher les m de l’aig gauche. Noeud merci
10.04.2026 - 16:32DROPS Design answered:
Bon jour Mme Villard, suivez attentivement les indications de la légende et suivez cette vidéo en même temps pour bien comprendre comment tricoter ce petit noeud. Bon tricot!
13.04.2026 - 07:32
![]() Guri Kvalvåg wrote:
Guri Kvalvåg wrote:
Klare ikke å forstå hvordan mønster 3stikkes(knute) finnes det strikkeanvisning på video
10.03.2026 - 19:34DROPS Design answered:
Hei Guri, Her er en lenke til videoen som viser hvordan man strikker knutene: https://www.garnstudio.com/video.php?id=1327&lang=no Denne videoen og andre som kunne være hjelpsomme til denne oppskriften, finner du også ved å klikke på "Videoer" på toppen av sida. Vennlig hilsen, Drops Team.
11.03.2026 - 06:55
![]() Mara wrote:
Mara wrote:
Buongiorno, ho risolto con il giro 11 , avevo trascritto male il grafico. Adesso la lavorazione procede perfettamente. Grazie
11.11.2025 - 06:53
![]() Mara wrote:
Mara wrote:
Da una risposta di un commento precedente relativo al giro 9 di A1 ,manca un gettato tra 2 maglie insieme a dritto (K2tog) e 2 maglie a dritto (k2),mentre nel grafico c'è. Come devo proseguire perché mi avanza 1 maglia nel giro 11. Grazie
09.11.2025 - 17:10DROPS Design answered:
Buongiorno Mara, siamo contente che sia riuscita a risolvere. Buon lavoro!
14.11.2025 - 14:51
![]() Alice wrote:
Alice wrote:
Det er en skøn trøje som jeg må 🧶
30.10.2025 - 15:09
![]() Karoline wrote:
Karoline wrote:
Hei, dersom man ikke ønsker å strikke A2, hvor mange maske skal man da øke første gang i strl s?
03.10.2025 - 18:05DROPS Design answered:
Hej Karoline. Eftersom antalet maskor inte förändras i A.2 så ökar du bara det antal maskor som står i beskrivningen (dvs 40 masker i storlek S vid första pilen). Mvh DROPS Design
07.10.2025 - 08:02
![]() Karen Townsend wrote:
Karen Townsend wrote:
I asked this question previously but to no avail did I get an answer. I would like to finish this sweater but I really need to know if I’m not doing graph A3 do I do all the last 2 increases on graph A2? And if not doing the increases do I just knit until I reach the proper yoke measurements and then divide the body. I would kindly appreciate an answer so I can get on with my sweater. Thank you
09.09.2025 - 20:58DROPS Design answered:
Hi Karen, in A.2 diagram, if you wish to complete it, you have to increase stitches as explained in the pattern, I mean at the arrows no 3, 4, 5 and 6. Happy knitting!
12.09.2025 - 11:46
![]() Karen Townsend wrote:
Karen Townsend wrote:
In my previous question on not doing the A3 graph I forgot to ask do I still do all the increases on the size L. Sorry for being a bother.
06.09.2025 - 21:49DROPS Design answered:
Hi Karen, for the size L, you don't have any increases in A.3 diagram. Happy knitting!
12.09.2025 - 11:43
![]() Karen Townsend wrote:
Karen Townsend wrote:
I’m not going to do A3 graph so would I just do plain knitting until I reach the proper yoke measurements and then divide body and sleeves.
05.09.2025 - 17:09DROPS Design answered:
Hi Karen, you can do that, just stocking stitch, without any increases, they don't apply to the size L. Until uou reach the proper yoke measurements, then divide your work for body and sleeves. Happy knitting!
12.09.2025 - 11:42
|
|||||||||||||||||||||||||||||||||||||
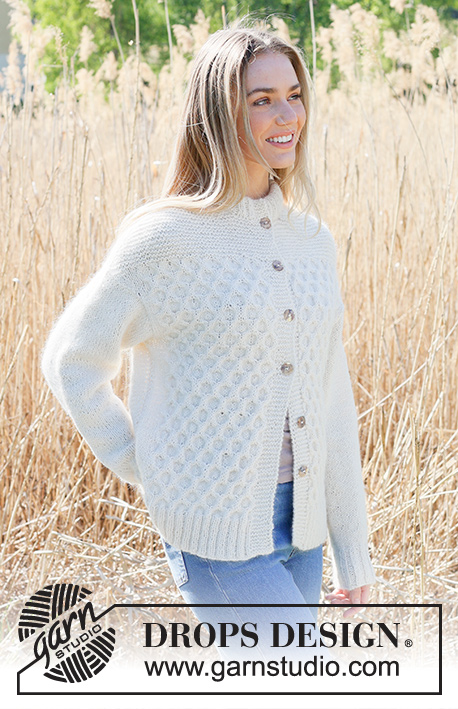
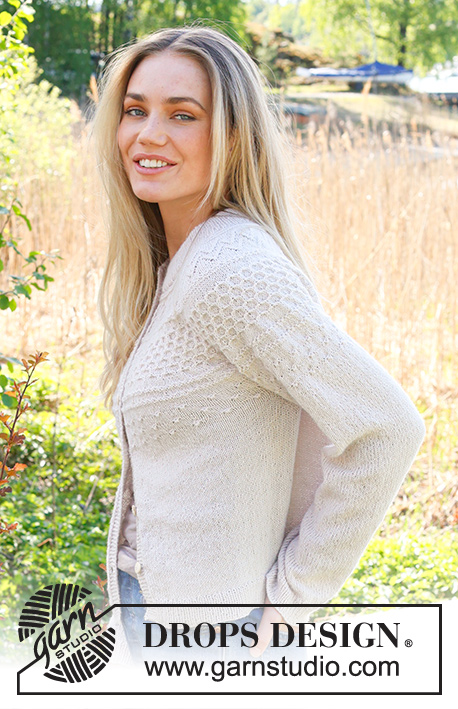
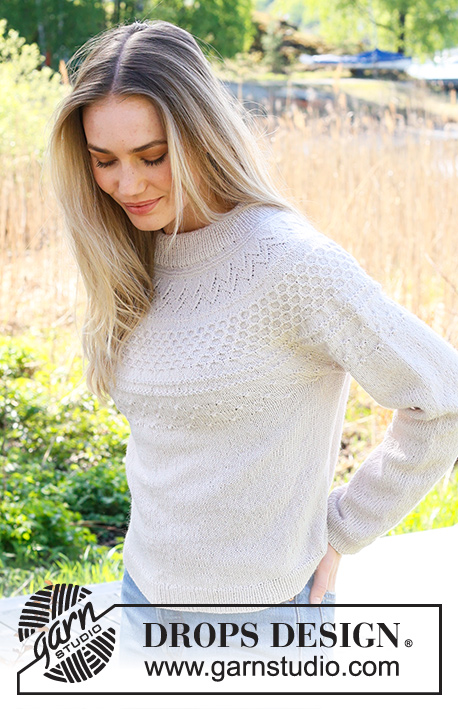
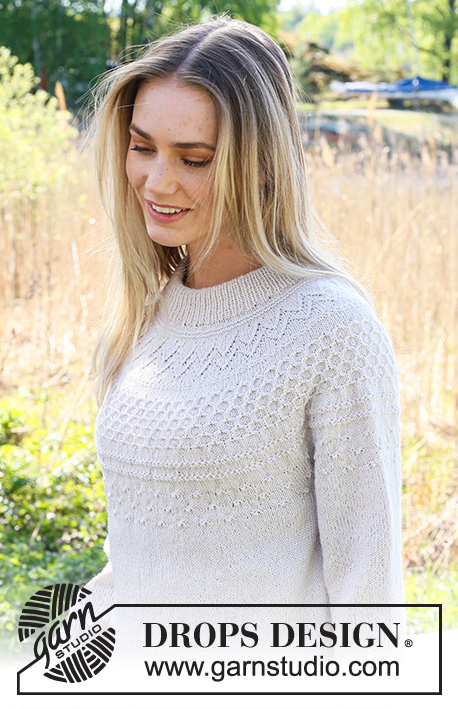
Miss Summerbee Sweater#misssummerbeesweater |
|||||||||||||||||||||||||||||||||||||
 |
 |
||||||||||||||||||||||||||||||||||||
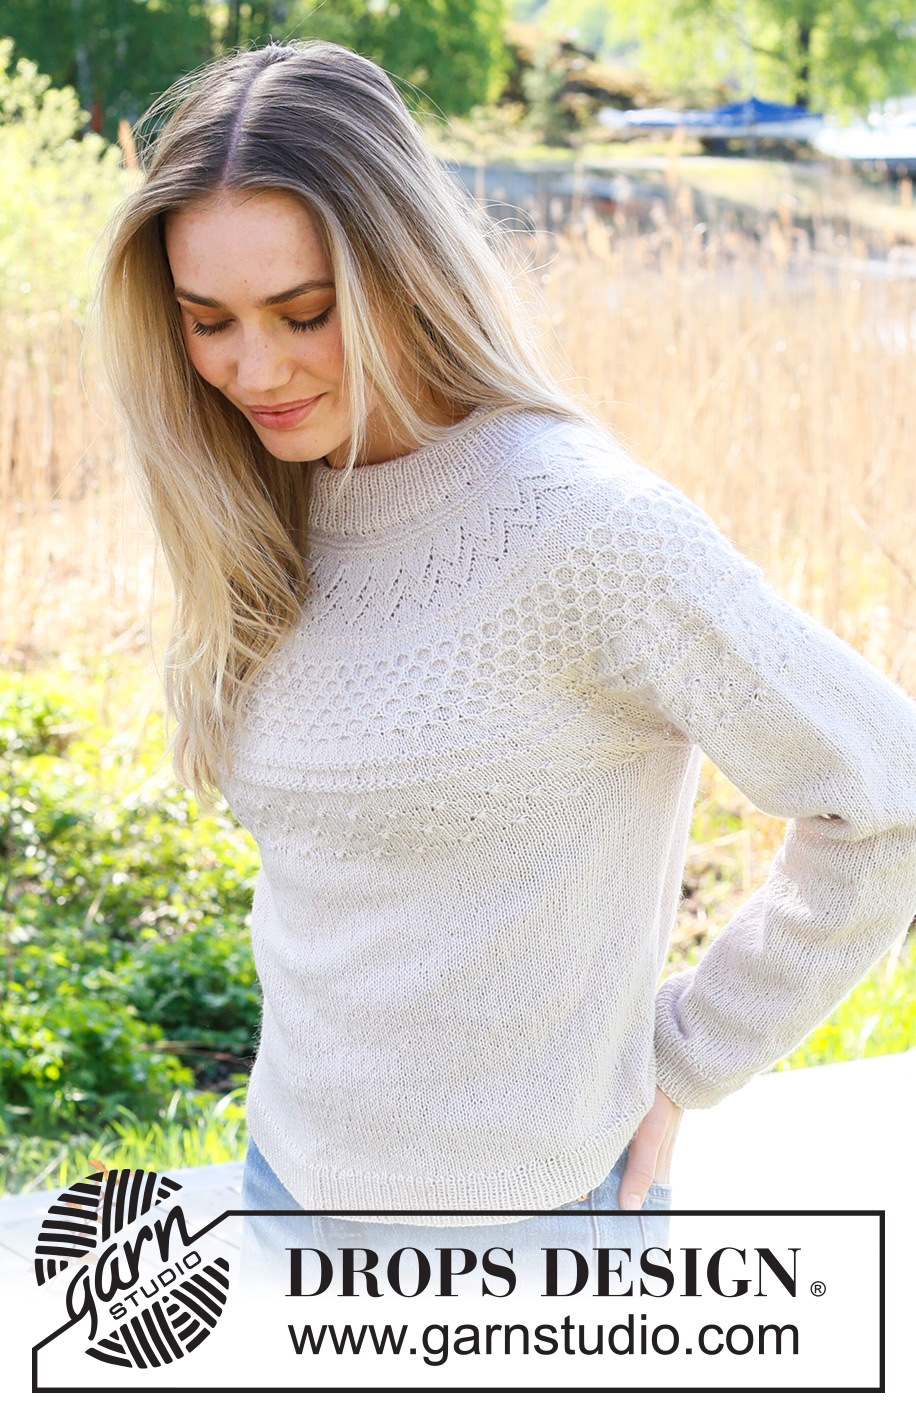
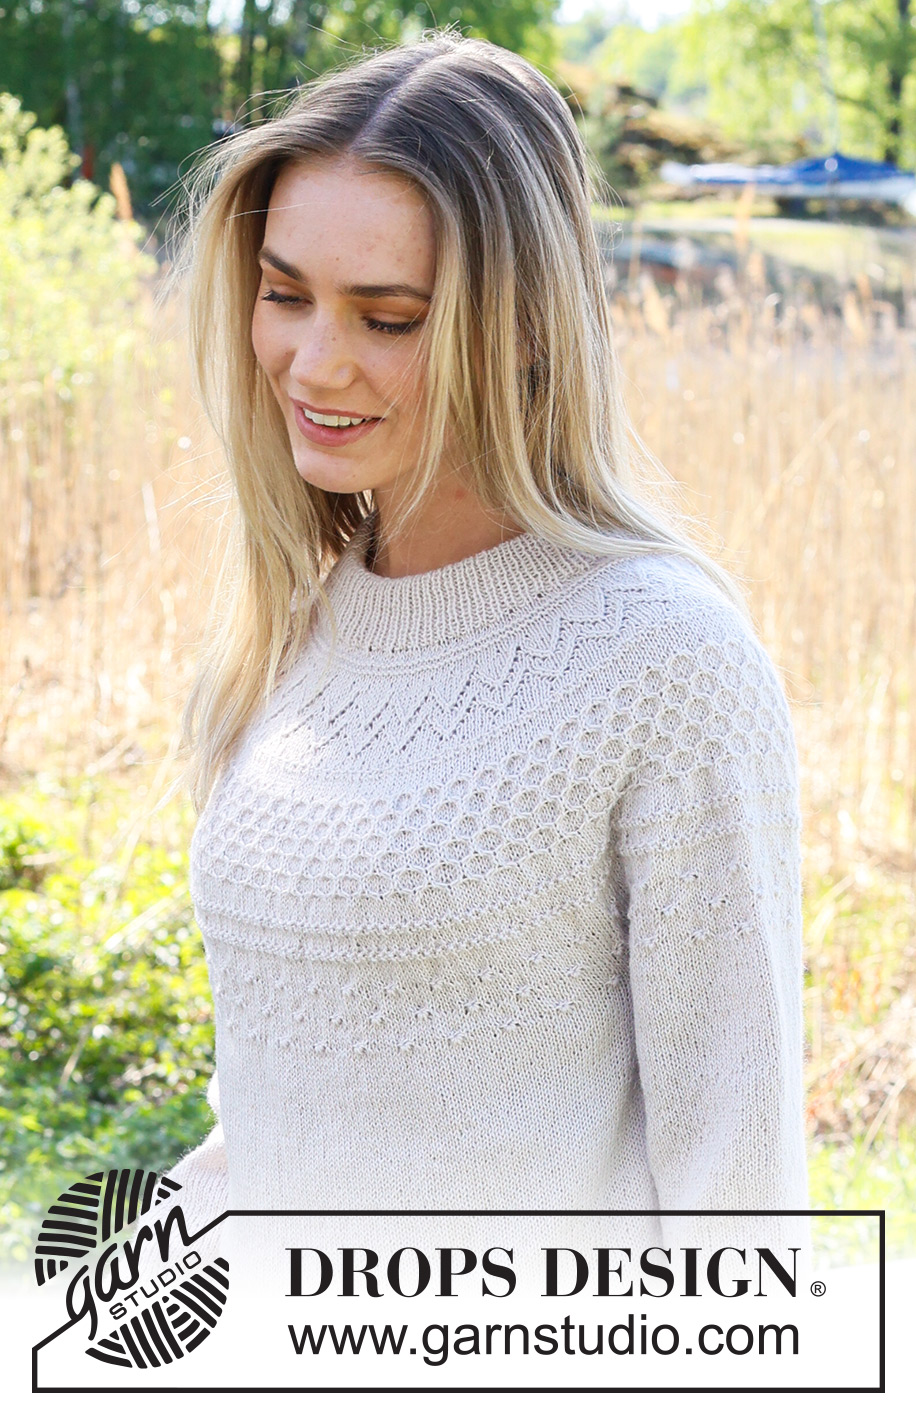
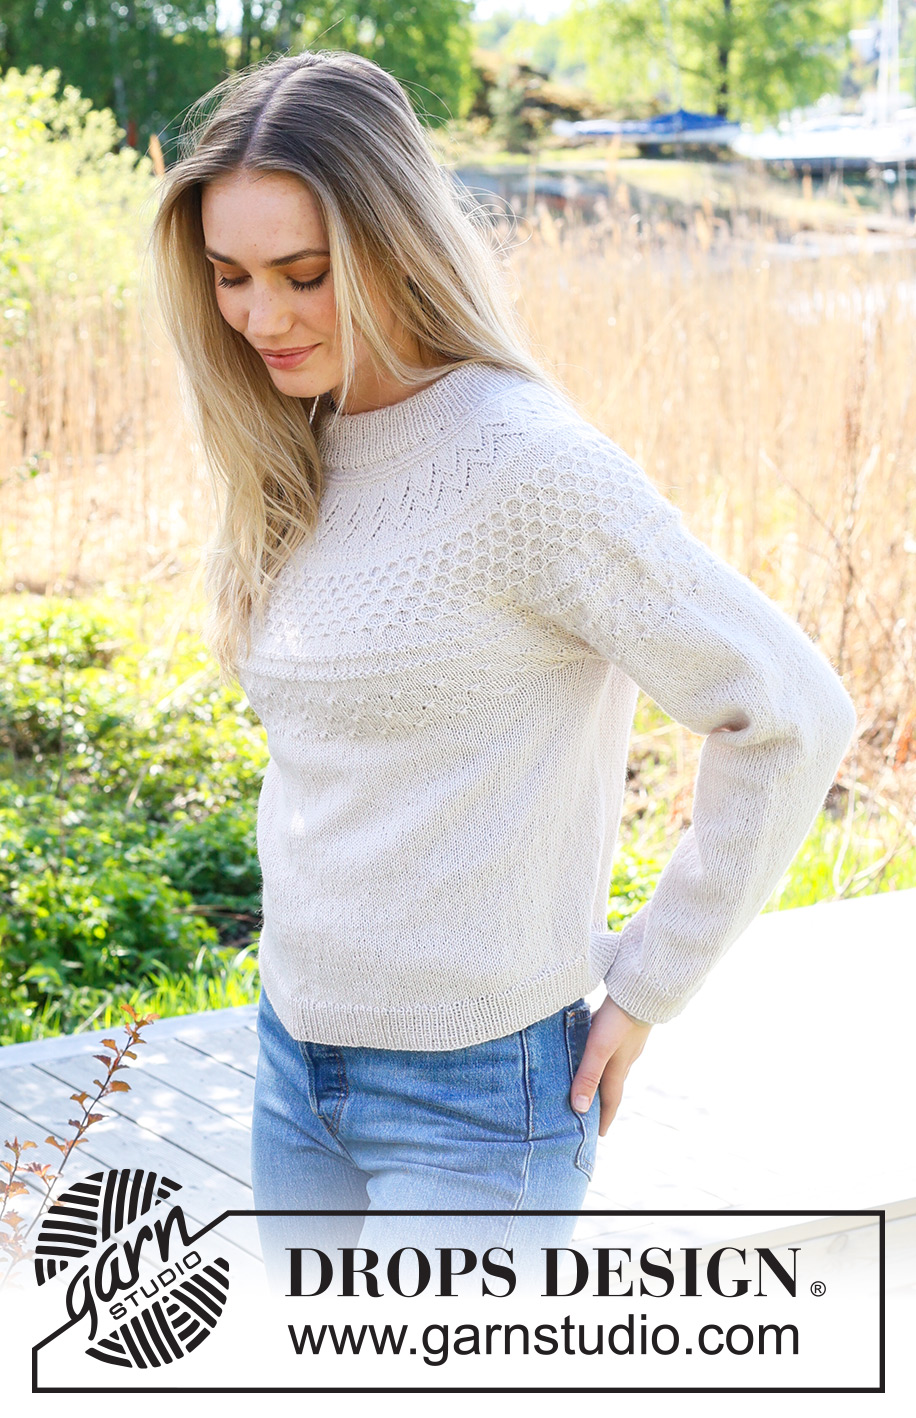
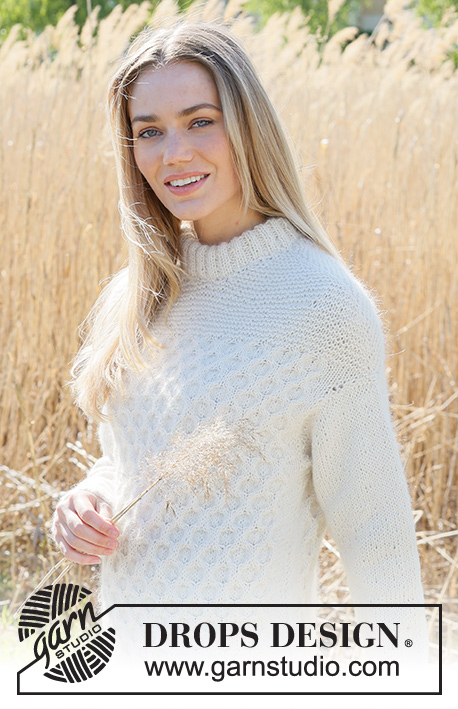
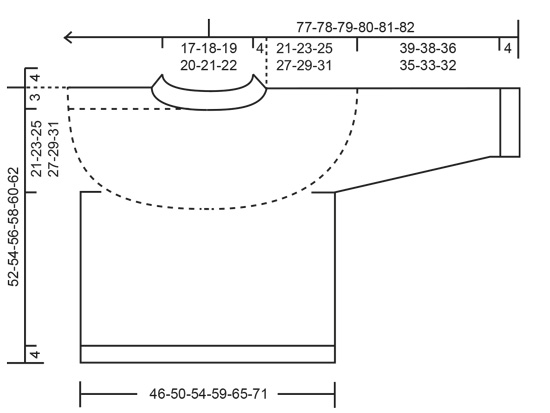
Knitted jumper in DROPS Flora. The piece is worked top down with double neck, round yoke and relief-pattern on the yoke. Sizes S - XXXL.
DROPS 236-2 |
|||||||||||||||||||||||||||||||||||||
|
------------------------------------------------------- EXPLANATIONS FOR THE PATTERN: ------------------------------------------------------- RIDGE/GARTER STITCH (worked in the round): 1 ridge in height = 2 rounds; Knit 1 round and purl 1 round. ELEVATION (back of neck): To make the back of the neck slightly higher when working the yoke, you can work an elevation as described here. Skip this section if you do not want an elevation. Insert 1 marker at the beginning of the round (mid-back). Start from the right side and knit 14-15-16-16-17-18 stitches past the marker, turn, tighten strand and purl 28-30-32-32-34-36 stitches back. Turn, tighten strand and knit 42-45-48-48-51-54 stitches, turn, tighten strand and purl 56-60-64-64-68-72 stitches back. Turn, tighten strand and knit 70-75-80-80-85-90 stitches, turn, tighten strand and purl 84-90-96-96-102-108 stitches back. Turn, tighten strand and knit 98-105-112-112-119-126 stitches, turn, tighten strand and purl 112-120-128-128-136-144 stitches back. Turn, tighten the strand and knit to mid-back. Then work YOKE as described in the text. PATTERN: See diagrams A.1 to A.3. INCREASE/DECREASE TIP (evenly spaced): To work out how to increase/decrease evenly, count the total number of stitches on needle (e.g. 120 stitches), and divide by the number of increases/decreases to be made (e.g. 32) = 3.8. In this example, increase by making 1 yarn over after approx. each 4th stitch. On the next row work the yarn overs twisted to avoid holes. When decreasing, knit together approx. each 3rd and 4th stitch. DECREASE TIP (for sleeves): Start 3 stitches before the marker, knit 2 together, knit 2 (marker sits between these 2 stitches), slip 1 stitch as if to knit, knit 1 and pass the slipped stitch over the knitted stitch. ------------------------------------------------------- START THE PIECE HERE: ------------------------------------------------------- JUMPER – SHORT OVERVIEW OF THE PIECE: The neck and yoke are worked in the round with circular needle, from mid back and top down. The yoke is divided for body and sleeves and the body is continued in the round. The sleeves are worked with short circular needle/double pointed needles. DOUBLE NECK: Cast on 120-124-130-136-140-146 stitches with DROPS Flora using 2 short circular needles size 2.5 mm and 3 mm held together. Remove the needle size 3 mm (doing this gives you an elastic cast-on edge) keeping the stitches on the needle size 2.5 mm. Work rib in the round (knit 1, purl 1) for 9 cm. Fold the neck double to the inside and work 1 more round of rib, working every 2nd stitch together with its corresponding stitch on the cast-on edge. You now have a double neck. Change to circular needle size 3 mm. Knit 1 round and increase 32-36-38-40-44-46 stitches evenly spaced - read INCREASE/DECREASE TIP = 152-160-168-176-184-192 stitches. Insert 1 marker in the middle of the round (mid-front) – this is used when measuring the yoke. You can now work an ELEVATION at the back – read description above. If you do not want an elevation go straight to YOKE. YOKE: Work 2-2-6-6-8-10 rounds of stocking stitch, then work 2 RIDGES over all stitches – read description above. REMEMBER THE KNITTING TENSION! Work A.1 in the round over all stitches, increasing as follows at each arrow: Arrow-1: Increase 40-40-48-56-64-64 stitches evenly spaced = 192-200-216-232-248-256 stitches. Arrow-2: Increase 48-52-60-68-64-74 stitches evenly spaced = 240-252-276-300-312-330 stitches. When A.1 is finished work A.2 over all stitches, increasing as follows at each arrow: Arrow-3: Increase 102-108-114-126-126-138 stitches evenly spaced = 342-360-390-426-438-468 stitches (you increase more stitches here as the pattern tightens the piece slightly). Arrow-4: Decrease 6-6-6-12-12-12 stitches evenly spaced – remember INCREASE/DECREASE TIP = 336-354-384-414-426-456 stitches. Arrow-5: Increase 24-30-30-30-36-42 stitches evenly spaced = 360-384-414-444-462-498 stitches. Arrow-6: Increase 16-24-26-28-34-38 stitches evenly spaced = 376-408-440-472-496-536 stitches. The increases are finished in sizes S, M and L. When A.2 is finished work A.3 over all stitches. Increase as follows at the arrow (applies only to XL, XXL and XXXL): Arrow-7 (XL, XXL and XXXL): Increase 16-24-24 stitches evenly spaced = 488-520-560 stitches. OVERVIEW OF THE NEXT SECTION: Continue with A.3 as described below. In addition the yoke is divided for the body and sleeves. Read PATTERN and DIVIDING FOR BODY AND SLEEVES before continuing. PATTERN: S and M: When A.3 is finished (a total of 3 rows of knots), continue with stocking stitch. NOTE: The yoke is divided for the body and sleeves before A.3 is finished. L: When A.3 is finished, work the first 6 rounds in the repeat marked with a star (a total of 4 rows of knots), then continue with stocking stitch. NOTE: The yoke is divided for the body and sleeves before A.3 is finished. XL, XXL and XXXL: When A.3 is finished, work the repeat marked with a star until you have a total of 5-6-6 rows of knots, then continue with stocking stitch. NOTE: The yoke is divided for the body and sleeves before A.3 is finished. DIVIDING FOR BODY AND SLEEVES: When the yoke measures 21-23-25-27-29-31 cm from the marker, divide for the body and sleeves as follows: Work 56-61-65-72-79-86 stitches as before (½ back piece), place the next 76-82-90-100-102-108 stitches on a thread for the sleeve, cast on 8-8-10-10-12-12 stitches (in side under sleeve), work 112-122-130-144-158-172 stitches (front piece), place the next 76-82-90-100-102-108 stitches on a thread for the sleeve, cast on 8-8-10-10-12-12 stitches (in side under sleeve), work the last 56-61-65-72-79-86 stitches (½ back piece). The body and sleeves are finished separately. The piece is now measured from here! BODY: = 240-260-280-308-340-368 stitches. Finish A.3 as described above – NOTE: After the division, the pattern will not fit under the sleeves; work pattern as far as possible with the remaining stitches under the sleeve in stocking stitch (the pattern is continued neatly from the yoke on the front and back pieces). When A.3 is finished (a total of 3-3-4-5-6-6 rows of knots), continue with stocking stitch until the body measures 24 cm from the division. Knit 1 round and increase 48-52-56-62-68-74 stitches evenly spaced = 288-312-336-370-408-442 stitches. Change to circular needle size 2.5 mm and work rib (knit 1, purl 1) for 4 cm. Cast off a little loosely. The jumper measures approx. 52-54-56-58-60-62 cm from the shoulder down. SLEEVES: Place the 76-82-90-100-102-108 stitches from the thread on the one side of the piece on short circular needle/double pointed needles size 3 mm and knit up 1 stitch in each of the new stitches cast on under the sleeve = 84-90-100-110-114-120 stitches. Insert a marker in the middle of the new stitches under the sleeve. Finish A.3 in the round as described above. NOTE: After the division, the pattern will not fit under the sleeve; work pattern as far as possible and then the stitches under the sleeve in stocking stitch. When A.3 is finished continue with stocking stitch until the sleeve measures 4-4-4-2-3-2 cm from the division. Now decrease 2 stitches under the sleeve – read DECREASE TIP. Decrease like this every 4½-3½-2-2-1½-1½ cm a total of 8-10-14-17-18-20 times = 68-70-72-76-78-80 stitches. Continue working until the sleeve measures 39-38-36-35-33-32 cm from the division. There is 4 cm left to finished length; try the jumper on and work to desired length.. Knit 1 round where you increase 12-14-14-14-14-16 stitches evenly spaced = 80-84-86-90-92-96 stitches. Change to double pointed needles size 2.5 mm and work rib (knit 1, purl 1) for 4 cm. Cast off a little loosely. The sleeve measures approx. 43-42-40-39-37-36 cm from the division. Work the other sleeve in the same way. |
|||||||||||||||||||||||||||||||||||||
Diagram explanations |
|||||||||||||||||||||||||||||||||||||
|
|||||||||||||||||||||||||||||||||||||
 |
|||||||||||||||||||||||||||||||||||||
 |
|||||||||||||||||||||||||||||||||||||
Have you finished this pattern?Tag your pictures with #dropspattern #misssummerbeesweater or submit them to the #dropsfan gallery. Do you need help with this pattern?You'll find 31 tutorial videos, a Comments/Questions area and more by visiting the pattern on garnstudio.com. © 1982-2026 DROPS Design A/S. We reserve all rights. This document, including all its sub-sections, has copyrights. Read more about what you can do with our patterns at the bottom of each pattern on our site. |
|||||||||||||||||||||||||||||||||||||


With over 40 years in knitting and crochet design, DROPS Design offers one of the most extensive collections of free patterns on the internet - translated to 17 languages. As of today we count 324 catalogues and 12290 patterns translated into English (UK/cm). 12290
We work hard to bring you the best knitting and crochet have to offer, inspiration and advice as well as great quality yarns at incredible prices! Would you like to use our patterns for other than personal use? You can read what you are allowed to do in the Copyright text at the bottom of all our patterns. Happy crafting!
Post a comment to pattern DROPS 236-2
We would love to hear what you have to say about this pattern!
If you want to leave a question, please make sure you select the correct category in the form below, to speed up the answering process. Required fields are marked *.