
Popular categories
Looking for a yarn?


Comments / Questions (70)
![]() Natalia wrote:
Natalia wrote:
Hej! Mam problem. Robię lewy przód, mam 42 cm. Przełożyłam 13 oczek (5 z plisy I 8 klasycznych) na nitkę. Miałam 28 oczek, od lewej zamykałam według instrukcji a od prawej robiłam rzędy skrócone. Skonczylam z 18 oczkami, które zamknęłam. Zostało mi 13 oczek na nitce z tej części. Przeglądając dalszą część instrukcji nie znalazłam informacji co mam z tym zrobić.
06.04.2026 - 12:14DROPS Design answered:
Witaj Natalio, odpowiedź jest w części. WYKOŃCZENIE DEKOLTU: Zaczynając na prawej stronie robótki, na krótkich drutach z żyłką nr 4 nabrać 86 - 100 oczek wokół dekoltu (w tym oczka przodów na nitkach). Pozdrawiamy!
07.04.2026 - 08:44
![]() Ramona wrote:
Ramona wrote:
Leider komme ich nicht weiter. Mein Rückenteil hat eine Länge von 44cm und es sollen die mittleren 28 Maschen für den Halsausschnitt in der nächsten Runde abgekettet werden. Im Abschnitt Halsausschnitt steht aber 1Masche in jeder Hinreihe insgesamt 2x abnehmen. Wie soll ich richtig für den Halsausschnitt am Rückenteil abketten ??? Liebe Grüße Ramona
10.02.2026 - 18:34DROPS Design answered:
Liebe Ramona, Sie ketten die 28 Maschen für den Halsausschnitt ab. Dann haben Sie rechts und links davon ja noch Maschen, die weitergestrickt werden müssen, das sind die beiden Schultern. Sie stricken jede Schulter einzeln weiter und nehmen dabei am Halsrand, wie beschrieben ab - zwischen der Abnahme und den abgeketteten Maschen sind 3 glatt rechte Maschen vorhanden. Viel Spaß beim Weiterstricken!
18.02.2026 - 22:55
![]() Jemma wrote:
Jemma wrote:
I don't understand the diagonal shoulder part. When does it say to turn in the middle of the piece?
30.11.2025 - 10:43DROPS Design answered:
Dear Jemma, to shape the diagonal shoulders you will need to work more rows over the stitches towards neck and less rows over the stitches towards armhole, find this technique in video here - for another pattern but technique of short rows for diagonal shoulders is the same. Happy knitting!
01.12.2025 - 09:17
![]() Maria wrote:
Maria wrote:
Welche Größe trägt das Model?
28.09.2025 - 22:16DROPS Design answered:
Hi Maria, S or M. Happy knitting!
29.09.2025 - 07:58
![]() Agnieszka wrote:
Agnieszka wrote:
Witaj. Robię rozmiar M i pierwszy raz skosy ramion. Przy wykonaniu tyłu użyłam rzędów skróconych. Zastosuję je też przy przodzie. Moje pytanie: Co robię z plisą po wykonaniu robótki na 44 cm? Do jakiego momentu ją przerabiam? Czy rzędy skrócone zaczynam od długości 46 cm? Pozdrawiam :)
04.09.2025 - 22:19DROPS Design answered:
Witaj Agnieszko, jak zdejmiesz na nitkę oczka na dekolt to już nie wykonujesz plisy. Zajmujesz się tylko ramieniem i jego skosem. Pozdrawiamy!
09.09.2025 - 09:57
![]() Cathy wrote:
Cathy wrote:
Hi, I don’t understand the pattern for the neck shaping. I’m on the left side I have 6 garter stitch band, 10 stitches then 14 stitches on a thread and 15 stitches on the armhole side. What happens with the 14 stitches on a thread? On the neck part do I do 6 garter cast off 3 ? Then cast off again? Thanks Cathy
30.08.2025 - 19:32DROPS Design answered:
Dear Cathy, the 14 stitches that are put on a thread you will use during the last NECK section, where you work a 4cm rib edge in the neck. You will pick up these stitches to work the neck, alongside other stitches arount the whole neck. These 14 stitches include the 6 band stitches. The remaining 31 stitches are used for the neck and shoudlers. In the first row from the neck you will cast off the first 3 stitches. In the 2nd row from the neck you cast off the first 2 stitches. Decrease 1 stitch in 4 rows from the right side as per the Decrease TIP. The diagonal shoulder is worked over the other 22 stitches. Happy knitting!
31.08.2025 - 18:55
![]() Beatriz wrote:
Beatriz wrote:
Mangas. No entiendo este apartado: “Continuar con punto jersey hasta que la manga mida 51-49-49-47-44-42 cm. Ahora continuar de ida y vuelta con punto jersey desde el centro bajo la manga hasta que la manga mida 52-50-50-49-48-47 cm (una abertura de 1-1-1-2-4-5 cm). Cerrar. Trabajar la otra manga de la misma manera.”
20.08.2025 - 18:41DROPS Design answered:
Hola Beatriz, la manga se trabaja en redondo hasta que mida 51-49-49-47-44-42 cm. A partir de aquí se trabaja de ida y vuelta en punto jersey. Como trabajas en filas, el inicio/final de las filas estará abierto y se formará una pequeña abertura bajo la manga. Sigues trabajando de ida y vuelta hasta que la manga mida 52-50-50-49-48-47 cm y cierras todos los puntos. Esta abertura se usará para ayudar a coser la manga a la sisa (puedes ver la abertura como la línea de rayas en el dibujo, debajo del esquema de medidas). La 2ª manga se trabaja entera igual que la primera; repites todos los pasos desde el principio.
25.08.2025 - 02:07
![]() Jagna wrote:
Jagna wrote:
Pytanie o gore swetra . W opisie jest zamknac 28 srodkowych oczek.Co zrobić z resztą niezamknietych oczek ? Jak to ma wyglądać? Przerobić oczka zamknac 28 przerobić rząd do końca a w kolejnym zamknąć je ? Czy zostawić na żyłce pomocniczej? We wzorze jest tylko napisane zamknac 28 srodkowych oczek i przerabiać odzielnie ramions a kolejny opisany etap to sa przody swetra. I nie ma wzmianki co zrobić z resztą oczek z tyłu
18.07.2025 - 10:39DROPS Design answered:
Witaj Jagno, przerabiasz oczka jednego ramienia (możesz je zdjąć na żyłkę pomocniczą, będą przerabiane później), zamykasz 28 o. na dekolt i teraz zamykasz 1 o. od strony dekoltu (drugie ramię) i przerabiasz rząd do końca. Teraz zaczynasz zdejmować oczka na początku rzędu na lewej stronie robótki jak w opisie i wykonujesz skos jednego ramienia. Później zajmiesz się drugim ramieniem. Pozdrawiamy!
18.07.2025 - 15:04
![]() Harriet wrote:
Harriet wrote:
Maat L klopt het aantal minderen toch niet als je de biezen niet mee moet rekenen? Ik kom op 51 minderingen als ik 180 steken moet overhouden
07.07.2025 - 16:51
![]() Carmen wrote:
Carmen wrote:
I bought the yarn (Air) to make Autumn pathways but now decided I like this pattern. Can I still use Air yarn . Yours with kindness.Carmen.
04.06.2025 - 15:15DROPS Design answered:
Dear Carmen, Big Merino and Air both belong to the same yarn group C, so that you can use Air instead - juste make sure you get enough yarn using the yarn converter and - as always, make sure you get and keep the right tension. Happy knitting!
04.06.2025 - 16:10
|
||||
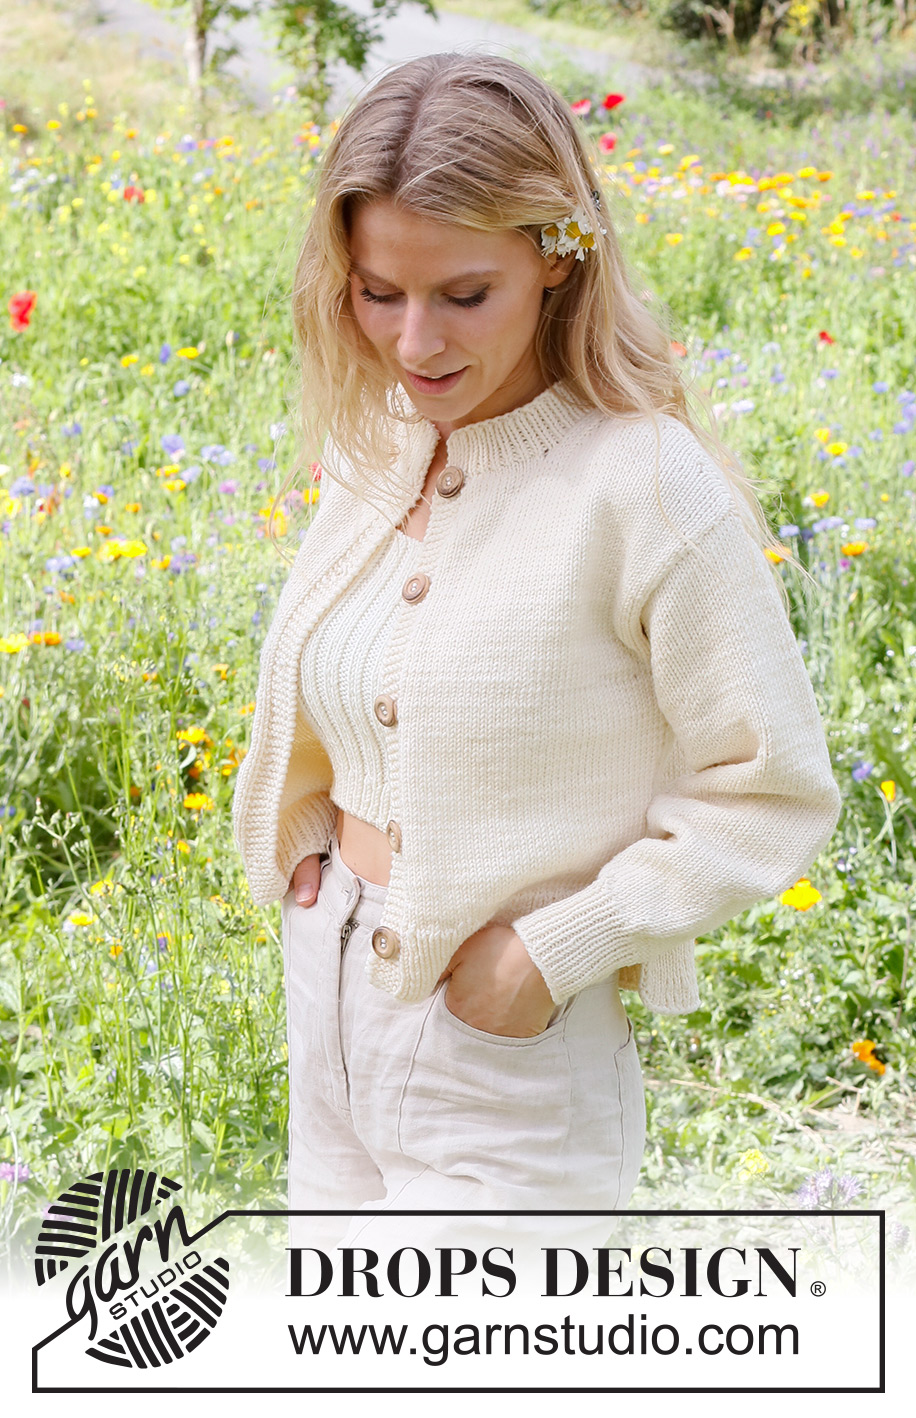
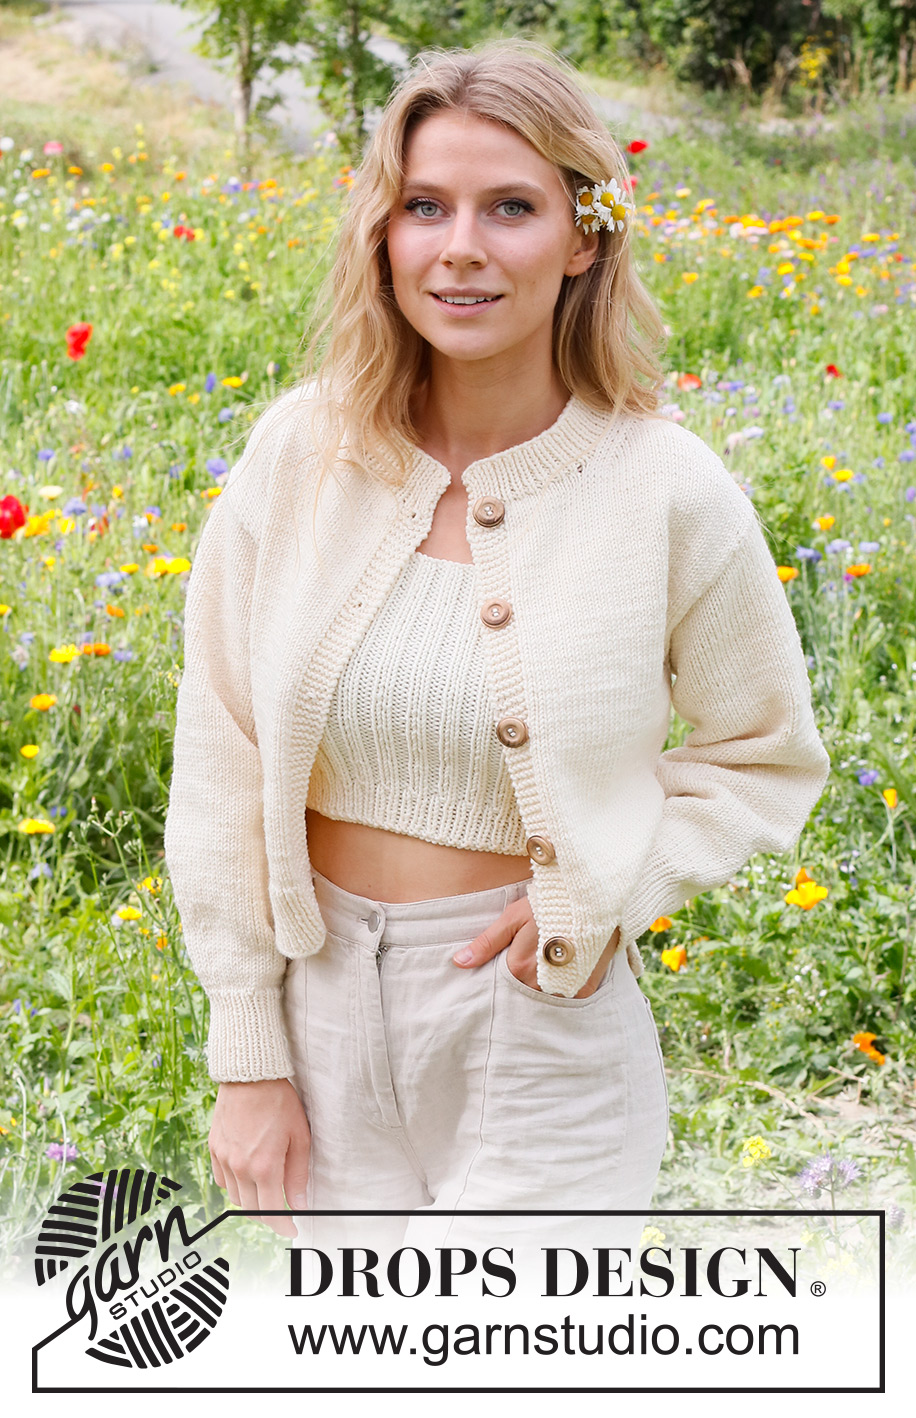
Prairie Rose Cardigan#prairierosecardigan |
||||
 |
 |
|||
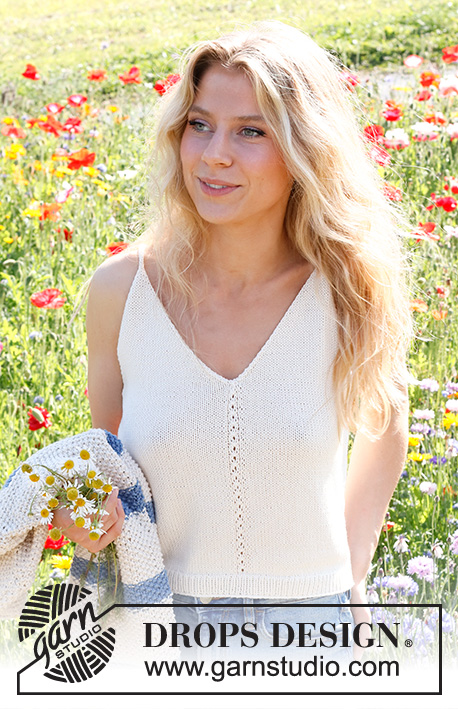
Knitted jacket in DROPS Big Merino. The piece is worked bottom up, with split in the sides. Sizes S - XXXL.
DROPS 230-4 |
||||
|
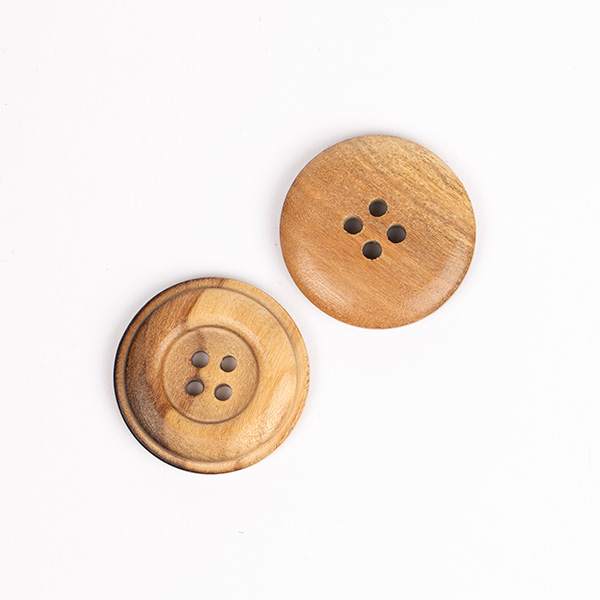
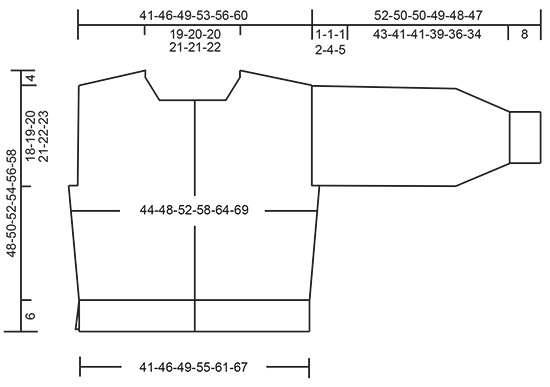
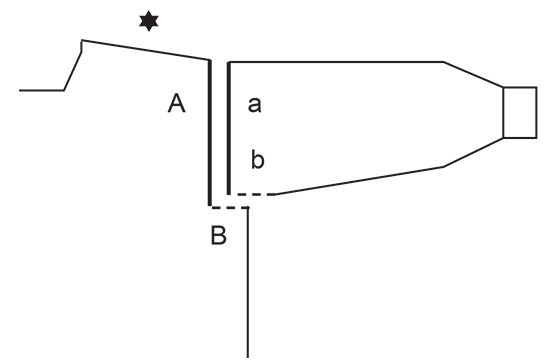
------------------------------------------------------- EXPLANATIONS FOR THE PATTERN: ------------------------------------------------------- RIDGE/GARTER STITCH (worked back and forth): Knit all rows. 1 ridge = knit 2 rows. INCREASE TIP (for body and sleeves): All increases are worked from the right side! Work until there are 2 stitches left before the marker, 1 yarn over, knit 4 (marker sits between these 4 stitches), 1 yarn over. On the next row/round work the yarn overs twisted to avoid holes. Then work the new stitches in stocking stitch. DECREASE TIP (decrease 1 stitch by the neck): Decrease from the right side, inside the 3 stocking stitches. AFTER THE 3 STOCKING STITCHES: Slip 1 stitch as if to knit, knit 1 and pass the slipped stitch over the knitted stitch (= 1 stitch decreased). BEFORE THE 3 STOCKING STITCHES: Work until there are 5 stitches left mid-front, knit 2 together, work the last 3 stitches in stocking stitch (= 1 stitch decreased). BUTTONHOLES: Work the buttonholes on the right band. 1 BUTTONHOLE = 1 yarn over inside the outermost 3 stitches on the row (from the right side). On the next row (wrong side) knit the yarn over together with the 3rd to last stitch on the row. Work the buttonholes when the piece measures: S: 5, 14, 24, 33 and 43 cm. M: 5, 15, 25, 35 and 45 cm. L: 6, 16, 26, 36 and 46 cm. XL: 6, 14, 23, 31, 40 and 48 cm. XXL: 6, 15, 23, 32, 40 and 49 cm. XXXL: 6, 15, 24, 33, 42 and 51 cm. ------------------------------------------------------- START THE PIECE HERE: ------------------------------------------------------- JACKET – SHORT OVERVIEW OF THE PIECE: The back and front pieces are worked separately, back and forth and bottom up until the split is finished. The pieces are joined and the body continued back and forth as far as the armholes. The back and front pieces are then finished separately, back and forth. The sleeves are worked in the round, bottom up. The neck is worked to finish. BACK PIECE: Cast on 95-105-113-127-141-153 stitches with circular needle size 4 mm and DROPS Big Merino. Purl 1 row from the wrong side. Then work rib (knit 1, purl 1) over all stitches – NOTE: The first and last stitches on the row are knitted from the right side and purled from the wrong side. Work this rib for 6 cm, finishing after a row from the wrong side. Lay the piece to one side. LEFT FRONT PIECE: Cast on 55-61-65-71-79-85 stitches with circular needle size 4 mm and DROPS Big Merino. Purl 1 row from the wrong side. Then work rib (knit 1, purl 1) until there are 6 stitches left, finish with 6 band stitches in GARTER STITCH – read description above. Work this rib for 6 cm, finishing after a row from the wrong side. Lay the piece to one side. RIGHT FRONT PIECE: Cast on 55-61-65-71-79-85 stitches with circular needle size 4 mm and DROPS Big Merino. Purl 1 row from the wrong side. Then work rib from the right side as follows: 6 band stitches in garter stitch, work rib (knit 1, purl 1) to the end of the row. Work this rib for 6 cm – remember the BUTTONHOLES on the band and finishing after a row from the wrong side. BODY: Place the right front piece, the back piece and the left front piece on the same circular needle size 5 mm = 205-227-243-269-299-323 stitches. Knit 1 row from the right side and decrease 53-59-63-69-79-83 stitches evenly spaced (do not decrease over the bands) = 152-168-180-200-220-240 stitches. Insert 1 marker 41-45-48-53-58-63 stitches in from each side (= 70-78-84-94-104-114 stitches between the markers on the back piece). Allow the markers to follow your work onwards; they are used when increasing in the sides. Work stocking stitch back and forth with 6 band stitches in garter stitch on each side. REMEMBER THE KNITTING TENSION! When the piece measures 10 cm, increase 1 stitch on each side of both markers – read INCREASE TIP (= 4 stitches increased). Repeat the increase when the piece measures 18-18-19-19-20-20 cm = 160-176-188-208-228-248 stitches. When the piece measures 26-27-28-29-30-31 cm, work the armholes as follows: Work 41-45-48-51-54-57 stitches as before (front piece), cast off 4-4-4-8-12-16 stitches, work 70-78-84-90-96-102 stitches (back piece), cast off 4-4-4-8-12-16 stitches, work 41-45-48-51-54-57 stitches (front piece). The back and front pieces are finished separately. BACK PIECE: = 70-78-84-90-96-102 stitches. Continue with stocking stitch back and forth until the piece measures 44-46-48-50-52-54 cm. On the next row cast off the middle 28-30-30-32-32-34 stitches for the neck and finish each shoulder separately. OVERVIEW OF THE NEXT SECTION: Decrease for the neck and place stitches on a thread for the shoulder as follows. Read NECK and DIAGONAL SHOULDER before continuing. NECK: Decrease 1 stitch for the neck, on each row from the right side, 2 times – read DECREASE TIP. DIAGONAL SHOULDER: Place the outermost stitches by the armhole on a thread, but to avoid cutting the strand, work the stitches before placing them on the thread. Place 5-5-6-7-7-8 stitches on the thread 3 times, then place the last 4-7-7-6-9-8 stitches on the thread. All stitches are now either decreased or placed on the thread. Place the 19-22-25-27-30-32 stitches from the thread back on circular needle size 5 mm. Purl 1 row from the wrong side but, to avoid a hole where you turned in the middle of the piece, pick up the strand between 2 stitches and purl it twisted together with the first stitch on the left needle. Then cast off loosely with knit from the right side. The piece measures approx. 48-50-52-54-56-58 cm from the cast-on edge to the top of the shoulder. Work the other shoulder in the same way. LEFT FRONT PIECE: = 41-45-48-51-54-57 stitches. Work stocking stitch back and forth with 6 band stitches in garter stitch towards mid-front. When the piece measures 42-44-45-47-48-50 cm, place the 13-14-14-15-15-16 stitches towards mid-front on a thread for the neck; to avoid cutting the strand, work the stitches before placing them on the thread. OVERVIEW OF THE NEXT SECTION: Cast off for the neck and place stitches on a thread for the shoulder as follows. Read NECK and DIAGONAL SHOULDER before continuing. NECK: Cast off for the neck at the beginning of each row from the neck as follows: Cast off 3 stitches 1 time and 2 stitches 1 times. Then decrease 1 stitch on each row from the right side 4 times - remember DECREASE TIP. DIAGONAL SHOULDER: AT THE SAME TIME, when the piece measures 44-46-48-50-52-54 cm, place the outermost stitches towards the armhole on a thread for the shoulder in the same way as on the back piece. When all the stitches are either decreased or placed on a thread, place the 19-22-25-27-30-32 stitches from the thread back on circular needle size 5 mm. Purl 1 row from the wrong side in the same way as on the back piece, then cast off loosely with knit from the right side. The piece measures approx. 48-50-52-54-56-58 cm from the cast-on edge to the top of the shoulder. RIGHT FRONT PIECE: Work in the same way as the left front piece. SLEEVES: Cast on 36-38-38-40-42-42 stitches with double pointed needles size 4 mm and DROPS Big Merino. Knit 1 round. Then work rib (knit 1, purl 1) in the round for 8 cm. Knit 1 round and increase 2-2-2-4-4-4 stitches evenly spaced = 38-40-40-44-46-46 stitches. Change to double pointed needles size 5 mm. Insert 1 marker at the beginning of the round and 1 marker after 19-20-20-22-23-23 stitches. These markers mark mid-under and mid-top of the sleeve. Allow the markers to follow your work onwards; they are used when increasing. Work stocking stitch. When you have worked 3 rounds, increase 1 stitch on each side of both markers – read INCREASE TIP (= 4 stitches increased). Increase like this every 4th round a total of 6-6-7-7-7-8 times = 62-64-68-72-74-78 stitches (change to short circular needle size 5 mm when you have enough stitches). Continue with stocking stitch until the sleeve measures 51-49-49-47-44-42 cm. Now continue back and forth with stocking stitch from mid-under the sleeve until the sleeve measures 52-50-50-49-48-47 cm (a split of 1-1-1-2-4-5 cm). Cast off. Work the other sleeve in the same way. ASSEMBLY: Sew the shoulder seams. Sew the sleeve cap to the armhole inside the outermost stitch on the body. Then sew the split to the bottom of the armhole – see sketch. Sew the buttons onto the left band. NECK: Start from the right side and knit up 86 to 100 stitches around the neck (including the stitches from the threads in front) with short circular needle size 4 mm. Purl 1 row from the wrong side where you increase to 103-107-109-111-115-119 stitches (do not increase over the bands). Work rib (knit 1, purl 1) back and forth, with 1 edge stitch in garter stitch on each side, for 4 cm. Cast off a little loosely. |
||||
Diagram explanations |
||||
|
||||
 |
||||
 |
||||
Have you finished this pattern?Tag your pictures with #dropspattern #prairierosecardigan or submit them to the #dropsfan gallery. Do you need help with this pattern?You'll find 29 tutorial videos, a Comments/Questions area and more by visiting the pattern on garnstudio.com. © 1982-2026 DROPS Design A/S. We reserve all rights. This document, including all its sub-sections, has copyrights. Read more about what you can do with our patterns at the bottom of each pattern on our site. |
||||


With over 40 years in knitting and crochet design, DROPS Design offers one of the most extensive collections of free patterns on the internet - translated to 17 languages. As of today we count 324 catalogues and 12290 patterns translated into English (UK/cm). 12290
We work hard to bring you the best knitting and crochet have to offer, inspiration and advice as well as great quality yarns at incredible prices! Would you like to use our patterns for other than personal use? You can read what you are allowed to do in the Copyright text at the bottom of all our patterns. Happy crafting!
Post a comment to pattern DROPS 230-4
We would love to hear what you have to say about this pattern!
If you want to leave a question, please make sure you select the correct category in the form below, to speed up the answering process. Required fields are marked *.