
Popular categories
Looking for a yarn?


Comments / Questions (15)
![]() Caleb wrote:
Caleb wrote:
When casting off for armholes, it list the number of cast off stitches on each row, But it says ‘at the beginning of each row.’ Does this mean one armhole will be higher up by one row? Or should i cast off three at start, then cast off last three on same row?
18.04.2026 - 22:37DROPS Design answered:
Dear Caleb, you should cast off the same number of stitches on each side, this means from both at the beginning of a row from RS then at the beginning of next row from WS, this difference of one row is not visible at all when piece is done. Happy knitting!
20.04.2026 - 09:56
![]() Brugere wrote:
Brugere wrote:
Bonjour , j aimerais tricoter ce modèle avec la laine alaska pouvez vous me dire svp si j aurais le même rendu ? Pouvez-vous me donner votre avis .merci beaucoup cordialement
07.02.2026 - 07:29DROPS Design answered:
Bonjour Mme Brugere, vous n'aurez pas exactement le même rendu car Air et Alaska ont des composition et donc des textures différentes, mais comme elles sont du groupe C toutes les 2, vous pouvez tout à fait tricoter ce pull en Alaska, utilisez juste le convertisseur pour avoir la quantité correspondante. Bon tricot!
09.02.2026 - 08:18
![]() Julia wrote:
Julia wrote:
Good morning. I'm reading through the pattern to make sure I understand it. Is there any reason not to do the neck ribbing (as it is worked back and forth) before sewing up the side seams?
27.01.2026 - 11:51DROPS Design answered:
Dear Julia, you can sew the sides afer or before working neck edge, it won't change anything, but armhole edges are worked in the round, so the sides should be then sewn before. Happy knitting!
27.02.2026 - 16:00
![]() SAMANTHA wrote:
SAMANTHA wrote:
So grateful for such a fabulous resource as a knitter looking to expand my repertoire :) Merry Christmas!
05.12.2025 - 00:33
![]() Marion C wrote:
Marion C wrote:
Bonjour, Il est plusieurs fois fait mention de « A.1 » dans le patron (« continuer A.1 », « tricoter maintenant A.1 »). Je n’arrive pas à comprendre de quoi il s’agit… Pourriez-vous m’éclairer ? Merci !
30.11.2025 - 22:34DROPS Design answered:
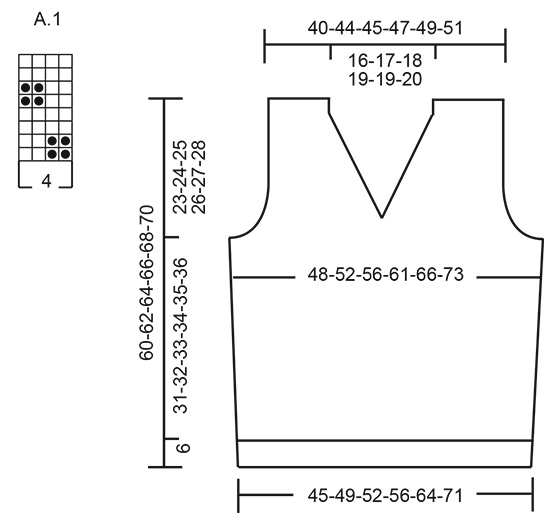
Bonjour Marion C., tout à fait, A.1 correspond au diagramme du point fantaisie que vous retrouverez en bas de page, sous la légende, à gauche du schéma des mesures. Retrouvez plus d'infos sur les diagrammes ici. Bon tricot!
01.12.2025 - 10:58
![]() Vaggelis wrote:
Vaggelis wrote:
Is there any table with the body dimensions corresponding to each size S. M. L. XL. etc?
11.10.2025 - 16:13DROPS Design answered:
Dear Vaggelis, you can find the size chart with the measurements of the finished garment at the bottom of the page; these measurements are in cm. You can read more on how to interpret our size charts here. Happy knitting!
12.10.2025 - 14:59
![]() LABORIER Marthe wrote:
LABORIER Marthe wrote:
Bonjour, merci d'avoir répondu rapidement à mon message DEVANT: monter 102 mailles tricoter en côtes...OK changer d'aiguillesOK " Tricoter en diminuant 12 mailles à intervalles réguliers au dessus des 88-96-100-120-132 mailles suivantes et 1maille lisière au point mousse= 78-86-90-98-100-122 mailles " ? Merci pour votre réponse. Bonne journée
09.09.2025 - 10:49DROPS Design answered:
Bonjour Mme Laborier, après les côtes, vous devez diminuer les mailles en côtes, vous conservez les mailles lisières et tricotez ainsi (en L): 1 maille lisière, tricotez les 100 mailles suivantes à l'endroit en diminuant 12 mailles à intervalles réguliers (utilisez la calculette que vous trouverez en bas à droite de la page) et terminez par 1 maille lisière, il vous reste: 1+(100-12)+1=90 mailles. Bon tricot!
11.09.2025 - 11:43
![]() LABORIER wrote:
LABORIER wrote:
Bonjour, En fait je ne comprends pas les explications du modele ma voisine bonne tricoteuse ne comprends pas non plus. Qui peut m'aider? merci
06.09.2025 - 16:45DROPS Design answered:
Bonjour Mme Laborier, pourriez-vous nous indiquer quelle partie des explications vous ne comprenez pas? Ce sera ainsi plus facile de vous aider. Merci pour votre compréhension.
08.09.2025 - 10:18
![]() Melody wrote:
Melody wrote:
Por que la espalda se trabaja de igual forma que la parte delantera? Deberia ser diferente para el cuello y los hombros. Por que los hombros se trabajan por separados?
31.08.2025 - 22:59DROPS Design answered:
Hi Melody, the shoulders on the back piece are knitted separately for only few centimetres. There is a V-neck on the front. Happy knitting!
22.10.2025 - 10:56
![]() Kimberly Phan wrote:
Kimberly Phan wrote:
Jeg strykker forstykke, og har kommet til den delen der jeg skal felle av til både V hals og ermehull. Felling til ermehull så står det bl.a. at jeg skal felle 3 masker 1 gang, 2 masker 1 gang, osv. Men skal det felles på enden av hver pinne eller jevnt fordelt ved å bruke felletips 1? Og når det står 3 masker 1 gang, betyr det at jeg skal felle 3 masker til 1 maske?
17.07.2025 - 21:25DROPS Design answered:
Hei Kimberly. Når du skal felle til ermhull skal arbeidet få et "hak" inn mot midten i begge sider. Se på målskissen og over tallene 48-52-56-61-66-73, der ser du at det blir en bue. Den får man ved å felle, først 3 masker i hver side, så 2 masker x antall ganger og så 1 masker x antall ganger. Til ermene skal det hverken brukes felletips 1 eller 2, men bare vanlig avfelling, se evnt hjelpevideoene (fell av fra retten og fell av fra vrangen). mvh DROPS Design
04.08.2025 - 10:33
|
|||||||
Blue River Slipover#blueriverslipover |
|||||||
 |
 |
||||||
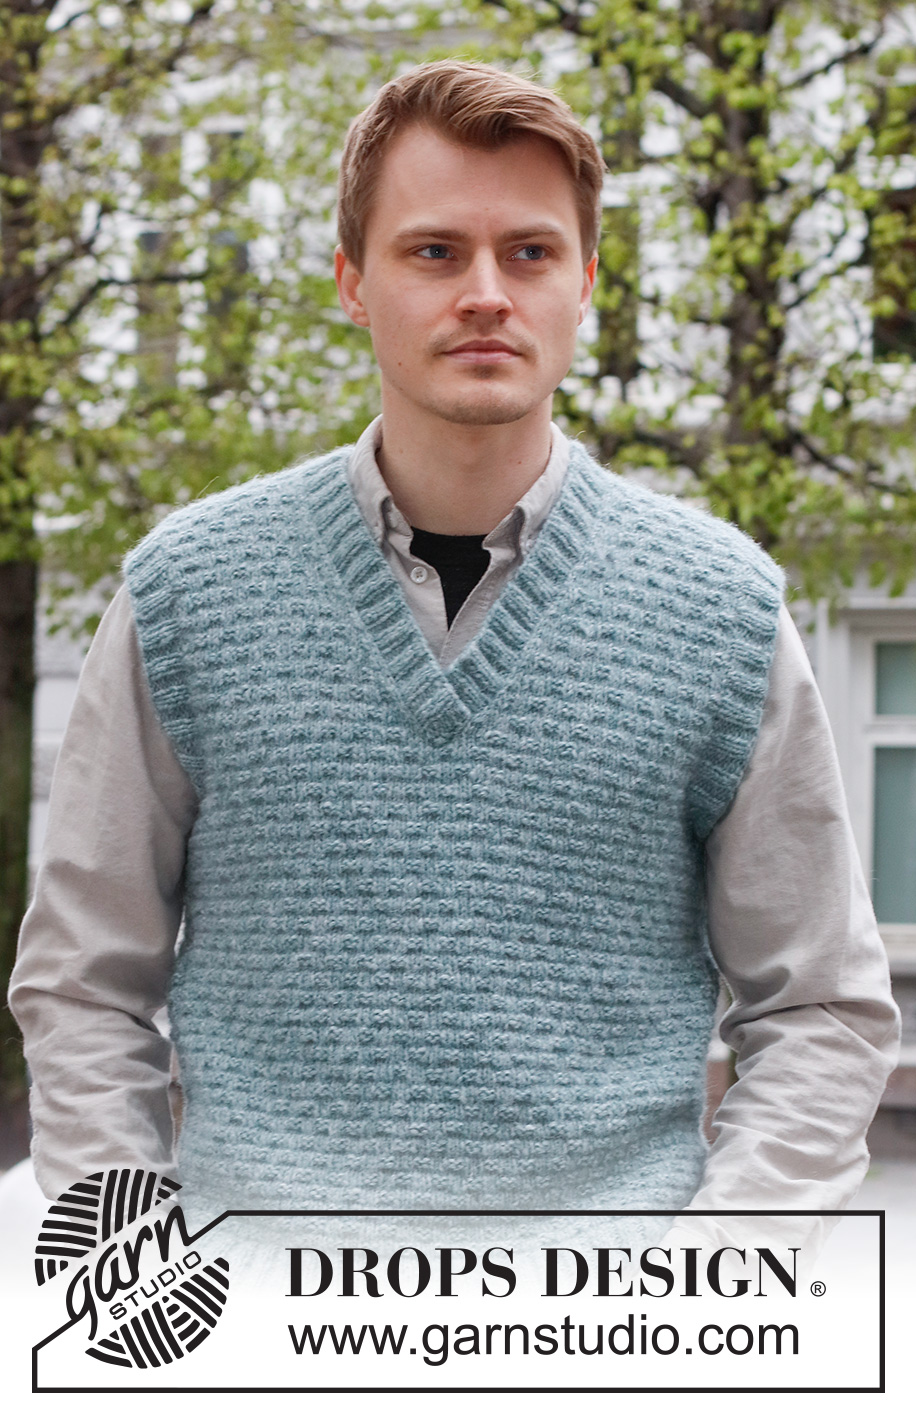
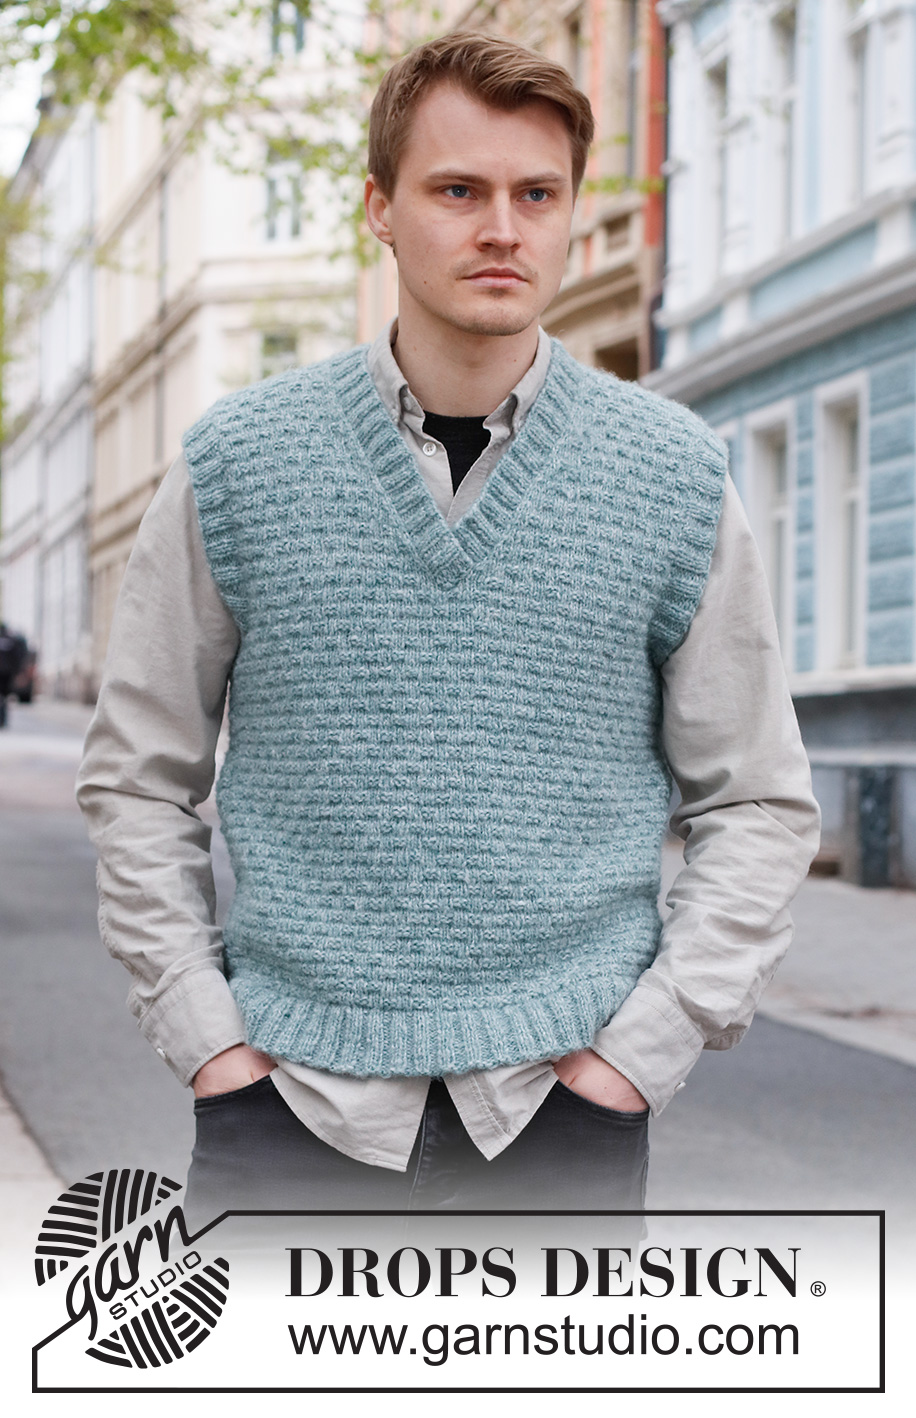
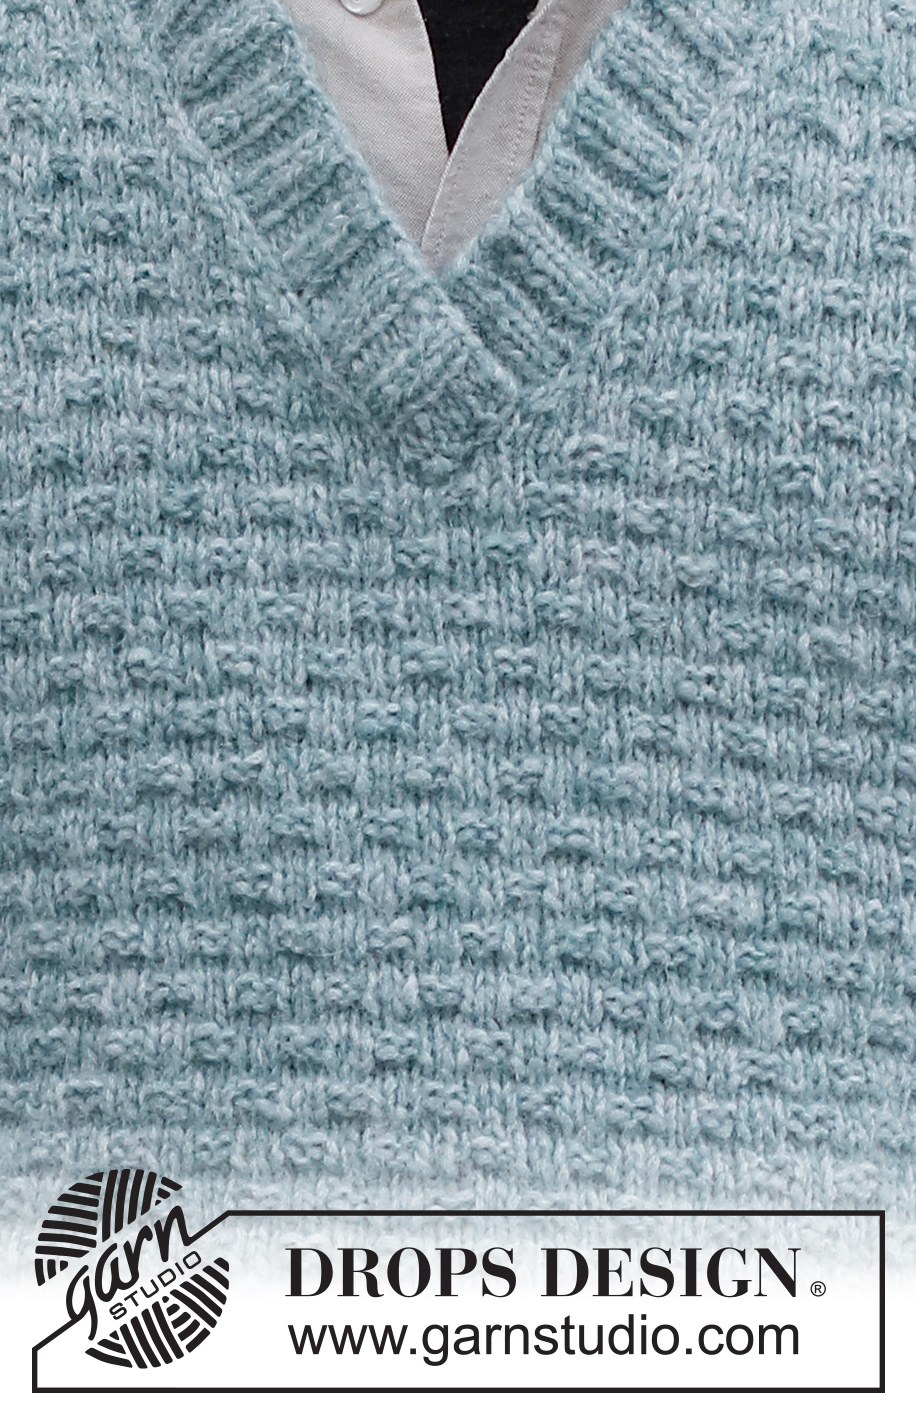
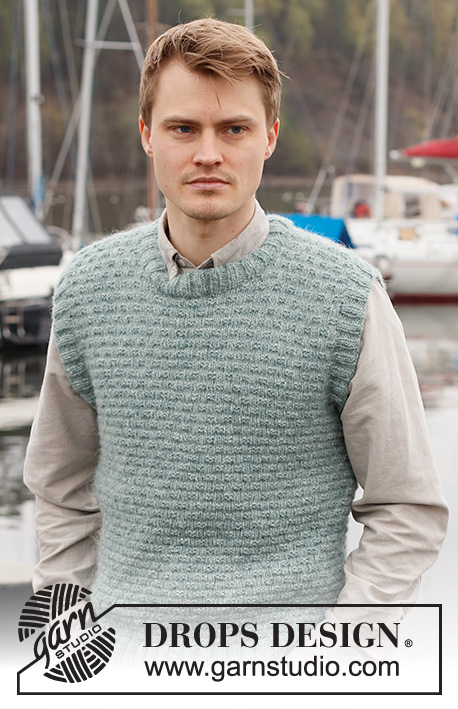
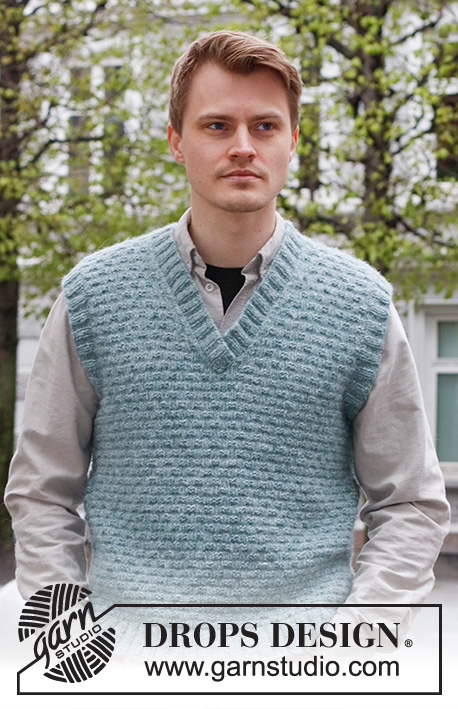
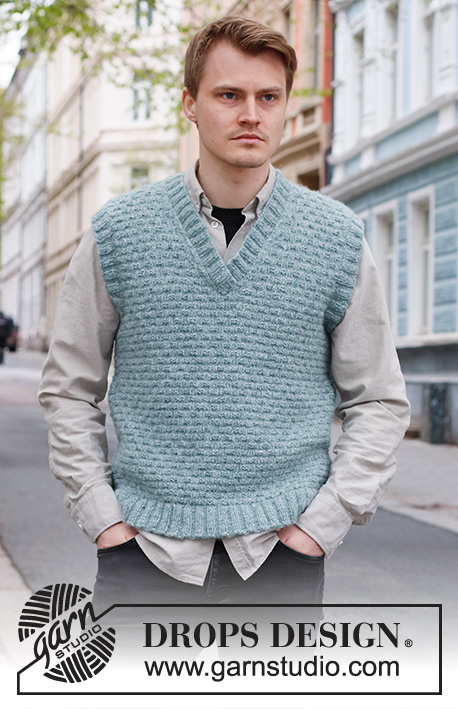
Knitted vest / slipover for men in DROPS Air. The piece is worked with textured pattern, V-neck and ribbed edges. Sizes S - XXXL.
DROPS 224-12 |
|||||||
|
------------------------------------------------------- EXPLANATIONS FOR THE PATTERN: ------------------------------------------------------- RIDGE/GARTER STITCH (worked back and forth): Knit all rows. PATTERN: See diagram A.1. The diagram shows all rows from the right side. DECREASE TIP-1 (evenly spaced): To work out how to decrease evenly, count the total number of stitches on needle (e.g. 90 stitches), minus the edge stitches (e.g. 2 stitches) and divide the remaining stitches by number of decreases to be made (e.g. 12) = 7.3. In this example decrease by knitting together approx. each 6th and 7th stitch. DECREASE TIP-2 (V-neck): All decreases are worked from the right side! At the end of the row: Work until there are 3 stitches left, knit 2 together and 1 stitch in garter stitch = 1 stitch decreased. At the beginning of the row: 1 stitch in garter stitch, slip 1 stitch as if to knit, knit 1 and pass the slipped stitch over the knitted stitch = 1 stitch decreased. ------------------------------------------------------- START THE PIECE HERE: ------------------------------------------------------- VEST – SHORT OVERVIEW OF THE PIECE: The front and back pieces are knitted separately, back and forth and bottom up then sewn together. Ribbed edges are worked around the neck and armholes to finish. FRONT PIECE: Cast on 90-98-102-110-122-134 stitches with circular needle size 4 mm and DROPS Air. Work rib back and forth as follows: 1 edge stitch in GARTER STITCH – read description above, * knit 2, purl 2 *, work from *-* until there is 1 stitch left and 1 edge stitch in garter stitch. Continue this rib for 6 cm. Change to circular needle size 5 mm and work as follows from the right side: 1 edge stitch in garter stitch, work stocking stitch and decrease 12 stitches evenly over the next 88-96-100-108-120-132 stitches - read DECREASE TIP, and 1 edge stitch in garter stitch = 78-86-90-98-110-122 stitches. Insert a marker thread in the middle of the row and allow it to follow your work onwards; it is used when working the V-neck later. Purl 1 row from the wrong side (edge stitches knitted). Work pattern A.1 with 1 edge stitch in garter stitch on each side. REMEMBER THE KNITTING TENSION! When the piece measures 10 cm from the cast-on edge, increase 1 stitch inside the edge stitches on both sides – 1 yarn over which is worked twisted into the pattern on the next row. Repeat this increase every 10-14-7-8-15-15 cm a total of 3-2-4-4-2-2 times on each side. There are 84-90-98-106-114-126 stitches. Continue the pattern until the piece measures 37-38-39-40-41-42 cm. Now you will cast off for the armholes and decrease for the neck; read the next section before continuing: Continue A.1 and cast off for the armholes at the beginning of each row as follows: 3 stitches 1 time, 2 stitches 1-1-2-2-3-4 times and 1 stitch 3-3-4-6-6-9 times on each side. AT THE SAME TIME when the piece measures 40-42-43-45-46-48 cm, start to decrease for the neck as follows from the right side: Work as before until there are 3 stitches left before the marker thread, knit 2 together, 1 stitch in garter stitch (marker here). Place the stitches on a thread for the left shoulder. Work 1 stitch in garter stitch, slip 1 stitch as if to knit, knit 1 and pass the slipped stitch over the knitted stitch, work the remaining stitches as before. Each shoulder is finished separately. RIGHT SHOULDER (front piece): Read DECREASE TIP-1. Continue A.1 and casting off for the armholes, and decrease for the V-neck at the beginning of each row from the right side a total of 13-14-15-16-16-17 times - read DECREASE TIP-2 (NOTE! The first decrease for the neck was worked before the division). When all the decreases for the neck and armhole are finished there are 21-23-23-24-26-26 stitches on the needle. Continue with A.1 and 1 edge stitch in garter stitch on each side. Cast off with knit from the right side when the piece measures 60-62-64-66-68-70 cm from the cast-on edge. LEFT SHOULDER (front piece): Place the stitches from the thread back on circular needle size 5 mm. Continue A.1 and casting off for the armholes, and decrease for the V-neck at the end of each row from the right side a total of 13-14-15-16-16-17 times - remember DECREASE TIP-2 (NOTE! The first decrease for the neck was worked before the division). When all the decreases for the neck and armhole are finished there are 21-23-23-24-26-26 stitches on the needle. Continue with A.1 and 1 edge stitch in garter stitch on each side. Cast off with knit from the right side when the piece measures 60-62-64-66-68-70 cm from the cast-on edge. BACK PIECE: Cast on 90-98-102-110-122-134 stitches with circular needle 4 mm and DROPS Air. Work rib back and forth as follows: 1 edge stitch in garter stitch, * knit 2, purl 2 *, work from *-* until there is 1 stitch left and 1 edge stitch in garter stitch. Continue this rib for 6 cm. Change to circular needle size 5 mm and work as follows from the right side: 1 edge stitch in garter stitch, work stocking stitch and decrease 12 stitches evenly over the next 88-96-100-108-120-132 stitches - remember DECREASE TIP-1 and 1 edge stitch in garter stitch = 78-86-90-98-110-122 stitches. Purl 1 row from the wrong side (edge stitches knitted). Continue with A.1 and 1 edge stitch in garter stitch on each side. When the piece measures 10 cm from the cast-on edge, increase 1 stitch inside the edge stitches on both sides – 1 yarn over which is worked twisted into the pattern on the next row. Repeat this increase every 10-14-7-8-15-15 cm a total of 3-2-4-4-2-2 times on each side. There are 84-90-98-106-114-126 stitches. Continue working until the piece measures 37-38-39-40-41-42 cm. Continue A.1 and cast off for the armholes at the beginning of every row as follows: 3 stitches 1 time, 2 stitches 1-1-2-2-3-4 times and 1 stitch 3-3-4-6-6-9 times on each side = 68-74-76-80-84-86 stitches. Continue with A.1 and 1 edge stitch in garter stitch on each side until the piece measures 58-60-62-64-66-68 cm and the next row is from the right side. Now work the neck as follows: Work the first 22-24-24-25-27-27 stitches as before, cast off 24-26-28-30-30-32 stitches for the neck and work the last 22-24-24-25-27-27 stitches. Each shoulder is finished separately. RIGHT SHOULDER (back piece): = 22-24-24-25-27-27 stitches. Continue the pattern and cast off 1 stitch on the next row from the neck = 21-23-23-24-26-26 stitches. Cast off with knit from the right side when the piece measures 60-62-64-66-68-70 cm from the cast-on edge. LEFT SHOULDER (back piece): = 22-24-24-25-27-27 stitches. Continue the pattern and cast off 1 stitch on the next row from the neck = 21-23-23-24-26-26 stitches. Cast off with knit from the right side when the piece measures 60-62-64-66-68-70 cm from the cast-on edge. ASSEMBLY: Sew the shoulder seams edge to edge so the seam is flat. Sew the side seams inside the 1 edge stitch, working from the bottom edge up to the armholes. V-NECK: Use circular needle size 4 mm and DROPS Air. Start from the right side, mid-front where the neck was divided. Knit up inside the 1 edge stitch approx. 43-44-45-46-46-47 stitches up to the shoulder, then knit up inside the cast-off edge approx. 30-32-34-36-36-38 stitches along the back of the neck and then 43-44-45-46-46-47 stitches down the other side of the neck to the division = approx. 116-120-124-128-132-132 stitches (the number of stitches should be divisible by 4). Work rib back and forth starting from the wrong side as follows: 1 edge stitch in garter stitch, * knit 2, purl 2 *, work from *-* until there are 3 stitches left, knit 2 and 1 edge stitch in garter stitch. Work this rib back and forth for 3 to 3½ cm. Cast off with knit over knit and purl over purl. Lay the right edge mid-front over the left edge. Fasten down neatly in the outermost edge stitch towards the neck-opening. Repeat on the inside, so the left side is sewn to the right side. SLEEVE-EDGES: Use circular needle size 4 mm and DROPS Air. Start from the right side by the side seam and knit up approx. 96-100-104-108-116-120 stitches around the armhole, inside the 1 edge stitch (the number of stitches should be divisible by 4). Work rib in the round (knit 2, purl 2) for 3 to 3½ cm. Cast off with knit over knit and purl over purl. Repeat around the other armhole. |
|||||||
Diagram explanations |
|||||||
|
|||||||
 |
|||||||
Have you finished this pattern?Tag your pictures with #dropspattern #blueriverslipover or submit them to the #dropsfan gallery. Do you need help with this pattern?You'll find 26 tutorial videos, a Comments/Questions area and more by visiting the pattern on garnstudio.com. © 1982-2026 DROPS Design A/S. We reserve all rights. This document, including all its sub-sections, has copyrights. Read more about what you can do with our patterns at the bottom of each pattern on our site. |
|||||||


With over 40 years in knitting and crochet design, DROPS Design offers one of the most extensive collections of free patterns on the internet - translated to 17 languages. As of today we count 324 catalogues and 12290 patterns translated into English (UK/cm). 12290
We work hard to bring you the best knitting and crochet have to offer, inspiration and advice as well as great quality yarns at incredible prices! Would you like to use our patterns for other than personal use? You can read what you are allowed to do in the Copyright text at the bottom of all our patterns. Happy crafting!
Post a comment to pattern DROPS 224-12
We would love to hear what you have to say about this pattern!
If you want to leave a question, please make sure you select the correct category in the form below, to speed up the answering process. Required fields are marked *.