
Popular categories
Looking for a yarn?


Comments / Questions (30)
![]() Paula María wrote:
Paula María wrote:
Volveremos a tener este color tan precioso soft tweed pastel de zanahoria?
11.12.2025 - 18:26DROPS Design answered:
Hola Paula María, desafortunadamente no tenemos ninguna información sobre qué colores van a ser añadidos en las próximas colecciones.
14.12.2025 - 20:42
![]() PELTIER wrote:
PELTIER wrote:
Bonjour et merci de vos explications sur le col. Maintenant je suis au raglan J’ai augmenté 4 x 2 mailles une première fois et j’ai fait le second tour. Pouvez vous me dire si au prochain rang les augmentations se font de part et d’autre des marqueurs ou De part et d’autre de la première maille d’augmentation ? Merci beaucoup. J’apprécie beaucoup votre aide car je débute en tricot 😜
23.05.2025 - 18:17DROPS Design answered:
Bonjour Mme Peltier, lorsque vous dites "4 x 2 mailles" vous voulez dire que vous avez augmenté 4 fois 1 maille de chaque coté de chaque marqueur? Si tel est le cas, alors au tour d'augmentations suivant, vous augmentez exactement de la même façon que la 1ère fois = de chaque côté de chacune des mailles avec un marqueur, comme indiqué sous RAGLAN. Ainsi, le nombre de mailles entre celles avec des marqueurs va augmenter (pour le dos, le devant et les manches), et les mailles avec un marqueur forment une ligne diagonale = les raglans. Bon tricot!
26.05.2025 - 08:25
![]() PELTIER wrote:
PELTIER wrote:
À 6 cm de côtes, pouvez vous détailler comment augmenter. Je ne comprends pas la traduction. Pouvez vous dire en détail, maille par maille exemple (1 m endroit, 1 maille envers, 1 maille endroit, 1 maille envers et ?? Merci
22.05.2025 - 12:06DROPS Design answered:
Bonjour Mme Peltier, à 3 cm de hauteur de côtes (pour le col), vous avez augmenté dans une section en mailles envers des côtes sur 2, autrement dit vous avez tout le tour (1 m torse à l'end, 2 m env, 1 m torse à l'end, 1 m env); à 6 cm de hauteur, vous augmentez dans les sections 1 m envers restantes de sorte que vous avez des côtes 1 m torse à l'end/ 2 m env tout le tour. Bon tricot!
22.05.2025 - 15:45
![]() Ute Jäger wrote:
Ute Jäger wrote:
Das Rückteil ist gleich hoch wie das Vorderteil? Keine verkürzten Reihen? Sitzt der Pullover dann gut?
09.01.2024 - 15:08DROPS Design answered:
Liebe Frau Jäger, ja genau, bei diesem Pullover gibt es keine Erhöhung, er sitzt ganz gut, genauso wie bei den Fotos. Viel Spaß beim stricken!
10.01.2024 - 08:52
![]() WEHRLEN Françoise wrote:
WEHRLEN Françoise wrote:
Pouvez vous m'exprimer ce que veux dire "augmenter dans une section 1 maille envers sur deux" et "augmenter 1 maille dans les dernières sections 1 maille envers"? Merci
27.12.2023 - 20:11DROPS Design answered:
Bonjour Mme Wehrlen, les côtes se tricotent au début (1 m torse à l'end, 1 m env), vous devez d'abord augmenter pour avoir des côtes (1 m torse à l'end, 1 m env, 1 m torse à l'end, 2 m env), puis terminer par (1 m torse à l'end, 2 m env). Autrement dit, augmentez les mailles envers, d'abord 1 fois sur 2 puis dans les dernières sections 1 m envers restantes. Bon tricot!
02.01.2024 - 09:05
![]() Nori wrote:
Nori wrote:
I can figure out the instructions on Warm My Heart pattern regarding the neck. “Increase every second purl 1 to purl 2”? How do you do it?
22.03.2023 - 21:19DROPS Design answered:
Dear Nori, you have a rib, knit twisted 1 / purl 1, and then ever other purl stitch (every 4th stitch on the round) you purl into the back and the fron leg of the stitch. I hope this helps. Happy Knitting!
23.03.2023 - 00:17
![]() Antonia wrote:
Antonia wrote:
In questo modello , è possibile costruire un'alzata sul dietro del collo? Se è possibile , come farla?
22.02.2023 - 16:56DROPS Design answered:
Buongiorno Antonia, per un aiuto così personalizzato, può rivolgersi al suo rivenditore DROPS di fiducia. Buon lavoro!
25.02.2023 - 13:58
![]() Heather wrote:
Heather wrote:
Thank you for the previous help! I'm at the point where I increase the body before dividing for the ribbing. When I increase stitches evenly, I'm starting with 216 and increasing to 262 (46 stitches). Do I divide 216 by 46 and work an increase after every 4th stitch and then every 5th stitch? Or do I divide 262 by 46 and increase after every 5th then 6th stitch? Or am I completely off track? Sorry for any confusion and thank you in advance for your help!
07.02.2023 - 20:04DROPS Design answered:
Hi Heather, Yes, you divide 216 by 46 as you say = 4.69. This means you increase approx. after after each 4th and 5th stitch. Happy knitting!
08.02.2023 - 06:51
![]() Gerd BRODÉN wrote:
Gerd BRODÉN wrote:
Det stämmer ju inte riktigt men jag hittade svaret i mönstret. Hade läst för dåligt. Diagram symbols = bakstycket är 10 cm längre än framstycket, dvs framstycket är 51-54-56-58-60-62 cm (med 4 cm resår) och bakstycket är 61-63-65-67-69-71 cm (med 14 cm resår).
17.01.2023 - 09:18
![]() Gerd Brodén wrote:
Gerd Brodén wrote:
Stämmer det att resåren på bakstycket ska skickas 14cm, 10cm längre än framstycket? Det syns inte på ritningen.
13.01.2023 - 21:56DROPS Design answered:
Hei Gerd. Vrangborden på bakstykket er 2 cm lengre enn forstykket, og om du ser på målskissen er det en * (sort stjerne) som er tegnet inn på målet til genseren. Der forklarigen er: * = bakstycket är 2 cm längre än framstyckena. Dvs, bakstycket är 66-68-70-72-74-76 cm (9 cm resår nederst) och framstyckena är 64-66-68-70-72-74 cm (7 cm resår nederst). mvh DROPS Design
16.01.2023 - 11:18
|
||||
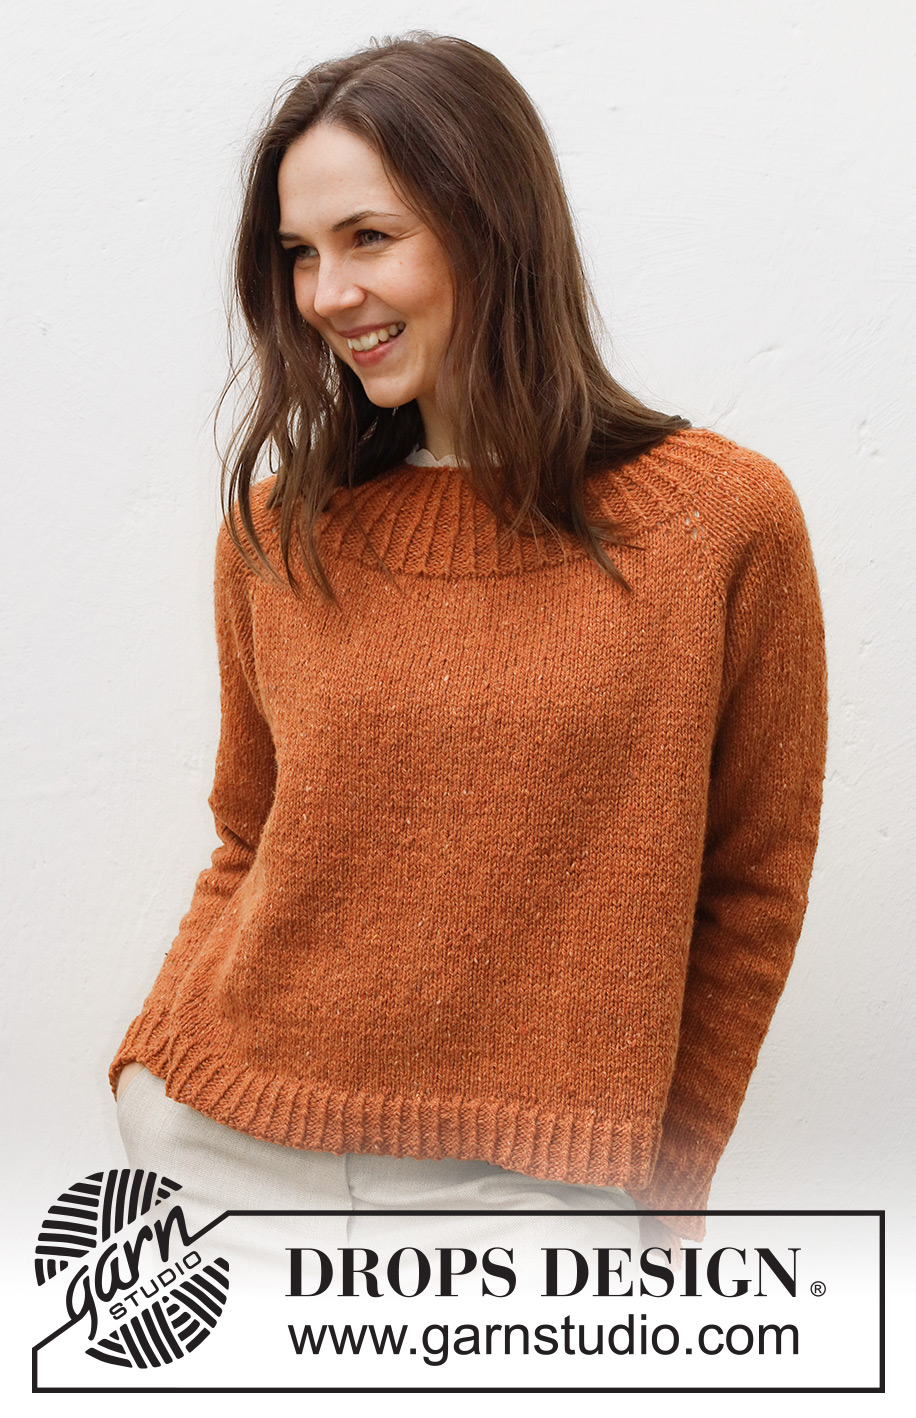
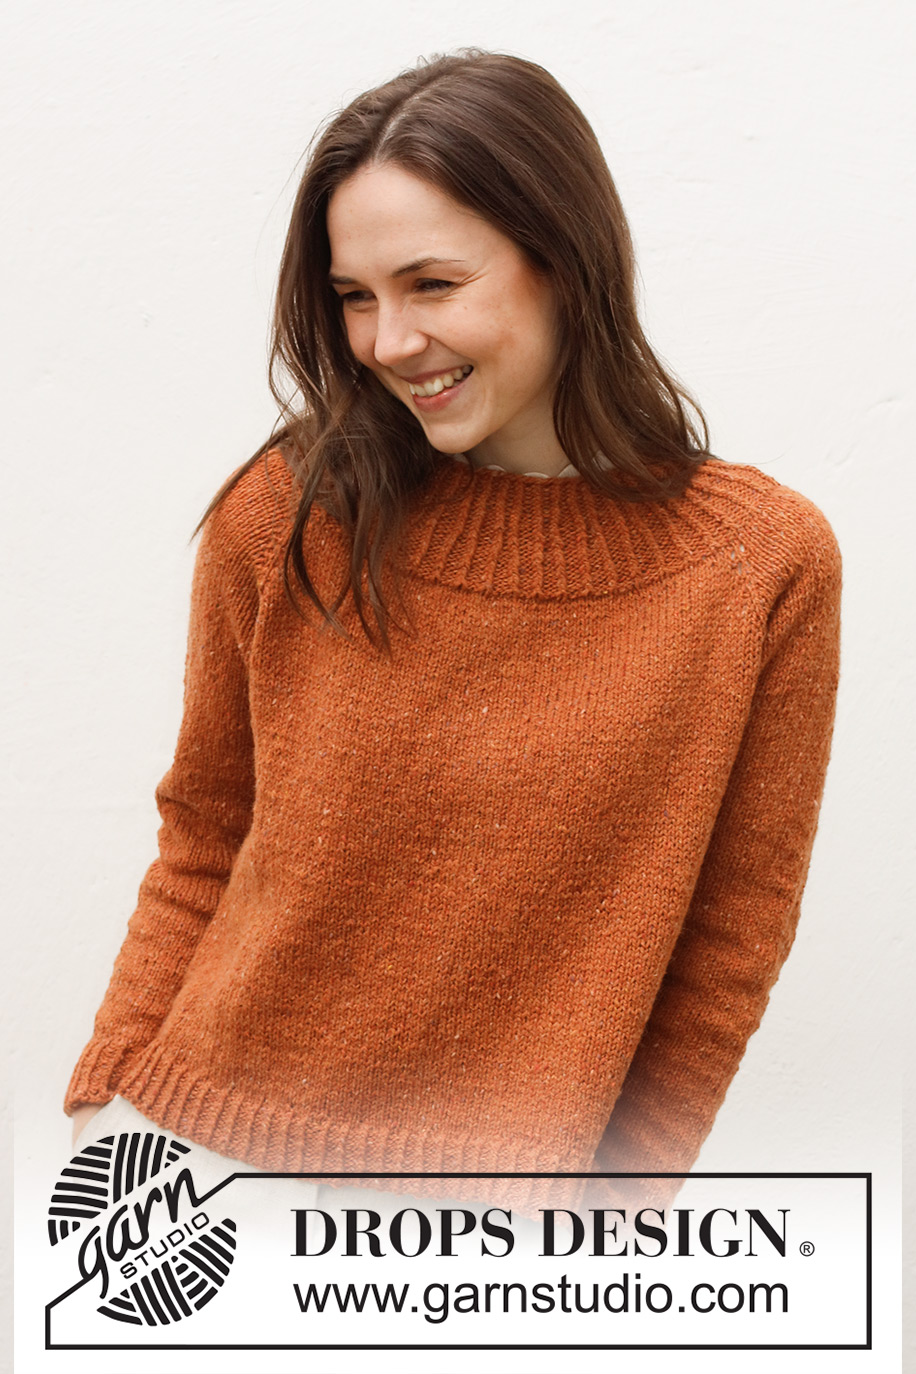
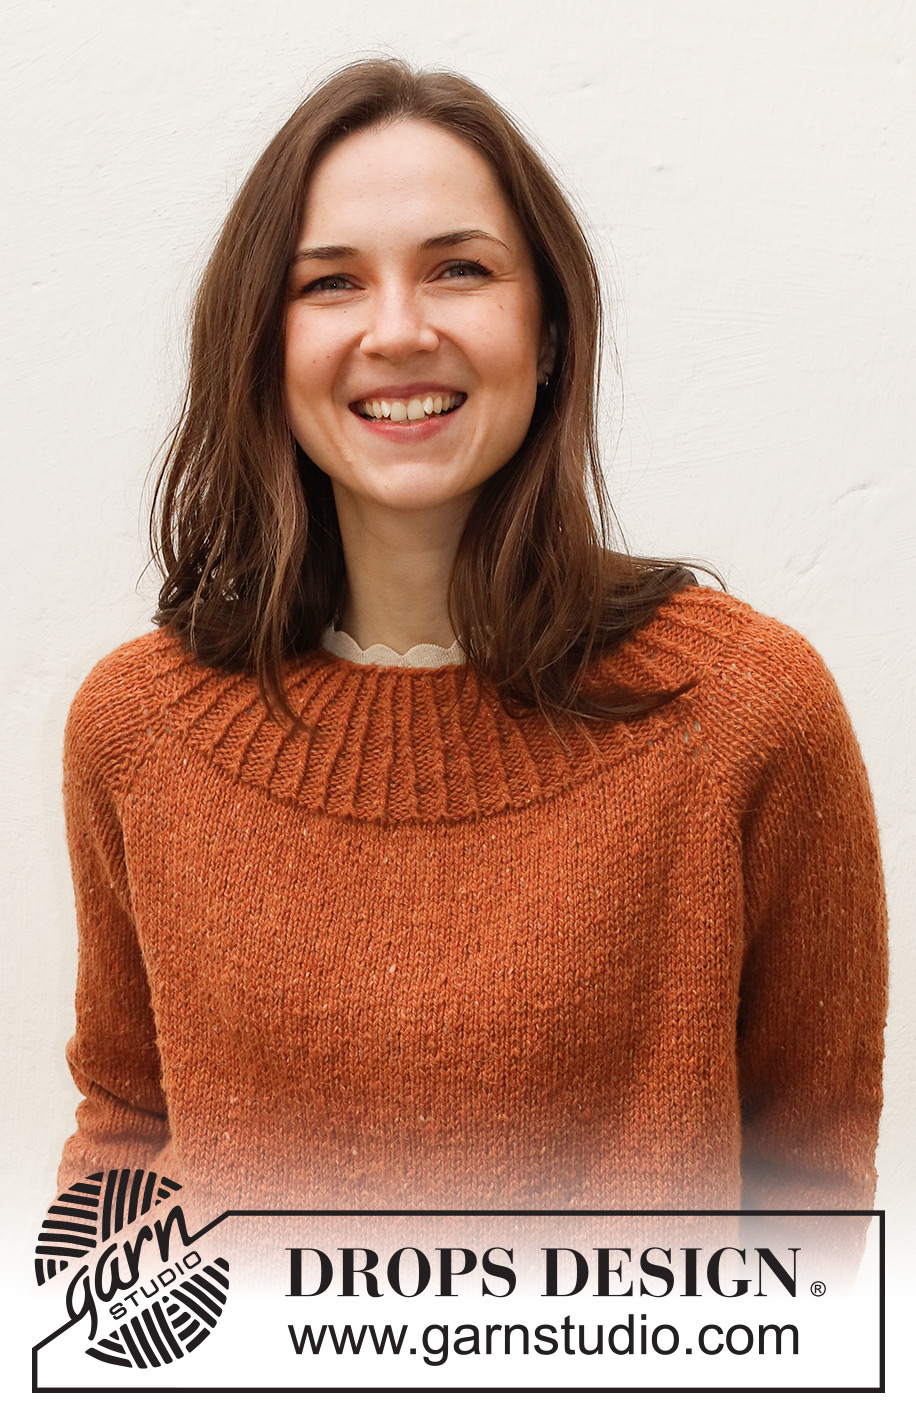
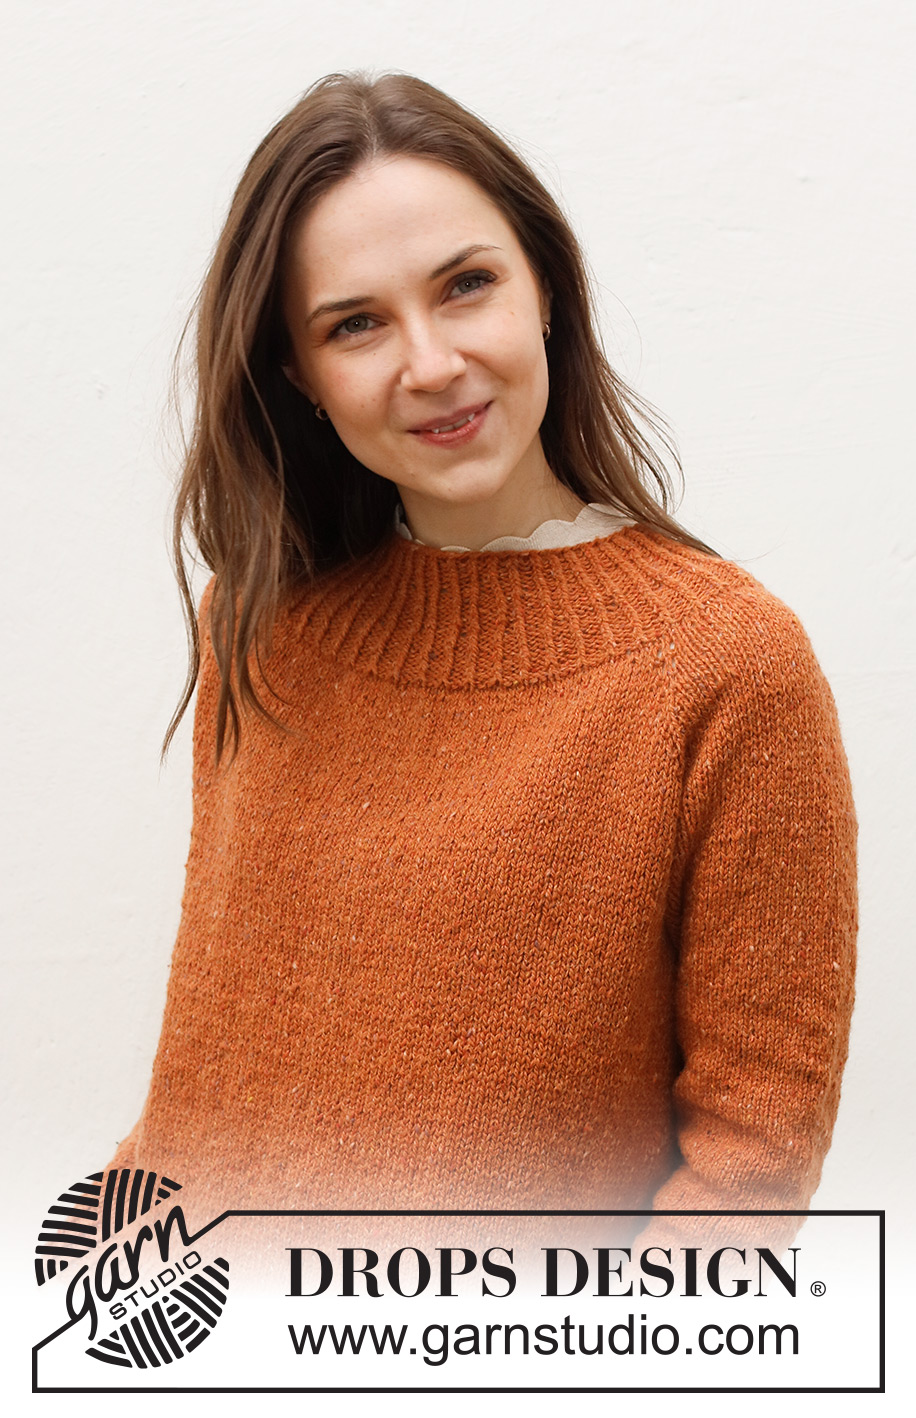
Warm My Heart#warmmyheartsweater |
||||
 |
 |
|||
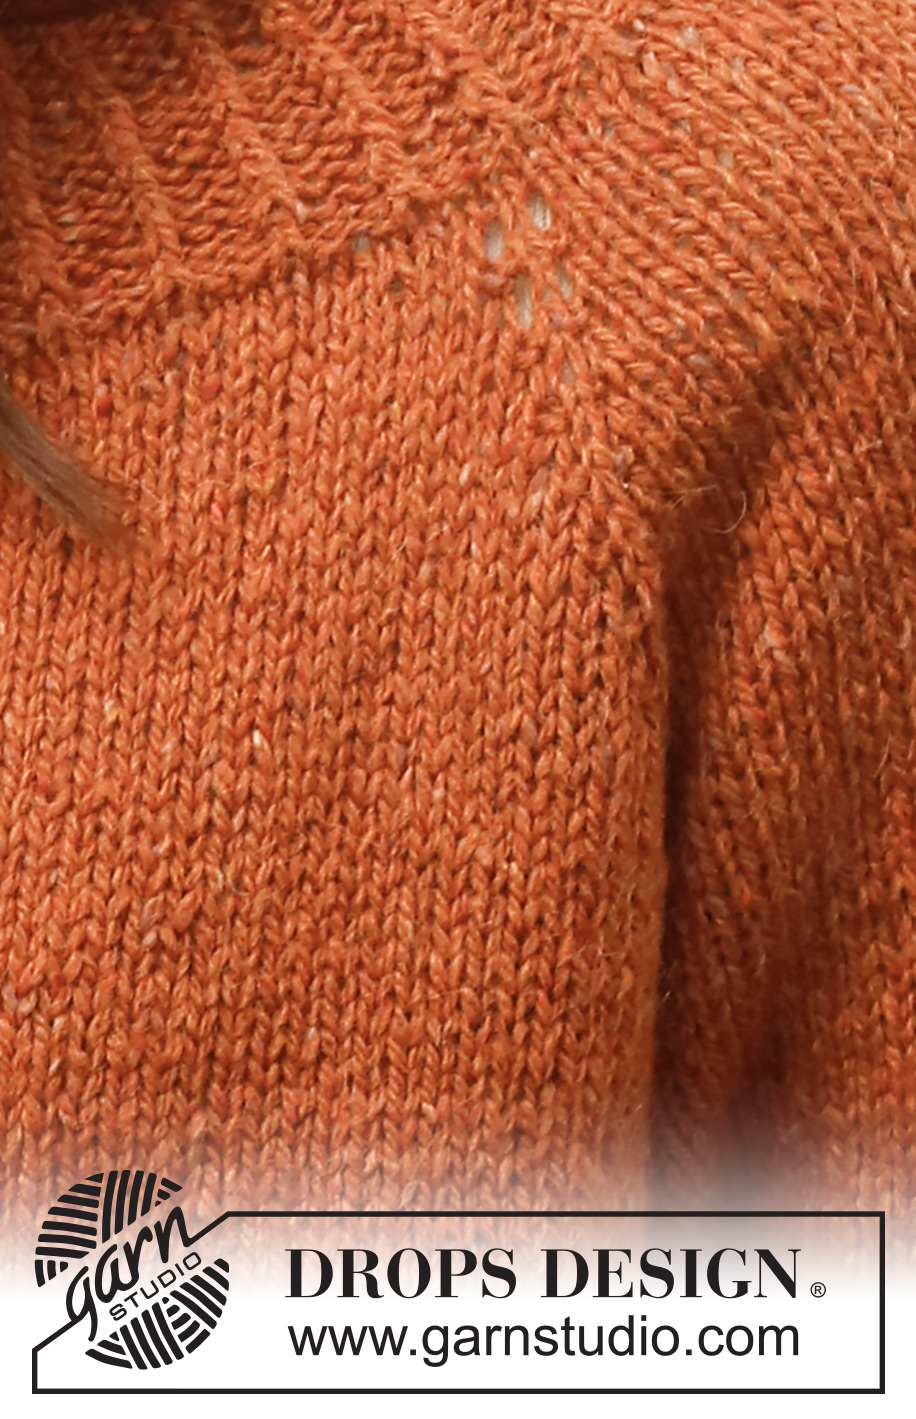
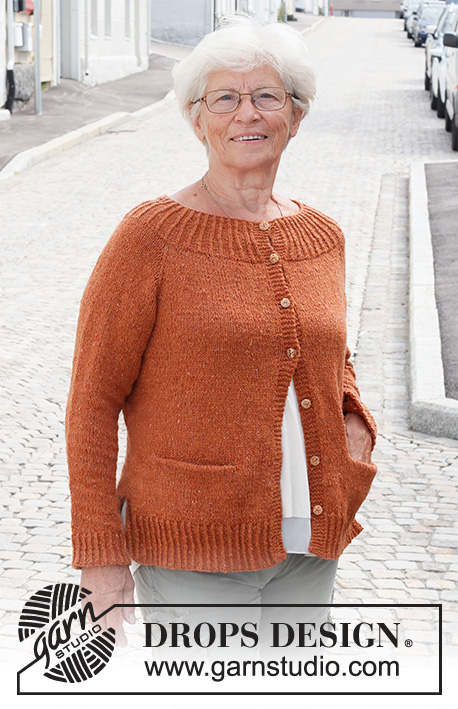
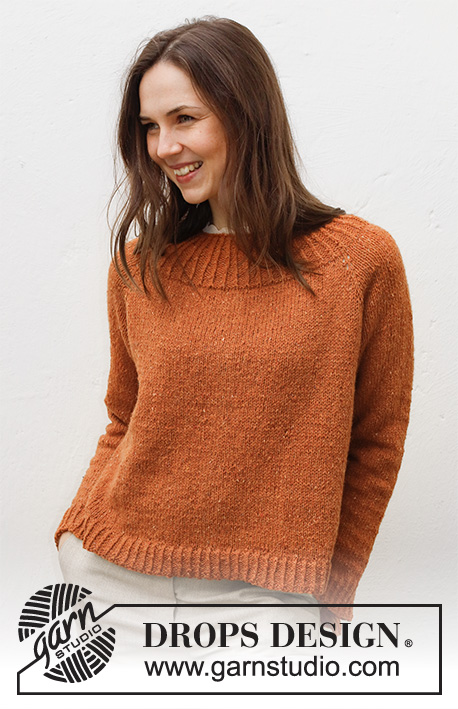
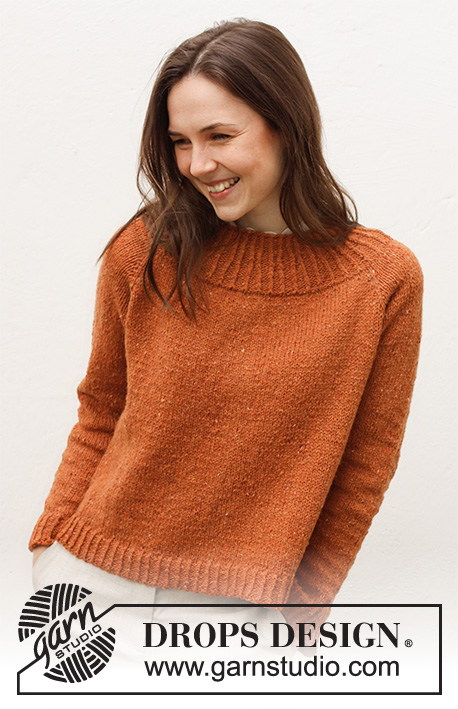
Knitted jumper for DROPS Soft Tweed. The piece is worked top down with raglan, split in the sides and ribbed edges. Sizes XS - XXL.
DROPS 228-18 |
||||
|
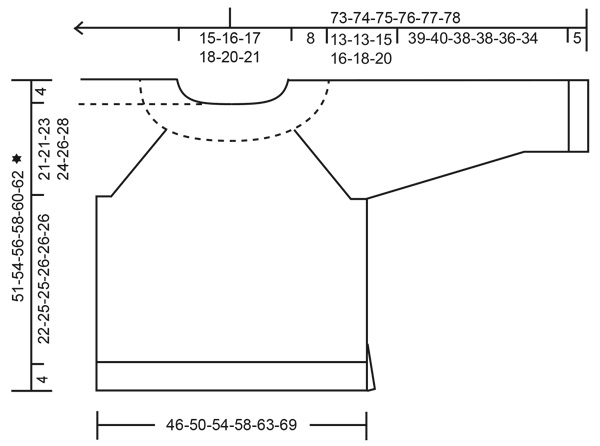
------------------------------------------------------- EXPLANATIONS FOR THE PATTERN: ------------------------------------------------------- INCREASE TIP-1: Increase 1 stitch by making 1 yarn over after each purled section. On the next round purl the yarn overs twisted to avoid holes. INCREASE TIP-2 (evenly spaced): To work out how to increase evenly, count the total number of stitches on the needle (e.g. 150 stitches) and divide by the number of increases to be made (e.g. 10) = 15. In this example, increase by making 1 yarn over after each 15th stitch. On the next round work the yarn overs twisted to avoid holes. RAGLAN: Increase 1 stitch on each side of the marker-stitches by making 1 yarn over (= 8 stitches increased on the round). On the next round knit the yarn overs twisted to avoid holes. Then work the new stitches in stocking stitch. DECREASE TIP (sleeves): Decrease 1 stitch on either side of the marker thread as follows: Work until there are 3 stitches left before the marker thread, knit 2 together, knit 2 (marker thread sits between these 2 stitches), slip 1 stitch as if to knit, knit 1 and pass the slipped stitch over the knitted stitch (2 stitches decreased). CASTING-OFF TIP: To avoid the cast-off edge being tight you can cast off with a larger size needle. If the edge is still tight, make 1 yarn over after approx. each 6th stitch at the same time as casting off; the yarn overs are cast off as normal stitches. ------------------------------------------------------- START THE PIECE HERE: ------------------------------------------------------- JUMPER – SHORT OVERVIEW OF THE PIECE: The neck and yoke are worked in the round with circular needle, from mid back and top down. The yoke is divided for body and sleeves and the body is continued in the round with circular needle top down to the beginning of the split in the sides. Then the front and back pieces are worked separately, back and forth. The sleeves are worked with short circular needle/double pointed needles, top down. NECK: Cast on 100-104-108-112-120-124 stitches with circular needle size 3.5 mm and DROPS Soft Tweed. Knit 1 round. Work rib in the round (knit 1 twisted, purl 1) for 3 cm. Now increase every second purl-1 to purl-2 – read INCREASE TIP-1 = 125-130-135-140-150-155 stitches. When the rib measures 6 cm increase the remaining purl-1 to purl-2 = 150-156-162-168-180-186 stitches. When the rib measures 8 cm, knit 1 round where you increase 10-20-26-32-32-34 stitches evenly spaced – read INCREASE TIP-2 = 160-176-188-200-212-220 stitches. Knit 1 round (yarn overs knitted twisted). Change to circular needle size 4.5 mm. Insert a marker here. THE YOKE IS MEASURED FROM THIS MARKER. YOKE: Insert 4 other markers as follows: Skip 27-29-31-33-36-39 stitches (= ½ back piece), insert marker in the next stitch (= in the transition between back piece and sleeve), skip 24-28-30-32-32-30 stitches, insert marker in the next stitch (= in the transition between sleeve and front piece), skip 54-58-62-66-72-78 stitches, insert marker in the next stitch (= in the transition between front piece and sleeve), skip 24-28-30-32-32-30 stitches, insert marker in the next stitch (= in the transition between sleeve and back piece). There are 27-29-31-33-36-39 stitches left after the last marker (= ½ back piece). Work stocking stitch, AT THE SAME TIME on the first round start to increase to RAGLAN – read description above. Increase like this every 2nd round a total of 14-16-18-19-21-24 times = 272-304-332-352-380-412 stitches. REMEMBER THE KNITTING TENSION! Continue working until the yoke measures 13-13-15-16-18-20 cm from the marker. Now divide for the body and sleeves as follows: Work the first 41-45-49-52-57-63 stitches (= ½ back piece), place the next 54-62-68-72-76-80 stitches on a thread for the sleeve, cast on 10-10-10-12-12-12 stitches (= in side under sleeve), work 82-90-98-104-114-126 stitches (= front piece), place the next 54-62-68-72-76-80 stitches on a thread for the sleeve, cast on 10-10-10-12-12-12 stitches (= in side under sleeve), work the last 41-45-49-52-57-63 stitches (= ½ back piece). The body and sleeves are finished separately. THE PIECE IS NOW MEASURED FROM HERE! BODY: = 184-200-216-232-252-276 stitches. Work stocking stitch in the round until the piece measures 22-25-25-26-26-26 cm from the division. There is approx 4 cm left to finished length; try the jumper on and work to desired length. To avoid the following rib being tight, knit 1 round where you increase 36-44-46-48-52-52 stitches evenly spaced = 220-244-262-280-304-328 stitches. Now divide each piece so that there are the same number of stitches on back piece and on front piece = 110-122-131-140-152-164 masker. Change to circular needle size 3,5 mm and work rib as explained below. FRONT PIECE: 1st ROW (= right side): 2 edge stitches in garter stitch, *knit 1 twisted, purl 2 *, work from *-* until there are 3 stitches left, knit 1 twisted, 2 edge stitches in garter stitch. 2nd ROW (= wrong side): 2 edge stitches in garter stitch, *purl 1 twisted, knit 2 *, work from *-* until there are 3 stitches left, purl 1 twisted, 2 edge stitches in garter stitch. Continue back and forth like this until rib measures 4 cm. Cast off with knit over knit and purl over purl – read CASTING-OFF TIP. The jumper measures approx. 51-54-56-58-60-62 cm from the shoulder down. BACK PIECE: Work rib the same way as on front piece until rib measures 14 cm. Cast off with knit over knit and purl over purl – remember CASTING-OFF TIP. The jumper measures approx. 61-64-66-68-70-72 cm from the shoulder down. SLEEVES: Place the 54-62-68-72-76-80 stitches from the thread on the one side of the piece on short circular needle/double pointed needles size 4.5 mm and knit up 1 stitch in each of the 10-10-10-12-12-12 stitches cast on under the sleeve = 64-72-78-84-88-92 stitches. Insert a marker thread in the middle of new stitches under the sleeve. Allow the thread to follow your work onwards; it will be used when decreasing under the sleeve. Start at the marker thread and work stocking stitch in the round for 4 cm. Now decrease 1 stitch on each side of the marker thread – read DECREASE TIP. Decrease like this every 4½-3-2½-2-1½-1½ cm a total of 7-10-12-14-15-16 times = 50-52-54-56-58-60 stitches. Continue working until the sleeve measures 39-40-38-38-36-34 cm from the division. There is approx 5 cm left to finished length; try the jumper on and work to desired length. Knit 1 round where you increase 13-14-15-16-17-18 stitches evenly spaced = 63-66-69-72-75-78 stitches. Change to double pointed needles size 3.5 mm and work rib (knit 1 twisted, purl 2) for 5 cm. Cast off with knit over knit and purl over purl – remember CASTING-OFF TIP. The sleeve measures approx. 44-45-43-43-41-39 cm from the division. Work the other sleeve in the same way. |
||||
Diagram explanations |
||||
|
||||
 |
||||
Have you finished this pattern?Tag your pictures with #dropspattern #warmmyheartsweater or submit them to the #dropsfan gallery. Do you need help with this pattern?You'll find 34 tutorial videos, a Comments/Questions area and more by visiting the pattern on garnstudio.com. © 1982-2026 DROPS Design A/S. We reserve all rights. This document, including all its sub-sections, has copyrights. Read more about what you can do with our patterns at the bottom of each pattern on our site. |
||||


With over 40 years in knitting and crochet design, DROPS Design offers one of the most extensive collections of free patterns on the internet - translated to 17 languages. As of today we count 324 catalogues and 12290 patterns translated into English (UK/cm). 12290
We work hard to bring you the best knitting and crochet have to offer, inspiration and advice as well as great quality yarns at incredible prices! Would you like to use our patterns for other than personal use? You can read what you are allowed to do in the Copyright text at the bottom of all our patterns. Happy crafting!
Post a comment to pattern DROPS 228-18
We would love to hear what you have to say about this pattern!
If you want to leave a question, please make sure you select the correct category in the form below, to speed up the answering process. Required fields are marked *.