
Popular categories
Looking for a yarn?


Comments / Questions (56)
![]() Åsa Andreasson wrote:
Åsa Andreasson wrote:
Hej . Ska man använda ökningstips 2 även när man gör ärmökningen? Har gjort första ökningen till sadelaxel och det blir väldigt snyggt. Mvh Åsa
26.10.2020 - 17:38DROPS Design answered:
Hej Åsa. Ja det ska du göra. Mvh DROPS Design
28.10.2020 - 07:50
![]() Caron wrote:
Caron wrote:
Modèle très simple mais classique et élégant à la fois. Un modèle un peu passe-partout que je tricote actuellement. La laine Lima est très agréable à travailler, je l'ai choisie en beige mix. Le col doublé est un classique du plus bel effet, les manches marteau sont une bonne idée. Merci beaucoup pour tous ces modèles que vous nous proposez régulièrement. A mon grand regret, je n'ai pas suffisamment de temps pour me faire plaisir. Merci à vous.
21.10.2020 - 17:38
![]() Saga wrote:
Saga wrote:
Hi! What size is the model wearing?
14.10.2020 - 22:23DROPS Design answered:
Hi Saga. She is wearing size S or M (not sure which one). Happy knitting!
15.10.2020 - 08:42
![]() Marie Var wrote:
Marie Var wrote:
Ce modèle est superbe. Il semble très confortable et pas si difficile que ça tout compte fait. Une première pour moi ces manches marteau. Bravo pour ces magnifiques ouvrages et vos laines.
12.10.2020 - 17:34
![]() Anne Marie Meldgaard wrote:
Anne Marie Meldgaard wrote:
Kan jeg få hjælp til at lave modellen højre i nakken?
29.09.2020 - 23:37DROPS Design answered:
Hej Anne Marie, du kan følge forhøjningen i DROPS 205-18. God fornøjelse!
30.09.2020 - 11:45
![]() Steffi wrote:
Steffi wrote:
Hallo liebes Dropsteam, ich stricke bei der beidseitigen Zunahmen jedes Markierers wie folgt: 1 Markierer: rechts geneigte Zunahme, 1 Masche rechts stricken, Maschenmarkierer abheben, 1 links geneigte Zunahme dann stricken bis zum 2 Markierer: rechts geneigte Zunahme, Maschenmarkierer abheben, 1 Masche rechts, 1 links geneigte Zunahme, rechts und dann noch mal die Zunahmen wie soeben beschrieben. Habe ich das so richtig verstanden? Vielen lieben Dank Steffi
31.08.2020 - 12:31DROPS Design answered:
Liebe Steffi, ganz genau :) und bei der 3. Markierung wie bei der 1. und bei der 4. Markierung wie bei der 2. zunehmen. Viel Spaß beim stricken!
31.08.2020 - 12:57
![]() Steffi wrote:
Steffi wrote:
Hallo liebes Dropsteam, Bei den Zunahmen beidseitig jedes Markierers stricken bis noch 1 Masche vor dem 1. bzw. 3. Markierer übrig ist lautet meine Frage Die erste Zunahme fange ich mit einer rechts oder links geneigten Zunahme an und bei der 2. bzw. 4 Markierer fange ich mit einer links oder rechts geneigten Zunahme an? Vielen Dank Steffi
31.08.2020 - 06:11DROPS Design answered:
Liebe Steffi, es wird vor den 1. und 3. Markierung gestrickt = vor der Markierung = nach recht geneight und nach den 2. und 4. Markierung gestrickt = nach der Markierung = nach links geneigt - siehe ZUNAHMETIPP-2. Viel Spaß beim stricken!
31.08.2020 - 10:16
![]() CC wrote:
CC wrote:
Finally a great simple saddle shoulder sweater! Can't wait to cast on :-)
30.08.2020 - 18:00
![]() Masalinchen wrote:
Masalinchen wrote:
Endlich mal wieder Sattelschultern! Ideal auch als Herrenpullover!
13.06.2020 - 08:27
![]() Elizabeth wrote:
Elizabeth wrote:
This looks like the perfect gersey to wear at the beach on a sunny winters day. My suggested name is Scarborough Beach.
08.06.2020 - 11:55
|
|||||||||||||
Glacier Waters#glacierwaters |
|||||||||||||
 |
 |
||||||||||||
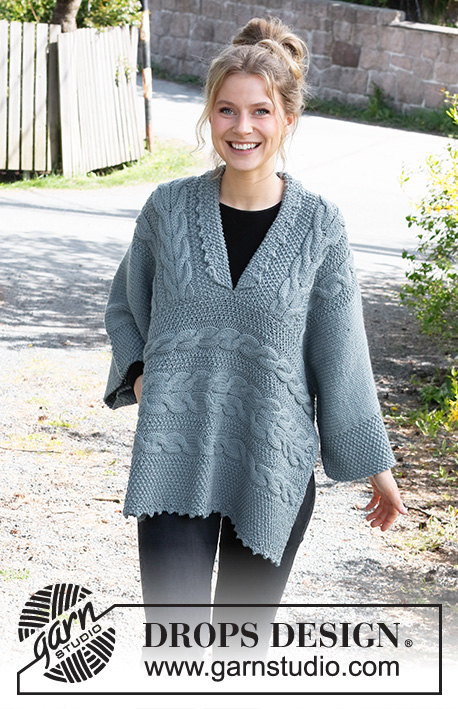
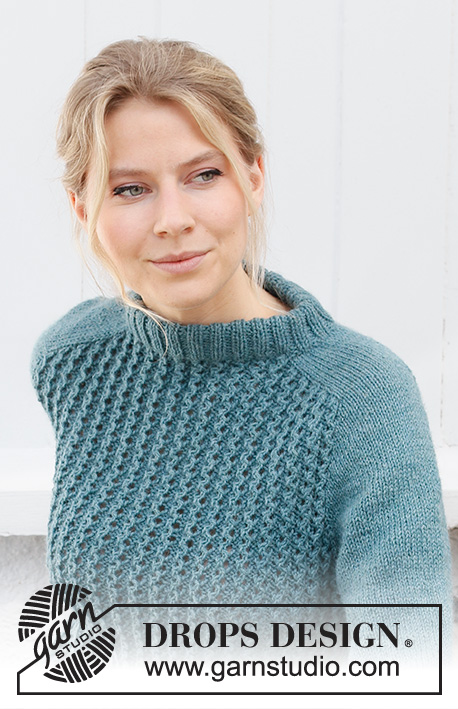
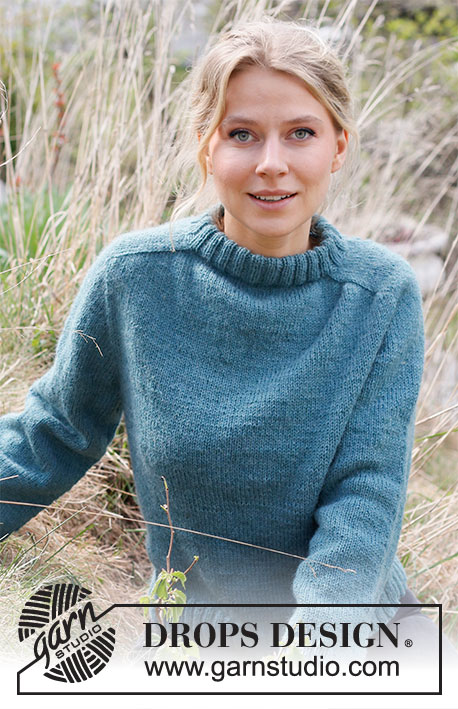
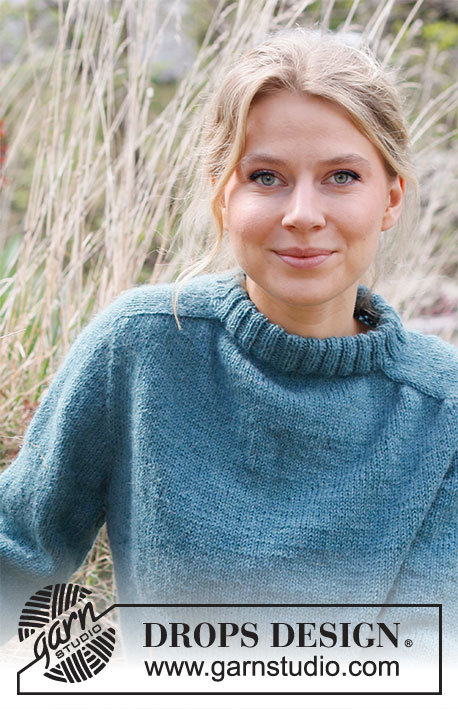
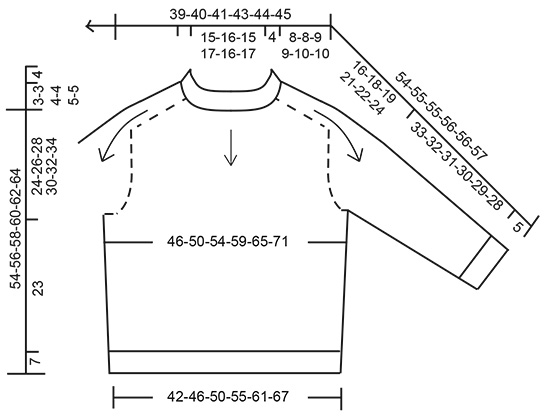
Knitted jumper with saddle shoulders in DROPS Lima or DROPS Soft Tweed. The piece is worked top down. Sizes S - XXXL.
DROPS 216-9 |
|||||||||||||
|
------------------------------------------------------- EXPLANATIONS FOR THE PATTERN: ------------------------------------------------------- INCREASE TIP-1 (evenly spaced): To work out how to increase evenly, count the total number of stitches on the needle (e.g. 96 stitches) and divide by the number of increases to be made (e.g. 12) = 8. In this example, increase by making 1 yarn over after each 8th stitch. On the next round work the yarn overs twisted to avoid holes. INCREASE TIP-2: BEFORE MARKER: The new stitch will be twisted, leaning towards the right. Use left needle to pick up strand between 2 stitches from the row below, pick up strand from behind and knit stitch in front loop. AFTER MARKER: The new stitch will be twisted, leaning towards the left. Use left needle to pick up strand between 2 stitches from the row below, pick up strand from the front and knit stitch in back loop. DECREASE TIP (for body and sleeves): Decrease 1 stitch on either side of the marker thread as follows: Work until there are 3 stitches left before the marker thread, knit 2 together, knit 2 (marker thread sits between these 2 stitches), slip 1 stitch as if to knit, knit 1 and pass the slipped stitch over the knitted stitch. CASTING-OFF TIP: To avoid the cast-off edge being tight you can cast off with a larger size needle. If the edge is still tight, make 1 yarn over after approx. each 4th stitch at the same time as casting off; the yarn overs are cast off as normal stitches. ------------------------------------------------------- START THE PIECE HERE: ------------------------------------------------------- JUMPER – SHORT OVERVIEW OF THE PIECE: The neck and yoke are worked in the round with circular needle, top down. Stiches are increased for the shoulders, then for the sleeves. The yoke is divided for body and sleeves and the body is continued in the round with circular needle. The sleeves are worked with double pointed needles, top down. NECK: Cast on 92-96-100-108-112-116 stitches with circular needle size 3.5 mm and Lima. Knit 1 round. Then work rib (= knit 2. purl 2) in the round for 8½ cm. Knit 1 round where you increase 12-12-20-20-24-28 stitches evenly spaced – read INCREASE TIP-1 = 104-108-120-128-136-144 stitches. Change to circular needle size 4.5 mm. Insert a marker at the beginning of the round (mid-back). THE PIECE IS NOW MEASURED FROM HERE! YOKE: Insert 4 markers in the piece, without working the stitches and between the stitches, as follows: Count 18-19-20-22-22-24 stitches (= half back piece), insert marker 1, count 16-16-20-20-24-24 stitches (= shoulder), insert marker 2, count 36-38-40-44-44-48 stitches (= front piece), insert marker 3, count 16-16-20-20-24-24 stitches (= shoulder), insert marker 4, there are 18-19-20-22-22-24 stitches left after the last marker (= half back piece). SADDLE SHOULDER INCREASE: Continue with stocking stitch and increase on the shoulders as follows: Increase 1 stitch BEFORE markers 1 and 3 and AFTER markers 2 and 4 – read INCREASE TIP-2 (=4 stitches increased); there are increases on back piece and front piece, number of shoulder stitches remain the same. The increased stitches are worked in stocking stitch. Increase like this every round a total of 21-21-24-24-26-26 times = 188-192-216-224-240-248 stitches. The piece measures approx. 8-8-9-9-10-10 cm from the marker on the neck. REMEMBER THE KNITTING TENSION! SLEEVE INCREASES: Now increase for the sleeves as follows: Increase 1 stitch AFTER markers 1 and 3 and BEFORE markers 2 and 4 (= 4 stitches increased). There are only increases on shoulder stitches and number of stitches on front piece and back piece remains the same. Number of shoulder stitches increases. Increase like this every 2nd round a total of 17-18-18-17-17-17 times = 256-264-288-292-308-316 stitches. The piece measures approx. 21-22-23-22-23-23 cm from the neck. If your measurements are shorter, continue with stocking stitch without increasing until the piece measures 21-22-23-22-23-23 cm. YOKE INCREASE: Now increase 1 stitch on each side of all markers as follows: Work until there is 1 stitch left before markers 1 and 3, increase 1 stitch BEFORE these markers, work 1 stitch, move the marker onto the right needle and increase 1 stitch AFTER these markers. Work to markers 2 and 4, increase 1 stitch BEFORE these markers, move the marker onto the right needle, work 1 stitch and increase 1 stitch AFTER these markers – remember INCREASE TIP-2 (= a total of 8 stitches increased). Increase like this every 2nd round a total of 4-5-6-10-11-14 times = 288-304-336-372-396-428 stitches. When all the increases are finished, the piece measures approx. 24-26-28-30-32-34 cm from the neck. Divide the piece for body and sleeves on the next round as follows: Work the first 42-45-49-54-59-65 stitches (half back piece), place the next 60-62-70-78-80-84 stitches on a thread for the sleeve, cast on 8-10-10-10-12-12 stitches under the sleeve, work 84-90-98-108-118-130 stitches (= front piece), place the next 60-62-70-78-80-84 stitches on a thread for the sleeve, cast on 8-10-10-10-12-12 stitches under the sleeve, work the last 42-45-49-54-59-65 stitches (= half back piece). Body and sleeves are finished separately. BODY: = 184-200-216-236-260-284 stitches. Insert 1 marker in the middle of the 8-10-10-10-12-12 stitches cast on under each sleeve; these will be used when decreasing in the sides. Work stocking stitch in the round. When the piece measures 4 cm from the division, decrease 1 stitch on each side of both markers – read DECREASE TIP (= 4 stitches decreased). Decrease like this every 5 cm a total of 4 times = 168-184-200-220-244-268 stitches. When the piece measures 23 cm from the division, knit 1 round where you increase 40 stitches evenly spaced = 208-224-240-260-284-308 stitches. Change to circular needle size 3.5 mm and work rib (= knit 2, purl 2) for 7 cm. Cast off with knit over knit and purl over purl – read CASTING OFF TIP! SLEEVE: Place the 60-62-70-78-80-84 stitches from the thread on the one side of the piece on double pointed needles size 4.5 mm and knit up 1 stitch in each of the 8-10-10-10-12-12 stitches cast on under the sleeve = 68-72-80-88-92-96 stitches. Insert a marker thread in the middle of the 8-10-10-10-12-12 stitches under the sleeve; you will decrease stitches either side of this marker. Work stocking stitch in the round. When the piece measures 3 cm from the division, decrease 1 stitch on each side of the marker thread – remember DECREASE TIP. Decrease like this every 6-5-3-2-2-1½ cm a total of 5-6-9-12-13-14 times = 58-60-62-64-66-68 stitches. Continue working until the sleeve measures 33-32-31-30-29-28 cm from the division. Knit 1 round where you increase 18-16-18-16-18-16 stitches evenly spaced = 76-76-80-80-84-84 stitches. Change to double pointed needles size 3.5 mm and work rib (= knit 2, purl 2) for 5 cm. Cast off with knit over knit and purl over purl – remember CASTING-OFF TIP. Work the other sleeve in the same way. ASSEMBLY: Fold the neck to the inside and sew down. To avoid the neck being tight and rolling outwards, it is important that the seam is elastic. |
|||||||||||||
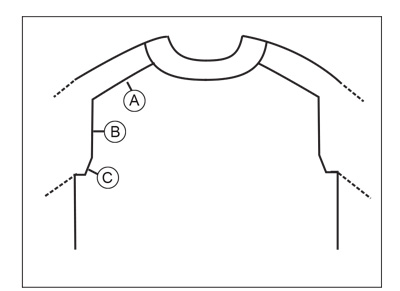
Diagram explanations |
|||||||||||||
|
|||||||||||||
 |
|||||||||||||
 |
|||||||||||||
Have you finished this pattern?Tag your pictures with #dropspattern #glacierwaters or submit them to the #dropsfan gallery. Do you need help with this pattern?You'll find 23 tutorial videos, a Comments/Questions area and more by visiting the pattern on garnstudio.com. © 1982-2026 DROPS Design A/S. We reserve all rights. This document, including all its sub-sections, has copyrights. Read more about what you can do with our patterns at the bottom of each pattern on our site. |
|||||||||||||


With over 40 years in knitting and crochet design, DROPS Design offers one of the most extensive collections of free patterns on the internet - translated to 17 languages. As of today we count 324 catalogues and 12239 patterns translated into English (UK/cm). 12239
We work hard to bring you the best knitting and crochet have to offer, inspiration and advice as well as great quality yarns at incredible prices! Would you like to use our patterns for other than personal use? You can read what you are allowed to do in the Copyright text at the bottom of all our patterns. Happy crafting!
Post a comment to pattern DROPS 216-9
We would love to hear what you have to say about this pattern!
If you want to leave a question, please make sure you select the correct category in the form below, to speed up the answering process. Required fields are marked *.